Showing posts with label Snacks. Show all posts

Tuesday, November 15, 2016

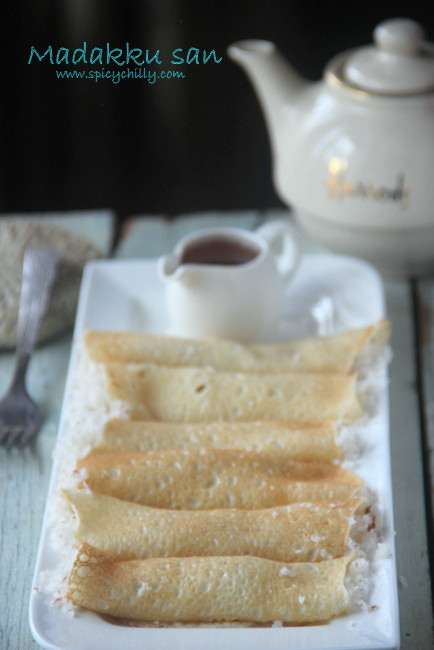
Madakku san ~ The Coconut filled Pancakes of Kerala!


These delectable coconut crepes evoke fond memories of my teen years back in my home town, Kottayam! Madakku san was a regular 'after the school tea time snack', for children back home at 4 or 5 in the evening in Christian households. Our neighbour Kunjumol aunty used to make the best madakku san ever, that the taste still lingers in my taste buds! I believe the delicacy hasn't yet disappeared from the tables of Syrian Christian homes, while I wish to recreate the dish after decades, here in my space.

Central Kerala is one of the places in South India, highly inflluenzed by the  English culture during the foreign rule which has thrown its impact over the cuisine. A major part of the Central Kerala Christian menu is at least a fusion of the Anglo-Malayalee food preferences.
Madakku san dish is closely related to the Westernised pancakes, predominantly the batter part combined with the addition of fresh coconut, making it the fusion combo :). It  has the name, Mutta Kuzhalappam , meaning rolled egg pan cakes, as well!

Down to the recipe....
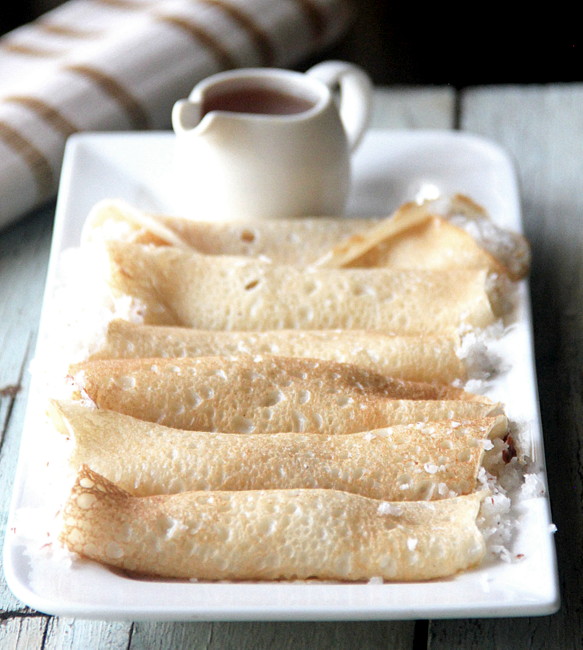


Madakku san
 Serves a family of 4
 Prep time- 5 minutes
 Cooking and assembly- 25 minutes

Get ready with:

 1 1/2 cups Maida or All purpose flour
 1 egg
 2 tbsps sugar
 3 fat pinches of table salt
 *1/2 cup milk
 *1 - 1 1/2cups Water


 For the filling:

 2 cups loosely filled freshly grated coconut
 Half of 1/4 tsp cardamom powder
 4 tsps sugar


Method:
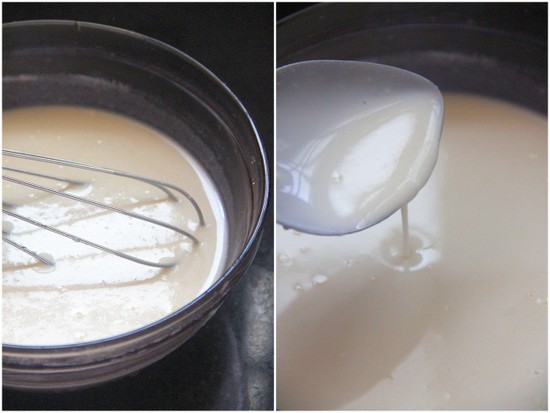


Beat the egg with a whisk in a bowl. Add flour, milk, water, salt and sugar to it and blend well to make it a thin runny batter. for 1.5 cups flour, you may need around 2 cups of liquid (milk and water combined). Probably you can add the milk first and carry on with a careful addition of water until to make the batter of the right consistency.
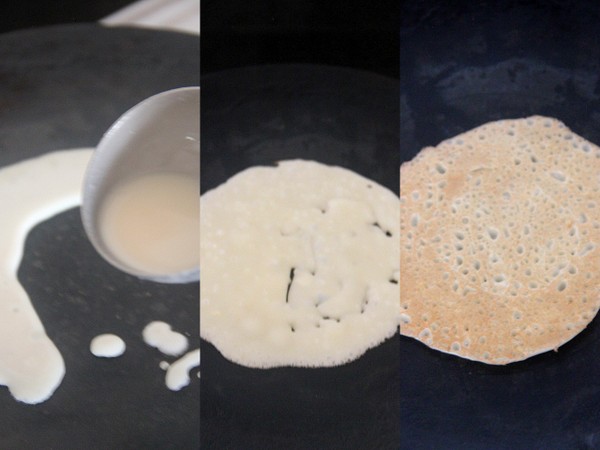


Heat a griddle or a tawa. Take a ladleful of batter and pour in a circular motion to complete the circle. Put the fire low.Flip the pan cake carefully over and cook the other side. Only if the batter is in the right consistency you will see the holes on one side and brown dots on the other side ( as in the picture below)  after cooking the pan cakes. make them one by one. Arrange them on a flat plate.
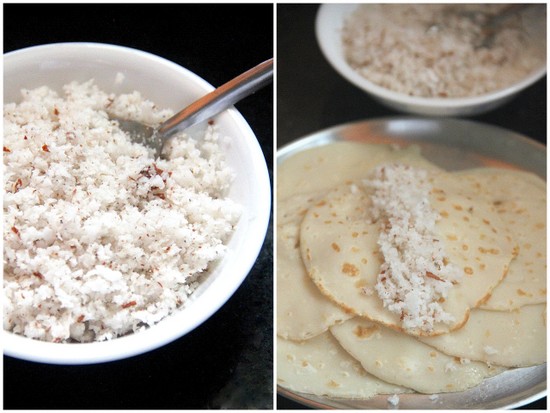


Prepare the filling. Combine the coconut, cardamom and sugar in a bowl. Spoon the filling on each of the crepes, in the centre from one end to the other as in the picture.
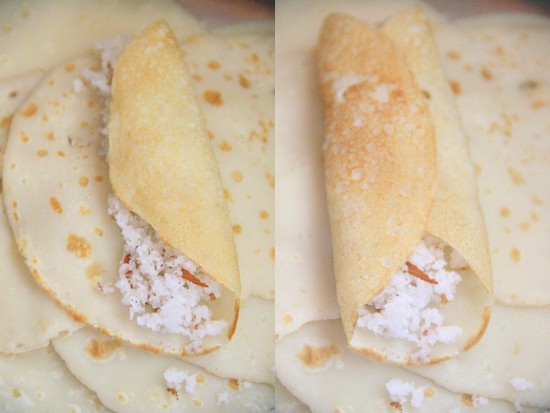


Bring one side over to cover one half and close the other half.  No rules about this part and you may roll it like your yoga mat too :). Just see that the filling is secured.
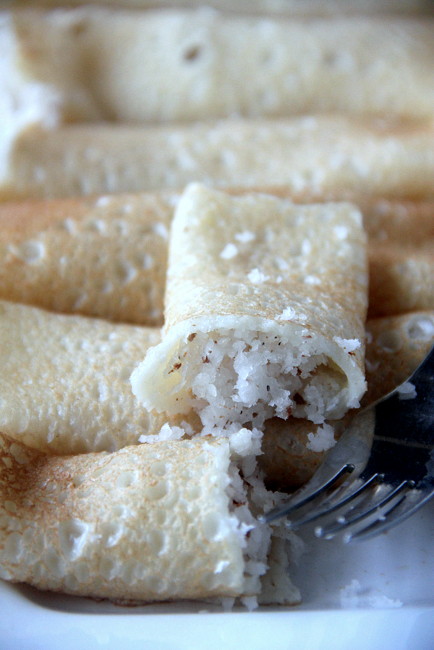

Madakku san

Drizzle maple syrup or honey and serve warm with tea of coffee.

Aparna, this post is for you!

Read More »

Tuesday, October 18, 2016

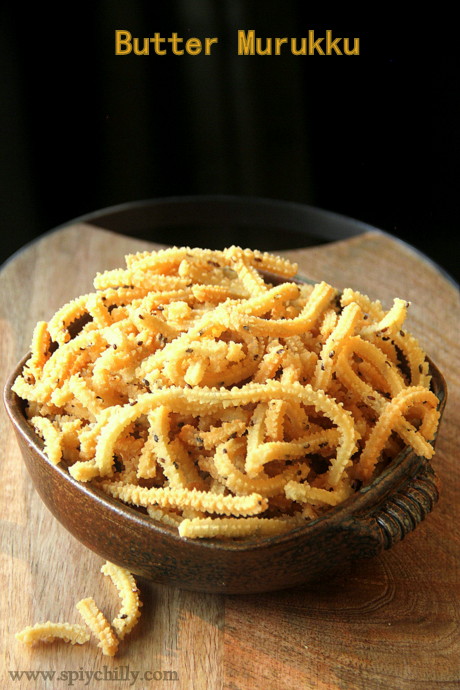
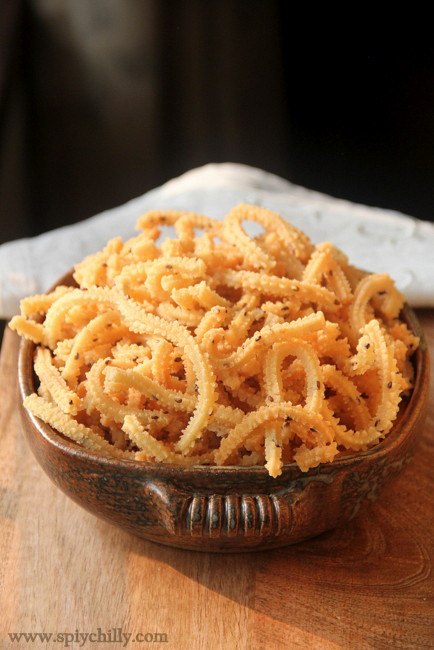
Butter Murukku ~ An easy to make Murukku / Chakli recipe for Diwali


It had been a while since I posted a recipe in my space. If to give reasons, there are a few; travel being the main one :), yes, to the far west end of the globe for about a quarter. While I still tide over the jet lag and tiredness coated with the wonderful memories of meeting a few of the wonderful blogger pals in Bay Area, I got prompted to get back to posting a Diwali recipe.
I am not an expert in making 'chaklis' or 'murukku' and decided to roll up my sleeves to attempt a simplest one to begin with. A simple family favourite with the recipe sourced out from one of my husband's aunts, who passed over the measurements in 'padi' or the traditional Tamil measuring cups which in turn were carefully scaled down to cup and tablespoon measures here :)

'Butter Murukku' is easy to make than you presume and you will realize the homemade ones, far better in taste and texture than the store bought counterparts.


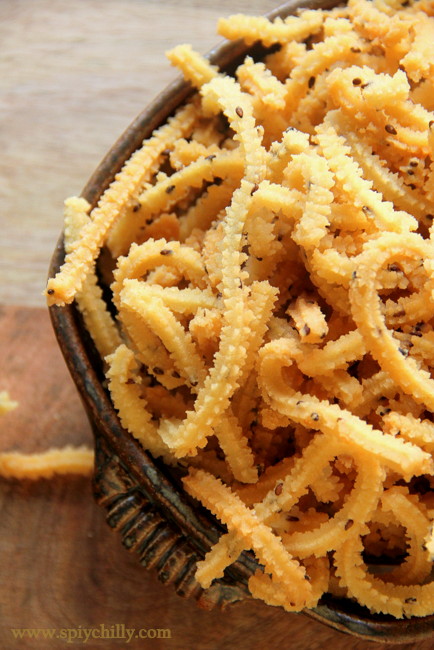
Butter Murukku
 Prep time 15 mins
 Cooking time 30 mins
 Yields a 500 ml bowl loosely heaped


 Ingredients

 1 cup Rice flour or Arisi mavu, not roasted- I used store bought raw rice powder.
 1 heaped tbsp Besan or Kadalai mavu
 1 heaped tbsp *Roasted gram flour or Pottukadalai mavu -(refer method down)
 1/4 tsp Hing or Perungayappodi
 3/4 tsp Cumin (Jeerakam) or Sesame seeds (Ellu) - I used Sesame seeds

 1 tbsp unsalted butter at room temp
 125 ml  water at room temp
 1/2 tsp table salt


Method


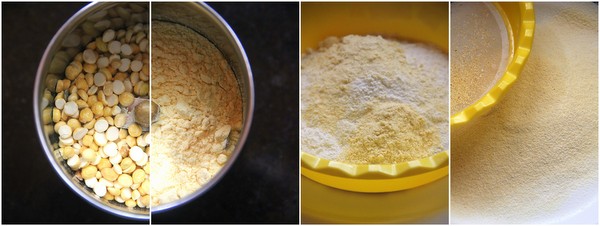
*Measure 1/4 cup of  Roasted gram, place in your food processor or a dry mixie jar and powder well.
Measure the rice flour, besan and the powdered gram flour (do not use the whole powder. just measure a heaped tbsp for our purpose) in a separate bowl and sieve to discard the grainy particles of the grams.


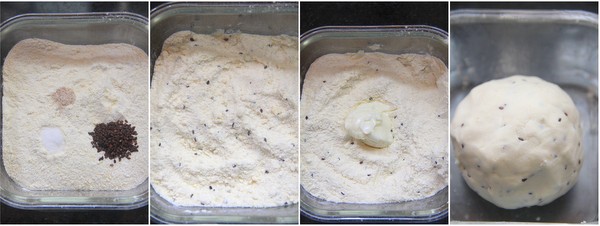
Transfer to a bowl and add hing, salt and the sesame seeds. Mix to combine with a whisk or use your finger tips. Next, rub in butter, combine evenly in the dry flour mixture and lastly add the water little by little to form a soft ball. I needed exactly 125 ml. But be careful with the measurement and be warned; it can slightly vary according to the quality of the flour used. The ball should neither be too hard nor soft. The consistency should be almost the same as 'Idiyappam' dough. Check salt at this point.


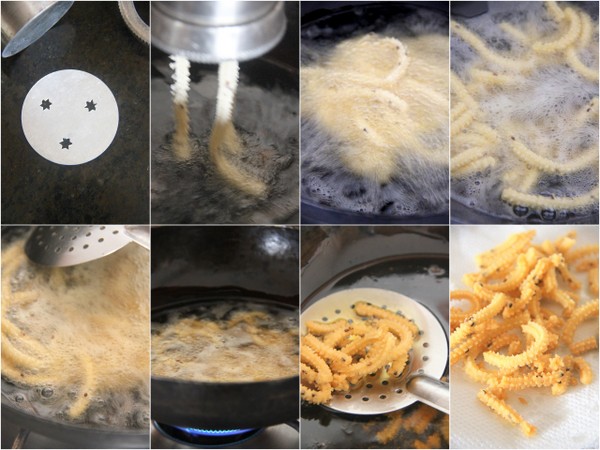
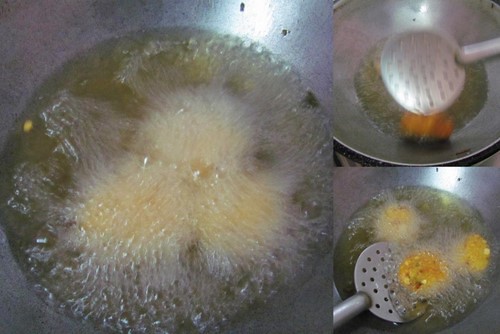
 Pick out the star designed disc and fix with the murukku press. Grease the insides of the cylinder and outsides of presser with a few drops of oil. Heat oil in a wide and thick bottomed kadai. To check the right temperature of the oil, pinch and drop a tiny ball of dough into the hot oil. The oil is in the right temperature, if it rises up immediately with a sizzle and not smoky. Fill half of the cylinder with the dough and press gently in a slow wide circular motion into the hot oil. It should sizzles you see in the picture. This murukku generally falls as broken pieces, though it happened to be intact for me :). Do not disturb for a few seconds and wait for the initial sizzle to calm down, may be for 15-20 seconds. Lower the flame if oil is smoky. Gently turn the murukku pieces in the oil until they attain a light golden hue of the morning sunlight. Drain and transfer to a tray or a flat plate lined with paper towels. Let it cool down completely before you transfer into an airtight container. Enjoy with a steaming cup of coffee or tea :)


Read More »

Tuesday, October 8, 2013

Konda Kadalai Sundal for Navarathri


Konda Kadalai Sundal


I amn't really very religious by nature. I do follow the festivals and recipes to the dot since I love that part of them. Navarathri is such a festival I enjoy visiting houses where I am invited, appreciating the 'Kolu', singing, exchanging 'kumkum' and flowers and savouring 'Sundal' prasadams. These days I am getting to know much about how the 'sundals' are related to the Navagrahas(the 9 celestials) and 'Navadhanyams' or the 9 cereals/pulses/legumes for the 'Navarathri' or the '9 nights' festival!

It's interesting!

Sunday – Sooriyan – Sun: Godumai (Wheat)
Monday – Chandran – Moon: Arisi (Rice)
(since it is not practical to make sundal out of these, generally they are broken and made as 'payasams' or 'puttu' as 'neivedyams')
Tuesday – Angarakan – Sevvai – Mars: Thuvarai (Thuvar Dhal)- Sundal can be made. Here's how I made with whole Thuvar grams.
Wednesday – Budhan – Mercury: pasi Payar (Green Gram)- Sundal can be made.
Thursday – Guru – Jupiter: Kadalai (Channa dal) or Konda Kadalai (Whole Channa or Cow peas) Recipe featured for today below!
Friday – Sukran – Venus: Mochai (White Dolicho Beans)
Saturday – Sani – Saturn: The tiny black Ellu seeds (Sesame Seeds) neivedyam can be 'ellu urundai' or the sesame seed balls.
8th day of Navarathri – Rahu: Kollu (Horse Gram)
9th day of Navarathri – Ketu: Uzhundu (Whole Urad )"Vadai" can be made. Here's the recipe for Vella Vedai made with a combination of jaggery and urad.

 The recipe for today is  Konda Kadalai Sundal, the Thursday's 'neivedyam' or the offering for Guru.

Read More »

Friday, May 31, 2013

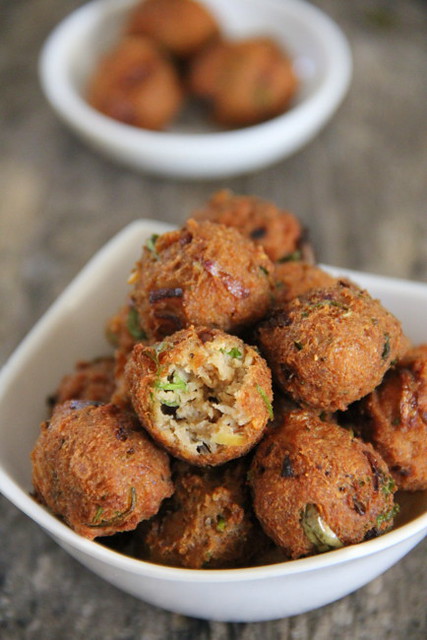
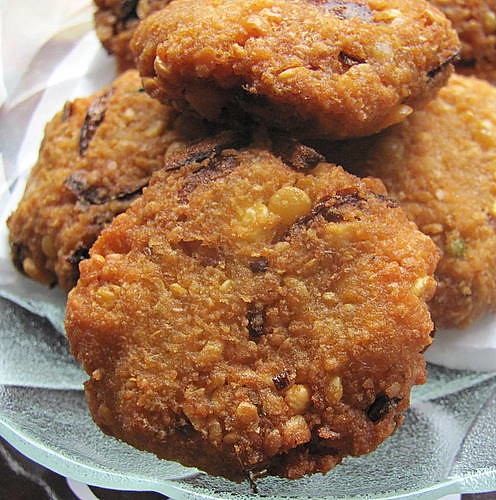
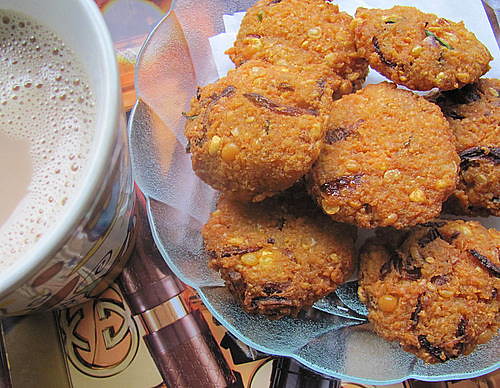
Masal Vadai ~ Deep-fried spiced-up Channa Dal Patties


Masal Vadai

I am still trying hard to bring out the exact English translation of the Tamils' Masal Vadai.
Spiced up lentil dumplings? lentil patties? dal patties? extra spiced version of paruppu vadai? the step brother to  Malayalee's Parippu Vada? I am unusually losing words for a simple description for this humble snack!
Hope the one on top with title which am (still) editing is fair enough :)

Paruppu vadais used to be and still are a regular tea-timesnack in my in-laws' house. Ma-in-law makes them in a jiffy. I see her entering the kitchen and breezing out with a plateful of hot vadais in the evenings, at least once a week. Honestly I had never been a fan of those paruppu vadais those days or even until this moment. They were bland, non-spicy with a gross flavour of dal that they were devoid of onions, garlic, ginger or even cilantro; the natural flavour enhancers of a South Indian recipe.
Neverthelessly the vadas were crispy enough while hot and the imperfectly shaped patties added to the taste while washed along down the throat with hot sips of chai those days.
Read More »

Friday, May 24, 2013

Bialys ~ Soft and chewy rolls topped with caramelised onions


Bialys


The name Bialy (pronounced bee-AH-lee) comes from 'Bialystocker Kuchen' which translates as “bread from Bialystok” which is in Poland. Apparently, Bialys are rarely seen or made in Bialystok these days.In the days when there used to be Bialys in Bialystock, it seems the rich Jews ate Bialys with their meals, while the Bialys were the whole meal for the poorer Jews.
In the early 1900s, many Eastern Eurpoeans, including the Polish, immigrated to the US and settled down in New York. Naturally, they also brought their Bialy making skills with them and that is how the New York Bialy became famous.

The Bialy maybe thought of as a cousin to a Bagel but is quite different from it. For one thing, a Bialy is baked whereas a Bagel is boiled and then baked. A Bialy is round with a depressed middle, not a hole, and typically filled with cooked onions and sometimes poppy seeds.So it is not shiny on the outside with largish puffy bubbles on the inside.A good Bialy should have a springy soft crumb and a chewy and floury crust. Bialys are best when eaten as they are and also within 5 to 6 hours of making them.

What lends Bialys their signature chewiness is the use of flour that is high in gluten. So to make Bialys, use bread flour if you can find it. Otherwise use all-purpose flour and add 1 tbsp vital wheat gluten (for the 3 cups). If like me, you can find neither bread flour nor vital wheat gluten, go ahead and make it with plain flour. You’ll still have very nice Bialys that are slightly softer, that’s all.

One way to make them slightly chewier is to refrigerate the dough overnight after the first rise. The next day, take the dough out and keep it at room temperature for about half an hour. Then shape the rolls and proceed with the recipe. These Bialys are on the softer side so do not over bake them or they will dry out and become tough.
Bialys usually have a thin layer of caramelised onions and poppy seeds. I decided to use only onions, and then lots of it. Being Indian and having been brought up on spices in my food, I also added some garam masala to spice up my filling. You can use whatever filling you would like. Anyways the filling needs to be savoury.
[Introductory content adapted verbatim from Aparna's recipe document]

And let me tell you now that there can't be a better choice than Bialys for We Knead to Bake for the month.


Bialys

Read More »

Friday, February 1, 2013

Soya Kheema Fritters


Before I go on with the recipe, I have a request to the bloggers, presumably the enthusiastic new bloggers. I try my best to visit you back from the comment section down, but lately I see lot of you linking your Google+ account with your names. I am not sure whether Google had made it default, but I would be grateful to you if you could link your name with your blogger profile page, instead. The name which links to G+ does not show your recipes unless you share there (at least this is what I guess) and I am not able to view your lovely blog posts if not in your circle. So it would be lovely if you would go to the settings and link your name to your profile or web page directly for ease of visit and probably to know you better!

So back to the recipe, I had bookmarked these cute looking crispy fritters from Hamaree Rasoi the minute I saw them in her lovely space. Then I had been in the process of shifting to Namakkal and everything was crazy for a while and  I got reminded of trying them just when I happened to come across the soya chunk packets in the near-by vegetable shop. I grabbed a packet and made the same evening for my son for tea, back from school.


Read More »

Thursday, January 3, 2013

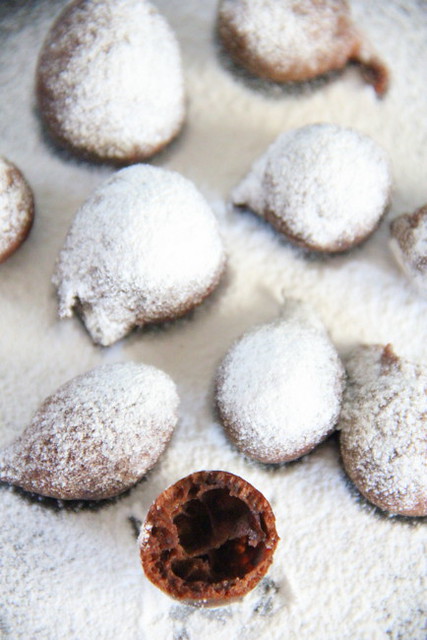
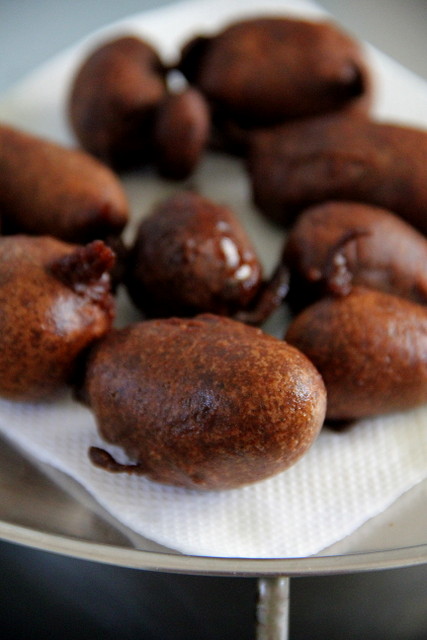
Cocoa Fritters


I have always thought of making fritters with cocoa!
If we can combine flour, sugar and salt, whip into a batter, dunk ripe sliced bananas (as a true blue Malayalee loves to do) and fry in hot oil, why mind stirring in a heaped tablespoon of cocoa and forget the fruit slices?
How would it taste?
I wondered whether such a recipe existed! But I badly wanted to bite into the perfectly fried crisp outsides, softer insides and enjoy the bursting flavour of cocoa and cardamom (crazy me)( or was I craving for a combo of chocolate and cardamom?)
well, once this kind of craving strikes, it makes me whizz like the character in  some video game powered by the energizer,who flies for seconds, favouring the player.

The google search results didn't disappoint me. Such a recipe did exist in some part of the world :)
Within minutes I savoured the sizzling hot Cocoa Fritters!


Read More »

Tuesday, January 25, 2011

Parippu Vada


As you may know, Parippu vada is a well known teatime snack with a hot cuppa chaya in Kerala!

The crispy outsides and the chewy insides bitten into, wandering across your palate ultimately melting in your mouth alternated with the hot sip of chaya is irresistible not only to a Keralite but to anyone!

So, to make this simple and tasty snack,

You need:

Yellow split peas dal (pattani/peas parippu) - 1 cup
Shallots- 5-6 chopped
Ginger, minced- a tsp
Green chillies- 2
Curry leaves- a few
Asafoetida/kayapodi- 2 fat pinches
Oil- 1 cup, more or less; to deep fry


Method:

Wash and soak the dal for4 hours. Drain and pulse to a coarse paste in your mixie/blender along with the chillies ( instead of pulsing along you may even mince them and add it as such when you mix in ginger bits, onions curry leaves etc, if you like biting into the chilly bits ) and salt without or using minimum water. You can reserve 2 tsps of soaked dal and mix it along to the mixture after pulsing. Mix in minced ginger along with finely cut onions and chopped curry leaves, asafoetida and shape into round patties on your left palm with your right hand fingers.


Heat oil in a kadai and drop 3 patties one by one at a time, carefully.(Do not over crowd them as you may find it difficult to get them out in perfect shape and texture).
Flip them over after a few seconds, once they acquire a light golden brown hue and cook the other side.

Turn over again until they are cooked and attain a deeper golden yellow/brown colour.
Place them on a plate lined with a paper napkin to drain off excess oil.


Serve hot vadas with piping hot Chaya on a rainy evening :)


Note- I substituted 1/2 big onion, sliced, for shallots since I love the flavour of deeply fried thin n long onion strips embedded over the crispy vadas. Yet, small onions are suggested! :)

Paruppu vadai is a delicacy snack in Tamil Nadu as well, but calls for kadalai paruppu(bengal gram dal) or thuaram paruppu (thuar dal) or even both, rathen than the pattani paruppu here! Will post the recipe some time later :)

This recipe is submitted to Kerala Kitchen.
Read More »

Tuesday, January 18, 2011

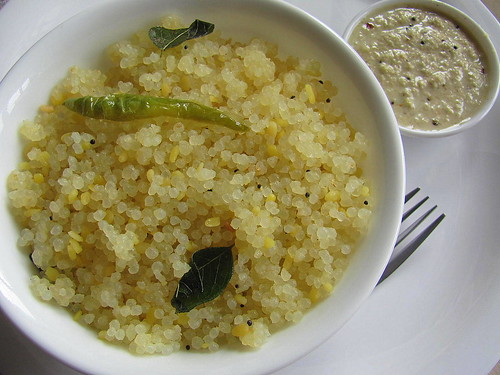
Sago / Javvarisi Upma


Sago Upma is an easy to make meal which calls for less ingredients, less cooking time, more taste and contentment!

I tasted this yummy dish for dinner at my sister in law's house a while back and instantly fell in love with it!

Though the dish is meant to be taken as an evening snack, I make it for breakfast or dinner as it's heartily filling.

Try this and I bet you will decide making it often at home as it needs no onions or even vegetables!
I am not very sure about the nutritional part of the dish; sago being low in nutrient content, you may also try adding vegetables while making this.

The recipe which follows is the basic one for the sago upma which I had tried and relished as such!


Ingredients: (to serve 4)

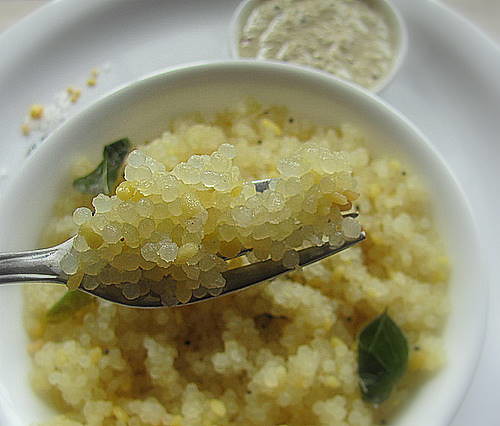
Sago/ javvarisi/chavvari- 2 cups (pick up the right sized pack of sago pearls..ie..slightly smaller than pepper corns, not the opaque white ones but the transparent ones)
Thick sour curd- 1 1/2 cups
Moong dal/pasi paruppu/cherupayar parippu- 1/4 cup (dry roasted)

To temper:

Oil- 1 1/2 tbsps
Mustard seeds - 1/4 tsp
Urad dal- 1/4 tsp
Green chillies-2-3-slit lengthwise
Curry leaves- a sprig
Salt- to taste

Method: (seems a little elaborate, but believe me, it's breeze!) :)

1. Wash sago well to remove any dust particles present. Beat the thick sour curd for 2-3 seconds to make it smooth and homogeneous. Transfer to a clean wide utensil. Wash the mixie with 1/2 cup of water and add to the thick curd. Drain washed the sago and soak in the beaten curd, immersed in such a way that liquid part is an inch above the sago.

2. Let is sit for 8 hours (generally 4-5 hours is said to be enough, but I resort to longer soaking hours as we prefer a tangier version of the Upma). It shouldn't be too dry and should be hydrated well enough in the curd. If you feel the liquid part being absorbed, add a little water now and then to make the pearls moist and happy :)

3. Fluff it with a fork once in two hours to facilitate even soaking of the pearls. (if you soak it for overnight, fluff it after an hour or two after you soak and repeat it before you cook it in the morning).

4. After 8 hours, drain away the excess liquid from the sago (you can even reserve this as you need some liquid to be sprinkled while cooking).

5. Cook dry roasted moong dal until 'just' done in an open pan of boiling water. (To dry roast the dal, heat the dal for 3-5 minutes medium flame until it acquires a light brown hue and the aroma spreads).

6. Heat oil in a wide, thick bottomed kadai or in a nonstick pan, splutter mustard seeds, brown the urad dal and throw in the green chillies followed by the curry leaves. Mix in the drained sago and combine gently. Within a couple of minutes the sago pearls turn transparent.Mix in gently the cooked dal. Sprinkle water if needed. The upma should be moist.Close the pan with a lid for 2 minutes.Turn again. By this time the excess water would have been used up and sago get rids of its stickiness if any, and turns soft. Switch off the flame.The whole cooking process here takes not more than 4-5 minutes.

7. Enjoy the hot sago upma with coconut chutney.

I would highly recommend Varalakshmi Sago to make this upma. They are smaller in size than the variety I have used in the above recipe and of higher quality. The soaking time of this sago is only 4 hours and has a much better taste!

Read More »

Friday, February 5, 2010

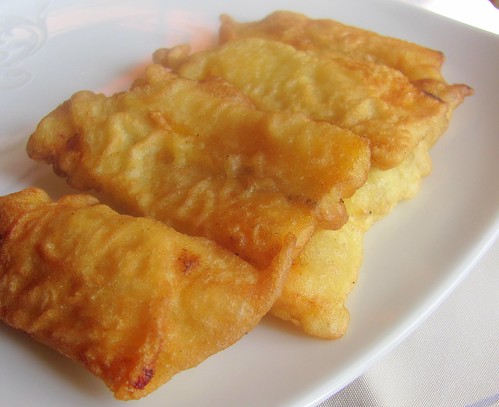
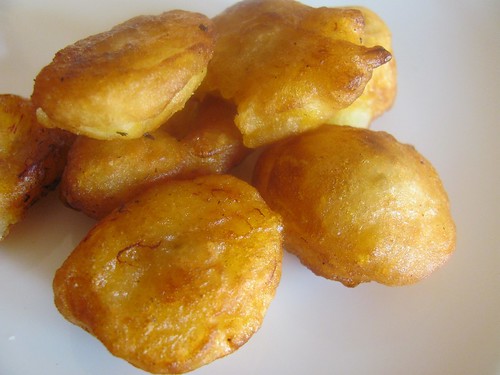
Aethekkappam/ Pazham Pori/ Banana Fritters- A Signature tea time snack of Kerala!


Do you get excited when you post a dish, you'd craved for a long time?..the food that you'd relished since your childhood days?..

Well, I undergo a special feeling whenever I do so..:)

A 17 year old Home Science student, confronts the public practicals of her main subject Nutrition and Dietetics, goes through the first question,"prepare a snack for tea, for your unexpected guest."

A few of those familiar ones flash past her mind.
Vada ?..hmm na!..any dal which goes into would require
some soaking.
Chips?...ahh...should I be making a junk snack for my exam?

All of a sudden this hits her -Ethakkappam?...!!!

She quickly approaches the counter where the raw materials are displayed..rice, flour, coconut, dal, vegetables, fruits...and there she spots in one corner, the aethapazham, she wanted at the moment, desperately... pulls out a couple of them, reaches out for a cup of maida and all the rest to make the snack for her 'unexpected guest'.
The girl is finally happy to have come out with the best of aethekkapams, (which she'd never tried to make in her life time) solves the nutritional problem, attempts the rest of the questions and comes out of the lab, with a wide grin.
She shares the story of her successful outcome of the pretty looking snack,with her friends, awaiting to be judged soon.

Heyyy, what do you have there, right up your hands??

She turns back to confront the serious examiner now, looks aside... down.. to see the neatly rolled up answer sheet under her right arm :)..
The girl has obviously submitted the Nutrition Information chart, instead of her answer sheet :)..apologises, scratches her head and hands over the paper..:)
...........
.......
....

Here's how she made them... after years :)

Ripe Kerala bananas/nenthran pazham/aethappazham- 2-3 nos

Maida/All purpose flour- a cup
Rice flour-1-11/2 tbsps (if you like crispy ones)
Sugar-1/2 tsp (more of this browns the fried snack)
Water-as needed to bake the batter
Salt-a pinch
Soda bi carb-a fat pinch
Turmeric power-a fat pinch(this is for that mild yellow colour)
Cardamom powder- to flavour ( I generally omit this, as I love the bursting natural flavour of ripe bananas)

Oil- to deep fry.


Select Ripe Bananas.
Halve them across in the middle and slice again, across, lengthwise as thin as possible. Not an easy job with real ripe ones :) but you get 5-6 slices this way.
If you find this really bugging..scroll down to the last picture :).


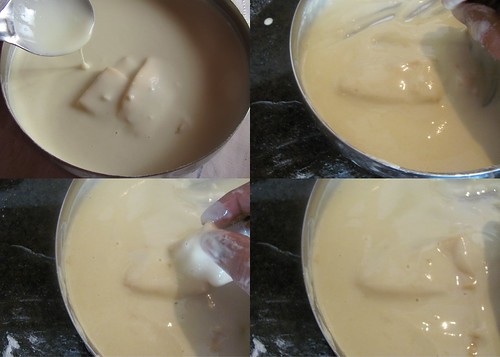
Combine the ingredients, except water and banana, well in a bowl.Add water to make a batter that resembles more or less a cake batter.
In the first picture, the batter is a little runny, so added a li'l more of maida and rice flour to make a thicker batter to ensure that it coats the banana pieces well.


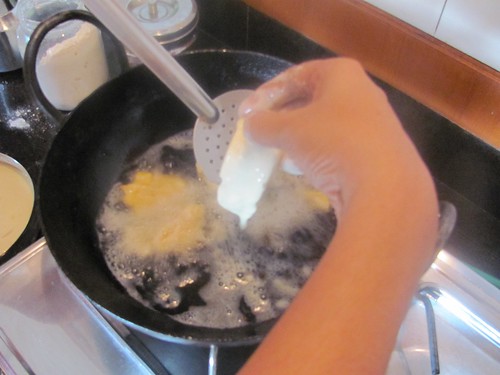
Now, drop the pieces one by one in hot oil...oops that's my son who grabbed my cam for shooting this pic..a little awkward, but I needed some help :)!


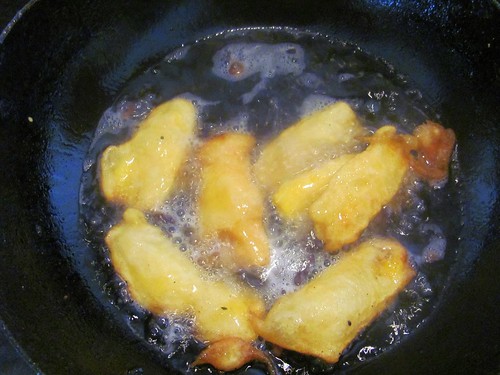
Turn over to cook both the sides. Remove once they are golden and crispy.


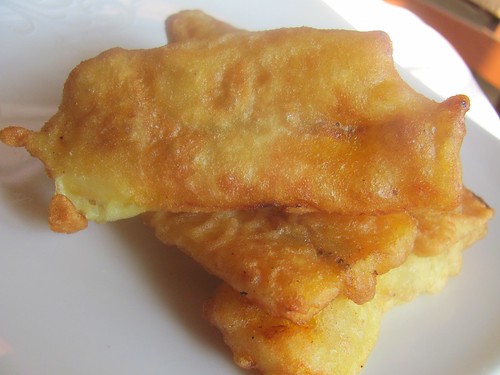
Serve HOT!!, with a hot cup of cardamom tea! :). (I love it with a scoop of vanilla icecream)


Ahh, yes, if you're impatient to slice the ripe ooey gooey bananas across, just peel n slice the whole banana round, dip in the batter, fry and enjoy! :)...
...Shhh.. this is how I make them, everytime ;)


P.S-Surprisingly, I have never come across a mallu who says, "Ughh!..I hate aethekkapam!".
So, if you hate this snack, kindly leave a comment here :)!
Read More »

Friday, July 31, 2009

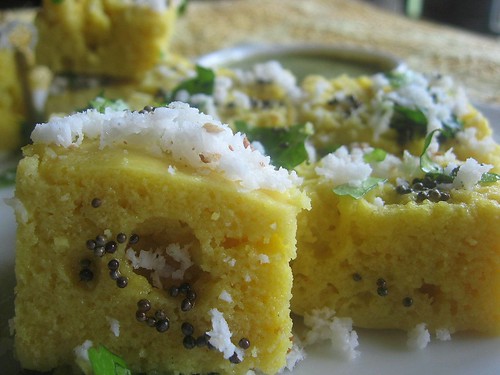
Indian Cooking Challenge - Khaman Dhokla ~ The Authentic Way!..


Khaman Dhokla - A delicacy which I had always to try, being postponed just because of failing to get a perfect recipe and lack of confidence :)..

Well, I am extremely glad about the best outcome with Srivalli’s Indian Cooking Challenge for the month of July-09. I enjoyed taking up the challenge, immensely and here is the recipe for Khaman Dhokla , guaranteed to success ;)..


Khaman Dhokla

To yield 10-12 squares

For the Batter:

Bengal Gram flour / Besan – 1 cup levelled( 1 ½ cups in the original recipe)
Curd – 1 & 1/2 tbsp (not very sour)
Water - 1/2 -1/3cup
Cooking Soda - 1/4 tsp

For seasoning - to be mixed to the batter (to be added just before cooking)

Oil - 1 tbsp
Turmeric- a generous pinch
Green Chilly paste - 1 - 2 long (as per taste)
Sugar - 1 tsp
Citric acid – a fat pinch(I used a tbsp of lime juice, instead)
Eno fruit salt –lemon flavour–a 5gm sachet(reserve 2-3 fat pinches for dusting)

The Thadka

Oil-1 tbsp
Mustard Seeds- ¾ tsp
Sesame seeds-1/4 tsp
Curry leaves-2 sprigs
Grated coconut- 2 tbsps-or as you like, to garnish
Coriander leaves-to garnish

Little water + Oil to be topped on Dhoklas


Method to prepare:

  • Mix first the curds with water. Start with ½ cup of water.Since I used lime juice I had to be careful here.To this add the besan and mix well to get a lump less batter.The consistency should be like of idli batter, more of dropping, not pouring consistency. Slowly add more water if needed else, add the soda. Keep it aside to rise for 1 hour.
  • Place a large vessel or pressure cooker with about 3 cups water on the stove top to heat. Grease a round pan or a pressure cooker insert vessel.
  • To the batter mix in the citric acid, oil, salt, sugar, green chili paste and turmeric powder. Mix well. This has to be done just before pouring to the plate.
  • Meanwhile have the pan on stove, and let the water start boiling. When the water reaches the rolling stage, you can mix the eno to the batter (remember to save little of eno for dusting on the plate), mix gently, you will see bubbles coming out, the batter turning frothy and light.
  • Dust or sprinkle the plate with eno. Immediately pour the batter to the plate. Place the plate carefully inside the pressure pan and cover with lid. Cover the cooker with its lid now.You need not use the whistle. Wait until you get a forceful jet of steam.Keep undisturbed for 5-7 minutes.
  • The batter should be filled to only 1/2 as it will rise up. After adding eno, the batter should not rest. Amount of sugar can be increased on preference.
  • Remove the lid and proof it using toothpick or knife. If the knife comes out clean, it’s done. Cover back and let it remain on flame for another minute and switch off the gas.Let stand for 5 more minutes.
  • The total time taken is 20-25 minutes.
  • In a bowl, mix 2 tsps of water along with a tsp of oil.
  • Open the lids. Remove the cooked dhokla from the pan carefully.
  • Sprinkle the oil-water mix as soon as you take out the dhoklas as they tend to be a little dry.


The Thadka

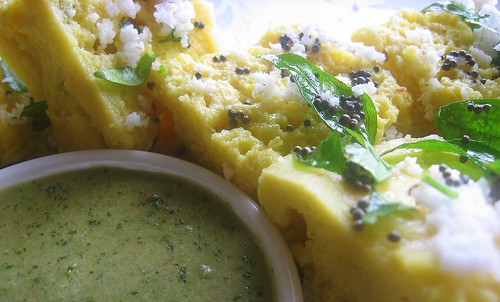
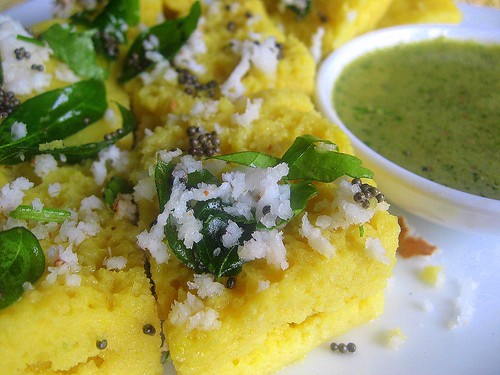
  • For seasoning, heat a pan with oil, pop mustard seeds, add sesame seeds, finely chopped green chilies and curry leaves in order, pour over the dhokla.
  • Garnish using finely chopped coriander leaves.
  • If you want perfect shaped ones and not the crumbly squares, cut and handle gently.
  • Serve warm with Green Chutney.


Green chutney

Green. chillies - 3 nos
Grated coconut – 1/2 cup
Fresh coriander leaves, chopped –1/4 cup
Cumin seeds - 1/4 tsp
Lime -1 big
Salt to taste

Grind all the ingredients except coriander in a food processor. Grind to a smooth paste.
Add the coriander and grind again. Remove to a bowl, add the remaining lime and serve with warm Dhoklas.


The changes I made from the original recipe.

  • A levelled 200 ml cup of besan instead of 1 & 1/2 cups.
  • Reserved 2-3 fat pinces of Eno from the same sachet for the purpose of dusting.
  • Cooked the dhoklas just like steaming up idlies, the traditional way,with the boiling water rolling down in the pan and dhokla in idly moulds, proving to be the best and hassle free method; got cooked in 12-15 minutes.
  • Along with the thadka, I added a tbsp of “Hot” water + a tsp of sugar mixed together for a sweetish finish, before pouring over to the dhoklas.
  • The above claims to be the original and authentic recipe for making Khaman Dhoklas.The recipe seems to be quite elaborate and complicated but easy to make, once the ingredients are set :) !!
  • The best and the easiest method to prepare ‘Jhatpat’/ ‘instant’ Khaman Dhoklas which I had tried and tested along with the authentic is here and here.
Read More »

Monday, June 15, 2009

Aval Nanachathu- Sweetened Rice flakes

I was in Chennai past week; plus V and minus Kids, that proved to be a lovely n relaxing weekend..;)
..and this Saturday night around 10pm, I happened to be in a restaurant fully packed, waiting, hoping to get one of the tables cleared.
A girl popped up from behind,"are you Bharathy?.. of Spicy Chilly?”..
She looked beautiful, 'slim n smart' and my “grey matter” was working with its fullest effort, trying to scan the cute face…

Yes I am…but..you…??..hmmm..!!..??*&*#

“Nanditha”.., she yelled sweetly.. !!..
.. next moment we found ourselves hugging tight, each other.. :)

Nanditha looked naturally pretty with no make up except for Kajal,…bubbly and young in a simple pink chicken-work cotton top n black pants that suited her very well which again complimented the colour theme of the restaurant(this part was ultimately detected by her warm and cheerful husband).. ;)
We ranted for quite sometime; about kids, family, her dance classes, her own academy that got inaugurated in a grand manner the very previous day ….and when I asked her to sit for a while(possibly to relax)..the next question was shot,"well, do you really mind me talking to you ?”

“Ha ha.. not at all”… (scratch scratch ..;) she would’ve read my mind struggling to keep a pace with her constant lovely n lively conversation ;))
Her cute little boys were playing in the kids area when I approached to say a 'hi' ...little more rants and finally it was time to say a bye..

Another warm bear hug…:D!!

It was the first time I’d bumped on a blogger pal.. and just can’t put in words how sweet n memorable those moments are.. !!..
……………..

…and now for the recipe, promised to rush to my sister who hosts Monthly Mingle-‘Ravishing Rice’, an event started by Meeta.


You need (to serve two)

Aval/Beaten or flattened rice- I used Double Horse brand thin red rice flakes-2 large cups

Fresh grated coconut- ½ cup(more or less)

Cold milk- ½ cup(a little more or less)

Jaggery-grated fine- 1/2 - 3/4 cup(or to taste-I like it sweeter)

Powdered cardamom- A fat pinch(optional)


Mix together aval and jaggery until it has blended well. Now mix in the coconut and the cardamom powder. Add the milk a few spoonfuls at a time and mix well. Using your fingers, preferably.. :)

You are done!... dig in a spoon and enjoy the world's easiest snack..:)

Note

Feel flexible with the ingredients making them more or less than suggested according to your likes.:)
If you like it a bit soggy and soft, use warm milk and leave aside for 10-15 mins before serving. This is an easily digestible, healthy snack and can be made in no time.

If you're new to 'flattened rice'..

Flattened rice is a dehusked rice which is flattened into flat light dry flakes. These flakes of rice swell when it absorbs water,milk or any other liquids whether hot or cold. The thicknesses of these flakes vary between almost translucently thin to nearly four times thicker than a normal rice grain -
Wikipedia.

Read More »

Sunday, August 31, 2008

JFI- Soya Chunk Cutlets


True that I love cooking soy and soy products, mainly because I’m into a core vegetarian family as these compliment a real good source of protein and supplement for the growing children.They had been persuading me to come up with the usual Soy chunk gravy, which I haven’t made for months, while hubby was looking forward to some freshly boiled and seasoned soy beans, though he was aware of the fact that they are not in season, at least here, at present.
Tofu was unfortunately out of stock in the near by supermarket today(I could always come up with the easy, yummy and healthy scrambled version of it, as the last minute entry)and I received perplexed looks from the sales girls when I demanded for pack of soy flour.All I could grab was a pack of Meal maker(soy chunks)sitting pretty and smiling at me from one of those topmost racks!..
Back home, I googled to find an interesting recipe from here.
The reasons for choosing the above are,
  • Easy recipe (promising to be tasty too).
  • Cutlets, an all time fav of my children.(a fine opportunity to sneak in spinach or any other ‘disapproved’ veg readily accepted as a filling ;))
  • As a replacement for my sudden craving for meat cutlets(sob sob) :)


So here goes, ( to yield 10 cutlets)..

You Need:
Soya Chunks-1 cup
Big onions-2 nos
Ginger –an inch piece
Garlic pods- 4 big or 7 small ones
Curry leaves- a few
Coriander powder-1/2 tsp or finely chopped cilantro-a tbsp
Chilly powder-1 tsp(more or less according to your spice level)
Garam masala powder-1 tsp
Turmeric powder-1/4 tsp
Pepper powder-1/2 tsp
Potato(medium)boiled-3 nos
Salt- as needed
Oil-2 tbsp
Bread crumbs- 3/4 cup or as reqd
*Egg-1 large
Oil-for deep frying

Method:

1. Boil a pan of water(3 to 4 cups).Wash and soak soya.Turn off fire and close the pan with a lid for 20-30 minutes.Ensure the chunks are soaked well and absorbs water by stirring once in 10 minutes.
2. Drain, squeeze out excess water and mince in a mixie.
3. Chop ginger-garlic,onions, green chillies and curry leaves to fine pieces and sauté in that order in 2 tbsps of oil.
4. When the colour turns to light brown, add salt, turmeric,coriander and chilly powders. Saute and mix well.
5. Add the minced Soya chunks and sauté for a few minutes.At this stage the mix resembles scrambled eggs.Sprinkle a few drops of water, cover and cook for 5 more minutes in minimum heat.
6. Add the garam masala, pepper powder and chopped cilantro.Mix well.
7. Add the boiled(preferable microwaved jacket potatoes-peeled and mashed), mix well and remove from fire.
8. When cooled shape into cutlets, dip in beaten eggs, roll in bread crumbs and fry in oil until golden brown in medium fire.
9. Serve hot with onion rings and tomato ketchup.

*For a vegetarian/vegan recipe substitute maida/bengal gram flour batter instead of beaten egg.


Now, off to Sia for JFI- Soya :)...
Read More »

Tuesday, September 18, 2007

Potato Bondas


How about hot potato bondas with a hot cup of tea for a rainy evening?..

I make this snack very frequently for the evening tea and never knew until from Sia who confirmed this to have originated from Karnataka.My special thanks to you Sia, who helped me realise about this.
Here we go with the recipe of the Mangalorean Aloo Bondas, I mastered from my ma-in- law, my second submission to RCI-Karnataka hosted by dearest Asha .:)


Yields 10-12 numbers.Preparation time-45 mintes.

You need:

For the filling;

2 Big potatoes cooked and mashed well
1/2 tsp each of Mustard Seeds and Urad Dal each
A fat pinch of jeera powder
4 Green chillies chopped finely
Ginger 1/2 inch chopped finely
A large Onion chopped finely
1/2 tsp Turmeric Powder
2 stalks cilantro, chopped finely
Salt-to taste
Lemon Juice extracted from a small sized lemon


For the Outer Layer/Dip;

3/4 cup Chikpea/Besan flour
1/4 cup Rice flour
(You can also use instant bajji mix instead of the besan and rice flours.)
A tsp of Red chilly powder
A fat pinch of Hing
A fat pinch of Baking soda
Refined Oil for deep frying

Method:


For the Filling;

Heat a tbsp of oil and temper with mustard seeds,urad dal, ginger and green chillies in that order and sauté for a little while.Add, chopped onion, jeera and turmeric powders.Sauté till the onions turn translucent.Add mashed potatoes, coriander leaves and lemon juice.Remove from fire.Add salt and mix well.At this stage the filling should be tough and firm but soft and not soggy or loose, so as to make into small lemon sized balls after it cools down.


For the Outer Cover;

Combine besan and rice flours.(Rice flour is added to make the outer cover crisp)Carefully add water to make a thick batter,(slightly thicker than idly batter) adding chilly powder, hing, salt and baking soda. Dip the balls for filling in the batter and slide one by one, 3 at a time, into the hot oil.Turn after a couple minutes at first and keep turning gently till it acquires a golden brown colour and the outer layer turns crisp.Serve these yummy and crispy hot aloo bondas with green/mint chutney and tomato sauce.Perfect with an evening cup of hot tea!.
Read More »
Related Posts Plugin for WordPress, Blogger...