Tuesday, December 31, 2013

Best of 2013 ~ A Recap


Yet another year has zoomed past, a year filled with hopes, challenges, excitements, disappointments...
All of us have grown another year in blogging as well!

 I honestly thought of dropping the idea of recap this year, contrary to waht I do by the end of each year, without any reason. I have not more than 3 hours for the start of 2014 when I decided to casually stop by here to do a look back at the best posts. I was amazed to see the top recipes of the year, the ones I had never expected to be the toppers when I made up my mind to do a review!

I hosted the event, 'My Spicy Recipe' this year, for the first time ever since blogging. Let me sincerely thank the participants for the great support, again :)

Well, a few of you might remember that I was in Namakkal for the first quarter of the year. The posts about the cute little town which captured my personal views and outlook were very well received in blog as well as in facebook; 100 Days in Namakkal and The Saturday Market!

Surprisingly, the top 5 posts of the year had also been the ones posted during the Namakkal days, when I had a crude lap tap which failed to function every now and then and left with no good photo editors installed!


Soya Kheema Fritters 


Cardamom Flavoured Coconut Pull - Apart Bread


Thakkali Poondu Rasam / Tomato Garlic Rasam


Hokkaido Milk Bread With Tangzhong

IMG_1385


Tender Coconut Mint Cooler 

IMG_1697


Here's Wishing you all a Very Happy and Blessed 2014!

Lots of Love,
Bharathy :)

Read More »

Tuesday, December 24, 2013

Bienenstich Kuchen (German Bee Sting Cake)


Bienenstich Kuchen


This month marks 12 months of baking breads together and given that’s it’s also a season when there’s a lot of festive baking done in parts of the country and the world, Aparna thought we could bake something special this month. And the choice falls for Bienenstich Kuchen or what’s also known as the German Bee Sting Cake!
Bienenstich is not really a bread but a traditional German sweet yeasted cake that has a baked on topping of crunchy almond toffee-like layer and filled with a vanilla pastry cream. Bienenstich is traditionally eaten as dessert and also served with tea or coffee.
Bienenstich means “bee sting” in German and probably got its name from the honey flavoured topping that it typical of this yeasted cake. There are however some interesting stories connected to it. One story is that the German baker who was creating this recipe came across a bee (possibly attracted by the honey) and was stung by it and decided to name the cake after the incident!
Another story is that a group of German bakers stopped invaders from entering a neighbouring village, sometime in the 15th century, by throwing beehives at them. IN order to celebrate their victory, they created the original version of the Bienenstich.


The Bienenstich is made with enriched brioche-like dough that’s typical for yeasted cakes which means that it contains a lot of butter, some milk and eggs. I have reduced the egg to one in the recipe. If you do use eggs you can use one more (total of 2 eggs) but you might need to add one or two tbsps. more of flour to the dough. On the other hand if you don’t use eggs, please leave it out. It will make a slight difference to the texture but not too much.
This yeasted cake is typically filled with pastry cream which is a mix of custard and whipped cream. I have used an egg-free version that uses custard powder but feel free to use your preferred recipe for custard using eggs.
You may also like to use butter cream, Bavarian Cream or Diplomat Cream. Remember the cake is a bit heavy so your filling should not be runny or too soft or it will not be able to carry the weight of the upper cake layer. You can also add fruit (strawberry, kiwi, mango, etc) to your “cream” layer even though this is not traditional.


Bienenstich Kuchen


I have baked my Bienenstich in ramekins and served individually but you can also bake it in a round or a square tin and cut it out into squares like we do with brownies.

One of the problems of this yeasted cake is making sure the filling is strong enough to take the weight of the upper layer. The other problem is cutting the Bienenstich into slices or squares without the filling squishing out ad making a mess of everything.
The first problem can be taken care of by using a filling that will hold up and not using too much filling. The whipped cream can be stabilized with cornstarch (or agar or gelatin if you use it). You can always thing the remaining fillng and serve it with the Bienestich as a sauce.
The second problem can be taken care of by placing the lower layer of the cake on the serving plate and then makinge a collar around it with a double layer of parchment paper that should be a little taller than the height of your finished Bienenstich. Now spread the filling over the lower layer evenly.
Then pre-cut your upper almond toffee layer into slices or squares depending on the shape of your Bienenstich. Now place the slices/ squares on top of the filling so it looks like the top layer is whole. Refrigerate this for at least a couple of hours before serving. When ready to serve, remove the parchment collar, and use the slices/ squares as a guide and cut through the filling right to the bottom.

Note: If you cannot find sliced almonds where you live (as in my case), you can make them at home. They will not be as thin as the store-bough version but I personally prefer my home made variety.

Blanch almonds by dropping them in just boiled hot water (not in boiling water, but boiling water that has just been taken off the heat). If you boil them, they will cook and become soft. Let them sit in the water for about 5 minutes. Then drain the water off and rinse once in cold water. Strain well. The skins of the almonds should feel a little loose and look wrinkled now. Pinch each almond at the broad end with thumb and forefinger and the skin should slip off easily.
Let the almonds dry out on a kitchen towel in an airy place for about half an hour. Then lay each almond down on its flat side and, using a sharp knife, slice as thinly as you can. There you have your sliced almonds.


Bienenstich Kuchen


BienenstichKuchen (German Bee Sting Cake)
To serve 6-8
Recipe Source- Aparna 

Ingredients:

For the Pastry Cream Filling:
250ml milk (I used 3%)
3tbsp sugar
3 tbsp vanilla flavoured custard powder
200 ml cream (I used 40% fat)
1 tbsp corn-starch

For the Dough:

1/4 cup milk (I used 3%)
100gm butter, at room temperature
2 cups all-purpose flour
2 tbsp sugar
1 egg
3/4 tsp salt
1 1/4 tsp instant yeast

For the Honey-Almond Topping:

50 gm butter
1/3 cup sugar
2 tbsp honey
1 tsp vanilla extract
2/3 cup almonds, sliced* (see Note above)

Method:

Bienenstich Kuchen

Make the custard for the filling first. This can be made the previous day and refrigerated till required.
Keep aside 1/4 cup of milk, and put the remaining milk and the sugar in pan. Over medium heat, bring this to a boil while stirring frequently to dissolve the sugar. In the meanwhile, dissolve the custard powder in the 1/4 cup of milk. Add this in a stream, to the boiling milk and keep whisking so that no lumps are formed.
Keep whisking until the custard becomes very thick. Take the pan off the heat and let the custard cool to room temperature. Whisk it on and off so it stays smooth. If it does become lumpy after cooling, use a hand blender to make it smooth. Transfer to a bowl, cover and refrigerate.
Once you are ready to fill the Bienenstich, whip 200ml of cream till soft peaks form. Then add the corn-starch and whip till it forms stiff peaks. Whisk the custard to make sure it is smooth. Gently fold the cream into the custard. If you feel it is too soft, refrigerate for a couple of hours and then use.


Bienenstich Kuchen

To make the dough, heat the milk until it is quite hot but not boiling. Cut the butter into pieces and add to the milk, stirring it until the better melts completely. Let it cool a little.
In the meanwhile, put the flour, sugar, salt and the yeast in the bowl of your processor. Run a couple of times to mix well and then add the egg (leave the egg out if you don’t use it). Run again till the egg has also mixed well. Now add the butter-milk mixture (it should be warm, not hot) and the then knead till it forms a smooth and soft (loose) brioche-like dough that’s just short of sticky. It should come way from the sides of the bowl and be easy to handle.
Shape the dough into a ball and place it in a bowl. Cover loosely and let it rise for about 1 1/2 to 2 hours. This dough will rise quite well but not to double or as much as your regular bread dough.

Deflate the dough, and shape again to a smooth ball. Place it in a8”spring form cake tin lined with parchment. It is important to do this otherwise the topping will make the bread/ cake sticky and difficult to unmould. Flatten the dough a little, pressing down lightly so that the dough fits the cake tin. It doesn’t matter if its not touching the sides like batter does. Let it rise for about 30 to 45 minutes. It will not rise very much and look a little puffy.


Bienenstich Kuchen

Prepare the topping while the dough rises. Melt the butter, sugar, honey and vanilla in a small pan, over medium heat. Keep stirring frequently and it will start bubbling up. Let it cook for about 3 minutes or so until it turns to a light beige colour. Add the sliced almonds, and stir well till the almonds are well coated. Take the pan off the heat and let it cool a bit. The mixture will become quite thick.


Bienenstich Kuchen

Now get ready to bake the bread/ cake. Once the dough has risen, use a spoon take bits if the topping (it will be quite thick, like a sticky fudge) and distribute it uniformly over the surface. If there are small gaps they will get covered once the bread/ cake is baking.


Bienenstich Kuchen

Bake at 180C (350F) for about 25 to 35 minutes until the top is golden brown and bubbling. A cake tester through the centre should come out clean. Let the cake cool in the pan for abpout 15 minutes. Then gently loosen the sides with a spatula and unmould. Let it cool completely on a rack.


Bienenstich Kuchen

When it has cooled completely, slice the cake into two equal layers carefully, using a very sharp knife. Spread the pastry cream on the lower layer and top with the upper layer and refrigerate till ready to serve.


Bienenstich Kuchen


Read More »

Friday, December 20, 2013

Ghirardelli Triple Chocolate Brownies with Oreo Biscuits


Ghirardelli Triple Chocolate Brownies


My brother, sister and myself own the similar model phones .We are obsessive with this new age cross-platform mobile messaging app named whatsapp. Guess what? We exchange messages in a crazy way! We are based in 3 different countries with very different time zones and this app binds us unbelievably together! Now, brother bakes a brownie and shares the picture of the yummy chocolatey treat with his sisters in his brand new spring form pan.


This sister shoots an eye, demands for the recipe of the cake along with the pan :).The e(o)ver generous brother brings them all the way from the far west to the home town where he meets his sisters and parents. Bliss!

All this happened a month back when we had a week's break in Kottayam. The moments went zoom and the time flew past. Brother showed me a packet of Ghirardelli Triple Chocolate Brownie mix and told this was what he baked and shared via app. I squealed in delight and grabbed the packet!

I never had an idea to blog about this one as it's about an instant mix. Still I was prompted to shoot a few pictures to share in fb for Christmas and a few loving requests got me now to share in this space.
Now comes the important point which I hadn't shared earlier! I love fudgy heavy chocolate brownies and I mixed along 3-4 oreo biscuits along the batter ;)


Ghirardelli Triple Chocolate Brownies


Ghirardelli Triple Chocolate Brownies with Oreo Biscuits
Yields- 16 squares

You need:

1 pouch of Ghirardelli Triple Chocolate Brownie mix
4 Oreo biscuits, crumbled (I used my fingers)
1/3 Cup Water
1/3 Cup Vegetable Oil
1 Egg

Method:


Ghirardelli Triple Chocolate Brownies


Ghirardelli Triple Chocolate Brownies
Before and after baking


Preheat oven to 160 deg C or 325°F. Prepare 8” x 8” baking pan by lightly greasing or spraying with non-stick cooking spray.

 Blend water, oil and egg in a mixing bowl. Add brownie mix and crushed oreo biscuits and stir until moistened (about 20 strokes). Spoon batter into prepared pan and spread evenly.

 Bake for 45-50 minutes.For glass pan, add 5 minutes to the bake time. Cool completely in pan before cutting.

Do not over bake. Fresh-baked brownies appear under baked but cool to doneness.


Ghirardelli Triple Chocolate Brownies

Ghirardelli Triple Chocolate Brownies

                                    Fudgy Brownies, made from scratch, are already here.
Read More »

Friday, December 13, 2013

A Spicy Tamil Lunch and the Rains!


Lunch and Rain

Lunch and Rain


We have not seen sun for the past 3 days. Its windy, cold and the downpour is heavy!
This is the time when the family craves for a wide spread of  'Vegetarian South Indian Lunch'. As you might have read earlier in many of my posts, we enjoy brunch by 10.30 every morning, straightaway.
Come monsoon, I love to stay tucked inside the warmth of duvet enjoying the cozy feel and have to struggle pulling myself up from the bed. Once up, the wonderful weather prompts me to be active and I will soon be brimming with energy!
Today morning had been one such day, when a full fledged lunch was made, photographed and blogged! ;)


Lunch and Rain


1. Pacha Thakkali Sambhar - The method is same as the Drumsticks/Murungakkai Sambhar. Raw garden fresh organic green tomatoes were used instead of drumsticks.

2. Vendakkai Vathakkal / Stir-fried ladies finger. I don't have the recipe yet, will post soon.

3. Poosanikkai Morkuzhambu . The recipe is here. I have also posted Bonda Morkuzhambu here.

4. Appalam.

5. Kathrikkai Puli Kuzhambu - I have the detailed recipe of Mochai-Kathiri-Murungai Kuzhambu here. I used only Kathirikkai/Brinjals today.

6. Rasam - Yes, it is the same Thakkali Poondu Rasam :)

7.Curd.

8.Lime pickle & Mor milagai- I have posted Citron/Narthangai pickle here. Lime is used to make this pickle instead of citron.

I also had Vazhaithandu Koottu and plain dal and forgot to add here. Anyhow it is fine not to overcrowd :). I didn't have a mood to make Payasam but had Maja Blanca, a Filipino dessert, to complete the meal.


Lunch and Rain


Oh yeah! I am geering up for the Christmas Bakes..... :)

Read More »

Tuesday, December 10, 2013

Easy Kerala Pavakka Roast / Deep Fried Bitter Gourd with Onions


Pavakka Roast


Many of amma's recent side dishes are seasonal. She makes yummy dishes during one of our visits and while on your next, she has a handful of new ones! The funniest part is that she forgets how she made a particular dish, we would have thoroughly enjoyed during our previous holiday with her. That's her :). Very quick and smart in learning a recipe and very forgetful :)

I pictured this pavakka roast she made during our last visit. Our maid Suma helped her with this one and while I am blogging I am dismissing the thought of reconfirming the recipe with her simply because she would have already forgotten about this :)
Typing simple the recipe with the aid of a crude note I made then along with the abundant step wise pictures I clicked along that day.. :)

I have noted that in Kerala, the bitter gourd is sliced long while in Tamil Nadu the vegetable in sliced round and thin for making the dry roasted version.


Pavakka Roast


 Kerala Pavakka Roast
Serves 2-3
Time needed 40 minutes

You Need:

Bitter gourd/ Pavakka - Sliced long as one inch pieces. Need not be very thin. - 2 cups
Coconut bits/thenga kothu - 1tbsp
Big onions - sliced thin- 1 cup, heaped
Green chilles- 3-4 slit lengthwise
Coconut oil- 1/2- 3/4 cup- to fry
salt - to taste

Method:

Pavakka Roast


Boil bitter gourd in just enough water adding green chillies and salt and cook till half done. Drain excess water and add in the coconut bits.


Pavakka Roast

Keep ready the sliced onions. Heat oil in a wok and begin with 1/2 cup of boiled 'pavakka'. Keep the flame to minimum and continue frying till the pcs turn brown and crisp. Drain using a slotted spoon and arrange on a flat vessel. Repeat as batches until you are done with frying. In the remaining oil saute the onions till brown and crisp ( pour a little more oil if necessary) Drain the fried onions and top the fried 'pavakka'.


Pavakka Roast

Serve hot with steamed rice and sambhar 

Read More »

Sunday, November 24, 2013

KanelSnegle or Kanelbullar ~ Swedish Cinnamon Buns


KanelSnegle/ Kanelbullar


KanelSnegle (Cinnamon Snails) or Kanelbullar (Cinnamon Buns) is the Swedish version of the popular American Cinnamon Rolls. The Swedish version are probably the original version and not sticky like their American counterparts and are also less sweet. These rolls are delightfully aromatic, soft and moist, and perfect with a cup of tea/ coffee whether for breakfast or in the evening. Yes, you guessed right, this is the bread the group has decided to bake for the month!

The Swedish KanelSnegle/ Kanelbullars less about sugar and more about the spices in it – cardamom in the dough and cinnamon inside the Snails/ Buns. Whether you call them Snails (coiled shape)or Buns (twisted and rolled up) depends on how you shape them. Scandinavian celebratory breads tend to be all about spices and warmth so you will find a lot of their breads scented with cardamom. Cinnamon, cloves, aniseed, etc.


KanelSnegle/ Kanelbullar


These Cinnamon Snails/ Buns are found all over Europe with slight variations in recipe and the shapes as Franzbrotchen, Korvapuusti, Skillingsbollen, etc.
KanelSnegle/ Kanelbullar are traditionally made on the 4th of October every year in Sweden to celebrate “the Day of the Cinnamon Bun” but can be found in bakeries all through the year. There are different ways of shaping this confectionery and I have detailed two types here – the typical “snail” shape which much like that of the regular Cinnamon Roll, and the “twist”. You are free to explore different shapes and try them out if you’re feeling adventurous.
Typically the traditional filling in these buns is just butter, sugar and cinnamon, but there are versions that also use almonds with this filling and that’s what I have done here. Feel free to leave the almonds out if you want.They usually come baked in white paper cases, and the nice thing about this is that the filling stays in the buns and doesn’t get left behind on the baking sheets!

Shaping

Shaping cinnamon roll style. (I followed this method of shaping).
One way of shaping is to just roll up the dough with filling like jelly/ swiss roll style and cut them into pieces. This is the typical KanelSnegle.Watch the video here.

Shaping by stretching and twisting into buns.
The other way is to fold the dough over the filling and cut it into strips. Then slightly pull/ elongate strips and twist like a rope and then roll it up, tucking the end underneath the bun.Watch the video here.

Shaping into “trouser leg” and twisting into buns.
The third slightly more complicated and prettier bun is made by cutting the strips into half lengthwise leaving one end attached (see pictures and video for details) like “trousers/ pants”. Then each “leg is twisted and then rolled up to form a bun.Watch the video here.


This recipe involves the preparation of a starter which is refrigerated overnight.
These KanelSnegle freeze quite well, so you can make the full batch of twenty and freeze them for later use. Just warm them up in the microwave or the oven whenever you want one or two.

KanelSnegle/ Kanelbullar


KanelSnegle / Kanelbullar (Swedish Cinnamon Snails / Rolls)
Makes 20 numbers
Source ~ Aparna, for Bread Baking Group.

Ingredients:

For the Starter:
1 cup warm milk
2tsp instant yeast
2 cups all-purpose flour

For the Dough:
All the Starter
2 cups all-purpose flour
3/4 tsp salt (if using salted butter, otherwise 1 1/2 tsp)
6 to 8 pods cardamom, powdered
2 tsp lemon zest
1/3 cup caster sugar
60g butter, soft at room temperature

For the Filling:
75g butter, soft at room temperature
1/2 cup light brown sugar, loosely packed (or 1/3 cup caster sugar)
2 tsp cinnamon
1/3 cup coarsely ground almonds

For the Topping:
1/4 cup milk (or egg wash if you eat eggs)
Pearl sugar or large sugar crystals ( I used Demerara)

Method:

KanelSnegle/ Kanelbullar


Mix together all the ingredients for the Starter into a sticky dough, in a large bowl. Place the Starter dough in an oiled bowl and loosely cover it and then refrigerate it. Remember the dough will rise quite a bit so use a container that has enough room for this.
The next day, about 30 minutes before you are ready to start on the dough, take the Starter out and leave it at room temperature. As always this can be kneaded by hand or in the processor. I’m giving instructions for using the processor.
Tear the Starter to large pieces and drop into the processor bowl. Now sift together the flour, cardamom and salt into a bowl. Add this, the lemon zest and sugar to the bowl and run the processor till well mixed.
Now add the soft butter and knead well until you have a smooth and elastic dough. If your dough feels dry, add a little milk or if it feels wet then add a little flour till you have the required consistency of dough.


KanelSnegle/ Kanelbullar

Now turn the dough out onto a lightly floured surface, and then roll it out into a approximately rectangle about 20” by 12” in size. Make the filling by mixing/ creaming together the soft butter, brown sugar and cinnamon with a fork or spoon into a spreadable paste. Depending on which shape you are going to make your Cinnamon Buns, spread the filling either all over your dough rectangle, or over half of it.
Sprinkle the coarse almond powder over this and then either tightly roll the dough jelly/ Swiss roll style and cut it into 20 equal pieces with a sharp knife. Place these, cut side down on a lightly greased baking sheet leaving space between them, or in white cupcake cases.
Otherwise fold the dough over in half and cut into 20 long strips with a sharp knife, twist and shape them as desired. Place these, cut side down on a lightly greased baking sheet leaving space between them, or in white cupcake cases.
Let them rise for about 10 to 15 minutes till they look a little puffy but not swollen up. Brush the Snails/ Buns with milk (or egg wash) and sprinkle with pearl sugar, large sugar crystals or brown sugar (whatever you have on hand). I used Demerara .

KanelSnegle/ Kanelbullar

Bake them at 200C (400F) for about 15 minutes till they’re cooked, golden brown and sound hollow when tapped. If they’re browning too quickly, turn down the temperature by about 20C (65F) and bake them till done.


KanelSnegle/ Kanelbullar

Let them cool on wire racks. You can serve them warm or at room temperature. You can freeze these KanelSnegle for whenever you feel like having one.


KanelSnegle/ Kanelbullar

Cinnamon Rolls Served in Denmark

While on last year's trip to Scandinavia, I was fortunate enough to savour the best of Cinnamon rolls from Denmark and Sweden (the source points). They were flaky and light and the ones you see in the picture were the ultimate! Little did I know that I would venture baking the same within months, near to perfection! Thanks Aparna! :)
Read More »

Wednesday, November 20, 2013

Palak Keerai Masiyal / Puréed spiced-up Spinach


Palak Keerai Masiyal

As we know, 'Palak' is the Hindi name for spinach, the common healthy greens, and 'Pasalai Keerai', the Tamil.
Having this on my mind, I requested my vegetable lady to bring 'pasalai keerai'. She confronted me with real fresh bunch of greens with oval shaped fleshy leaves that bore tiny pink flowers. The bunch looked cute. I cooked and mashed the leaves, but found this one totally slimy and non-edible! Strange but true.

Lately, I learnt the exact greens I was searching for was called 'Palak Keerai'! This one had longer and broader leaves which were thinner.'Pasalai', I was told, was a different variety: the one with oval leaves and pink flowers.Strange again. I still get confused!

I tried this dish while in Namakkal. The town sells fresh greens, no matter where you live, you can grab the freshest bunch every morning from the vegetable ladies or the nearby shops. I got the bunch from the market.
Those were the times when I was the guardian for my school going son who was in high pressure preparing for the public exams. I saw to it, he received healthy and tasty diet.
'Palak Keerai Masiyal' was thus born, a recipe I tweaked from my other mashed spinach recipes combined with the tips given by my neighbour. Neither my mom or ma-in-law had cooked the same and I had not tasted too. To my excitement, my son really loved this one and I included in his lunch menu, twice a week. The intake of spinach in this form will be greater by one who eats it and the mashed form is better assimilable. This 'Masiyal' or 'Kadasal'( meaning mashed) is thus one of the tastiest greens I prepare!


Palak Keerai Masiyal


Palak Keerai Masiyal/Kadasal
To serve a family of 4
Time taken - 40 minutes

A small bunch of Spinach/ Palak
2 tsps of oil
1 medium sized big onion, chopped
Half of a green chilly  or one small, slit lengthwise to two pcs
1/4 tsp cumin/jeera powder
A fat pinch or turmeric powder
1 medium sized tomato
5-6 cloves garlic
2 tbsps of cooked thuvar dal
Salt- 1/2 tsp or as needed

Seasoning (optional, I didn't do as my son dislikes. The taste was still good!)
2 tsps of oil
1/4 tsp of mustard seeds and urad dal
A red chilly, broken into 3 bits
Pinch of hing


Palak Keerai Masiyal

Wash well enough and retain the leaves and tender stem. I retained just an inch of stem from the leaf. Discard the fibrous parts of the stem completely. Chop the greens. You may not need to chop fine since we are going to cook them. Rough chopping will do. Heat 2 tsps oil in a kadai. Sauté the onions adding salt until translucent and then the garlic and chilly. Add in cumin and turmeric powders...


Palak Keerai Masiyal

..followed by the tomato pieces and sauté until they turn mushy. Top up with chopped spinach. Sprinkle 1/4-1/2 cup of water and close the pan with a lid.Turn the flame to low-medium and let it cook for 4-5 minutes. Open and check whether the palak is cooked soft. Fresh greens let out water while cooking so check the amount of water you sprinkle earlier.


Palak Keerai Masiyal

Now that it's cooked, stir in cooked dal. Switch off fire and let it cool. The whole mass should be moist may be with 2-3tsps and water in it as you see in the picture. Too much of water will spoil the consistency of the 'kadasal'. If you feel it's too dry, add 2-3 tsps of hot water.Purée or blend in a mixie. Check salt. Serve with steamed rice or phulkas.


Palak Keerai Masiyal

Read More »

Tuesday, October 29, 2013

Ghee Mysore pak


Ghee Mysore Pak


I was introduced to making a variety of sweets during my early years of marriage, as a young daughter in law. In a joint family there was always the need of home made sweets and snacks. During festival time, ma-in-law and ammayi ( her mom) would plan out meticulously what all to prepare and how. We mostly had an 'Iyer' or a Brahmin who is supposedly and expert to make the diwali goodies, who turned up a week before the D-day and starts off with much pomp. He would come prepared with his 'edupidi' or assistants who would give him a helping hand throughout. The firewood was set at our back yard, with a high roofed 'shamiana' to ward off unexpected showers of the month, and the Iyer would start off with his simple prayers. The whole process of making sweets and snacks, in mounts, would go for at least 5 days but those were the times I really loved! I used to simply watch in awe the way the 'edupidis' roll out ladoos from hot boondhi, the way Iyer squeezes out jalebis and does the final mix up of the 'mixture' as heaps! Ma- in- law took the complete responsibility of shopping the ingredients, dividing the whole bunch of goodies and shared with our relatives, friends and workers at home. My part was mostly to help her packing the stuff and making some extra
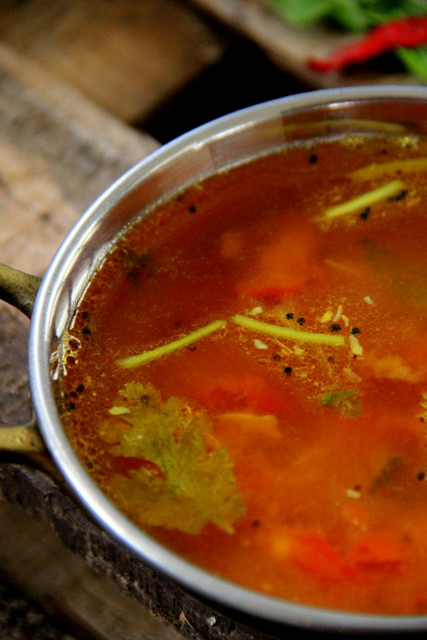
 sambhar, rasam and koottu for the Iyer and his assistants while I prepared the lunch for the family.
Those were the days ignorant of blogging and I missed to capture those scenes live to share with you! They remain as memories. These days it is getting harder to find a good cook that we simply order the sweets and snacks out to commercial joints.
Ever since blogging years, I make it a point to make at least a sweet for the festival at home, which I can share in my blog. 'Bhajji' and 'Rava Kesari' are always unavoidable on the Diwali day, anyway!

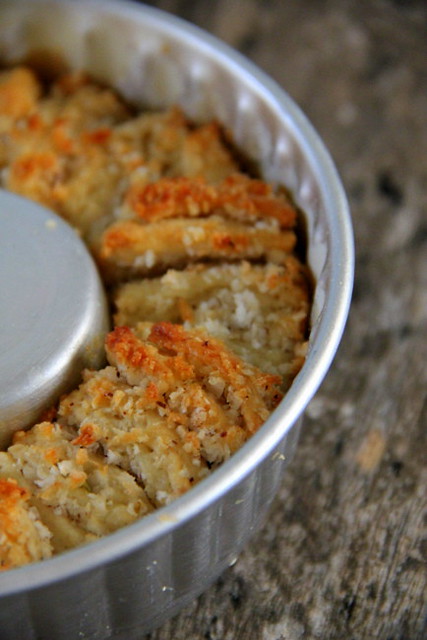
This year, I resorted to Ghee Mysore Pak for blogging. To start learning how to make the same, I depended completely upon my neighbour, Rama Aunty and her daughter Hari. Aunty is more than a neighbour with her much timely help and motherly affection. Hari is my favourite! :)
Hari made sure she mastered the art of making the sweet and went for at least half a dozen trial and errors. She sent me a sample of her every trial and I could visibly see the difference in the quality of sweet improving each time. Finally, the lovely mom and talented daughter summoned me home with all the ingredients of the all time delicacy. Since they handled the whole of stove top, all I did conveniently was the photo shoot! I realised how difficult it would be if I had tried the same and handled the photography single handed!


Ghee Mysore Pak


Mysore Pak
Yields 20 rectangles +/-
Total Time needed- 20-25 minutes

1 cup Besan / Kadalai Mavu-
2 cups melted ghee + 2-3 tbsp for adding in the last stage
1-2 tsps of ghee to grease the pan
2.5 cups sugar
3/4 cup water (this is related to quantity of sugar and not besan)


Ghee Mysore Pak
Measure besan


Ghee Mysore Pak
Dry roast lightly for a minute in medium heat, stirring continuously. Transfer to a dry tray. Besan should have slightly more than bearable heat if you do a 'touch test'.


Ghee Mysore Pak
Transfer besan to a metal sifter or to a metal sieve. (do not transfer to a nylon based sieve as it melts down due to the high heat of the besan!)


Ghee Mysore Pak
Transfer sugar to the same pan, pour water and let it boil together.


Ghee Mysore Pak
Stir now and then to dissolve sugar completely and minimise the flame to low.


Ghee Mysore Pak
While the sugar and water mix comes to a boil, grease the pan with melted ghee. This is the pan onto which you need to transfer the piping hot mysore pak right from the stove


Ghee Mysore Pak
The stage to attain is 'one string consistency' or 'pisukku padam'. This is the most important part which decides the consistency of the final outcome. So, be very careful to get it right.
The sugar water solution, after a few minutes (say, 4-7 minutes, that is: medium heat until the crystals dissolve and later in low flame;) froths up, and comes to a rolling boil as in the middle picture. Keep the flame to minimum at this point and you can see the solution turning thicker. The three pictures were shot within a minute so the stage attains in seconds after the solution starts frothing!
The solution should be sticky if you feel a few drops between the tips of your index finger and thumb. The stage has reached in the third picture above. Since the liquid is really hot, take care not to burn your fingers.


Ghee Mysore Pak
Immediately not letting to go to the next stage of syrup, add one cup of ghee.


Ghee Mysore Pak
and mix well along.


Ghee Mysore Pak
Sift in flour using sifter with one hand and a whisk to stir avoiding lumps, with the other hand.


Ghee Mysore Pak
The sifting in and vigorous mixing should take place simultaneously! It's better to have a helping hand if you are a first timer for this part!


Ghee Mysore Pak
Whisk briskly at this stage.


Ghee Mysore Pak
You can use a flat headed ladle while it thickens.


Ghee Mysore Pak
add the remaining one cup ghee 1/4 cup at a time between 3-5 minutes of continuous stirring.

Ghee Mysore Pak
You will finish the ghee as 3-4 batches while stirring.


Ghee Mysore Pak
 Keep the flame low while the mixture starts thickening and bubbles up.


Ghee Mysore Pak
Continuous stir is the most important and a bit laborious task at this point.


Ghee Mysore Pak
This stage attains within 2-3 minutes of the previous stage. Watch the edge of the pan while stirring. The mix leaves the edges or when you see 'honey comb like holes', appearing along the edges while stirring, the final stage has reached!
You may drizzle 2-3 tbsps of ghee at this point to make an extra rich Mysore Pak. But if you need to concentrate too much on the final stage, it's fine, skip it! :)


Ghee Mysore Pak
Transfer the hot lava :) to the greased tray.


Ghee Mysore Pak
Its quite natural for the sweet to froth up soon after the transfer because of the high heat.


Ghee Mysore Pak
 If it does, tap the pan gently on the counter and it settles down!


Ghee Mysore Pak

Cool for 10 minutes to get rid of the piping heat and slice mark nicely to the deep bottom. It is important to slice mark while the sweet is hot or very warm. The warm/cooled down sweet tends to break into powder and makes it tough to shape. Also, take care to slice mark deep enough to touch the base of the metal since the pieces may stick up again, due to the high heat around the base. You may not be able to slice perfectly as in shops. No worries, machines do for them :). Our imperfect rectangles are perfect heart warmers, instead :)


Ghee Mysore Pak


Notes: 

1. Mysore Pak made in non-stick pans lack the natural grainy texture. Hence we used Indolium pan. The sweet needs some crude heat with metal can offer and non-stick bases cannot!

2. 10 minutes was needed for attaining 'pisukku padam' ( the sugar syrup consistency) in low-medium flame when we tried double the quantity, of the above recipe.Therefore, for the above measurement I have written down, the time needed for the one string stage or the 'pisukku padam' will be around 4-6 minutes.

3. The sifting in and whisking process demanded 20 minutes when we made.

4. Hence the total time taken on stove was 33 minutes in exact for the doubled recipe. It may not get cut down to half the time if the recipe is halved ( the above quantity I'd mentioned), but will take around 20-25 minutes from start to finish.

If you feel the recipe explained so far, will give a very sweet mysore pak:

I tried with the measurement of 1:1:1 (besan : sugar : ghee) and it faired quite well. Just follow the same steps above while on stove stop. While making the surar syrup, add water enough to immerse the sugar. Reserve 1/4 part of the ghee to add to the pan just before you remove the sweet from the stove. This moistens and gives the sweet a better melt-in-the mouth texture.
This measurement will give you the rich ghee flavoured mysore pak which I personally prefer.

Ramaunty and Hari, this post would not have been possible with you two. I have no words to thank you both!

Ghee Mysore Pak


Read More »
Related Posts Plugin for WordPress, Blogger...