Showing posts with label Breakfast. Show all posts

Tuesday, July 22, 2014

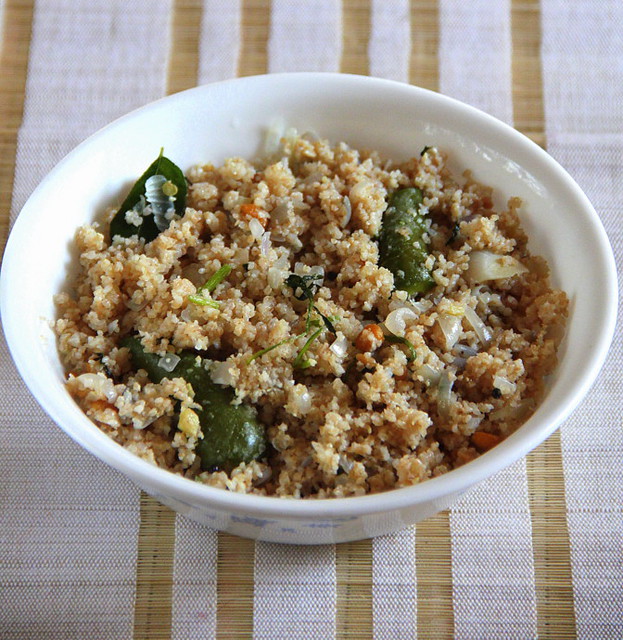
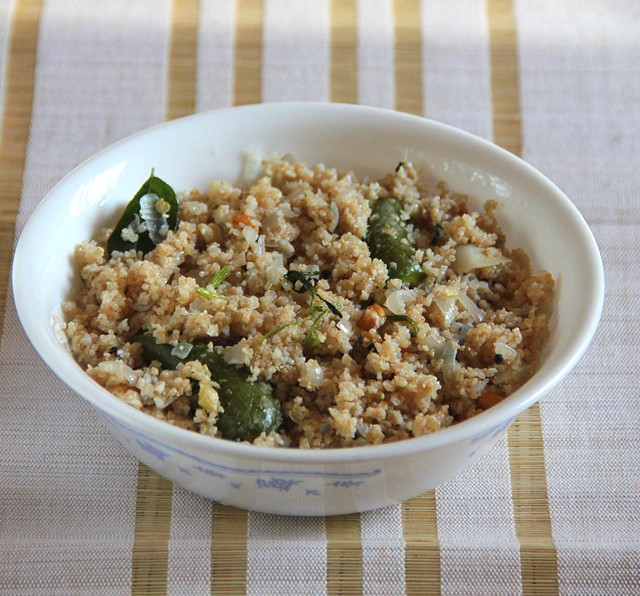
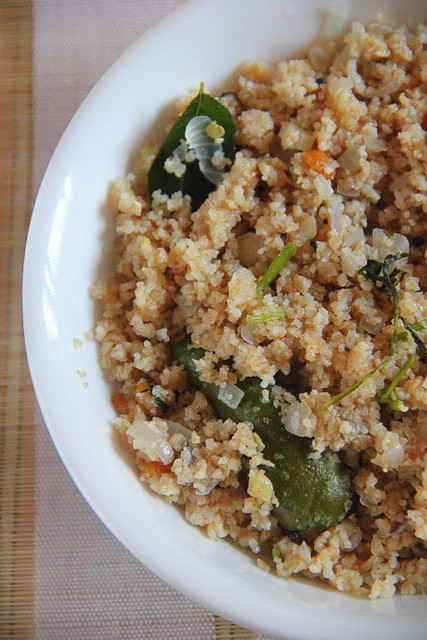
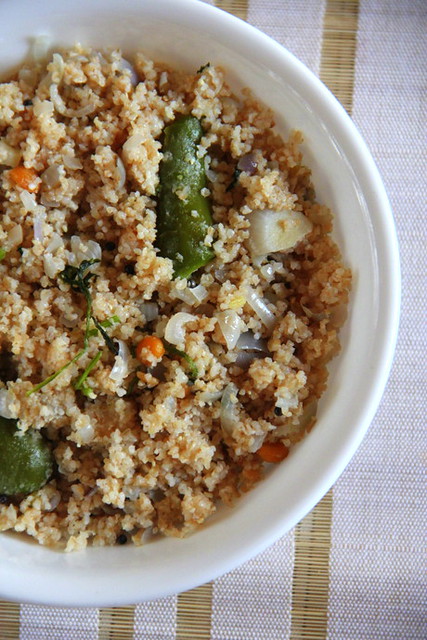
Gothumai Rava Upma ~ A simple spicy meal made with broken wheat


Gothumai Rava Upma


While I am still clearing and organising the things put away carelessly, or rather dumped, during the post wedding phase, I stole some time to check my unread e-mails. Among loving enquiries of absence, ad requests, and personal mails, a few ones from my readers caught my attention. Their common and prime request had been nothing else but to post healthy meals. Simple dishes rich in fibre, wholesome and easy to make with available ingredients. I realised  I had been doing injustice with blogging  with not a good combination of recipes though I take extreme care with my everyday cooking.

Lately, I have been making this 'broken wheat meal' or 'Godhumai upma' made by 'Gothumai rava' for my better half twice a week for dinner but haven't really thought of blogging about it, probably because the portion gets over by night and there wont be anymore left for the next day's photo shoot. So, this one you see was made in the morning, shot, blogged and reserved for his dinner :)

I have made this according to his palate preferences; soaked in butter milk instead of water as he likes the natural tanginess of the same, extra ginger bits and no addition of vegetables. He insists Rava Upma has to be made this way and the addition of vegetables makes it a 'Khichadi'.

Soaking time- 15-20 minutes
Total stove top time- 15-20 minutes

Now, to make the 'Upma' to serve one,
Get Ready with:

Broken wheat rava - 3/4 cup
Table salt- 1/2 -3/4 tsp
Oil- 1 tbsp
Mustard seeds- 1/4 tsp
Urad dal- 1/4 tsp
Bengal Gram dal- 1 tsp
Ginger, a one inch pc, chopped fine
Green chillies- 2, slit across
Big onion- 1 chopped
Thin and slightly sour butter milk - 3/4 cup or enough to soak the rava
Chopped coriander leaves- 1-2 tbsps
Curry leaves- A sprig


 Method:

Godhumai Ravai Upma

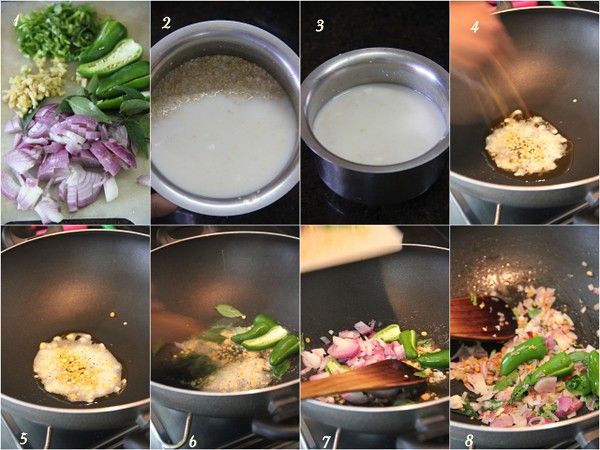
Soak rava for 15-20 minutes in butter milk and salt, enough to cover and the liquid stays 1 cm above it. In the meanwhile chop the onions, ginger, chillies and coriander. After the rava has soaked well (press the grains to check whether they are fully hydrated and soft), heat a tbsp of oil in a non-stick kadai, splutter mustard seeds, brown the urad dal followed by the bengal gram dal. Throw in the ginger bits, chillies and onions in order and sauté until the onions are translucent and partly cooked. Say for 2-3 minutes in medium flame.


Godhumai Ravai Upma

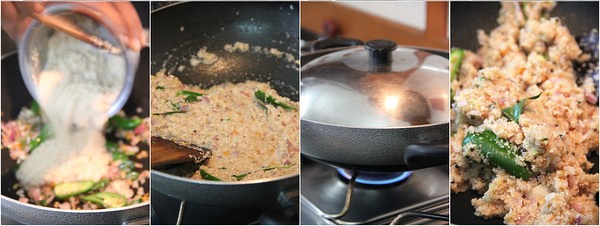
Add in the soaked rava. Stir gently to combine. Close the kadai with a lid for 5 minutes keeping the flame low. Stir the upma at intervals, twice or thrice during this phase and close to lock the steam in. Open after 5 minutes. The Upma will be sticky at this point. Keep stirring at intervals, adding curry and coriander leaves in the open kadai, until the stickiness wades off and the rava is cooked with the seasonings infused well enough, for around 8-10 minutes. The Upma shouldn't be too dry as well. There should be a tint of moisture when you feel it between your fingers.
Serve hot with Coconut Chutney. I made it later in the evening and could not include here :)


Godhumai Ravai UpmaGodhumai Ravai UpmaGodhumai Ravai Upma

Read More »

Sunday, November 24, 2013

KanelSnegle or Kanelbullar ~ Swedish Cinnamon Buns


KanelSnegle/ Kanelbullar


KanelSnegle (Cinnamon Snails) or Kanelbullar (Cinnamon Buns) is the Swedish version of the popular American Cinnamon Rolls. The Swedish version are probably the original version and not sticky like their American counterparts and are also less sweet. These rolls are delightfully aromatic, soft and moist, and perfect with a cup of tea/ coffee whether for breakfast or in the evening. Yes, you guessed right, this is the bread the group has decided to bake for the month!

The Swedish KanelSnegle/ Kanelbullars less about sugar and more about the spices in it – cardamom in the dough and cinnamon inside the Snails/ Buns. Whether you call them Snails (coiled shape)or Buns (twisted and rolled up) depends on how you shape them. Scandinavian celebratory breads tend to be all about spices and warmth so you will find a lot of their breads scented with cardamom. Cinnamon, cloves, aniseed, etc.


KanelSnegle/ Kanelbullar


These Cinnamon Snails/ Buns are found all over Europe with slight variations in recipe and the shapes as Franzbrotchen, Korvapuusti, Skillingsbollen, etc.
KanelSnegle/ Kanelbullar are traditionally made on the 4th of October every year in Sweden to celebrate “the Day of the Cinnamon Bun” but can be found in bakeries all through the year. There are different ways of shaping this confectionery and I have detailed two types here – the typical “snail” shape which much like that of the regular Cinnamon Roll, and the “twist”. You are free to explore different shapes and try them out if you’re feeling adventurous.
Typically the traditional filling in these buns is just butter, sugar and cinnamon, but there are versions that also use almonds with this filling and that’s what I have done here. Feel free to leave the almonds out if you want.They usually come baked in white paper cases, and the nice thing about this is that the filling stays in the buns and doesn’t get left behind on the baking sheets!

Shaping

Shaping cinnamon roll style. (I followed this method of shaping).
One way of shaping is to just roll up the dough with filling like jelly/ swiss roll style and cut them into pieces. This is the typical KanelSnegle.Watch the video here.

Shaping by stretching and twisting into buns.
The other way is to fold the dough over the filling and cut it into strips. Then slightly pull/ elongate strips and twist like a rope and then roll it up, tucking the end underneath the bun.Watch the video here.

Shaping into “trouser leg” and twisting into buns.
The third slightly more complicated and prettier bun is made by cutting the strips into half lengthwise leaving one end attached (see pictures and video for details) like “trousers/ pants”. Then each “leg is twisted and then rolled up to form a bun.Watch the video here.


This recipe involves the preparation of a starter which is refrigerated overnight.
These KanelSnegle freeze quite well, so you can make the full batch of twenty and freeze them for later use. Just warm them up in the microwave or the oven whenever you want one or two.

KanelSnegle/ Kanelbullar


KanelSnegle / Kanelbullar (Swedish Cinnamon Snails / Rolls)
Makes 20 numbers
Source ~ Aparna, for Bread Baking Group.

Ingredients:

For the Starter:
1 cup warm milk
2tsp instant yeast
2 cups all-purpose flour

For the Dough:
All the Starter
2 cups all-purpose flour
3/4 tsp salt (if using salted butter, otherwise 1 1/2 tsp)
6 to 8 pods cardamom, powdered
2 tsp lemon zest
1/3 cup caster sugar
60g butter, soft at room temperature

For the Filling:
75g butter, soft at room temperature
1/2 cup light brown sugar, loosely packed (or 1/3 cup caster sugar)
2 tsp cinnamon
1/3 cup coarsely ground almonds

For the Topping:
1/4 cup milk (or egg wash if you eat eggs)
Pearl sugar or large sugar crystals ( I used Demerara)

Method:

KanelSnegle/ Kanelbullar


Mix together all the ingredients for the Starter into a sticky dough, in a large bowl. Place the Starter dough in an oiled bowl and loosely cover it and then refrigerate it. Remember the dough will rise quite a bit so use a container that has enough room for this.
The next day, about 30 minutes before you are ready to start on the dough, take the Starter out and leave it at room temperature. As always this can be kneaded by hand or in the processor. I’m giving instructions for using the processor.
Tear the Starter to large pieces and drop into the processor bowl. Now sift together the flour, cardamom and salt into a bowl. Add this, the lemon zest and sugar to the bowl and run the processor till well mixed.
Now add the soft butter and knead well until you have a smooth and elastic dough. If your dough feels dry, add a little milk or if it feels wet then add a little flour till you have the required consistency of dough.


KanelSnegle/ Kanelbullar

Now turn the dough out onto a lightly floured surface, and then roll it out into a approximately rectangle about 20” by 12” in size. Make the filling by mixing/ creaming together the soft butter, brown sugar and cinnamon with a fork or spoon into a spreadable paste. Depending on which shape you are going to make your Cinnamon Buns, spread the filling either all over your dough rectangle, or over half of it.
Sprinkle the coarse almond powder over this and then either tightly roll the dough jelly/ Swiss roll style and cut it into 20 equal pieces with a sharp knife. Place these, cut side down on a lightly greased baking sheet leaving space between them, or in white cupcake cases.
Otherwise fold the dough over in half and cut into 20 long strips with a sharp knife, twist and shape them as desired. Place these, cut side down on a lightly greased baking sheet leaving space between them, or in white cupcake cases.
Let them rise for about 10 to 15 minutes till they look a little puffy but not swollen up. Brush the Snails/ Buns with milk (or egg wash) and sprinkle with pearl sugar, large sugar crystals or brown sugar (whatever you have on hand). I used Demerara .

KanelSnegle/ Kanelbullar

Bake them at 200C (400F) for about 15 minutes till they’re cooked, golden brown and sound hollow when tapped. If they’re browning too quickly, turn down the temperature by about 20C (65F) and bake them till done.


KanelSnegle/ Kanelbullar

Let them cool on wire racks. You can serve them warm or at room temperature. You can freeze these KanelSnegle for whenever you feel like having one.


KanelSnegle/ Kanelbullar

Cinnamon Rolls Served in Denmark

While on last year's trip to Scandinavia, I was fortunate enough to savour the best of Cinnamon rolls from Denmark and Sweden (the source points). They were flaky and light and the ones you see in the picture were the ultimate! Little did I know that I would venture baking the same within months, near to perfection! Thanks Aparna! :)
Read More »

Thursday, February 28, 2013

Thengai Pottukadalai Chutney / Roasted gram and Coconut Dip for Idly and Dosa


IMG_1142
IMG_1154


There are a few dishes we normally ignore to blog just because we make it almost everyday thinking, "ah! who wants this recipe. I better not bring it to light"

Thengai Chutney is one such recipe, I had never wanted to bring out.

While we adapt stylishly, the westernised fruit shakes, cereals and sandwiches as food for the morning, I feel a South Indian does justice to his genes by opting his simple and favourite comfort breakfast which is none other than a plate of hot and soft idlies or crispy dosas with small katoris of seasoned flavourful coconut chutney and sambhar.
I bet he misses the satisfaction he might get in this simple breakfast, otherwise in his westernised option, wherever he lives!
Read More »

Thursday, October 4, 2012

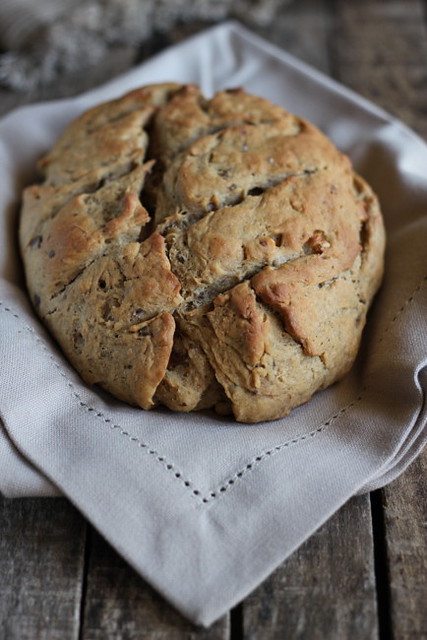
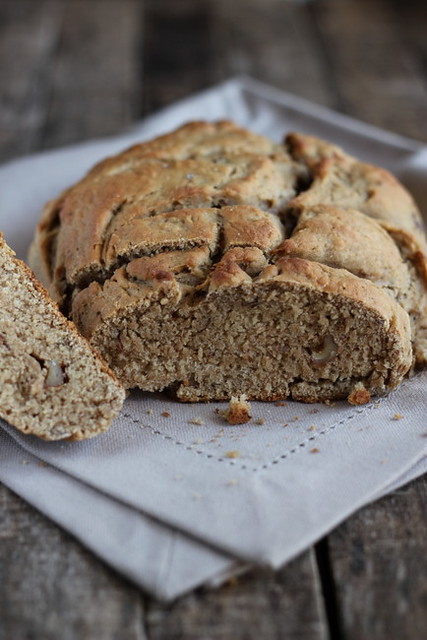
Rustic Wheat, Date & Walnut Bread


I came across this beautiful looking bread in Chinmayie's space. Ever since I had been dreaming baking this, taking pictures and savouring the heavenly stuff!

The attractive part was that, the recipe of this bread seemed to be flexible and I loved the way she'd described..

Read More »

Thursday, September 27, 2012

Rava Dosa / Sooji or Semolina Dosa


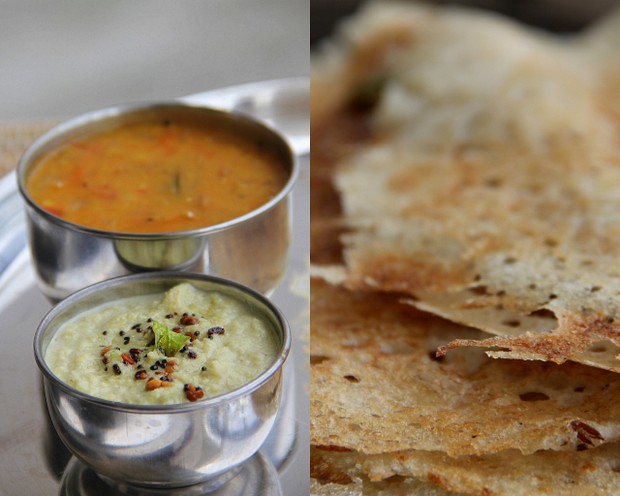
                          Rava Dosai served with 'Tiffin Sambhar' and 'Thengai Chutney'


Rava Dosai or Rava Dosa is a Tiffin ( I love the way the Tamil name it ) which I hadn't mastered so far. I go 'bumper' every time I try. I come out with under cooked, torn,  or rather overly done dosas and go bonkers.

Ah! here?
The perfect dosas!
Who makes them?
My ma in law's co-sis Uma Chithi! :)

Read More »

Tuesday, January 24, 2012

Semia / Vermicelli Upma


I have been keeping the recipe typed and the pictures of this post drafted for the past 4 days ever since amma made, back home and I had been wondering what to type for the intro part! Oh yeah, most of the times my mind gets blocked when it comes to this and badly want to proceed to the recipe directly..

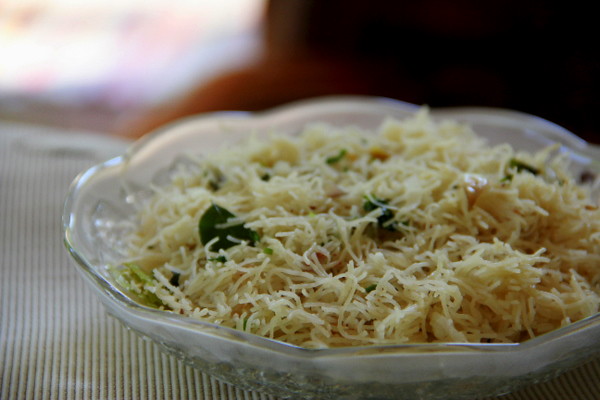
So, this what amma made for breakfast in a jiffy and I loved the preparation though not a fan of regular upmas or even semia upmas. I had wanted to post the step by step for this one but was away for the morning walk and by the time I came back amma had arranged the food in the glass bowl asking me to take the picture :)

And now for the recipe part she had gotten ready with:

Roasted vermicelli- 200 gms or 3 cups +/-
Water- 500 ml
Salt- as needed

To Season

Oil- 3 tbsp
Mustard seeds- 1/4 tsp
Urad dal- 1/2 tsp
Ginger, minced finely- 1/2 tsp
Green chillies- 3, slit lengthwise
Curry leaves - a sprig
Chopped coriander - to garnish
Freshly grated coconut - 2 tbsps (optional; tis the Kerala way)

 Method:

Heat oil to season in a non stick kadai, splutter mustard seeds, brown the urad dal, followed by the minced ginger and the green chillies. Stir for a few seconds and throw in the curry leaves. Now pour the water. Bring it to boil, adding salt.Stir in the vermicelli  stirring to combine the whole ingredients taking care not to form any lumps and close the kadai with a lid. Reduce the flame and cook until done. The semia would have cooked soft absorbing the water and  see to it the strands aren't sticky and stay separate. Top the Upma with the freshly grated coconut ( which is purely optional), yes she used it, garnish with finely chopped coriander leaves and serve hot with coconut chutney.


Variations

You may add onions while seasoning. A large big onion sliced lengthwise will be apt for the mentioned amount of vermicelli. Saute the onion after ginger and green chillies and proceed...


Read More »

Monday, November 14, 2011

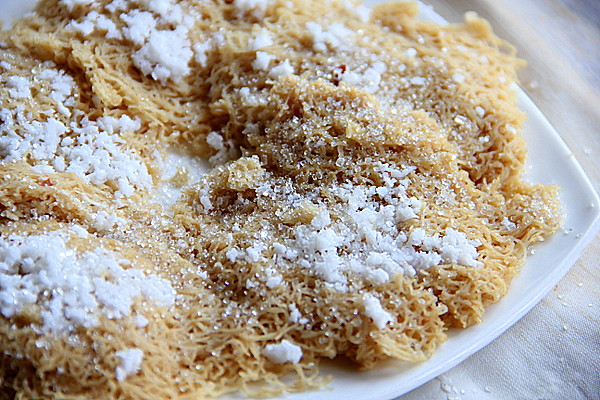
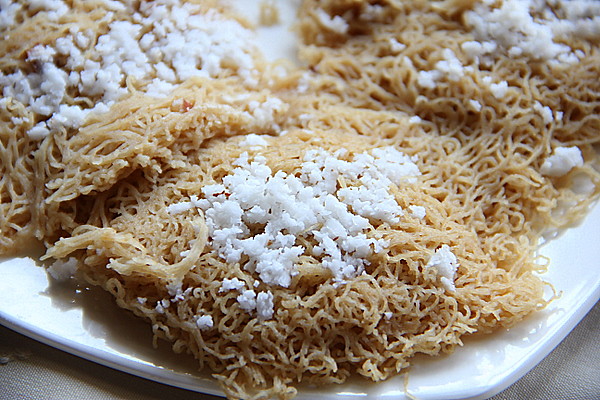
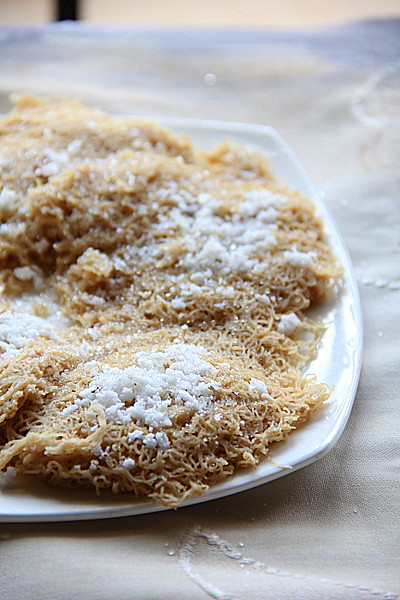
Godhumai Idiyappam / Whole Wheat Flour String Hoppers


Healthy breakfast always goes a longer way. The easily digestible steamed food is not only nourishing but is apt for all ages.

Here is a breakfast which you can prepare within minutes. If you do not have the time to make a side dish for this one, simply drizzle fresh melted ghee and top with sugar. It will definitely be a change to your routine cereal and fruits!

Honestly I havent tasted this ever since. Neither I have seen my mom or in laws steaming wheat flour hoppers!
I was much prompted to try this after a phone call with V's cousin lately  after her beautiful narration of how it's prepared by her ma in law! So, being my first attempt I am still unsure whether I had perfected with the outcome but still couldn't stop me from sharing with you, about just how I made it!

Yields- 10-12 small idiyappams
Serves  2

Whole wheat flour- 1 cup
Salt- 1/4 tsp
Oil - a tsp
Coconut shavings- 1/4 cup or as needed
*Water 1 cup + 2tbsp


Fry the sieved dry flour in a thick/copper bottomed kadai to ensure even heating.(No oil is added)
Keep the flame low-medium and fry continuously. Within two minutes you will see streaks of flour turning dark brown at the bottom and sides even while you stir continuously!


Minimise the heat to low and continue for 8-10 minutes. Take care not to burn the flour!
I fried for 9 minutes, continuously and carried on for another minute in the heat of the pan.


Transfer the flour to a bowl and heat water with salt added. The water should be just hot and should not bubble as you see here.


*For 1 cup of flour, start with 3/4 cup and add the remaining water carefully, little by little. Stir in oil in between.
I needed 1 cup + 2 tbsps of water to make the dough.The amount of water depends upon the quality of the wheat flour as well. Prepare a soft warm dough using a ladle or a wooden stick.


Shape the dough into small cylinders with your fist before to ease into the presser.


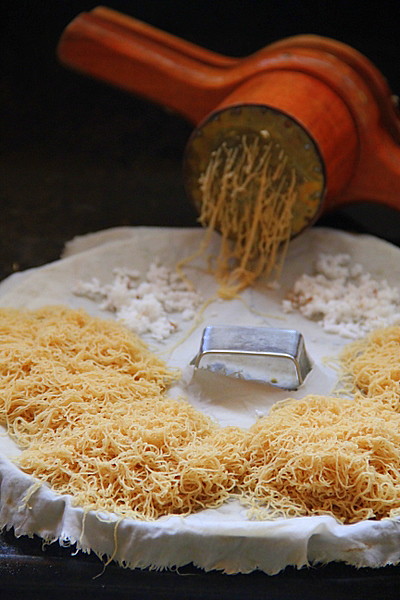
Squeeze out the warm dough on your idiyappam plates over the sprinkled fresh coconut gratings.


Place over the steamer, on fire, and it's ready to be steamed.


Steam for about 10 minutes or until done.


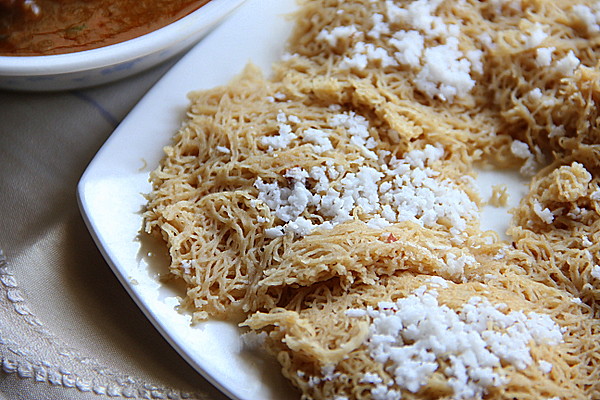
Topple carefully inverting the plate with cooked idiyappams over another one.


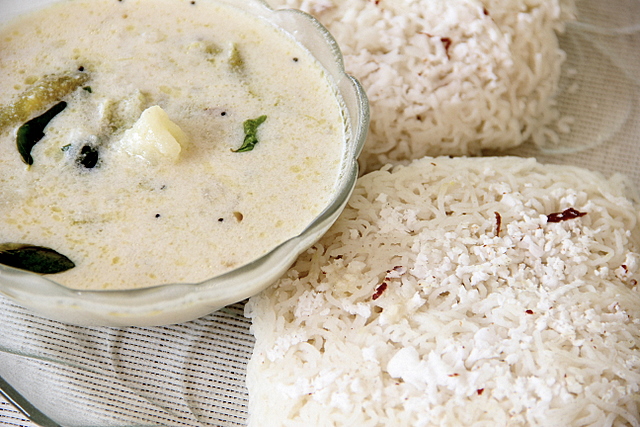
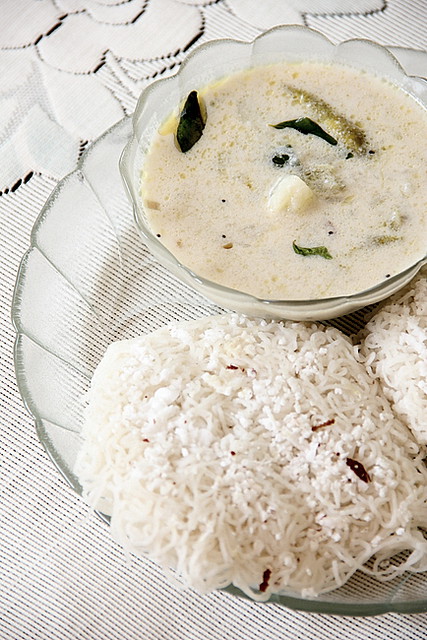
Wheat Idiyappams go well with coconut based curries like Vegetable Ishtoo / Stew ,  Mutton Stew or Vegetable Khurma. I served with an onion based gravy which was fine too.


I loved it topped with melted ghee and lots of sugar :)


So, never bother if you don't have a side dish in hand..


                    The warm melted ghee and sugar combo is simply flavorful and delicious!

Note

Whole wheat flour with comparatively less gluten content makes the best idiyappams. I used Aashirvaad atta.

Never use boiling water for preparing the dough. Boiled water cooks the flour and makes it difficult to squeeze. The hoppers get  too soft and soggy too!
Fry the flour well. I fried for 9 minutes continuously and continued for another minute in the heat of the pan and am thinking of frying for 9-11 minutes over controlled flame and a minute without flame, the next time I try, making a total of 12 minutes frying time.

Wheat flour Idiyappam needs a little more time than the Rice Idiyappam to get cooked.So, give at least 10 -12 minutes cooking time.

Warmer the dough easier the squeeze. A smart cook can always preserve the heat of the dough, kept as a ball, in a hot box / casserole until the next batch is squeezed. Or one can squeeze out on a couple or more plates and steam the batches at the same time, thus acting fast.

Another method of preparation - Wheat flour is steamed for 20 mins,cooled and sieved, made into a dough and squeezed out. I haven't tried this method though!
Read More »

Tuesday, July 26, 2011

Idiyappam with Ishtoo


It always makes wonder how the name 'Ishtoo' got popular in Kerala and presume as an attempt to sound like the English, when they named this mild curry, Stew..probably!

Amma wanted to make idiyappam and ishtoo for breakfast, the dish which evokes the reminiscences of our childhood days, the day sis and me were busy packing off from Kottayam. She had a hard time on the day with unannounced power cuts and least help from her daughters ;), well, she never expects our help as well but later by the end of the day her maid turned up and promised solid help to make the dish, which turned out to be our 'pack-away dinner' in Ernakulam!

I managed to click a few pictures in the middle of packing and running up and down the town for the last minute shopping and today, exactly after 3 weeks, since we left home, I drafted the post and rang amma up for the recipe..


Kerala Idiyappam (Serves 4-6)

Ready made rice flour / idiyappa podi (She used Matha. Double Horse, Eastern and Nirapara are also good brands)- 1/2 kg
Boiling water- 3 1/2 - 4 cups (more or less) or as needed to make a soft dough.
Salt - 1/2 - 3/4 tsp or to taste
Grated coconut- 1 cup


Boil water in sauce pan and add to the flour in a large wide vessel while mixing to form a dough with the stem of a ladle or so. Add water little by little adding salt to the flour and knead to an ultimate soft dough.The amount of water varies according to the quality or the rice powder.


Lightly grease the idiyappam press mould and put in one portion of the dough. Sprinkle 1-2 tbsps of coconut shavings on a a piece of greased banana leaf. Press out the dough to form circular mounds over the shavings.


Place the leaf carefully on the perforated plate of the steamer..


Idiyappam stew 004

and steam for about 10 minutes till the iddappam is cooked; with the steamer closed with its lid :)
I badly wanted to capture the steam n oye oye, I made it!!


Idiyappam stands or an idli stand can be the substitutes to the perforated plate lined with banana leaf. A pressure cooker, without the weight, can be used for steaming instead of the traditional 'appachembu' or the steamer you see here.


Ensure idiyappam is cooked.


Topple gently on a tray or a flat plate and serve steaming hot with Potato Ishtoo.


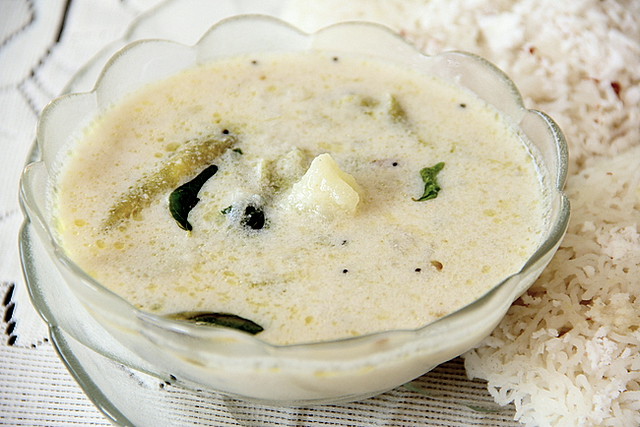
Potato Ishtoo


To serve 4 , you need,

Potatoes - 4 medium, peeled & cubed
Big onions - 2 medium, cut into squared slices
Green chillies - 4 to 5, slit lengthwise

For the coconut milk,
Grated coconut - 4 cups, loosely packed. You may need 1 big or 2 small coconuts.

To season,
Coconut oil - 1 tbsp
Mustard seeds - 1/4 tsp
Finely minced shallots/small onions- 1-2 tsps
Curry leaves - 2 sprigs
Salt to taste

* Dried and liquid variants of coconut milk are widely available in the market, these days. Prepare thick/thin milk according to the package/can instructions . The traditional way of preparing coconut milk, added to the curry enhances the taste and flavour to a large extend and hence I always resort to this method!

Extraction of coconut milk

Place a half of the coconut shavings in the blender with about 100ml (1/2 cup) of warm water. Process for about 20 seconds. Repeat with the other half with another 100 ml. Strain the milk using a filter or a double layered cheese cloth. Squeeze to finish off extraction completely.The milk you thus get is the concentrated milk or the 'onnam pal'/ first extract. Set this aside in a separate bowl.

Repeat, with added 200 ml of water to the coconut. Pulse to strain out the second extract / 'rendam pal'.
Another 200 ml of water pulsed will result in the third extract / 'moonam pal'.


Combine 2nd and the 3rd extracts.You may have, more or less, 3 cups of milk. Transfer into pan and boil potato chunks in this.The liquid part should at least 2 inches above the pieces. Be careful not to bring to a complete boil but simmer instead, stirring every now and then. Add the onions, green chillies and salt let cook until soft. Do not bother much if the milk curdle a bit coz it's natural. Once the vegetables are cooked, switch off the stove and add the first concentrated extract.
Heat coconut oil in a separate pan, crackle mustard seeds, caramelise the minced onions, throw in the curry leaves. Pour this over the curry. Close with a lid until served with steamy idiyappams.

Variations- You can add pieces of carrots and minced ginger while simmering the vegetables, the original Ishtoo additions!We generally avoid both as they suppress the divine flavour of coconut milk.
You may avoid the seasoning part by drizzling the coconut oil and stirring in the curry leaves.

Ishtoo serves well with Appams too!
Read More »

Tuesday, January 18, 2011

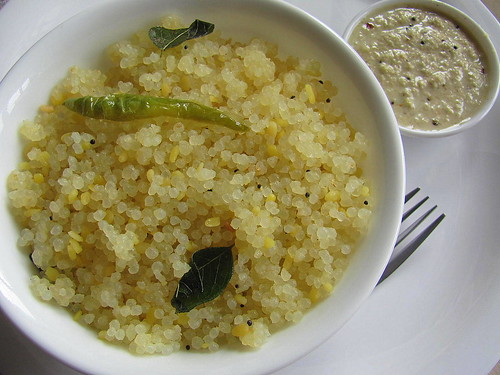
Sago / Javvarisi Upma


Sago Upma is an easy to make meal which calls for less ingredients, less cooking time, more taste and contentment!

I tasted this yummy dish for dinner at my sister in law's house a while back and instantly fell in love with it!

Though the dish is meant to be taken as an evening snack, I make it for breakfast or dinner as it's heartily filling.

Try this and I bet you will decide making it often at home as it needs no onions or even vegetables!
I am not very sure about the nutritional part of the dish; sago being low in nutrient content, you may also try adding vegetables while making this.

The recipe which follows is the basic one for the sago upma which I had tried and relished as such!


Ingredients: (to serve 4)

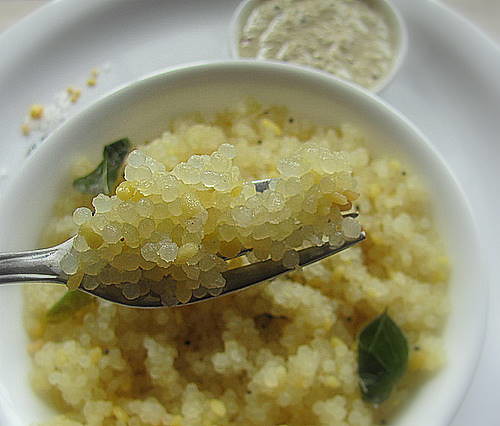
Sago/ javvarisi/chavvari- 2 cups (pick up the right sized pack of sago pearls..ie..slightly smaller than pepper corns, not the opaque white ones but the transparent ones)
Thick sour curd- 1 1/2 cups
Moong dal/pasi paruppu/cherupayar parippu- 1/4 cup (dry roasted)

To temper:

Oil- 1 1/2 tbsps
Mustard seeds - 1/4 tsp
Urad dal- 1/4 tsp
Green chillies-2-3-slit lengthwise
Curry leaves- a sprig
Salt- to taste

Method: (seems a little elaborate, but believe me, it's breeze!) :)

1. Wash sago well to remove any dust particles present. Beat the thick sour curd for 2-3 seconds to make it smooth and homogeneous. Transfer to a clean wide utensil. Wash the mixie with 1/2 cup of water and add to the thick curd. Drain washed the sago and soak in the beaten curd, immersed in such a way that liquid part is an inch above the sago.

2. Let is sit for 8 hours (generally 4-5 hours is said to be enough, but I resort to longer soaking hours as we prefer a tangier version of the Upma). It shouldn't be too dry and should be hydrated well enough in the curd. If you feel the liquid part being absorbed, add a little water now and then to make the pearls moist and happy :)

3. Fluff it with a fork once in two hours to facilitate even soaking of the pearls. (if you soak it for overnight, fluff it after an hour or two after you soak and repeat it before you cook it in the morning).

4. After 8 hours, drain away the excess liquid from the sago (you can even reserve this as you need some liquid to be sprinkled while cooking).

5. Cook dry roasted moong dal until 'just' done in an open pan of boiling water. (To dry roast the dal, heat the dal for 3-5 minutes medium flame until it acquires a light brown hue and the aroma spreads).

6. Heat oil in a wide, thick bottomed kadai or in a nonstick pan, splutter mustard seeds, brown the urad dal and throw in the green chillies followed by the curry leaves. Mix in the drained sago and combine gently. Within a couple of minutes the sago pearls turn transparent.Mix in gently the cooked dal. Sprinkle water if needed. The upma should be moist.Close the pan with a lid for 2 minutes.Turn again. By this time the excess water would have been used up and sago get rids of its stickiness if any, and turns soft. Switch off the flame.The whole cooking process here takes not more than 4-5 minutes.

7. Enjoy the hot sago upma with coconut chutney.

I would highly recommend Varalakshmi Sago to make this upma. They are smaller in size than the variety I have used in the above recipe and of higher quality. The soaking time of this sago is only 4 hours and has a much better taste!

Read More »

Wednesday, July 14, 2010

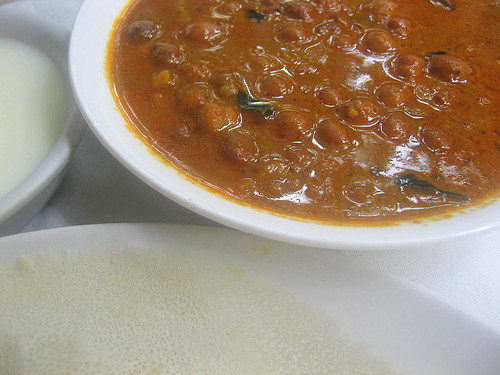
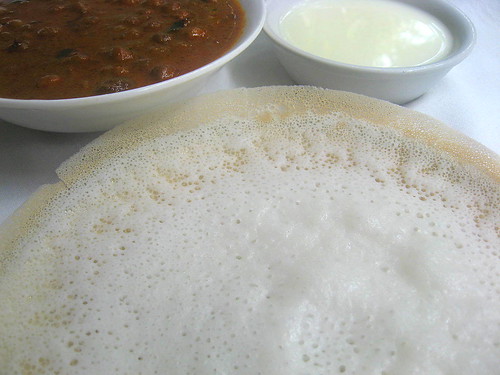
Appam and Kadala Curry-The Beauty and the Beast!


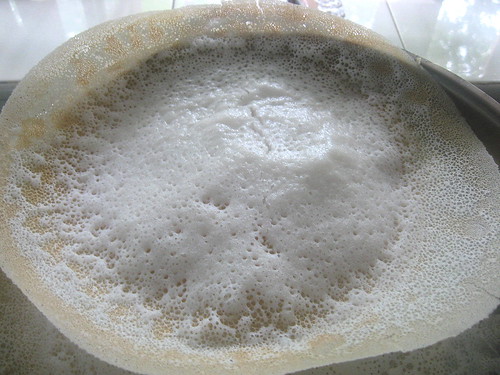
Aappam for Tamilians, appa or hopper for the Srilankans; Palappam or in short, 'Appam' is regarded as the ‘Queen of Kerala Breakfast Dishes’, a traditional fermented flat ‘Rice n Coconut bread’.

These Soft centered lacy pancakes are said to be adapted from the Jews who migrated to Kerala and thus became a popular dish among the Syrian Christians of the state.

Times have changed and Appam has become an identity of all Keralites.


Here you find the basic recipe for Kerala Palappam; my mom made while we were holidaying in Kottayam, last summer J (I’ll post the Tamil version which I make often, later;)).

Get ready with:

Raw Rice/Pachari- I use Ponni Pachari- 2 cups

Cooked Rice- 1 cup

Grated Coconut- 1 cup ( I had mentioned 4 cups earlier, sorry abt the typo error.Thanx to ashwini and ras who made me realise!!:))

Active dry yeast- 1/2 tsp

Sugar- 3tsps or to taste

Salt-to taste

Thin coconut milk- as needed; to dilute the batter if needed just before making them.


1. Soak Raw rice for 4-5 hours.Drain.Grind it to a smooth batter with grated coconut and cooked rice.

2. Dissolve yeast in a cup coconut water or just luke warm water.Keep it aside for half an hour till frothy.Add this to the above ground batter.Add sugar and salt as well.

3. Let the batter ferment for 8 hours (in India) or according to the temperature of your zone.

4. Heat a non stick appa kadai.Pour a ladle full of batter and quickly but gently swirl the pan around such that a thinner layer of batter covers the sides and a thicker faltter layer settles in the middle. Cover with the lid and cook in mild heat for 2-3 minutes, until the edges are golden and lacy and the centre; soft and cooked.

5. The edges lift while done and the middle part shouldn't stick to your water dipped fingers, while touched gently(this is how you test whether its righlty cooked).

6. Do not turn over the appam.

Remove the appams from the pan with care and transfer one by one on a flat tray before serving.


Note- The batter should be of dropping consistency.If not dilute it with thin coconut milk.

If you find the appams 'sticky' it means you have added more of it.So be a little careful with the batter.


Kadala Curry


You Need:

Kadala/ Channa-(The traditional recipe calls for Black Channa)- 1 ½ cups

To roast and grind:

Oil- 2 tsps

Coriander seeds- ½ cup

Grated coconut – ½ cup

Garlic- 3-4 cloves

Turmeric powder- ¼ tsp

Red chillies- 12-15 more or less, as you prefer

Curry leaves- a large healthy sprig J

Shallots- 4-5 nos

Garam masala powder - 1 tsp OR whole spices like cardamom, clove and cinnamon to be used while seasoning(see down) the curry instead of mustard seeds( we generally prefer the curry seasoned with mustard seeds)

To Season

Coconut Oil- a tbsp

Mustard seeds-1/4 tsp OR 1 clove+ 2 cardamom+ a 1” pc of cinnamon

Minced shallots- 2 tsp

Curry leaves- 2 sprigs

Small pieces of Coconut- Optional


1. Soak channa over night and pressure cook till soft with salt. Drain and reserve the water in which cooked.

2. In the meanwhile heat a thick bottomed kadai with 2 tsps of oil and roast coriander seeds for 5-7 mins in medium flame followed by the red chillies, garlic, coconut,turmeric powder and the curry leaves until the roasted aroma spreads around.Throw in the shallots and fry for a minute or two.Cool and grind to smooth paste adding enough water.

3. Pour the paste over the cooked channa in the pressure cooker, bring to a boil and simmer until raw smell of the spices disappear, adding enough salt.

4. Season the curry. Heat oil in a pan, splutter mustard seeds, curry leaves and brown the coconut pieces. Pour this to the curry.

Enjoy the Curry served with the Warm n Soft Appams along with thick n creamy, fresh coconut milk! J


Read More »
Related Posts Plugin for WordPress, Blogger...