Wednesday, May 27, 2009

Vattayappam / Steamed Rice n Coconut Bread

Vattayappam is nothing else but a simple "Rice Bread"!.

This sweetened steamed up bread is a popular tea time delicacy in Christian homes of Kerala and said to be a delicacy served for breakfast during Christmas time.

Usually I make them using rice flour, the easiest way, but this time tried out the traditional method from Anita’s, which I 'd bookmarked a few months ago, which turned out to be a mega hit at home yesterday.


Just follow blindly what she has explained step by step and you are there with the perfect vattayappams in the end.

A few "musts" to keep in mind for the best Vattayappams.

  • Usage of cooked Rose matta while grinding along with soaked raw rice as Anita has suggested.
  • Collecting the froth atop the fermented batter, spooned out with care.
  • Usage of shallow round pan for steam cooking.
  • Always use the best quality yeast, raw rice and freshly grated coconut.
Whew!, what a great escape from typing down a whole traditional recipe ;)..

For my sister who hosts Monthly Mingle-‘Ravishing Rice’, an event started by Meeta.

Read More »

Sunday, May 24, 2009

With love, from Kuttanad…


Born in the lovely town of Alappuzha, I am emotionally bound to Kuttanad, the suburban stretch, I used to watch in awe as a child; the lovely sight of lush green paddy fields stretching out to eternity and palm fringed backwater banks with the dainty blue sky above .


Kuttanad is the rice bowl of Kerala, the major granary of the state, with the major rivers Pampa , Meenachil, Achenkovil and Manimala.


Rice is cultivated in Palakkad as well.

The first harvest season in Kerala is just before the onset of summer, around the months of March-April.The next harvest season during the months of October-November; the entire place is a sight to behold with golden paddy swaying in the breeze.

Rice is the staple food of Keralites.They strongly prefer the healthy Chumanna Ari or the Red Rice with the bran rich in Vitamins and minerals to the polished ‘unhealthy’white rice.


Now let’s have a quick introduction to the common varieties of Red Rice that hail from the state..


Palakkadan Matta

Cultivated in Northern Kerala. Paddy is cleaned and made free from mud and stones. Next it is boiled in water, once(oru puzhukkal).The process is known as Parboiling.The paddy is dried and pounded so as to separate the grains from the Paddy (Nellu Kuthal).These grains cooked to rice are soft.Cooking time is less and the yield is also comparatively lesser.

Kuthari-(Kuthiya Ari meaning-Pounded Rice) -(Vadi variety)

A product of Kuttanad.Paddy is boiled in water, twice(Iru puzhukkal) or Double boiled,dried and pounded.Cooks for a longer time and the yield of the boiled rice is higher and the grains, firmer and less sticky than Matta.

Podiyari-(Podi Ari-Broken Rice)

The grains of Kuthari,while the process of Nellukuthal or while being pounded, gives off broken rice which is separated and named as Podiyari. Keralites use Podiyari to prepare Podiyari Kanji or the rice porridge.

Unakkalari-(Unakku Ari-Dried Rice)
Unakkalari is Raw Rice (pachari) with bran.The paddy is cleaned but the boiling part is skipped.The wet paddy is spread, dried well enough in shadow and pounded. Unakkalari is added along while preparing Puttu Podi.Also used to make Payasam.

Kuttanad image courtesy- Manoj Lovedale & www.keralatourism.org
Palakkad image courtesy-
www.shubhyatra.com

The Article goes to my sister who hosts Monthly Mingle-‘Ravishing Rice’, an event started by Meeta.

Read More »

Saturday, May 23, 2009

Ariyunda - The simple sweetened rice balls from Kerala


Ariyunda, the simple snack of God’s own country is one among my favourites. Still being in my home town,I could easily get hold of Kuthari (the red rice) and the sarkara(jaggery).This dark coloured jaggery (I wonder why these exact ones are unavailable in other states of the country!!) gives the unique flavour and colour when blended with the pretty fibre packed Kuthari ,the one extremely preferred to make this delicacy.


Traditionally the roasted rice was hand pounded in Ural and its wooden pestle, the Ulakka, those days , imparted the right fresh flavour and consistency to the done snack.As the Mixer is being replaced as any other machines,the roasted rice gets in there and makes the work much easier, but for sure not that enriched taste as the former…

Get ready with:

Rice-Kuthari preferred- a cup

Jaggery-200 gms-broken to lumps

Water-1/4 cup(to melt jaggery)

Freshly grated coconut- a cup

Cardamom-3-4-powdered

How to..

1. Wash Kuthari well.Remove stones if any. Heat a heavy bottomed kadai .Drain the rice and directly transfer to the kadai.

2. Dry roast the wet rice stirring all the time so that the grains are browned in a uniform way.This takes 10-12 minutes or continue till you hear mild cracking sound of the rice getting roasted.Pop a few grains into your mouth and they crack well between your teeth or will be brittle.This is how we can know the right stage of the roasted rice.

3. Cool and powder in a mixer.Neither too coarse nor too powdery.Sift the powder using the sieve for fine rava or make sure the mesh is in the right size just to allow granules down like that of fine rava.Mix in the powdered cardamom.

4. Melt the jaggery lumps in 1/4 cup of water. Strain to remove impurities, return to the stove and bring to a boil.Add coconut at this stage and keeping the flame low, simmer the mixture until the syrup gets sticky; takes 5 minutes more or less.Take care not to boil this syrup mix is boiled too much as the final Ariyunda tends to be hard.Turn off flame once the right consistency is reached.

5. Stir in the rice powder.Mix well taking care that no lumps are formed.Take a fistful and shape into balls. This measurement would yield upto 15 balls.Don’t worry if the they are soft as they turn harder the next day.Consume while fresh or else refrigerate, even if they have a shelf life for a week.

6.This is referred to as 'Poor man's sweet' and hence the traditional Ariyunda requires no ghee or cashews.If you love the combination ,feel free to add both and enjoy the richer delicacy :)


For my sister who hosts Monthly Mingle-‘Ravishing Rice’, an event started by Meeta.

Read More »

Thursday, May 21, 2009

To my Grandma…


While we honour mothers
With words of love and praise,
While we tell about their goodness
And their kind and loving ways,
We should also think of Grandma..
She's a mother, too, you see
For she mothered my dear mother,
As my mother mothers me!


Lying peacefully at the corner of the bedroom, she breathed for one last time….

Amidst the grievances of the loss,I console myself for having spent some solid time, took care of her,fed her the last Sunday morning she passed away.

Funeral, condolences,consoles,relatives, friends…all had came to a slow still by the passing days…

…………..

………

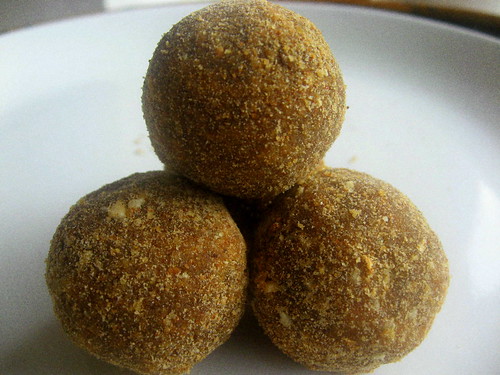
Amma and me decided to make Vatti Pulusu, which reminded of grandma, in every step.

Grandma was undoubtedly an expert in preparing this special curry,Vattipulusu , a comfort dish, truly unique and loved by all of us in the family..

I knew amma had mixed feelings all the while and I needed to be the one to reassure her that at least she had a peaceful end and is in a better world..

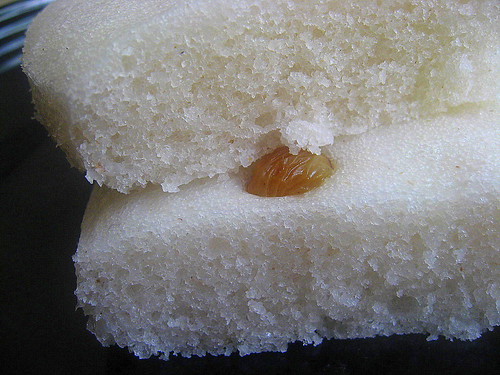
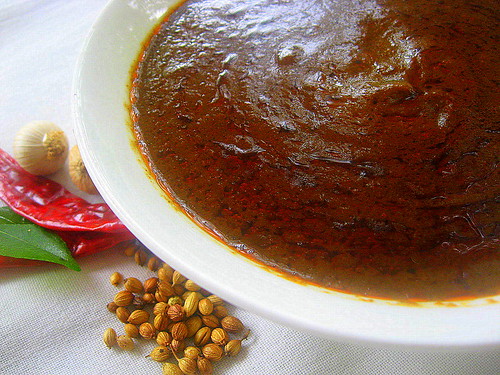
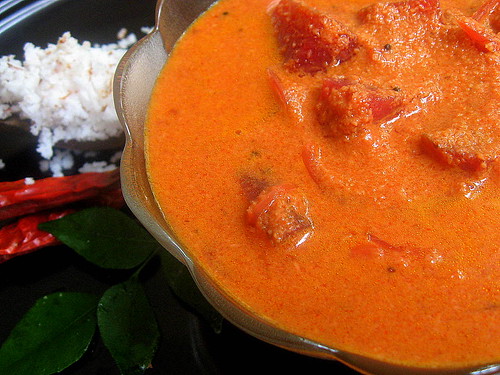
.... Vattipulusu, simmering in the Kalchatti, spreading the aroma all over the house, she prepares for us with her utmost love and care..


Ingredients:

Tamarind-a small lime sized ball

Salt-to taste


To roast and grind to a very smooth paste:

Gingelly seed oil-a tsp

Coriander/ Kothamalli/Malli/Dhania Powder-4 tbsps (use 4 heaped tbsps if you use seeds)

Fenugreek seeds/uluva-1/4 tsp

Red Chillies-8-10

Black Pepper corns-a heaped tsp

Cumin seeds-1/2 tsp

Turmeric powder-1/2 tsp

Shallots-1/2 cup

Garlic cloves-8

Curry leaves-a sprig


To season:

Gingelly seed oil-2 tbsps

Mustard seeds-1/4 tsp

Asafoetida-less than 1/4 tsp

Curry leaves-a sprig


Method:

1. Soak tamarind in warm water.Extract pulp.

2. Heat a tsp of oil as mentioned in the ”roast and grind” list in a heavy bottomed kadai.Roast the fenugreek and next the coriander seeds and the red chillies in medium flame stirring all the time till the colour changes and the aroma spreads out. (Usage of coriander powder is the easiest way and if you use this make sure not to burn it, and roast along with the chillies stirring all the time until the colour of the powder turns deeper and the aroma spreads out).

3. Turn off the flame.


4. Throw in rest of the ingredients ; the pepper corn,cumin seeds,turmeric powder, shallots,garlic and curry leaves in order, stirring the mixture heating them all up.The heat of the kadai is enough for this step.


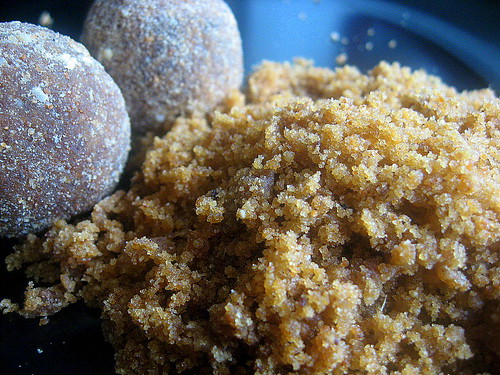
5. Cool and grind to the smoothest paste with just enough water.(Coriander powder grinds well rather than the seeds and hence suggested)


6. In a thick bottomed vessel (we used the traditional Kalchatti) combine the above paste with the tamarind extract.Add salt. Let the curry be watery at this stage.Boil and simmer the pulusu well closed with a lid. After 10-15 minutes, season the simmering Pulusu by heating the 2tbsps of oil in the earlier kadai , used for roasting, splutter the mustard seeds, asafoetida and next the curry leaves.Simmer until you get the real flavour of the Vattipulusu spreading all around the kitchen and the oil separates .


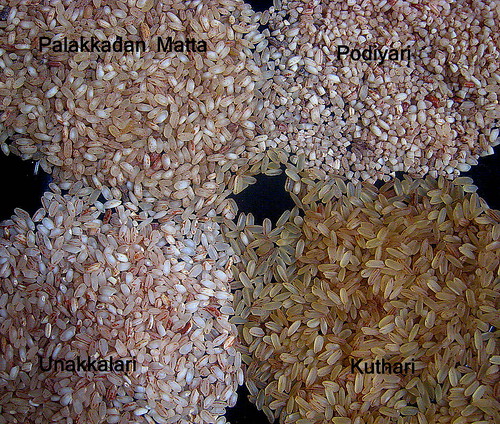
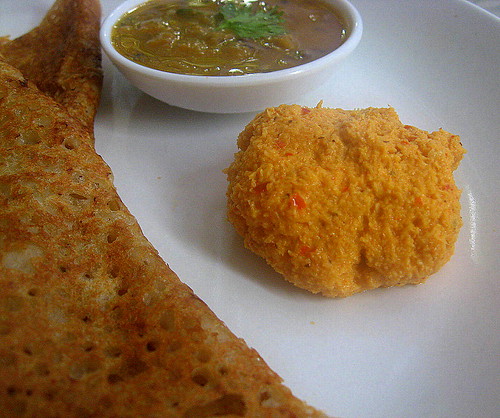
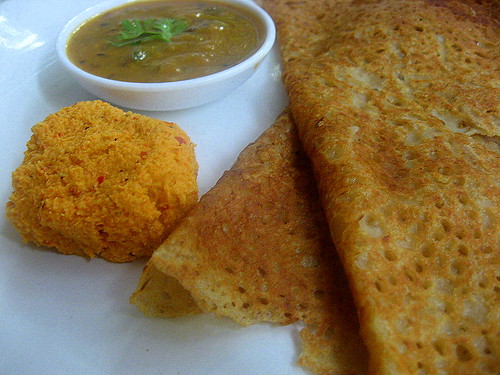
7. Serves best with boiled rice, idlies and dosas.


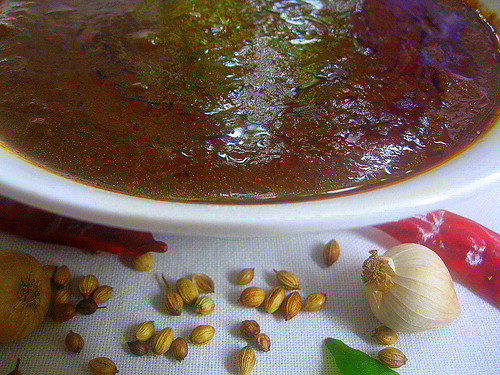
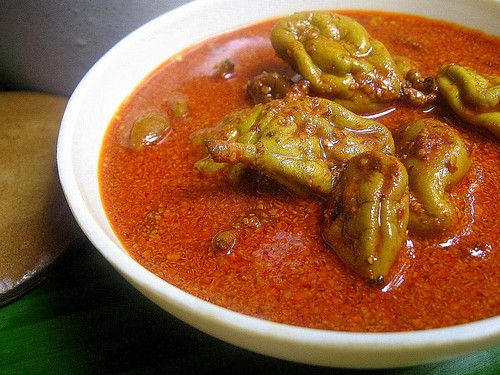
This is a spicy and tangy Indian curry, with no vegetables.The name Vattipulusu must have originated from the Telugu word Vanti, meaning plain and Pulusu, a gravy.
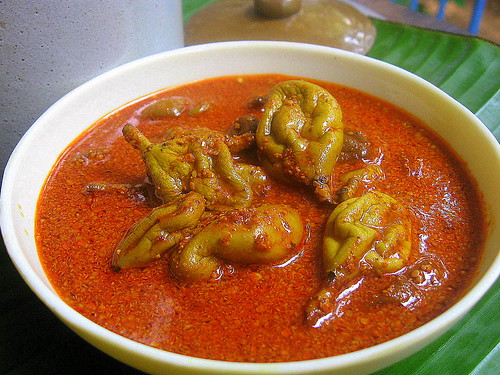
Vattipulusu
is close to Vatral kuzhambu, of Tamil cuisine ( of course without the vatral) and Theiyal of Kerala..

I’d not wished to show my feelings here but badly wanted to share this wonderful dish with my lovely friends what I watched and learned from my grandmother, the greatest cook of my world..

I strongly feel her presence in this room, when I type this in my lap top, breathing in her air …

....and my sister's post moving me to tears...

Read More »

Monday, May 11, 2009

Godhambu Dosa / Wheat pan cakes with Red Chutney


When I woke up on Mother’s day, Anon’s words flushed in to my mind ,
"God could not be everywhere and therefore he made Mothers."
Still in my home town, I was glad that I could spend this Special day with her after a long time; hurried downstairs to hug and wish amma who was busy making the morning coffee, hugged me back with the same warmth, asking ,"Bharathy, what do you want for breakfast?"..
Hmm.. something simple..
Chappathis?Pooris?...Idiyappam??(all these obviously fall under her easy-to-make list!)
"What about Godhambu Dosa and Red Chammanthi ?"..I intruded..
"Yeah Sure!, but will you blog this?..for me??"
YAY!! Why not..??!!..
She deserved another TIGHT bear hug from me…

The batteries were pulled out from the charger, red lights still on, warning me "uncharged!". The camera was loaded and all set..


While amma was making the preparations I noted down the ingredients:

Whole wheat flour - 2 cups
Water – 4 to 5 cups
Salt- to taste

To temper:

Oil-2 tbsps (you may not need oil while cooking dosas)
Mustard seeds-1/2 tsp
Finely cut big onions-1/2 cup
Green Chillies- slit once lengthwise and across to four pcs- 2
Curry Leaves- a sprig


What she did:


1. First mixed the flour and salt in a large bowl.
2. Gradually she added water to make a thin batter taking care that no lumps are formed while doing so. I gave her a helping hand here.
3. The consistency of the batter was thinner than the normal dosa batter. We needed about 1 3/4-2 cups of water.
4. She heated oil in a pan, spluttered the mustard seeds, sautéed the onions, green chillies and the curry leaves and poured this over the batter while warm(not hot, straight from the fire) which I finished mixing by then.
5. She heated up the dosa griddle, greased with a few drops of oil and poured a ladleful of batter from the edges towards the centre to form a round shaped dosa.


6. She told me to trickle the edges with a few drops of oil 'only if necessary'.
The dosa lifted on its own well with the tempered oil in itself.


7. Allowed to cook for a couple of minutes on each side while turning over. The dosa was ready when browned and cooked on both sides.


8. While I took hold of the dosa making part, she proceeded with the red chutney, the divine combination for Godhambu Dosa


Red Coconut Chutney

We needed:

Red chillies-6
Coconut -2 cups
Garlic cloves-2
Tamarind- a tamarind seed sized
Salt-to taste
Water- as needed
Curry leaves- 6 nos

Grind all the above with enough water and salt to make the chutney.
Make sure that you pulse the chillies alone at first , grind all the rest except the curry leaves which are to be added lastly.
We settled down together and enjoyed our breakfast with the rest of the members of my family :)....
I am thinking of getting her some cute gift now.. :)!!..
Note-The perfect golden brown colour, I feel is due to the usage of whole wheat flour, freshly ground from the wheat, in a local mill.Therefore the colour and the texture of the dosa is highly dependant on the quality of the powder.
Read More »

Saturday, May 9, 2009

Beetroot Coconut Curry


Beets are disliked by most.I seldom buy this purple veggie since V and kids are never fans of it.


Alas!..Our own farm grown beets slowly began filling up my veggie tray forcing me to try something new and believe me this easy-to-make curry went quite well with hot steamed rice, proving to be a good comfort dish on a hot summer noon!.


Ingredients:

Beet root-2 medium-each cut into one inch cubes.

Tamarind-marble sized or a tbsp of thick tamarind pulp.


To Grind:

Grated Coconut-2 cups

Red chillies-10 nos or Chilly powder- 1 ½ tbsps

Shallots-4

Cumin seeds -½ tsp

Turmeric powder-1/4 tsp


To Season:

Oil- a tbsp

Mustard seeds-1/2 tsp

Fenugreek seeds/uluva-1/2 tsp

Finely minced shallots-3

Curry leaves- a sprig


Method:

Cook the beetroot pieces in a pan in just enough water till half done.

Grind the ingredients to a paste, not too smooth.Extract the tamarind pulp.Add these to the pan.

Simmer for 5 minutes with enough water to form a thick curry.

Heat oil in another pan, splutter mustard seeds, throw in the fenugreek seeds,

sauté the minced shallots and the curry leaves.Pour over the curry.

Simmer the curry for another 5-10 minutes till the right consistency.Check salt and remove from fire.


Read More »

Tuesday, May 5, 2009

Kannimanga Achar / Tender Mango Pickle


Summer in Kerala... the season for Mulla poo(jasmine),Chakka (jack fruit)and Kannimanga(the young mangoes)..

I'm still enjoying my holidays in my native town down here in Kerala…the hot days filled with fun, loads of love and care…

V simply loves LOVES "Vadu manga oorugai".Me never an expert when it comes to making pickles, always “dread” to the utmost :).. decided to try making the same with the help of amma, blog, as I was sure it would be a great traditional keeper for you girls as well as for me and take my words it was so simple and never ever “dreadful “ as I felt until now…
So here’s the pickle packed with loads of love and care…

You need:

Sour variety Tender mangoes, as bunches-1 kg
Salt- 250gms
Water-Boiled well and cooled to room temp- 4 cups more or less(or the quantity to just immerse the mangoes)
Mustard seeds-50gms
Red chilly powder-4 heaped table spoons
Asafoetida powder/Perungaya podi-to flavour
Vinegar-optional(in case the magoes are less sour)-2 tbsp
Mustard seed oil- 2 tbsp

How to:

Wash the mangoes as bunches. Amma never let me separate them at this stage as she badly wanted to preserve the Chona (the milky sap)which started oozing out when I did it ;)
Now she came into the scene, washed them well, shook off excess water, placed them on a clean white dry cloth,wrapped up and patted dry. Now we together snipped the mangoes one by one and saw to it that every mango had at least a cm of its stalk along with. Then we stacked them into a clean and dry 2 ltr Bharani, the traditional earthen pot used for preserving pickles(see pic).


Add salt to the mangoes in the bharani. Shake well. Close with its lid and tie a white cloth around the neck.


Open the bharani on the 3rd day, 4rd ,6th and 8th days, shake to toss the mangoes or stir well with a clean, dry wooden ladle.The mangoes shrink as the water ooze out and lose the green colour to a pale yellow with aging.
Water has to boiled and cooled to room temperature. Has to be added on the 3rd or 4th day, after having a watch on the water oozed out with the addition of salt from the mangoes. The oozing out of the water stops as soon as the water is added and the mangoes wont get that "shrunk" look anymore. Adjust the quantity of water added so as to just 'immerse' the mangoes as it tends to bring down the shelf life.

On 8th day(just after a week), heat mustard seeds in a dry kadai.Take care not to roast, but heat well. Turn off flame, remove the seeds and heat the chilly powder now. Stir continuously while you do the heating part of both. Take care not to burn the chilly powder as well. Add asafoetida and mix well.Powder the mustard seeds.


Stir in the powdered mustard seeds, chilly powder and asafoetida to the mangoes. Mix well.


Vinegar, as said above can be used if the mangoes are less sour.We avoided this as the mangoes were of good quality and secondly I feared V would complain about a “chemical flavour” in the pickle :)

Do not hesitate to stir in Mustard seed oil (heated and cooled to room temp) which imparts the real traditional taste and thickness to the Kanni manga Achar :)!!

Keep closed the bharani as earlier with the white piece of cloth, tied to the neck.Open and use whenever needed.

Read More »
Related Posts Plugin for WordPress, Blogger...