Monday, June 18, 2012

Less is more, so let's keep it simple!


Less is more, so lets keep it simple! says Aparna in her much inspiring series of food photography- lesson #2.

Core Idea -
Less props, making the food the hero, thereby allowing one's eye to concentrate on the main focal point of the composition without distractions.

Well, I would like to talk less too so that the photography gets more attention :)


                                                                  Blueberry muffins 
                                                       Recipe adapted from Joy of  Baking


                                                             Dull mood, less props
                                                   Did I drag your eyes to the muffins?
                           
                    Shot this around 9.30 in the morning when the muffins were piping hot and my glass window refused to let through the diffused sun light as in my general shoots which happen around mid day.
Tried to create a shadowy surround with  just a folded napkin underneath and let the dull morning light fall on the muffins from the right through the window...

Exposure  0.017 sec (1/60)
Aperture   f/2.8
ISO           200
Lens Used- Canon EF 50mm f/1.8


                                                          Bright mood, less props
                           I am successful if I had drawn your attention on the muffin mount :)
                                                         Oh!  plzz say Yes ;)

This was intentionally a bit over exposed by increasing the ISO. To have a bluish white surround to make your eyes focus 'only' on the muffin. The other attributes were also adjusted accordingly.


Exposure   0.025 sec (1/40)
Aperture    f/3.5
ISO           400
Lens Used- Canon EF 50mm f/1.8

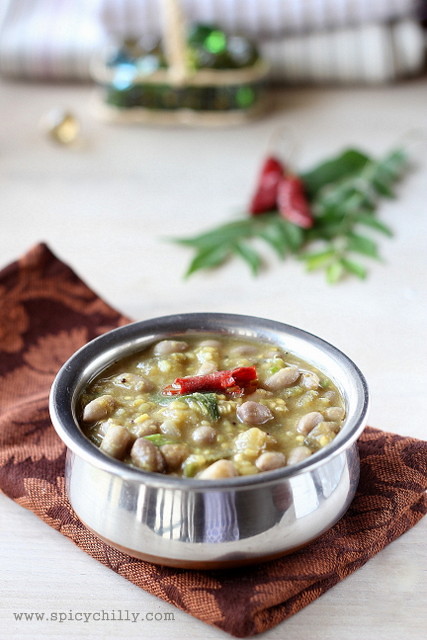
Like Aparna, I have limited stocks on props and dishes. I pull in shells, conchs, colored pebbles, glass jars and napkins which I use at home otherwise to create a novelty/style in each of my posts.

Now, I love the concept, "Less is more" for two reasons..

1.The ultimate food photo is still classy. Coz you're learning the art called 'photography!'
2.The intensity of relationships don't go "Less" ;) (you see a piece of rag you had yearned for a while, a dainty sheet of hand made paper or a glamorous cut glass in your friend's/relative's house and you never fall for it) ;)


Read More »

Monday, June 11, 2012

Kathirikkai Kadalai Koottu / The Lentil based curry with Peanuts and Brinjals


A curry with groundnuts as the main ingredient was something totally new to me as a newly wedded girl in my husband's home.
Soon I realised that this side dish gained a unanimous support in the 10 member family! When the general lunch menu of the house called for dal, sambhar, rasam, poriyal and curd to finish off, this curry was a rescue for the lazy days. Kadalai Kathirikkai Koottu served as a sumptuous meal with hot steamed rice, rasam and curd!

This is a 'Koottu' ( lentil based curry) I make at least once a month for years since then.


  Get ready with:

  Pacha Kadalai / de-shelled peanuts or groundnuts - 1 cup
  Kathirikkai / brinjal - diced 1 cup
  Moong dal, lightly roasted - 1/2 cup
  Finely minced shallots - a tbsp
  Jeera powder-1/2 tsp
  Turmeric powder- a fat pinch
  Sambhar powder - 1/2 tsp
  Fresh coconut gratings - 2 tsps

 To Season,

 Oil- a tbsp
 Mustard seeds- 1/4 tsp
 Urad dal- 1/4 tsp
 Finely minced shallots - a tsp (optional.. I don't add this.. but it enhances the flavour of the curry)
 Red chillies- 1 or 2, broken to three pcs each
 Curry leaves- a sprig

Method:

Soak groundnuts overnight. Rinse and pressure cook ( I use a 3 ltr pressure cooker body) till soft with enough water and salt. Remove to another vessel along with the cooked water.
Give a quick rinse to the roasted moong dal. Add 1 cup of water and bring to a boil. Reduce and while it simmers, stir in shallots and the powders (jeera, turmeric and sambhar). Add salt. Stir along the brinjal pieces and coconut gratings lastly. Pressure cook for 1-2 whistles (not more than that).

Open the lid after the steam vents off and season the curry. You know how to do it, right?
Heat the oil in a separate kadai, crackle the mustard seeds, brown the urad dal, followed by the minced shallots. Caramelize them, throw in the red chilly bits and the curry leaves. Pour this over the curry and you are done.
Check the final consistency of the curry. It shouldn't be too thick nor watery. It does thicken while cooling down.


The softly cooked groundnuts combine well with the brinjal chunks soaked in the moong dal base, seasoned to perfection! The 'Koottu' is healthy, mild and flavourful. Goes well with steamed rice, rotis and phulkas.


Read More »

Monday, June 4, 2012

Bitter Sweet Dark Chocolate Cake with Oreo Cookie Frosting


Bitter Sweet Dark Chocolate Cake with Oreo Cookie Frosting                                            

For the Cake:

All purpose flour- 1 1/2 cups
Granulated sugar- 1 cup
Butter, softened- 1/2 cup (you may also use 1/4 cup butter + 1/4 cup oil)
Eggs- 2
Salt- a pinch
Baking powder- 1/4 tsp
Baking soda- 1 tsp
Vanilla essence- 1 tsp
Boiling water- 1 cup
Unsweetened cocoa powder- 1/2 cup + 1 tspful 
Coffee powder- 3/4 tsp


1. Boil a cup of water in a wide saucepan. Switch off the stove and dissolve coffee and cocoa powders well without any lumps. Keep aside to cool to room temperature.

2. Powder sugar. Sift the dry ingredients 3-4 times. (ie, flour + salt+ baking soda+ baking powder). Keep aside.

3. Position a rack in centre of the oven and pre-heat to 350 F/175 C. Grease and flour, two 8 inch cake pans.

4. In another wide n large bowl, beat butter until fluffy using an electric mixer and gradually add the powdered sugar. Beat in the eggs, one at a time; add the vanilla and beat again until light for a minute or two. Fold in the dry ingredients alternating with the cocoa mixture, beginning and ending with the dry ingredients.

5. Divide batter between the prepared pans, smoothing the tops. Bake for 25-30 minutes, until the tops spring back when lightly touched and a skewer inserted in the centre comes out with just a few crumbs clinging to it.

6. Cool the pans on a wire rack.Run a knife around the edges to loosen from the pans and turn layers out on the rack, placing one upside down and the other right side up.


Frosting: (Oreo butter)

I had some reserve of this from the oreo cookie cake which I used up, that complimented well, for this cake.

1/2 c sugar, powdered
3/4 c butter
3 Oreos, crushed with hands

In a small bowl, beat together sugar and butter till fluffy and pale. Stir in the cookie crumbs and spread it evenly over the cake.Cover the sides too, if you prefer.


Read More »
Related Posts Plugin for WordPress, Blogger...