Showing posts with label Tamil Recipes. Show all posts

Wednesday, February 15, 2017

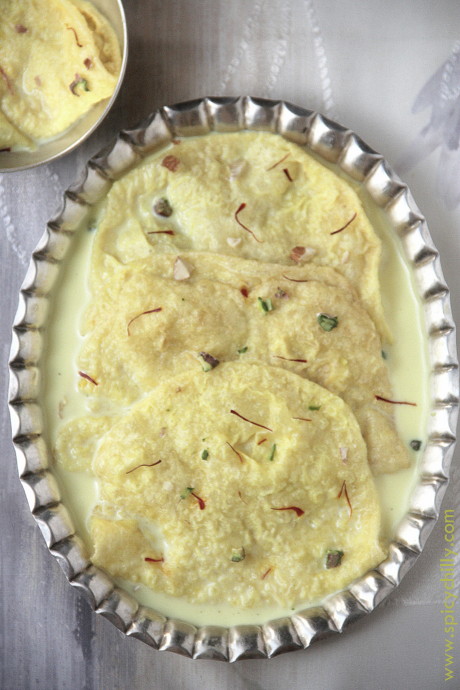
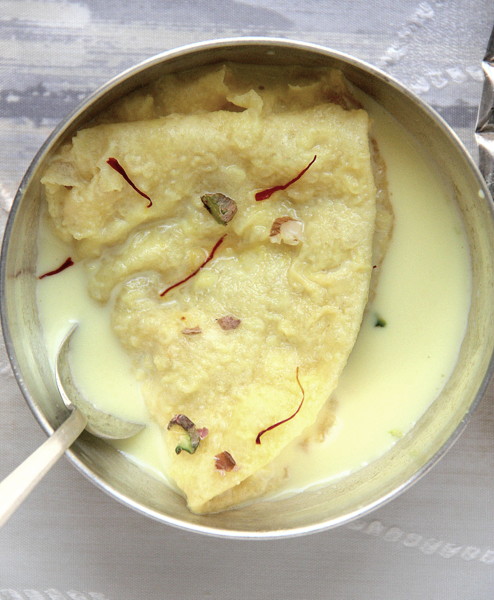
Paal Poli ~ Pooris Soaked in Sweetened n Flavored Milk!


As the name says it all, Paal Poli is a  dessert made by soaking fried pooris in flavoured milk. Yes, it's just simple as it sounds! The best Paal Polis, I savoured are the ones made by my son-in law's grand ma, who resides in her beautiful ancestral home, in the neighboring village, Peruvalanallur! These cuties were what she opted to make, while throwing the feast for her grand kids. My husband and myself  couldn't make it to the village for her heartwarming lunch as the post wedding paraphernalia had  left us thoroughly exhausted. Back from the village late evening, my daughter hopped in with a lovely container in which soft paal polis were packed, with loads of love and care. I could feel that when the first bite hit my taste buds, and ah! I found myself devouring the heavenly morsels!!
I called her up, the next minute and typed the recipe, right away in my blogger. The simplicity of the dish surprised me that I had to suppress my urge to rush into the kitchen, knead the dough, fry the pooris and soak them, immediately!!

It had been been several months since then and had wanted to prepare the sweet as the first recipe for the year, but then got postponed. Better late than never!

Peruvalanallur athai's Paal poli, recreated, with lots and lots of love... :)
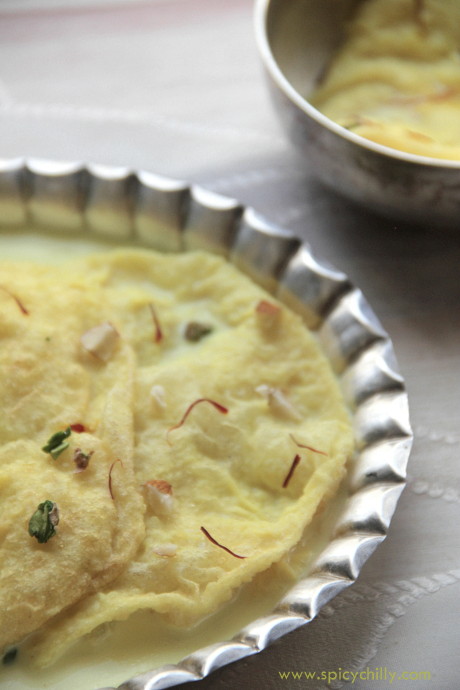


Paal Poli 

Makes 8 large or 10 medium or 13 small sized pooris
Serves 4-6

 Prep time: 20 mins
 Standing time; dough: 1-2 hours
 Soaking time of the finished dessert: at least an hour to *one day

Ingredients:

100 gms all Purpose Flour / Maida -  ( this is between 3/4 to 1 cup)
2 tbsps rava (sooji/semolina) ( not roasted)
A pinch of yellow food colour
50-60 ml luke warm water

Oil- for deep frying

600 ml milk (I used milk with 3% fat content)
1/4 cup heaped white sugar
A fat pinch saffron

A few almonds and pistachios, chopped, to garnish


Method:
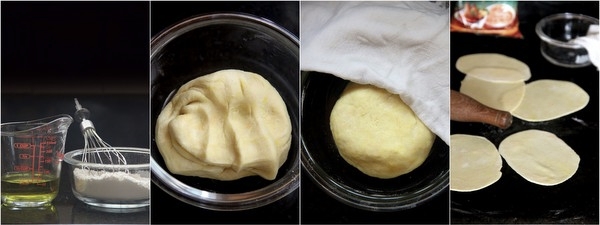
Paal Poli

Whisk together maida and rava in a bowl. Measure 60 ml of water in a microwavable jug and warm a bit. Just to make it luke warm. Dissolve a pinch of edible yellow food colour. Add to the flour mix little by little and knead well until you get a soft pliable dough like poori dough. I needed exactly 55 ml of water. Make into into a ball and cover with a wet kitchen towel or  cling film and rest it for 2 hours. We do not want the ball to get dried up in the outsides. So make sure you cover it to retain the moisture. After a couple of hours, knead again and roll equal sized balls ( 8 or 10 or 13 acc to your size preference) I divided into 8 balls to make larger pooris. Also I had spread them into slightly elongated ones than perfect rounds, since as to get larger semicircles as we fold them into half for serving.
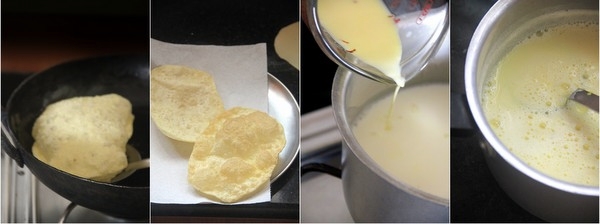

Paal Poli

Heat oil for frying the pooris. Fry one at a time. Let them the soft and not crisp. Drain in paper towels so as to absorb excess oil. Keep them aside.
Soak saffron strands in 1/4 cup hot milk for 10 minutes. Heat the remaining milk in a sauce pan. Add sugar followed by the saffron milk and bring to a boil. Simmer for a minute in low flame and switch off. You don't have to thicken the milk.
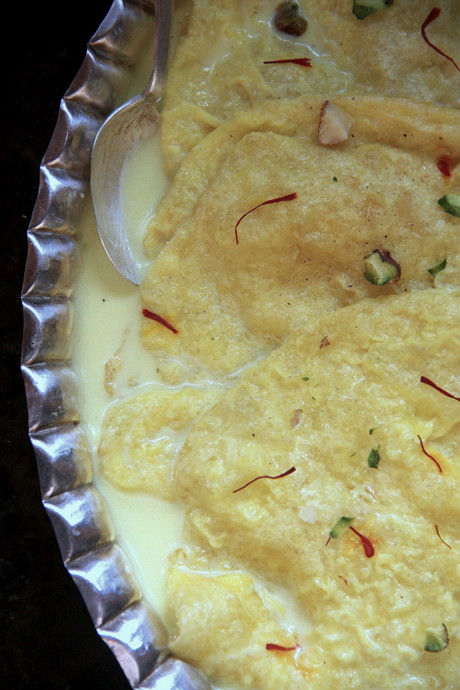


Arrange the pooris in a tray, half folded and pour the hot milk over them generally so as to soak them. after an hour you may need to add more, as they absorb the milk. Whole pooris soaked in milk as such weren't looking pretty in pictures. So had to revise the garnish idea to make the dessert prettier. Thanks to Raks, my lovely buddy ♥ :))) for the pretty looking garnish idea :).
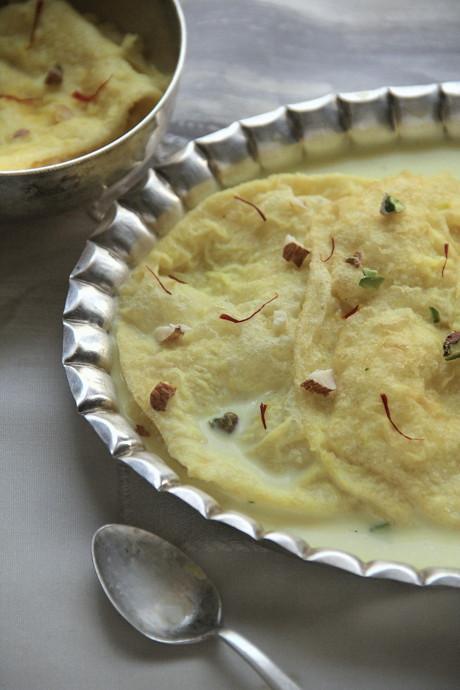


They have to get soaked at least for 2 hours before serving. *You can prepare Paal polis,
 soak them up the previous day and refrigerate, for your guests. Thus, your dessert is done, hours ahead!  Oh yeah! I love them chilled :)

 Garnish with chopped nuts (microwave for a minute and toss). Sprinkle a few strands of saffron before you serve.
Sure to receive compliments!

Read More »

Saturday, October 29, 2016

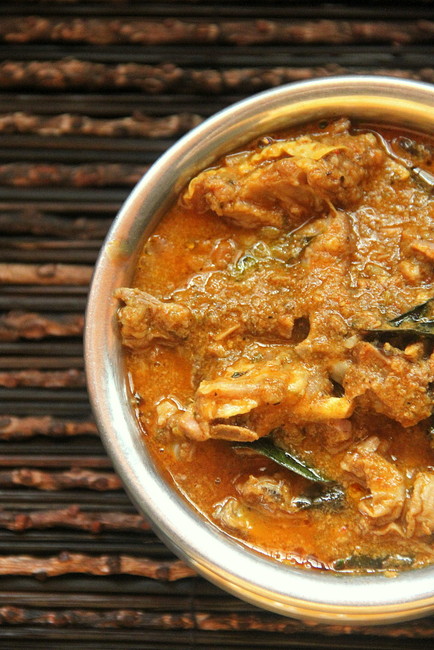
Deepavali Mutton Kuzhambu


While all the Hindu festivals are related with feasts, sweets, snacks and goodies of whatever kind, it has to be all of vegetarian origin. Plants, leaves, flowers and fruits. But this festival Deepavali or Diwali has an 'excuse'. The Tamilians, especially, the Southies cook lamb on this day and serve for breakfast as Mutton Kuzhambu and/or mutton biriyani for lunch/dinner.

Back in my parents' home, amma used to make mutton thovaram, an amazing sidedish made with pieces of boneless mutton cubes sauteed to perfection with coconut and jeera with a touch of chillies. I had seldom celebrated Diwali with my parents ever since my marriage and had been continuously missing out on these delicacies! Here in my family, my in-laws follow a much traditional pattern, holding strictly, the vegetarian concept! Mutton and Deepavali put together is considered blasphemous ;)..though V smiles at the disappointment I have every time, every year on the D day :). To top the bad luck, the full moon day or the amavasya fell on the same day calling for feasts made with country vegetables even with no onion and garlic and sans 'English kay' like beans, carrots, potatoes... :)

I always wished to source out a South Tamilnadu deepavali mutton recipe and recreate for my space. This recipe is from Eshwari my friend, who hails from down South and makes this authentic Virudhunagar style dish for her family, every Diwali morning!

I should admit, this dish is one of the authentic mutton curries, I have tasted; with that balanced taste and aroma of the cinnamon and fennel, subtly dominating the combined flavours of ginger garlic with a touch of earthiness contributed by the lastly stirred in, mildly roasted and crushed jeera n pepper powders! What I really loved with this recipe is the generous addition of  pearl onions and the final cooking in coconut milk! Irresistible!


Virudhunagar Deepavali Mutton Kuzhambu

Prep time- 20 mins
Cooking time-40 mins
Total time needed- 1 hr
Serves 3


You Need:

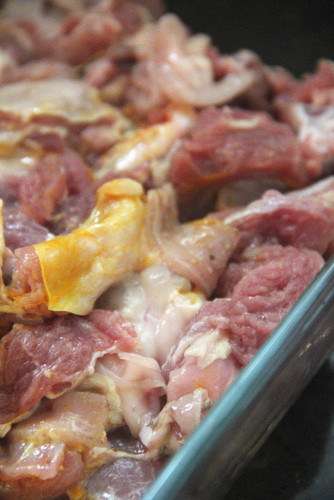
1/2 kg Mutton / Attukari with bones, cut into small pieces
1/4 tsp turmeric powder


To dry roast
1/2 tsp coarsely crushed pepper corns / milagu
1/2 tsp coarsely crushed Jeera / jeerakam
A sprig curry leaves

To season
3 tbsps Sesame seed oil /  Nallennai
1/2 tsp Fennel seeds / Sombhu
1 inch pc Cinnamon /pattai, crushed coarsely ( I used Ceylon Cinnamon / Surul Pattai )
1/2 tsp crushed ginger / inji
1/2 tsp crushed garlic /poondu
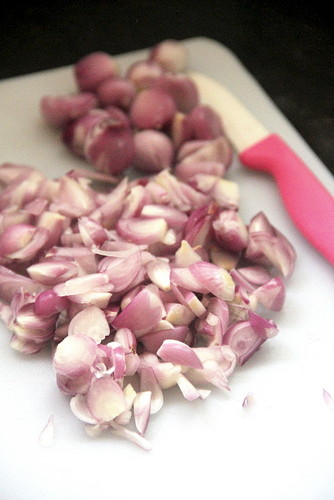
Chopped pearl onions / chinna vengayam, enough to fill a 200 ml cup
2 green chillies, sliced lengthwise
2 tbsps red chilly powder / milagai thool
1/2 tbsp coriander powder / malli thool
A sprig curry leaves / karuveppilai
A fat pinch of turmeric powder
7-8 cilantro / malli thazhai, whole herb,  roots removed

Freshly grated coconut enough to fill loosely a 200 ml cup OR 250 ml medium thick coconut milk

1 tsp Kosher salt / Kallu uppu


Method:


Wash and drain the meat pieces. Blend along 1/4 tsp of turmeric powder. Let it stand for at least 30 minutes.


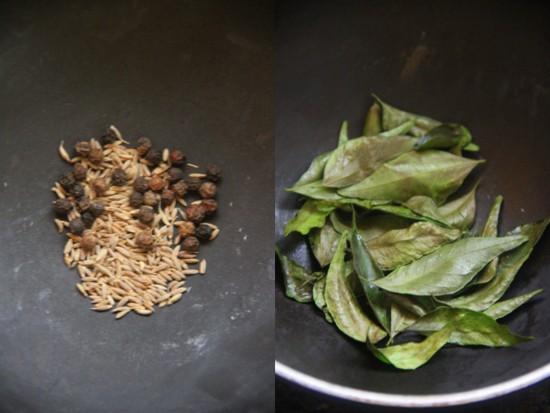
Dry roast pepper corns and jeera for a minute until the aroma emanates. Remove and roast the curry leaves in 4 drops of sesame seed oil. Remove and keep aside. We are going to use it for garnishing.


Coarsely grind of pulse the jeera and pepper in your mixer. Crush ginger -garlic as well. You can also use ginger garlic paste. I used my stone mortar (ammikkallu).


Chop pearl onions lengthwise, thin. Keep aside.


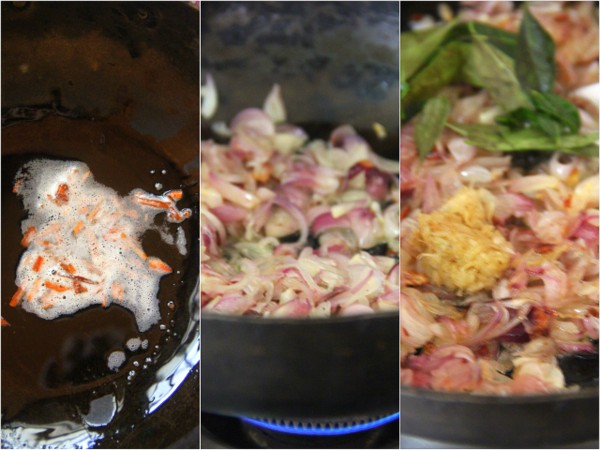
Heat 3 tbsps sesame oil in a wide thick bottomed kadai. Throw in crushed cinnamon ( Ceylon cinnamon is brittle and has a milder flavour. It can be crushed with finger tips too ) and fennel seeds. Saute sliced small onions. While golden brown, add the fresh sprig of curry leaves ( not the roasted ones ) and the ginger garlic paste. Saute for a minute.


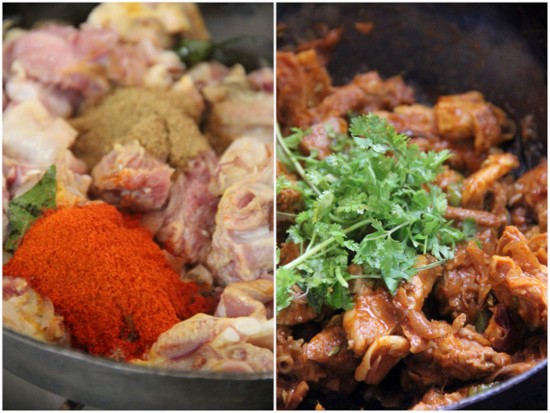
Now add the red chilly, coriander and the turmeric powders along with the salt. Mix well and heat up the whole thing to blend well in low flame for 3 minutes adding the cilantro. No need to chop the herb, leave them a bit long.


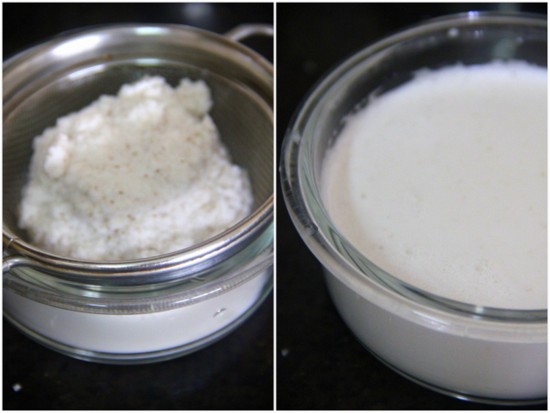
Extract 250 ml coconut milk from the grated coconut. You need not separate 1st and 2 nd milk or thick and thin milk. Just have them together in medium thickness.


Add along the curry. Mix well and transfer to a pressure cooker.


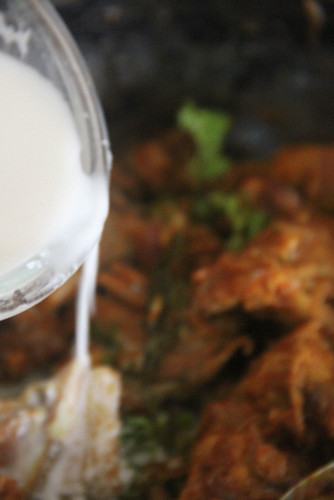
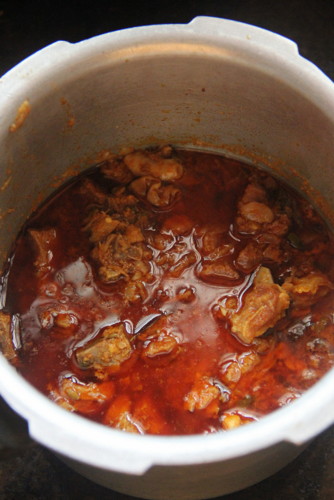
Cook in full flame until one whistle. Lower the flame to minimum and keep on fire for 20-25 minutes or until the chunks are cooked soft! Open. Voila !! You are sure to confront a sexy red curry topped with oil ;) with a full blast aroma! Slide out a piece of meat and check the doneness. If not, give a stir and return to the stove top and cook for some more time. You need not add any water.


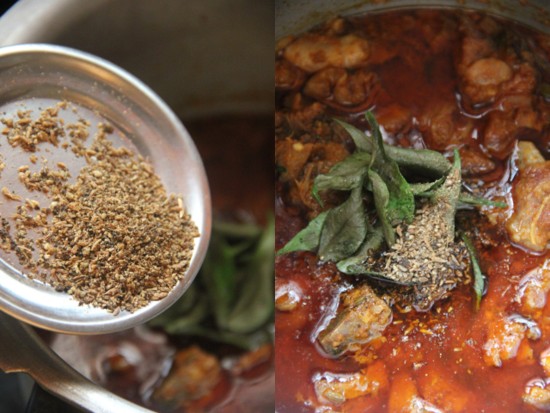
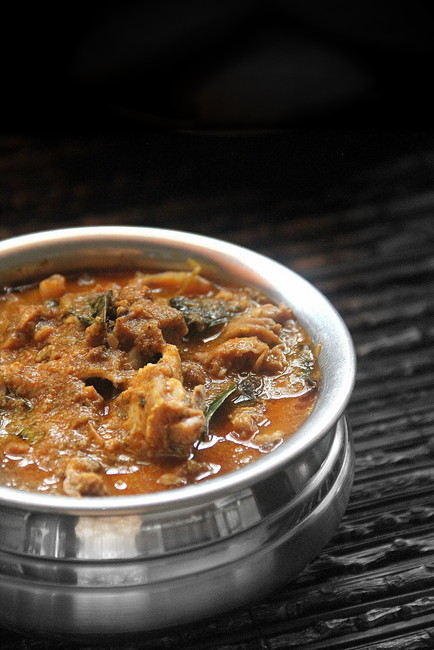
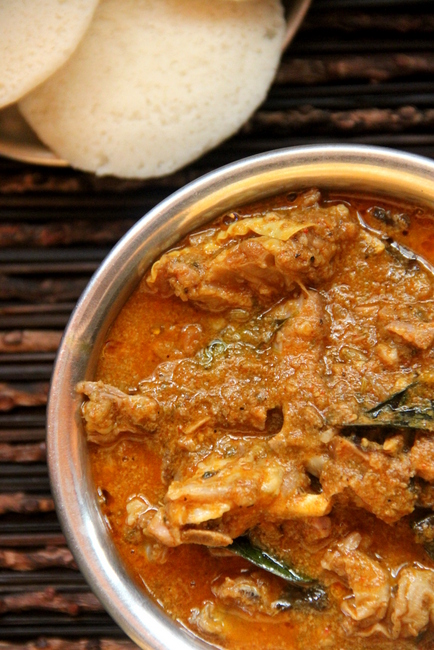
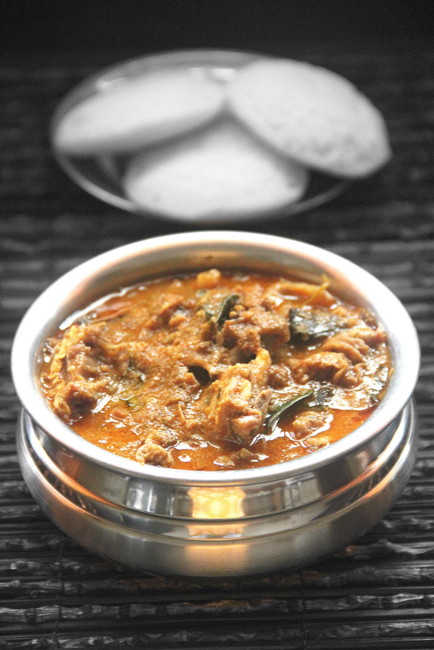
Throw in the roasted curry leaves, along with the powdered cumin and pepper. Stir gently to combine. Check salt at this point. Transfer to a serving bowl. Your Virudhunagar Mutton Kuzhambu is all ready to be served hot with idlies or dosas.


Note:


  • This recipe calls for sesame seed oil or nallennai for the authentic taste.
  • Do not compromise on the onions. Yes, it has to be small onions / pearl onions which fills loosely a 250 ml cup so that once sliced it yields a 200 ml cup.
  • I have used freshly extracted coconut milk from freshly grated coconut shavings. You may use canned milk or 3- 3.5 tbsps of coconut milk powder mixed in warm water. The whole idea is to have a medium thickcoconut milk.
  • The amount of ginger garlic paste is lesser when compared to meat curries in this one. This is to bring out the flavour of spices! Do not skip the final addition of the roasted n crushed cumin-pepper mix. My friend insisted on rock salt / Kosher salt / 'kallu uppu' instead of the regular table salt. Seems this salt combined with the spices add to the authenticity of the dish!


Read More »

Monday, August 3, 2015

Sura Meen Kuzhambu / Sravu Varutharacha Curry / Shark Fish Curry


Sura Meen Kuzhambu


Shark fish curry is familiar for the Keralites and Tamilians. Surameen Kuzhambu basically belongs to the Chettiar cuisine, made using paal sura or the young and tender sharks. Sravu Curry is not common in central Kerala, though, a much loved thick brown coloured curry made to perfection!

insisted Amma to go for a fish dish everyday this time in Kottayam, the reason being I never get to have these favourites of mine back home. She made the fish and coconut curry, red fishcurry, fried fish and the small fish varieties with coconut. She makes the best ones or at least, we children approve so.

I had been mentioning about shark fish and the curry she makes, which I wished to make a note and Bingo, she finds the young sharks in the shop right beside our home.This is a curry I crave and amma says I would have some extra meal with this side dish when I was a kid.

Now, before hitting the publish button, I did a bit of research to which cuisine the curry belongs and was excited to see the curry amma prepares is a lovely combination of both. The ingredients, method and the look of the final curry in both the cuisines is the  same; dark and thick!


Sura Meen Kuzhambu

Sura Meen Kuzhambu / Sravu Varutharacha Curry /  Shark Fish Curry
Serves a family of 6-8 members
Total time needed- 80 minutes

Ingredients:

2 lbsPaal Sura meen / Baby shark fish - cleaned, deskinned and sliced

To roast and grind
Set-1

3 tbsps Coriander powder
1 tsp Sombhu / Perunjeerakam / Fennel seeds ( This is an imp ing. Do not omit pls)
2 tsps Red Chilly powder
1/2 tsp Jeerakam / Cumin seeds
1 tsp Milagu/ Kurumulaku / Black pepper corns
1/2 tsp Manjal Thool /Manjal podi / Turmeric powder

Set-2
1/2 cup  freshly grated coconut
A sprig of Curry leaves
10 numbers Shallots
6-7 Garlic cloves, small variety ( if large, 3-4 will fair)

 Extract from lime sized ball (Tamil recipe) of Tamarind ( I used this) OR *4-5 pieces of Kokum / 'Kudampuli' (Kerala recipe)

For Seasoning:

3 tbsp Nallennai / Nallenna / Sesame seed oil
1 tsp Mustard Seeds
1 tsp Venthayam / Uluva ?Fenugreek seeds
8 numbers shallots, sliced lengthwise
3 green chillies, slit lengthwise until 3/4th
A sprig of Curry leaves

Method:

Sura Meen Kuzhambu

Dry roast coriander powder till it turns into a deeper brown hue for about 4-6 minutes in low-medium flame. Note the colour. This is very important for the right flavour of the final curry.


Sura Meen Kuzhambu

Add the fennel seeds and chilly powder and turn off heat.
Add jeera seeds, pepper corn and turmeric powder and mix well. The heat in the pan will be enough to heat them up. Transfer this to your large mixie jar. We need to grind it later.

Roast coconut gratings and Curry leaves for a few minutes. Add whole shallots and garlic cloves and roast continuously for a few more minutes until the coconut is browned.
Transfer this to the mixie with the earlier roasted powders and spices.
Grind the whole mix into a fine paste adding enough water.
Prepare the tamarind extract.Mix it with the ground paste and keep aside.

 *If you use Kokum or 'Kodampuli', rinse and soak them in a cup of warm water for 10-15 minutes. You need not extract the pulp. Keep aside.


Sura Meen Kuzhambu


Slice the onions. Slit chillies until 3/4th, lengthwise. Do not separate them.
Heat oil in a wide kadai or the one in which we roasted the ingredients earlier or a seasoned earthern pot. Splutter mustard seeds and brown the fenugreek seeds. Sauté sliced shallots until light brown followed by the green chillies and curry leaves.
Pour the ground mix carefully over the seasoning. (If you use Kokum, add at this point).
 Add a cup of water to dilute and add salt. Simmer the curry and slide in the fish pieces, gently. Continue to simmer until the pieces are cooked soft for 8-10 minutes, in medium flame keeping the kadai closed. Check salt and fish pieces whether cooked. Young sharks are tender and cook soon. If not, simmer in low fire until the oil separates!

Sura Meen Kuzhambu

Serve hot with steamed rice and chips or 'Pappadam'. The curry turns thicker, darker and tastier, the next day!

Note:

 Traditionally, we should use whole coriander seeds and red chillies for roasting in Set-1.I have used the powders instead. This doesn't alter theauthentic taste if roasted rightly. This is easier to grind as well, than the whole seeds.
Amma used a 'Manchatti' or an earthern pan in the very final part. The curry was kept closed in it and was reserved for the next day. :).


Read More »

Thursday, July 24, 2014

Easy Stir-fried Capsicum


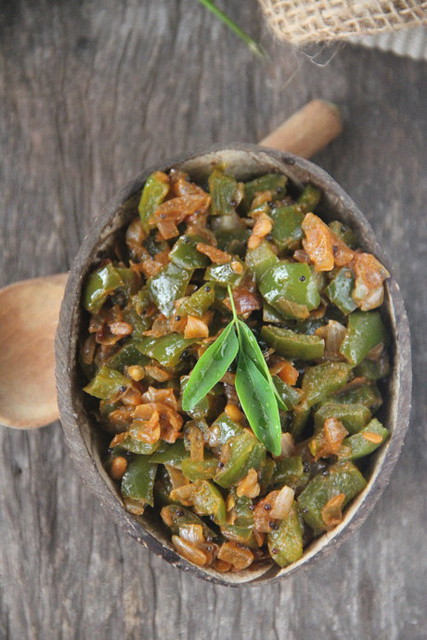
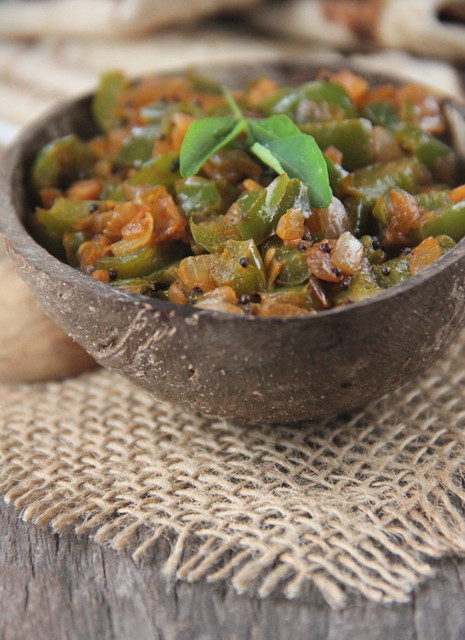
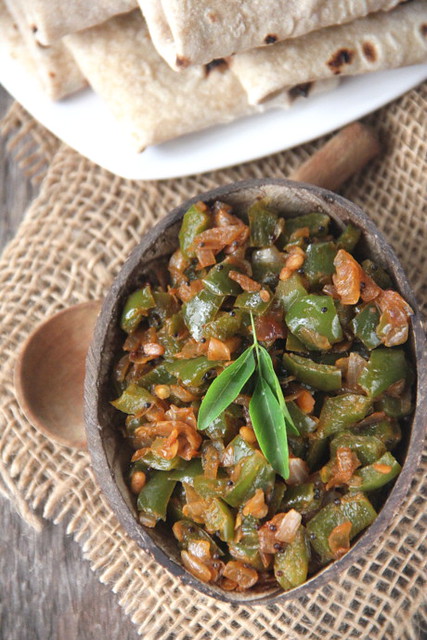
Easy Capsicum Stir-fry


I had the chance to savour this heart warming side dish in my sis-in-law's house. It was one of the humbly placed accompaniment, in a casserole, supposed to be a  'not-so-prompt' one among the lunch spread. When every one was enjoying the speciality meals of the day; vegetable biriyani, sambhar sadam, paruppu thuvayal sadam, raving about the array of rich as well as comfort food all laid on the table, the taste of this simple dish dominated my taste buds. It went perfectly well with the chapathis and all the varied rice meals!  Both Akka ( sis- in law) and her daughter-in-law were busy catering to our needs but as always, the curiosity heads and prompts me to find out the recipe!
 Gayathri, her pretty and homely daughter-in-law, narrated instantly how they made it, smilingly.

The mental note grasped by my recent 'not-so-efficient-n-highly-impatient-brain-cells' again prompt me loud and clear, Cummon , I can't hold it for long babe. Try soon, it's simple!
Succumbed to the instinct, I tried the  following week...


Easy Capsicum Stir-fry


Stir-fried Capsicum 
Serves two
Preparation time: 10 mins
Stove top time: 15-20 mins
Total time needed: less than 30 minutes

You need,
1 large green bell pepper / capsicum
One medium sized large onion
1/2 tsp sambhar powder
A fat pinch of turmeric powder
Salt - 1/4 tsp or to taste

To season,
2 tsps oil
1/4 tsp mustard seeds and urad dal each
A sprig of Curry leaves


Easy Capsicum Stir-fry

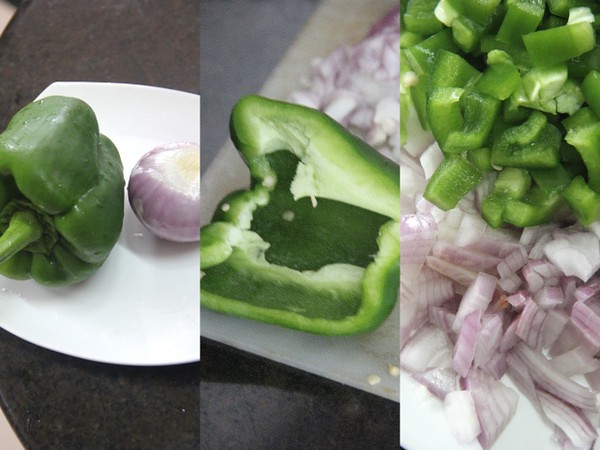
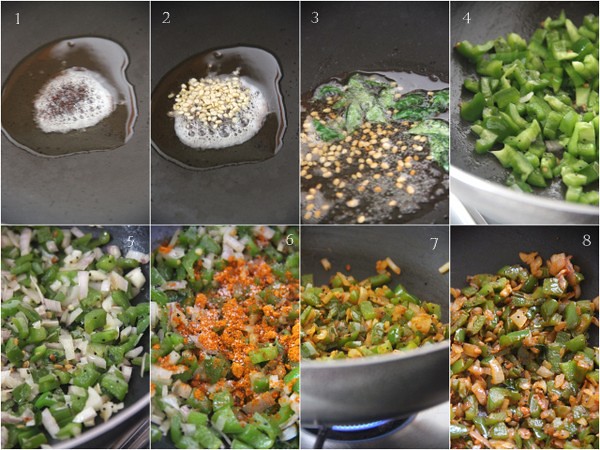
Wash bell pepper and peeled big onion. Halve the pepper, de-seed and cut into 1 cm cubes. Chop onions.


Easy Capsicum Stir-fry

Heat oil in a non-stick kadai. Splutter mustard seeds, brown the urad dal and throw in the curry leaves. Add the bell pepper bits and sauté along for a few minutes, say for 4-5 minutes .  You may sprinkle very little water after a while only if needed to get them cooked. But see to it it retains the crunchiness. (Mine wasn't quite fresh, so I had to.) Now, stir along the chopped onions. Add salt and turmeric and sambhar powders. [I have used my own recipe of sambhar powder which contains no turmeric. If your version has already the turmeric powder in it, avoid using it again.]
 Remember, do not close the pan at any point while making this dish. Stir to combine. Sauté for 5-6 minutes, until the pieces are shrunk, cooked ( not soft but still, a little crunchy) and the spices seeped in.
Remove from fire and serve hot with steamed rice or Indian breads.


Easy Capsicum Stir-fry

I had them with warm phulkas.


Read More »

Tuesday, July 22, 2014

Gothumai Rava Upma ~ A simple spicy meal made with broken wheat


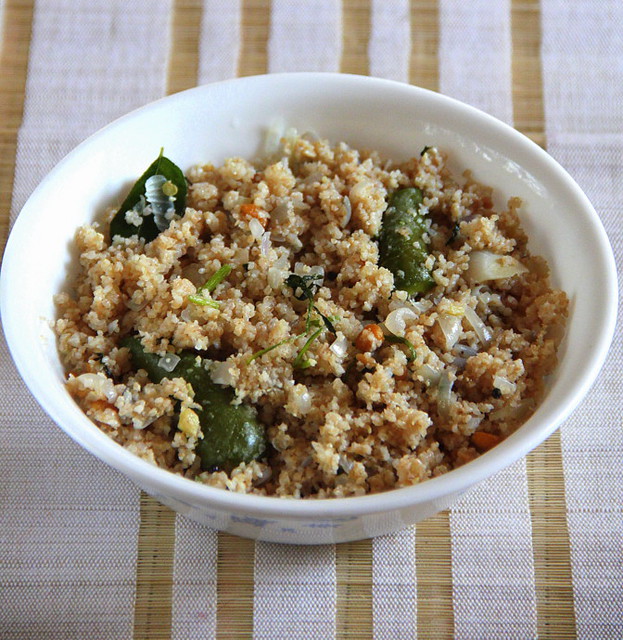
Gothumai Rava Upma


While I am still clearing and organising the things put away carelessly, or rather dumped, during the post wedding phase, I stole some time to check my unread e-mails. Among loving enquiries of absence, ad requests, and personal mails, a few ones from my readers caught my attention. Their common and prime request had been nothing else but to post healthy meals. Simple dishes rich in fibre, wholesome and easy to make with available ingredients. I realised  I had been doing injustice with blogging  with not a good combination of recipes though I take extreme care with my everyday cooking.

Lately, I have been making this 'broken wheat meal' or 'Godhumai upma' made by 'Gothumai rava' for my better half twice a week for dinner but haven't really thought of blogging about it, probably because the portion gets over by night and there wont be anymore left for the next day's photo shoot. So, this one you see was made in the morning, shot, blogged and reserved for his dinner :)

I have made this according to his palate preferences; soaked in butter milk instead of water as he likes the natural tanginess of the same, extra ginger bits and no addition of vegetables. He insists Rava Upma has to be made this way and the addition of vegetables makes it a 'Khichadi'.

Soaking time- 15-20 minutes
Total stove top time- 15-20 minutes

Now, to make the 'Upma' to serve one,
Get Ready with:

Broken wheat rava - 3/4 cup
Table salt- 1/2 -3/4 tsp
Oil- 1 tbsp
Mustard seeds- 1/4 tsp
Urad dal- 1/4 tsp
Bengal Gram dal- 1 tsp
Ginger, a one inch pc, chopped fine
Green chillies- 2, slit across
Big onion- 1 chopped
Thin and slightly sour butter milk - 3/4 cup or enough to soak the rava
Chopped coriander leaves- 1-2 tbsps
Curry leaves- A sprig


 Method:

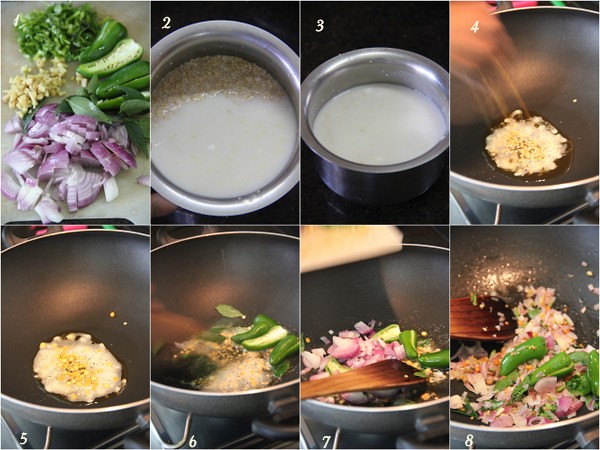
Godhumai Ravai Upma

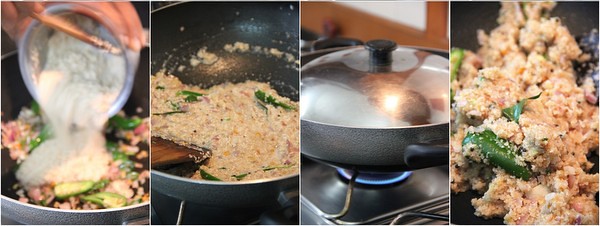
Soak rava for 15-20 minutes in butter milk and salt, enough to cover and the liquid stays 1 cm above it. In the meanwhile chop the onions, ginger, chillies and coriander. After the rava has soaked well (press the grains to check whether they are fully hydrated and soft), heat a tbsp of oil in a non-stick kadai, splutter mustard seeds, brown the urad dal followed by the bengal gram dal. Throw in the ginger bits, chillies and onions in order and sauté until the onions are translucent and partly cooked. Say for 2-3 minutes in medium flame.


Godhumai Ravai Upma

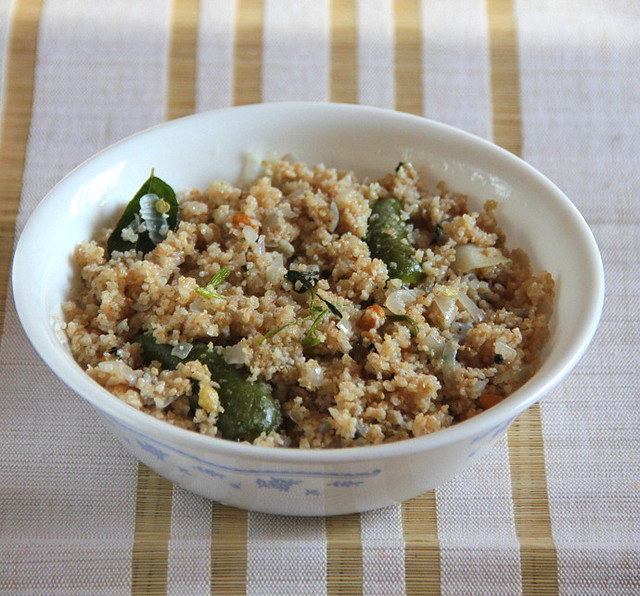
Add in the soaked rava. Stir gently to combine. Close the kadai with a lid for 5 minutes keeping the flame low. Stir the upma at intervals, twice or thrice during this phase and close to lock the steam in. Open after 5 minutes. The Upma will be sticky at this point. Keep stirring at intervals, adding curry and coriander leaves in the open kadai, until the stickiness wades off and the rava is cooked with the seasonings infused well enough, for around 8-10 minutes. The Upma shouldn't be too dry as well. There should be a tint of moisture when you feel it between your fingers.
Serve hot with Coconut Chutney. I made it later in the evening and could not include here :)


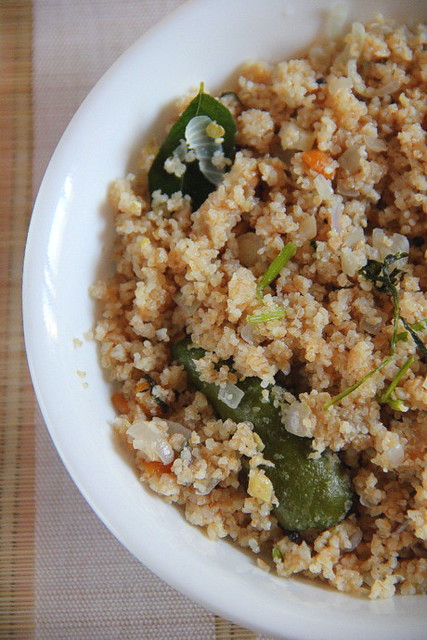
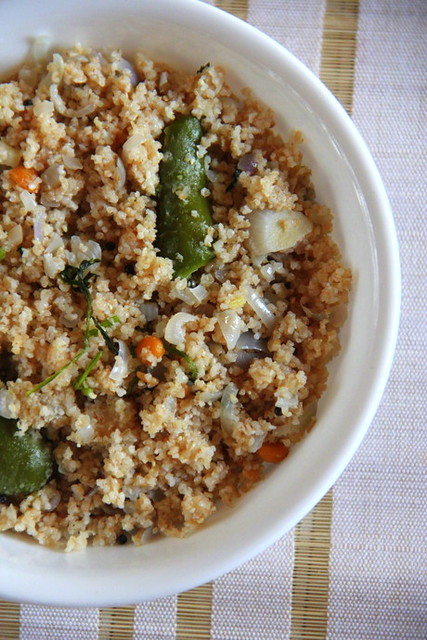
Godhumai Ravai UpmaGodhumai Ravai UpmaGodhumai Ravai Upma

Read More »

Friday, December 13, 2013

A Spicy Tamil Lunch and the Rains!


Lunch and Rain

Lunch and Rain


We have not seen sun for the past 3 days. Its windy, cold and the downpour is heavy!
This is the time when the family craves for a wide spread of  'Vegetarian South Indian Lunch'. As you might have read earlier in many of my posts, we enjoy brunch by 10.30 every morning, straightaway.
Come monsoon, I love to stay tucked inside the warmth of duvet enjoying the cozy feel and have to struggle pulling myself up from the bed. Once up, the wonderful weather prompts me to be active and I will soon be brimming with energy!
Today morning had been one such day, when a full fledged lunch was made, photographed and blogged! ;)


Lunch and Rain


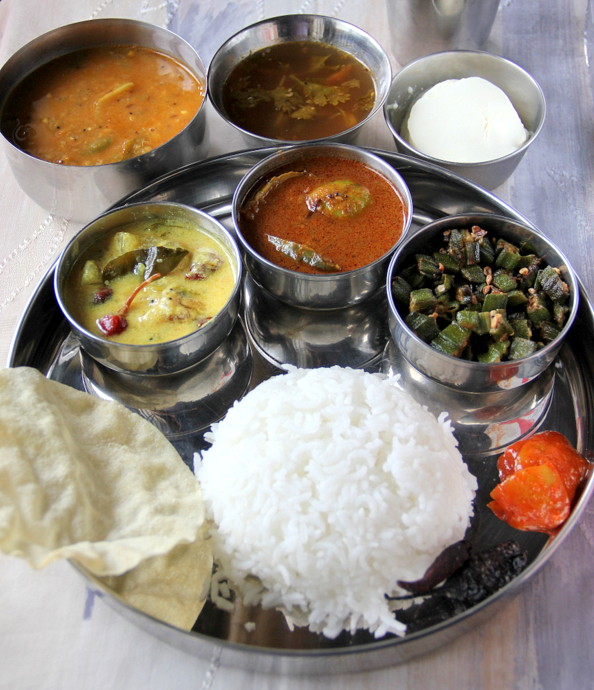
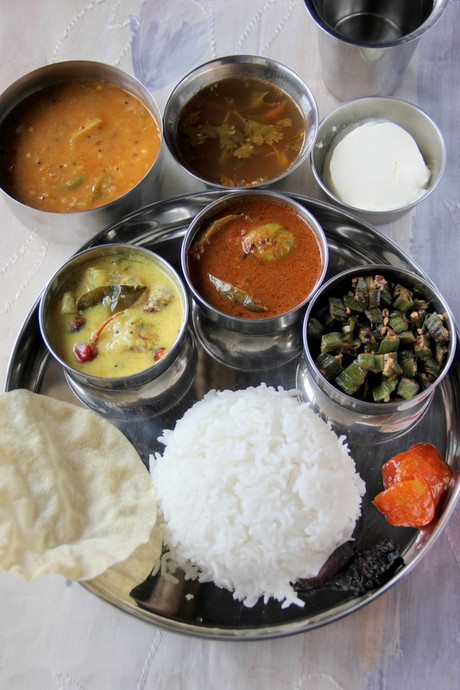
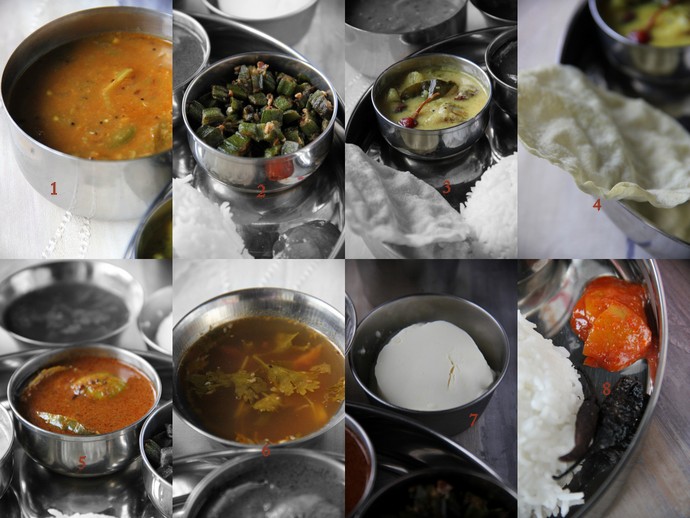
1. Pacha Thakkali Sambhar - The method is same as the Drumsticks/Murungakkai Sambhar. Raw garden fresh organic green tomatoes were used instead of drumsticks.

2. Vendakkai Vathakkal / Stir-fried ladies finger. I don't have the recipe yet, will post soon.

3. Poosanikkai Morkuzhambu . The recipe is here. I have also posted Bonda Morkuzhambu here.

4. Appalam.

5. Kathrikkai Puli Kuzhambu - I have the detailed recipe of Mochai-Kathiri-Murungai Kuzhambu here. I used only Kathirikkai/Brinjals today.

6. Rasam - Yes, it is the same Thakkali Poondu Rasam :)

7.Curd.

8.Lime pickle & Mor milagai- I have posted Citron/Narthangai pickle here. Lime is used to make this pickle instead of citron.

I also had Vazhaithandu Koottu and plain dal and forgot to add here. Anyhow it is fine not to overcrowd :). I didn't have a mood to make Payasam but had Maja Blanca, a Filipino dessert, to complete the meal.


Lunch and Rain


Oh yeah! I am geering up for the Christmas Bakes..... :)

Read More »

Wednesday, November 20, 2013

Palak Keerai Masiyal / Puréed spiced-up Spinach


Palak Keerai Masiyal

As we know, 'Palak' is the Hindi name for spinach, the common healthy greens, and 'Pasalai Keerai', the Tamil.
Having this on my mind, I requested my vegetable lady to bring 'pasalai keerai'. She confronted me with real fresh bunch of greens with oval shaped fleshy leaves that bore tiny pink flowers. The bunch looked cute. I cooked and mashed the leaves, but found this one totally slimy and non-edible! Strange but true.

Lately, I learnt the exact greens I was searching for was called 'Palak Keerai'! This one had longer and broader leaves which were thinner.'Pasalai', I was told, was a different variety: the one with oval leaves and pink flowers.Strange again. I still get confused!

I tried this dish while in Namakkal. The town sells fresh greens, no matter where you live, you can grab the freshest bunch every morning from the vegetable ladies or the nearby shops. I got the bunch from the market.
Those were the times when I was the guardian for my school going son who was in high pressure preparing for the public exams. I saw to it, he received healthy and tasty diet.
'Palak Keerai Masiyal' was thus born, a recipe I tweaked from my other mashed spinach recipes combined with the tips given by my neighbour. Neither my mom or ma-in-law had cooked the same and I had not tasted too. To my excitement, my son really loved this one and I included in his lunch menu, twice a week. The intake of spinach in this form will be greater by one who eats it and the mashed form is better assimilable. This 'Masiyal' or 'Kadasal'( meaning mashed) is thus one of the tastiest greens I prepare!


Palak Keerai Masiyal


Palak Keerai Masiyal/Kadasal
To serve a family of 4
Time taken - 40 minutes

A small bunch of Spinach/ Palak
2 tsps of oil
1 medium sized big onion, chopped
Half of a green chilly  or one small, slit lengthwise to two pcs
1/4 tsp cumin/jeera powder
A fat pinch or turmeric powder
1 medium sized tomato
5-6 cloves garlic
2 tbsps of cooked thuvar dal
Salt- 1/2 tsp or as needed

Seasoning (optional, I didn't do as my son dislikes. The taste was still good!)
2 tsps of oil
1/4 tsp of mustard seeds and urad dal
A red chilly, broken into 3 bits
Pinch of hing


Palak Keerai Masiyal

Wash well enough and retain the leaves and tender stem. I retained just an inch of stem from the leaf. Discard the fibrous parts of the stem completely. Chop the greens. You may not need to chop fine since we are going to cook them. Rough chopping will do. Heat 2 tsps oil in a kadai. Sauté the onions adding salt until translucent and then the garlic and chilly. Add in cumin and turmeric powders...


Palak Keerai Masiyal

..followed by the tomato pieces and sauté until they turn mushy. Top up with chopped spinach. Sprinkle 1/4-1/2 cup of water and close the pan with a lid.Turn the flame to low-medium and let it cook for 4-5 minutes. Open and check whether the palak is cooked soft. Fresh greens let out water while cooking so check the amount of water you sprinkle earlier.


Palak Keerai Masiyal

Now that it's cooked, stir in cooked dal. Switch off fire and let it cool. The whole mass should be moist may be with 2-3tsps and water in it as you see in the picture. Too much of water will spoil the consistency of the 'kadasal'. If you feel it's too dry, add 2-3 tsps of hot water.Purée or blend in a mixie. Check salt. Serve with steamed rice or phulkas.


Palak Keerai Masiyal

Read More »

Tuesday, September 17, 2013

Vazhaithandu Koottu ~ A no-grind banana stem curry made with moong dal


Vazhaithandu Koottu


Back from a 2 week holiday, V and me were craving for some light comfort food. Some fibre-rich dish which has some body again and mildly spiced. The very same day, ma in law sent me along fresh chunks of stem chopped out from her garden! I was excited.

Many of you already are aware of the goodness of  banana stem. If not, here we go:
Banana stem adds bulk to the food and is very useful for all those who wish to lose weight.The fibre in the stem helps to cure constipation and detoxify the body. Banana stem also acts like a diuretic helping to eliminate waste fluids from the body and helps in eliminating kidney stones. Being a body cooler, it is highly recommended in tropical countries.
Read More »

Thursday, August 22, 2013

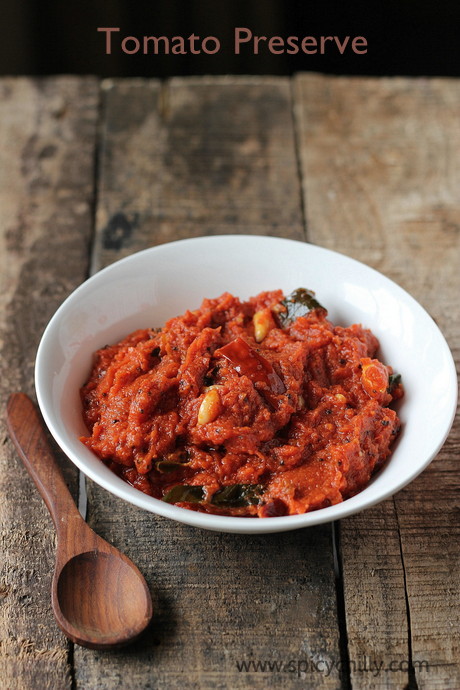
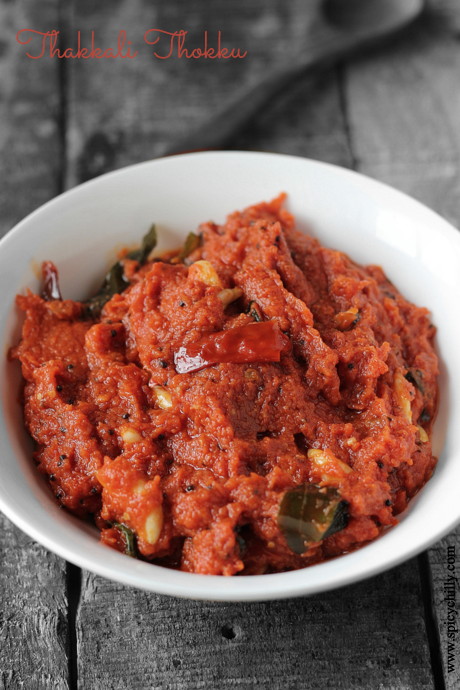
Thakkali Thokku / Ground Tomato Pickle or The Spicy Tomato Preserve


Thakkali Thokku


I am obsessive about tomato chutney recipes. I enjoy trying out  numerous variations, playing with the amount of tomatoes, onions and chillies going in every time and trust me you can never go wrong with the  chutney. The different tastes are always exciting and tasty however you jumble the ingredients! I have my granma's (amma's too) version of Tomato Chutney already posted here which is a 'semi preserve' type.
Thakkali Thokku or the Spicy Tomato Preserve is a stronger Tamil variation of tomato chutney in which onions are avoided completely and given a final touch of vendayappodi (methi or fenugreek powder) for the characteristic 'pickle flavour'.

So let me assure, you can be a little flexible with the ingredients for this one and the final dish will be heartwarming as always!


Thakkali Thokku

Thakkali Thokku
Yields enough to fill  two 200ml cups

Ingredients:

Ripe red tomatoes- 750 grams
Tiny garlic cloves- 40 numbers. ( I used 'tharai poondu' or the country garlic which are tiny and slender. If you have normal cloves, use 20 no.s. Halve or quarter them lengthwise.)
[Use one-third quantity of garlic for grinding and the rest for seasoning]
Table salt-1 tsp

Oil- 1/2 cup ( let this be a 50:50 mixture of any oil you use for cooking and gingelly seed oil/nallennai
Mustard seeds- 1tsp
Fenugreek seeds- 2 fat pinches
Red chillies- 3-4 no.s broken into 3 pieces each
Red chilly powder- 1- 1 1/2 tsp
Hing / perungayappodi -1/4 tsp
Methi powder/ venthayappodi - 1/4 tsp (the methi seeds should be dry roasted well enough before powdering)


Method:

Thakkali Thokku

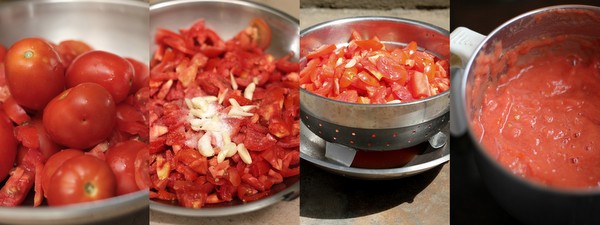
Wash and slice the tomatoes. They can be long, but slice them thin. Retain the juice that ooze out.
Throw in 10-12 pcs/pods of garlic pods and a tsp of salt. Combine gently and transfer to a colander placed on a wide bowl. Sundry for a few hours or at least a couple of hours under 'good' sun ( I had this out for 4 hours as there wasn't much sun and quite breezy ). Toss once every 30-45 minutes. The juice thus drips further more and get collected in the bowl below. Grind the pieces to a smooth paste. (Do not add the collected juice or water while grinding)

*I had about 1 cup of drained juice and 4 cups of pulp. This was reduced to 2 cups finally.*

Thakkali Thokku

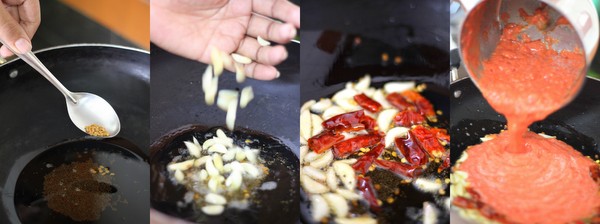
Heat oil in a non-stick kadai. Splutter the mustard and brown the fenugreek seeds. Add the rest of garlic followed by the broken red chilly bits. Sauté for a few seconds and mix in the ground tomato pulp.


Thakkali Thokku

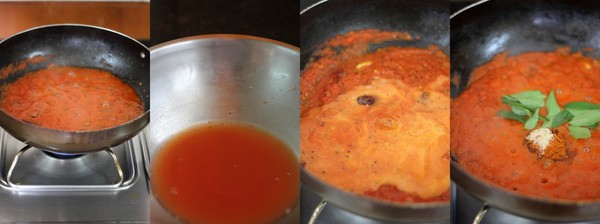
Bring the mixture to a boil and keep the flame low. Make sure the kadai is wide and deep enough so as to avoid splutters. Allow the saucy mix to thicken. Now pour the reserved juice and mix along. Simmer for a few more minutes. Add the chilly powder, hing and curry leaves. Thicken the mix further until the watery part has all evaporated an the oil starts separating on the sides.


Thakkali Thokku

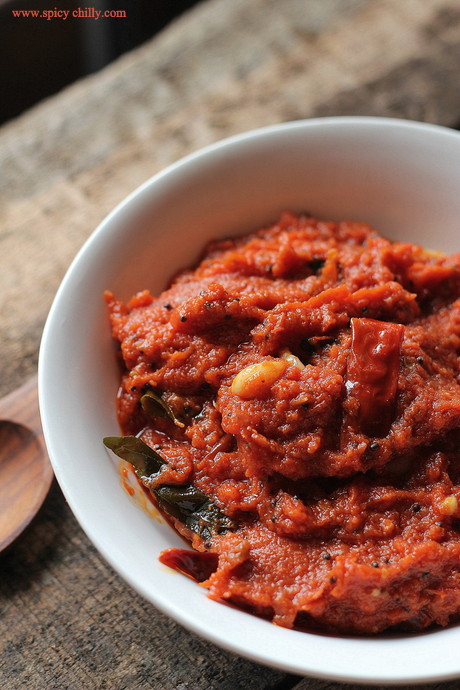
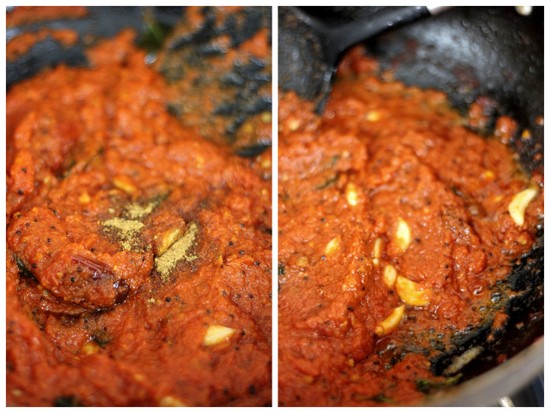
Add fenugreek powder and salt (check and add) and mix along until the oil separates and bubbles on the sides. It's quite fine if at all you don't see the oil separating. You may always drizzle a little if it doesn't. Just make sure you had reduced the pulp to half with the consistency as in the picture below. It need not be too thick. It should be moist, oily, glossy and happy :)


Thakkali Thokku


Always use ripe red tomatoes. You may not need to use country tomatoes. I used Bangalore tomatoes and they were perfect! If your tomatoes are ripe and towards the sweeter side than sourness, you may add a bit of tamarind paste. Use very little for the tanginess. Do not avoid the final addition of fenugreek powder. It's a must for 'that' special flavour.
Drizzle a little oil if you find it too dry towards the final stages. I recommend you to  add the required oil while seasoning itself as the paste would get sautéed well enough from the start.

Thakkali Thokku keeps well for a few weeks if refrigerated.I learnt this recipe from my ma-in-law's co-sister. She suggests to top the preserve with castor oil/vilakkennai which increases the shelf life considerably for those days we never had the luxury of refrigerators. She mentions how the tomatoes were ground in large amounts those days in our ancestral village home using "aattu kallu" to serve the large joint family!

The spicy tomato preserve goes well with just anything and this was packed for sister during my visit to Singapore last month :)
Read More »
Related Posts Plugin for WordPress, Blogger...