Showing posts with label Preserves. Show all posts

Saturday, March 25, 2017

Idly / Dosa Podi


Idli Podi


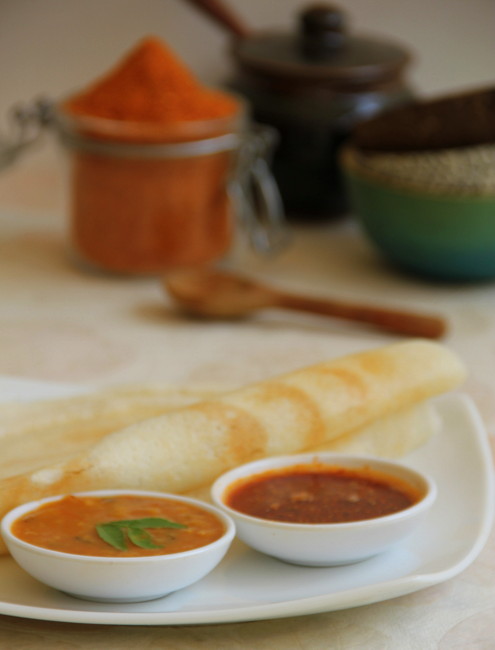
There would be no home in South India that has not prepared this spice powder as an accompaniment to the breakfast mains; idly or dosa. Each South Indian state has its own version. Chammanthi podi of Kerala has an addition of roasted coconut and curry leaves, while in Karnataka and Andhra, addition of roasted peanuts and more of chillies make it unique. In Tamil Nadu, roasted chick peas, sesame seeds add to the taste of Idly Milagai Podi.

The one I am posting now, is my mom's version of podi, we grew up savouring and a real special one. The fact that astonished me is that while each home , around the states has varied versions of the this spice preserve, the Reddiars of Kerala had a standard recipe of this one. In one word, truly addictive, with that perfect balance of chillies, garlic and dal with a touch of coriander!

My sis and me still have this habit of  having podi with hot idlies along with sambhar and coconut chutney. My brother, an idly hater who is forced to have them after amma's strict rules would have it with podi, sesame seed oil and lots of sugar :). Strange, but he still loves that way, all mashed up :D
My daughter is an ardent fan of this one, and demands in bulk!

This post is for Maria and Evin, the girls I love :)
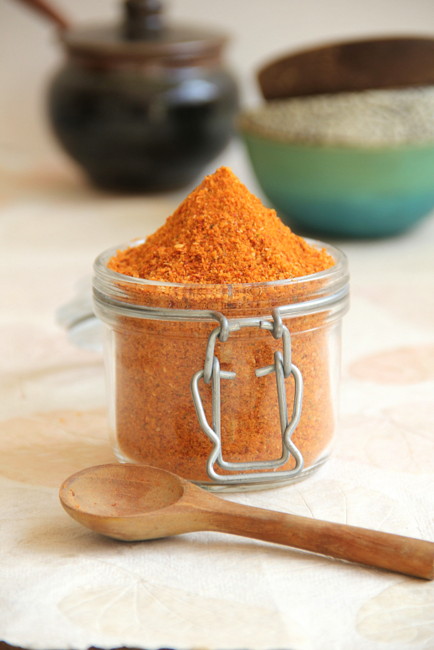


Idly / Dosa Podi

Yield - 1 3/4 cups
Cuisine - South Indian.
Prep time - 10 minutes
Time needed for frying - 20 minutes 

Get ready with:

1 cup broken urad dal /uzhutham parippu (sun dried)
3.5 tbsp coriander seeds / kothamalli (sun dried)
50 nos medium sun dried and destalked redchillies / milagai (weighed approx 50 gms)
1/2 tsp Hing
1 tsp table salt
15 nos slender garlic pods (I used nattu poondu or country variety)
3-4 sprigs washed and wiped dry
Few drops of oil- for frying


Method:


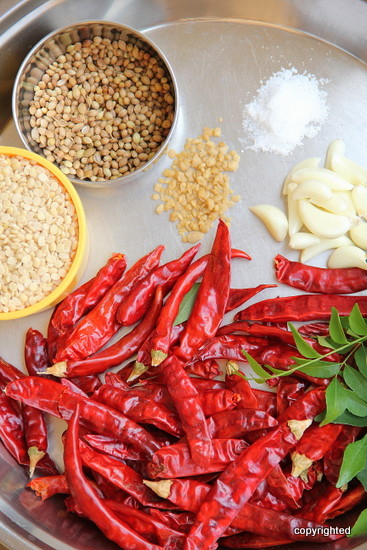
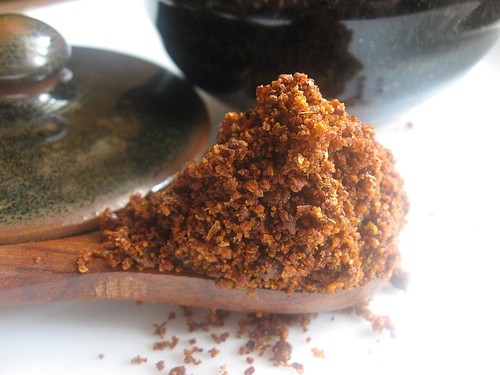
Assemble the ingredients. As mentioned above, I sun dried urad dal, coriander and the red chillies. Esp the chillies until they were light and crisp. The hing, you see near the table salt, is the rock variety for the added flavour. The garlic is country variety which also adds to the final flavour.


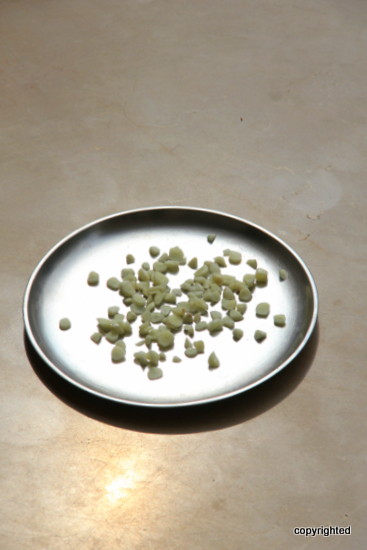
Mince the garlic and let it sundry for a couple of hours. This is to absorb the extra moisture in them. The fresh garlic if used directly would interfere with grinding of dry powder, towards the final stage.


Heat a wide thick bottomed kadai with a few drops of oil. Add urad dal and coriander seeds and fry together in low-medium heat to 5-7 minutes, or until they are golden brown in colour. Transfer to a stainless tray. Always use a heat resistant metal tray as the fried ingredients transferred, tend to be too hot.


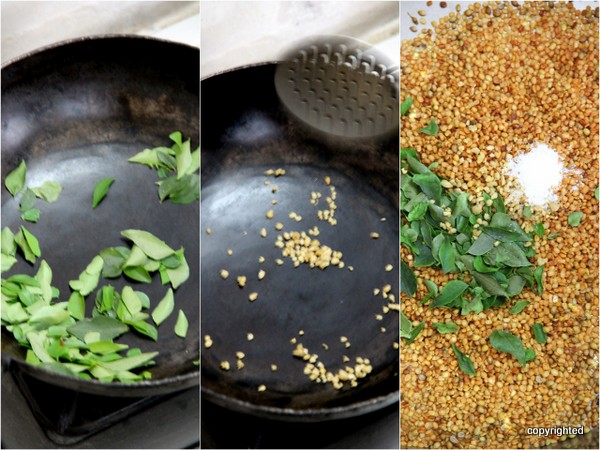
Fry the curry leaves for a few seconds and transfer to the plate. Do not bother to fry them until crispy. The heat of the dal is enough to turn the leaves, crispy.
 Fry the hing next, for a few seconds and transfer.


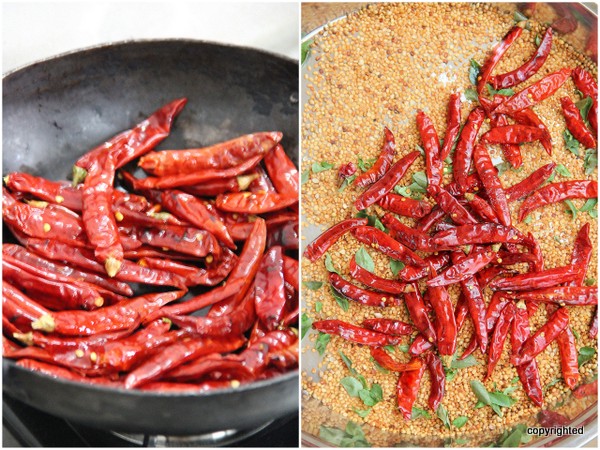
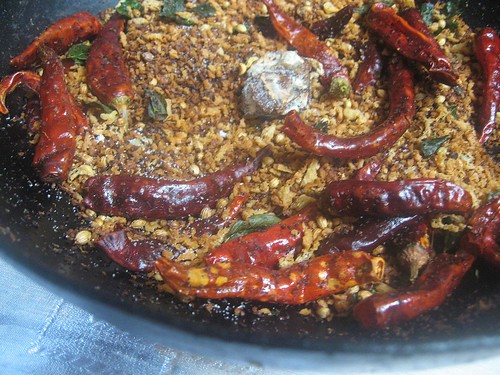
Trickle a few drops of oil and fry the chillies for a few seconds until the aroma emanates, taking utmost care not to burn them.


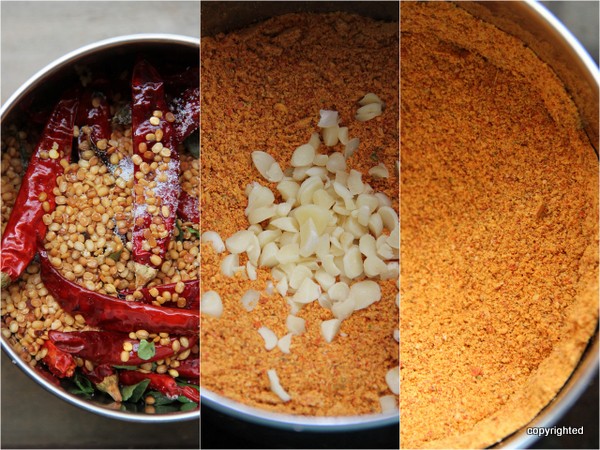
Let it cool to room temperature. Transfer to a mixie and pulse for a few seconds. Do not pulse too fine. Add the sun dried garlic bits, while still coarse and pulse / dry grind again. It's again a personal choice to make it a bit coarse or fine. I prefer my podi, slightly coarser.


Sun drying the ingredients before frying, enhances the shelf life. We do not want moisture in them so that it grinds fine after frying as well. If you cannot sundry, microwave the dal and coriander for a few seconds, toss and return for some more time. You can do the same with minced garlic too.

My family prefers  podi, a bit towards the spicier side. Addition of gingelly oil while serving would bring down the heat and spice levels . If you are still apprehensive, you may cut down the number of chillies to 25-30, for a milder version.

Bring down the numbers to 5-6, if you use larger cloves of garlic.


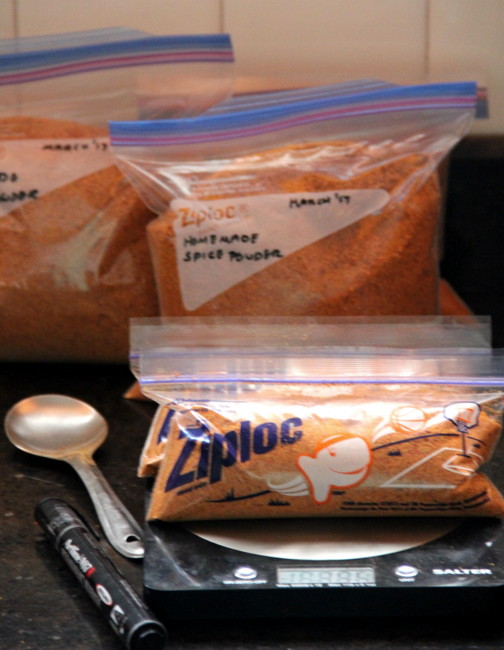
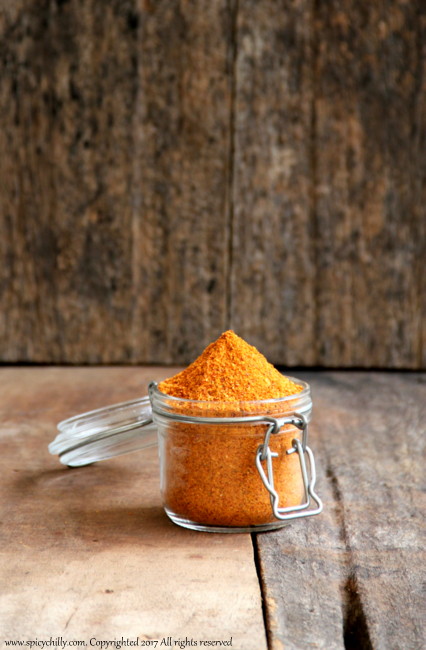
 2.5 kgs of  fresh podi for my daughter,  packed right away all set to go to the US.


Read More »

Thursday, August 22, 2013

Thakkali Thokku / Ground Tomato Pickle or The Spicy Tomato Preserve


Thakkali Thokku


I am obsessive about tomato chutney recipes. I enjoy trying out  numerous variations, playing with the amount of tomatoes, onions and chillies going in every time and trust me you can never go wrong with the  chutney. The different tastes are always exciting and tasty however you jumble the ingredients! I have my granma's (amma's too) version of Tomato Chutney already posted here which is a 'semi preserve' type.

Thakkali Thokku or the Spicy Tomato Preserve is a stronger Tamil variation of tomato chutney in which onions are avoided completely and given a final touch of vendayappodi (methi or fenugreek powder) for the characteristic 'pickle flavour'.

So let me assure, you can be a little flexible with the ingredients for this one and the final dish will be heartwarming as always!


Thakkali Thokku

Thakkali Thokku
Yields enough to fill  two 200ml cups

Ingredients:

Ripe red tomatoes- 750 grams
Tiny garlic cloves- 40 numbers. ( I used 'tharai poondu' or the country garlic which are tiny and slender. If you have normal cloves, use 20 no.s. Halve or quarter them lengthwise.)
[Use one-third quantity of garlic for grinding and the rest for seasoning]
Table salt-1 tsp

Oil- 1/2 cup ( let this be a 50:50 mixture of any oil you use for cooking and gingelly seed oil/nallennai
Mustard seeds- 1tsp
Fenugreek seeds- 2 fat pinches
Red chillies- 3-4 no.s broken into 3 pieces each
Red chilly powder- 1- 1 1/2 tsp
Hing / perungayappodi -1/4 tsp
Methi powder/ venthayappodi - 1/4 tsp (the methi seeds should be dry roasted well enough before powdering)


Method:

Thakkali Thokku

Wash and slice the tomatoes. They can be long, but slice them thin. Retain the juice that ooze out.
Throw in 10-12 pcs/pods of garlic pods and a tsp of salt. Combine gently and transfer to a colander placed on a wide bowl. Sundry for a few hours or at least a couple of hours under 'good' sun ( I had this out for 4 hours as there wasn't much sun and quite breezy ). Toss once every 30-45 minutes. The juice thus drips further more and get collected in the bowl below. Grind the pieces to a smooth paste. (Do not add the collected juice or water while grinding)

*I had about 1 cup of drained juice and 4 cups of pulp. This was reduced to 2 cups finally.*

Thakkali Thokku

Heat oil in a non-stick kadai. Splutter the mustard and brown the fenugreek seeds. Add the rest of garlic followed by the broken red chilly bits. Sauté for a few seconds and mix in the ground tomato pulp.


Thakkali Thokku

Bring the mixture to a boil and keep the flame low. Make sure the kadai is wide and deep enough so as to avoid splutters. Allow the saucy mix to thicken. Now pour the reserved juice and mix along. Simmer for a few more minutes. Add the chilly powder, hing and curry leaves. Thicken the mix further until the watery part has all evaporated an the oil starts separating on the sides.


Thakkali Thokku

Add fenugreek powder and salt (check and add) and mix along until the oil separates and bubbles on the sides. It's quite fine if at all you don't see the oil separating. You may always drizzle a little if it doesn't. Just make sure you had reduced the pulp to half with the consistency as in the picture below. It need not be too thick. It should be moist, oily, glossy and happy :)


Thakkali Thokku


Always use ripe red tomatoes. You may not need to use country tomatoes. I used Bangalore tomatoes and they were perfect! If your tomatoes are ripe and towards the sweeter side than sourness, you may add a bit of tamarind paste. Use very little for the tanginess. Do not avoid the final addition of fenugreek powder. It's a must for 'that' special flavour.
Drizzle a little oil if you find it too dry towards the final stages. I recommend you to  add the required oil while seasoning itself as the paste would get sautéed well enough from the start.

Thakkali Thokku keeps well for a few weeks if refrigerated.I learnt this recipe from my ma-in-law's co-sister. She suggests to top the preserve with castor oil/vilakkennai which increases the shelf life considerably for those days we never had the luxury of refrigerators. She mentions how the tomatoes were ground in large amounts those days in our ancestral village home using "aattu kallu" to serve the large joint family!

The spicy tomato preserve goes well with just anything and this was packed for sister during my visit to Singapore last month :)
Read More »

Monday, September 19, 2011

Maangai Oorugai / Mango Pickle


Well, this post is finally meant to do some justice to my blog's title after a while. Bakes, chocolatey cookies, muffins and Indian sweets had been dominating the space lately here as you could see.

Sample the pickle and you can judge the talent of the cook. Yeah! a good cook makes a perfect South Indian pickle, the one which doesn't turn stale for a longer time and tastes perfect throughout. I look upon my in laws as perfectionists when it comes to this art. The way they make pickles however make me feel I'm still in baby steps and got a long way to go!

I do try pickles which have already peeped in this blog and this one was made and sent over by my sis in law right after we got back home finishing our US visit this summer. The pickle was perfect for our everyday lunch while we finished off with lots of yogurt as the summer was still on.

I clicked a picture, last month when it was almost getting over, fast and today I called up my sis in law for the recipe as I sincerely felt should be a keeper!

This recipe  actually suits best for avakkai which is prepared in larger quantities, meant as an year long preserve with amazing shelf life but here she has substituted regular sour cut mangoes. The recipe is surprisingly simple as well!

Maangai Oorugai

Yields a small bottle

You need:

Sour variety raw mango cut into small cubes - A cup
Red chilly powder- 2 -3 tsps
Mustard seeds - A tspful
Garlic cloves- small- 5-6, minced
Sesame seed /gingelly oil / nallennai - 1/4 - 1/2 cup (almost half the measure of  mangoes)
Table salt- 1- 1 1/2 tsp, more or less or to taste (depends on the sourness of the mango)
*Fenugreek seeds / venthayam- 1/4 tsp

Method :

**Sundry mustard seeds spread on a flat tray, the previous day you intend to make the pickle. Powder in a mixie or hand pound as the quantity is less, the next day. Separate and remove the skin of the seeds using a bit of  wide netted sieve.

Now all you have to do is mix all the ingredients raw gently in a glass or ceramic bowl to combine. How much easier than a pickle can get? No heating of any ingredient, as simple as that! It would be dry just after you mix it but the water oozes out within a couple of days.

The pickle kept well for 2 whole months under refrigeration.


Author's Notes 


1. This recipe is meant originally for Aavakai Orugai as mentioned earlier and the cut mangoes are a substitution here.

2. Generally a kilogram of aavakkai is pickled. So naturally the amount of the other ingredients also shoot up accordingly. About half cup of mustard seeds are used, which are sun dried and powdered the following day. Sun drying is highly recommended for the seeds for such larger amounts of pickling.
** If you cannot  sundry, you can heat the seeds in a hot kadai (do not roast or fry) before powdering.

3. * Whole fenugreek seeds are used in the above recipe. For larger amounts of pickling, dry roast the seeds in a kadai until they turn dark red and powder which can be mixed along with the other ingredients.

4. Refrigerate the pickle stored in a glass jar / bottle for prolonged shelf life.

Looking forward to summer;  the season of mangoes and hoping to come up with the authentic Aavakkai Oorugai, soon! :)

Read More »

Monday, July 11, 2011

Tomato Onion Chutney


thakkali chutney and kovakka 036

Ripe red tomatoes blended with onions and sautéed to perfection will be the right definition for this heart warming chutney. Or if you are on the look out for a tomato chutney that fairs well with a week's shelf life I highly recommend to try this one..

Ingredients

Ripe tomatoes (less sour variety will be better) - 1/2 kg
Big onions - 3 nos or 1/4 kg, sliced thin lengthwise
Garlic - 5-6 cloves
Red chilly powder- 1 1/2 - 2 tbsp or acc to your spice level
Dhania/coriander powder- atbsp
Oil- 2-3 tbsps

To Season:

Oil- 1 tbsp
Mustard seeds
Hing / Kayapodi- 1/4 tsp
Curry leaves - 2 sprigs
Salt- to taste

Step by step method

thakkali chutney and kovakka 004

Dice tomatoes


thakkali chutney and kovakka 001

Sauté onions in 2-3 tbsp oil for a few minutes adding salt.


thakkali chutney and kovakka 008

Addition of salt accelerates caramelizing. Add garlic cloves. Continue until onions turn golden brown.


thakkali chutney and kovakka 014

Dump in the tomato pieces and cook.


thakkali chutney and kovakka 018

Yes, the tomatoes let out water while cooking and become pulpy. You need not add water at any point of  sautéing this chutney A bit of spluttering would happen which is quite normal. See to it you use a large kadai.


thakkali chutney and kovakka 023

Continue to sauté in medium flame for a few more minutes until the water evaporates and the tomato onion mixture gets mushy and cooked. Remove from fire.

Cool and blend to a smooth paste. Add the oil to season in the same kadai, splutter the mustard seeds followed by hing and curry leaves. Switch off the flame and add the powders (chilly powder and dhania).This is to prevent charring of the powders. Stir in the paste immediately, put on the flame to medium.Check salt. Remove from fire when the oil separates and the chutney thickens.

Serve warm with Dosa or Hot idlies drizzled with sesame seed oil. I love this that way :).Coconut oil fairs well too.

thakkali chutney and kovakka 034

  • Note:
  • Let the tomatoes be ripe and red. The chutney would have that red hot colour and tastes perfect.
  • The kadai you choose can be non-stick and large as spluttering happens towards the later end.
  • The chutney keeps well in fridge for 2 weeks or even more if sautéed well enough!
  • Add oil liberally ; upto 4 tbsps (this chutney demands a bit more oil ) during the first part of sautéing itself .Then only the oil separates well after the second part (seasoning).
  • Half of the total amount can be substituted with gingelly seed oil too.
  • This comfortably adapts both the Tamil and Kerala cuisine as  Thakkali Vengaya Chutney and  Thakkali Ulli Chammanthi :)
Read More »

Saturday, January 8, 2011

Maa Inji - Pachai milagu Oorugai / Pickled Mango-ginger with Green pepper!


Most of you had guessed it right :) but Mango-ginger is surprisingly unfamiliar to many, the humble root vegetable which belongs to the Ginger family has a bursting combo of the flavours of fresh raw mango and ginger!

I got introduced to this interesting vegetable in Tamil Nadu by my ma in law from whom I learnt this simple, guilt free, yet a much addictive pickle.

Cheers to Cilantro, Sumi and ? again who guessed the dish absolutely right as 'Pickle' :)


You Need:

Ma inji / Mango-ginger- peeled and cut - 1 cup
Fresh green pepper- 1/3 cup
Lime juice -2 tbsps
Red chilly powder- 1tbsp
Salt-a tspful or as needed
Gingelly oil- a tbsp
Mustard seeds- 1/4 tsp
Asafoetida-a fat pinch
Curry leaves- a few (optional-I avoided them)
Hot water- 1/4 cup scant


Method:

Scrape away the thin skin of the mango-ginger. Wash and dry using a clean towel.Slice them into rounds and then across resembling 'half moons' as in the picture.The bigger half moons can again be sliced into two if needed.

Wash the green pepper with the stalks. Dry using the clean towel. Divide each stalk into smaller pieces with your fingers by careful pinches. A few corns may drop off from the stalks and do not worry about it. Dry well.

Heat oil in a small kadai, splutter the mustard seeds, stir in the asafoetida and the curry leaves followed by the red chilly powder. Be careful with the flame. I generally put off the stove at this stage to control the heat, acting on the chilly powder.Throw in the mango-ginger slices along with the green pepper. Let the flame be minimum to medium now and stir well to combine. Add salt and lime juice. Mix in hot water to add to the liquid part of the pickle.

Transfer maa inji - milagu oorugai in a clean dry ceramic container or a glass jar and refrigerate to keep well.

Enjoy with rice and curd :)


Read More »

Friday, December 10, 2010

Vazhapindi Achar / Banana Stem Pickle for Arusuvai Season ll


T raditional recipes of Pickles belonging to Kerala are simple.The blend of ingredients in each pickle is simple, yet universal. The process of making these preserves at home has turned out lesser these days, due to busy lives of the working women.After all who wants to stress and strain wasting time on these while you have a wide choice in the market? Thanks to the village lives where women can afford more time for home made snacks and preserves.


Here's my attempt of recreating the age old Central Kerala recipe of Vazhapindi Achar, derived from amma's best pal, Shantha auty.


Palayan kodan variety vazhapindi would give the best results as they bits are crunchier and tend to have a more shelf life without turning soggy.

Vazhapindi Achar/Banana Stem Pickle

*Chopped banana stem- 1 cup
Kaduku parippu/ split mustard seeds- 1 tsps
Mustard seed powder-1tsp (mix with 2 tsps of water to make a thick paste)
Turmeric powder- a pinch
Asafoetida/kayapodi- a pinch
Salt- to taste


To season:

Sesame seed oil/nallenna- 2 tsps
Mustard seeds- a pinch
Green chillies 2-3 nos- slit lengthwise and once across breadthwise making 4 pcs each
Ginger- 1/2 tsp julienned
Garlic- 1 tbsp julienned
Small onions/ulli- whole small sized-1/4 cup
Curry leaves- a sprig

To boil together:

White vinegar- 1/2 cup (I needed 1/2 cup.Add a little more or less depending upon the quality)
Water- 1 cup

*Remove the outer layers of the banana stem and cop them into thin rounds carefully removing the fibre simultaneously while slicing each. Cut each slice into 4 strips across lengthwise and again 4 times breadwise leaving equal gaps to get small square shaped bits. Click here for a tutorial. Do not make the pieces too tiny as they might get soggy after pickling.

Dissolve salt in 1/4-1/2 cup of boiled water.Cool to room temperature and mix this solution to the banana stem bits (uppu vellathil ittu vekkal). Stir in turmeric and asafoetida powders along with the split mustard seeds and mustard powder paste.

Heat oil and the seasoning ingredients one by one in order. Take care the chillies, ginger, garlic and onions have to be lightly seasoned to retain the crunchiness, which is quite important!
Add this to the banana stem mixture.

Boil the water and vinegar together. Let it stand to get the steam evaporated. Pour this over the pickle while still HOT.The heat of this liquid mixture will be enough to ward off the raw smell of the ingredients, if any.


The Arusuvai ingredient from Sayantani!


The original recipe calls for 2 tsps of split mustard seeds/kaduku parippu.I used a tsp of it and substituted the mustard powder fro the other half, the Arusuvai ingredient. Again, if you cannot get hold of small whole pearl onions, you can use the regular small onions each cut into 4 pcs.The pickle keeps well under refrigeration.

Banana tree - picture courtesy-Derick Thomas

Read More »

Monday, November 23, 2009

Dates Pickle


The whole final week of September, was spent in Dubai with my brother.In spite of being ardent ‘Date-haters’ the amazing choice of ‘em simply tempted us to buy some. So our boxes back to India generously allowed space for these black beauties to sit in pretty comfortably. :).

A few exotic packets(chocolate wrapped, almond and cashew stuffed) were given away to dear and near and one small pack remained on my counter which was smiling at me…unconsumed even after a month and a half! :)
As a matter of fact, many(like my inlaws, husband and children) dislike, any touch of sweetness in curries or pickles, except for certain special ones like me(my sis, brother and mom too) who would vouch unlike ;)..(Warm welcome to join our team if anyone out there …plzzz) ;)!!...(((V is just around counting the number of my team mates! ;) ))

Since I knew I would be the one finishing the whole thing, I opted to try making a lesser amount, with just less than a dozen dates.They tasted awesome and I ended up eating the pickle with steamed rice,chapathis, dosa and with almost all main stuff I prepared for the past two weeks….so I'm really not sure about the shelf life of this preserve ;)!..

So, here’s how I pickled them up..

Dates – 10 nos
Green chillies finely minced-2 (I avoided this)
Ginger – a one inch piece- julienned
Garlic - 4 cloves- julienned
White vinegar-1-2 tbsps(according to the preffered sourness)
Sugar – ½ tsp


Seasoning

Oil – ½ cup
Curry leaves – a sprig
Mustard seeds-1/2tsp

Let me put all the powders together here :)

Chilly powder-1 tbsp(I used a tbsp of roasted red chillies powdered coarsely)
Asafoetida/Kayam - 1/4 tsp
Fenugreek/Uluva-Roasted and powdered finely– 1/4 tsp
Turmeric powder- a fat pinch
Salt - As needed


  • Deseed the dates and cut each into 4 pieces.
  • Heat oil in a pan.Throw in green chillies, ginger, garlic bits and curry leaves.Saute for a few seconds.
  • Add dates.Now be careful with flame.Keep it to minimum or just put off and add the all the powders. Ensure they are mixed up and heated well enough,rather than getting over fried/charred.
  • Add vinegar(I added a little water, just enough to make the pickle a little saucy-as I love that way :)..though addition of water is strictly 'Not' recommended as in any pickles).Adjust the flame and bring the sauce to a boil.
  • Add salt and sugar.Mix well.
  • Store the dates pickle in a ceramic jar or glass bottle.


Because the addition of water, I refrigerated, till it got over, for the safer side.Otherwise it has a longer shelf life, in room temperature.

Dates pickle is an excellent combination with any Non vegetarian Biriyani..(Sigh!! :().. err compliments Vegetable Biriyanis well enough too :) !!..

Thank You Swapna, for making this post possible!.
Read More »

Thursday, July 23, 2009

Chammanthi Podi - Roasted Coconut n Spice powder


Chammanthi podi, a fine medley of roasted coconut and spices, is a common preserve in Keralite homes. Each home has its own variations.
The “Spice powder” goes well with steamed rice, dosas and idlies. I love this as an accompaniment for plain, cold curd rice; an excellent comfort meal by itself...
You Need:
Grated coconut- 1 ½ cups
Coriander seeds-2 tbsps
Black pepper corns- 1/2 tsp
Red chillies- 7-8 nos(or according to your spice level- Use 5 chillies if you like it medium spicy or less than 5 if you like it milder)
Tamarind-a fat one inch piece; pinched to smalled bits.
Salt-to taste
Curry leaves-4-5 sprigs

Heat a broad and wide iron wok.Do NOT use even A DROP of OIL.
Dry fry, coconut until the moisture in it evaporates and turns the colour into mild brown. Cool and pulse twice for not more than 2 secs . We do this, for even frying later, as this brings the powder to even particles. Freshly grated coconut, while getting fried doesn't brown equally. Hence this step.
Tranfer all the ingredients with pulsed coconut, to the wok stirring all the time in slow-medium flame,evently. Fry until the coconut gets a deep brown hue and the roasted coconut-spice aroma spreads around.This will take around 25 minutes.
Cool and powder.Add tamarind and check salt.Pulse/grind again.See to it, you don’t throw in the tamarind piece before you powder the mix in the first stage.Let the Chammanthipodi be a little coarse, coz that’s the way it has to be ;).Store in airtight-glass bottles.The powder has a high shelf life and stays well for a month in room temperature and stays better in fridge/freezer compartments.


The Authentic Chammanthi Podi calls for a tsp of finely minced ginger, a few cumin seeds and a tbsp of minced shallots in addition to the above mentioned ingredients.I generally avoid these 3, as I personally feel they would bring down the fine roasted "coconut-spice-curry leaf" flavour.
Go ahead if you prefer the, 'gingery,' cuminy’, 'shallotty' touch... :)
You can skip the pulsing part in the first step, if you use dessicated or store bought coconut or if the particles are even sized.


In olden days, Chammanthi podi was ‘hand powdered’ in Ural and Ulakka, the traditional stone mortar and its wooden pestle.The sorted out roasted chillies from the fried mix and rock salt goes in the Ural, first.After they are ‘beaten’, IN goes the roasted coconut and spices. The oil which oozes out at this stage , from the roasted coconut, is absorbed by the ginger, shallots and the tamarind, added next ; the heavenly spice-blend imparting the much authentic taste to the Thenga Varuthidicha Nadan Chammanthi Podi.”
Read More »

Tuesday, May 5, 2009

Kannimanga Achar / Tender Mango Pickle


Summer in Kerala... the season for Mulla poo(jasmine),Chakka (jack fruit)and Kannimanga(the young mangoes)..

I'm still enjoying my holidays in my native town down here in Kerala…the hot days filled with fun, loads of love and care…

V simply loves LOVES "Vadu manga oorugai".Me never an expert when it comes to making pickles, always “dread” to the utmost :).. decided to try making the same with the help of amma, blog, as I was sure it would be a great traditional keeper for you girls as well as for me and take my words it was so simple and never ever “dreadful “ as I felt until now…
So here’s the pickle packed with loads of love and care…

You need:

Sour variety Tender mangoes, as bunches-1 kg
Salt- 250gms
Water-Boiled well and cooled to room temp- 4 cups more or less(or the quantity to just immerse the mangoes)
Mustard seeds-50gms
Red chilly powder-4 heaped table spoons
Asafoetida powder/Perungaya podi-to flavour
Vinegar-optional(in case the magoes are less sour)-2 tbsp
Mustard seed oil- 2 tbsp

How to:

Wash the mangoes as bunches. Amma never let me separate them at this stage as she badly wanted to preserve the Chona (the milky sap)which started oozing out when I did it ;)
Now she came into the scene, washed them well, shook off excess water, placed them on a clean white dry cloth,wrapped up and patted dry. Now we together snipped the mangoes one by one and saw to it that every mango had at least a cm of its stalk along with. Then we stacked them into a clean and dry 2 ltr Bharani, the traditional earthen pot used for preserving pickles(see pic).


Add salt to the mangoes in the bharani. Shake well. Close with its lid and tie a white cloth around the neck.


Open the bharani on the 3rd day, 4rd ,6th and 8th days, shake to toss the mangoes or stir well with a clean, dry wooden ladle.The mangoes shrink as the water ooze out and lose the green colour to a pale yellow with aging.
Water has to boiled and cooled to room temperature. Has to be added on the 3rd or 4th day, after having a watch on the water oozed out with the addition of salt from the mangoes. The oozing out of the water stops as soon as the water is added and the mangoes wont get that "shrunk" look anymore. Adjust the quantity of water added so as to just 'immerse' the mangoes as it tends to bring down the shelf life.

On 8th day(just after a week), heat mustard seeds in a dry kadai.Take care not to roast, but heat well. Turn off flame, remove the seeds and heat the chilly powder now. Stir continuously while you do the heating part of both. Take care not to burn the chilly powder as well. Add asafoetida and mix well.Powder the mustard seeds.


Stir in the powdered mustard seeds, chilly powder and asafoetida to the mangoes. Mix well.


Vinegar, as said above can be used if the mangoes are less sour.We avoided this as the mangoes were of good quality and secondly I feared V would complain about a “chemical flavour” in the pickle :)

Do not hesitate to stir in Mustard seed oil (heated and cooled to room temp) which imparts the real traditional taste and thickness to the Kanni manga Achar :)!!

Keep closed the bharani as earlier with the white piece of cloth, tied to the neck.Open and use whenever needed.

Read More »

Wednesday, January 30, 2008

Vengaya Thokku / Ground and Spiced Onion Preserve


Thokku is a version of semi-thickened preserve where the vegetable invoved is ground to a coarse or fine paste, sautéd in oil, spiced up and seasoned accordingly.Vegetables with relatively more water content is considered ideal for making thokku.The vegetable when ground brings out the water, the sautéing part reduces the water content and the oil for seasoning enhances the shelf life of the preserve.

Get ready with:

Shallots/Chinna vengayam/Small red onions-1/4 kg or 2 levelled 250ml cups
Tamarind-a medium lime sized ball
Red chilly powder-1/3 cup
Fenugreek or methi seeds/venthayam-1 tsp
Jaggery-1 tsp(optional)
Turmeric powder-1/2 tsp
Mustard seeds-1/2 tsp
Hing/Perungayam-1/4 tsp
Sesame seed oil/nallennai-1/2 +1/4 cup
Salt-A tbsp-more or less

To carry on:

1. Soak tamarind in just enough warm water for half an hour.Extract pulp as thick as possible.Keep this aside.

2. Heat a non-stick wok and dry fry the fenugreek/methi seeds till brown and aroma spreads, without adding oil.Powder and keep aside.

3. Peel the small onions.Grind to a coarse paste without adding water.

4. Heat ½ cup oil in the above non stick wok.Splutter the mustard seeds.Add hing and the onion paste, sauté till the water content is absorbed, the colour changes to darker brown and the oil separates.Add the chilly powder and mix well.Pour in the tamarind pulp, mix in jaggery, turmeric powder and salt.

5. Sauté again till the water content evaporates slowly, the gravy thickens and the oil separates again.Never close the wok or the pan during the preparation so as to facilitate the evaporation of the water content of the thokku as far as possible.

6. Sprinkle the methi powder and mix well.Remove from fire when the semi thick consistency is reached and add the extra ¼ cup if you need more oil to float.

7. Cool and transfer thokku in clean and dry bottles.The oil, should float at least a centimeter length, as the upper layer. Store in a cool and dry place. Refrigerate for a longer shelf life.

This goes to Radhika of Radhis Kitchen who hosts JFI-Onions for the month.


Small onions are highly suggested to make this preserve. Big onions may also be substituted, so as to avoid the hazzles of peeling and poor availability, but the taste does alter, and may have comparitively a lesser shelf life.
This is an excellent dip for Dosas and Idlies.A good accompaniment for plain rice too.
Read More »

Thursday, October 25, 2007

A Spice Mix for a Spoonful of Christmas...


It had been quite a surprising discovery that a cute girl residing in Sweden has almost the same tastes of that of a lady who dwells in South India!!.The resemblances of these ladies are the love for chillies, spices, care for their sisters and more..So what if comes, if these attributes blend?...Care for the sisters, love for the spice mixes and sending them over as a gift?..

After having seen and read about the awesome Monday Spice Series , the collection of spice mixes, which the Swedish girl had prepared personally and gifted her sister for her wedding, the idea had been brewing up in me which had eventually turned out to reality now.


Even in her early teens my sister preferred homemade spice mixes and would remark,"when I start cooking, I am never going to get the store bought masalas or powders and will see to it that I make them personally, unadulterated!".

This is my gift to Nags , for her love of fresh spices ; my submission to A Spoonful of Christmas hosted by the sweet Zlamushka .

Sambhar masala or Sambhar powder had earned me the "greatest hit credit" among all the recipes blogged so far; the simple reason of choosing this ingredient to be gifted..


The recipe to make this "spice mix" is here and the "curry" which can be made out of this powder is here.
Read More »
Related Posts Plugin for WordPress, Blogger...