Showing posts with label Veg dry. Show all posts

Thursday, July 24, 2014

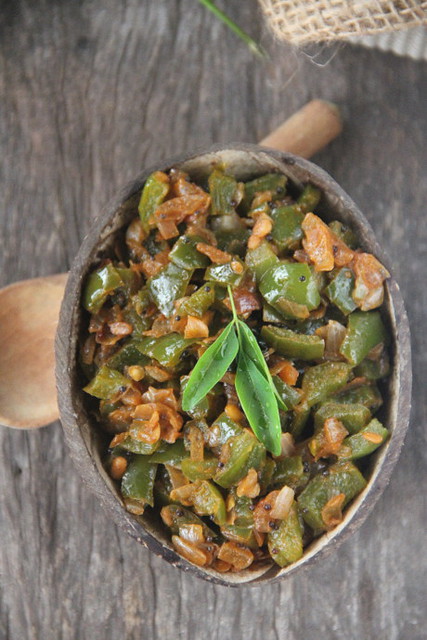
Easy Stir-fried Capsicum


Easy Capsicum Stir-fry


I had the chance to savour this heart warming side dish in my sis-in-law's house. It was one of the humbly placed accompaniment, in a casserole, supposed to be a  'not-so-prompt' one among the lunch spread. When every one was enjoying the speciality meals of the day; vegetable biriyani, sambhar sadam, paruppu thuvayal sadam, raving about the array of rich as well as comfort food all laid on the table, the taste of this simple dish dominated my taste buds. It went perfectly well with the chapathis and all the varied rice meals!  Both Akka ( sis- in law) and her daughter-in-law were busy catering to our needs but as always, the curiosity heads and prompts me to find out the recipe!
 Gayathri, her pretty and homely daughter-in-law, narrated instantly how they made it, smilingly.

The mental note grasped by my recent 'not-so-efficient-n-highly-impatient-brain-cells' again prompt me loud and clear, Cummon , I can't hold it for long babe. Try soon, it's simple!
Succumbed to the instinct, I tried the  following week...
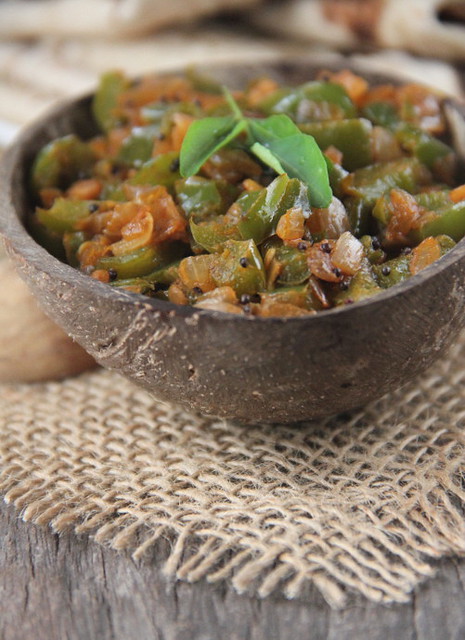

Easy Capsicum Stir-fry


Stir-fried Capsicum 
Serves two
Preparation time: 10 mins
Stove top time: 15-20 mins
Total time needed: less than 30 minutes

You need,
1 large green bell pepper / capsicum
One medium sized large onion
1/2 tsp sambhar powder
A fat pinch of turmeric powder
Salt - 1/4 tsp or to taste

To season,
2 tsps oil
1/4 tsp mustard seeds and urad dal each
A sprig of Curry leaves
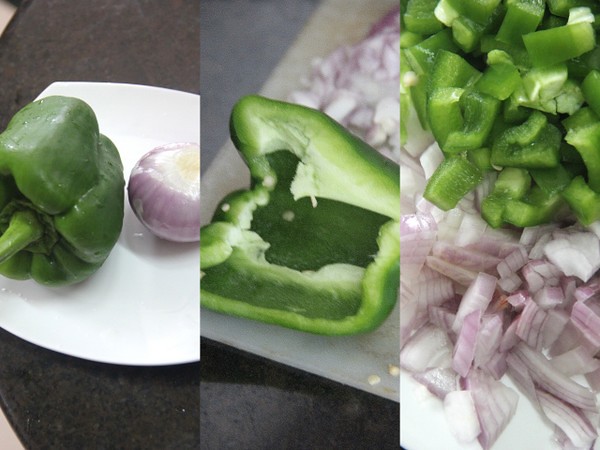

Easy Capsicum Stir-fry

Wash bell pepper and peeled big onion. Halve the pepper, de-seed and cut into 1 cm cubes. Chop onions.
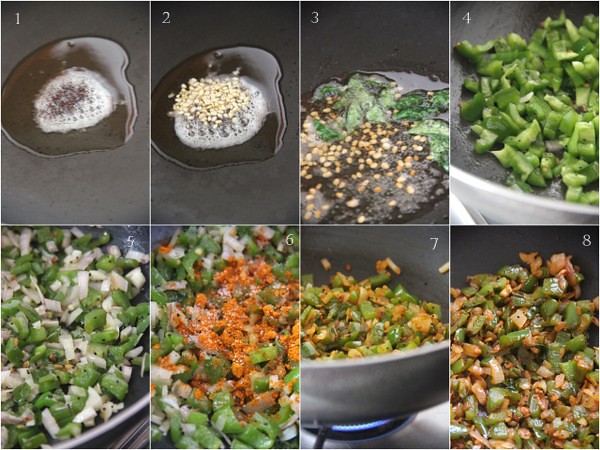

Easy Capsicum Stir-fry

Heat oil in a non-stick kadai. Splutter mustard seeds, brown the urad dal and throw in the curry leaves. Add the bell pepper bits and sauté along for a few minutes, say for 4-5 minutes .  You may sprinkle very little water after a while only if needed to get them cooked. But see to it it retains the crunchiness. (Mine wasn't quite fresh, so I had to.) Now, stir along the chopped onions. Add salt and turmeric and sambhar powders. [I have used my own recipe of sambhar powder which contains no turmeric. If your version has already the turmeric powder in it, avoid using it again.]
 Remember, do not close the pan at any point while making this dish. Stir to combine. Sauté for 5-6 minutes, until the pieces are shrunk, cooked ( not soft but still, a little crunchy) and the spices seeped in.
Remove from fire and serve hot with steamed rice or Indian breads.
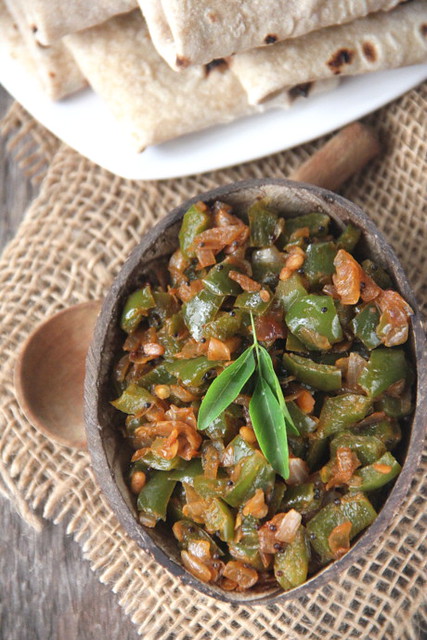

Easy Capsicum Stir-fry

I had them with warm phulkas.


Read More »

Friday, December 13, 2013

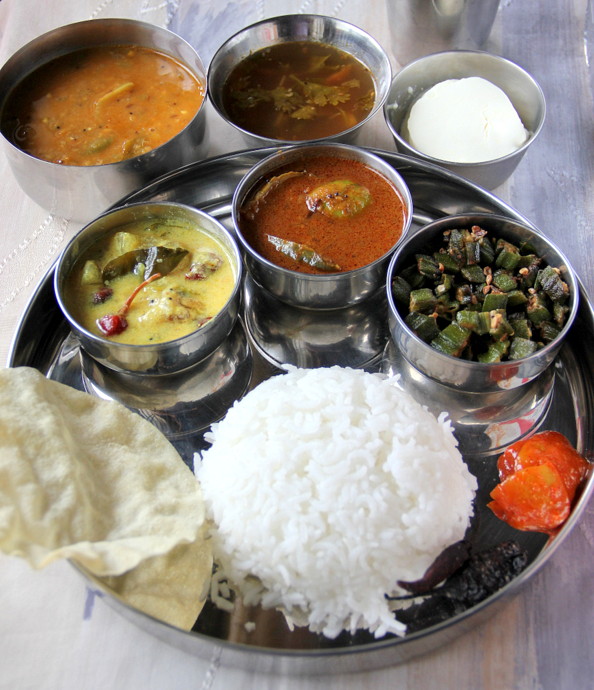
A Spicy Tamil Lunch and the Rains!


Lunch and Rain

Lunch and Rain


We have not seen sun for the past 3 days. Its windy, cold and the downpour is heavy!
This is the time when the family craves for a wide spread of  'Vegetarian South Indian Lunch'. As you might have read earlier in many of my posts, we enjoy brunch by 10.30 every morning, straightaway.
Come monsoon, I love to stay tucked inside the warmth of duvet enjoying the cozy feel and have to struggle pulling myself up from the bed. Once up, the wonderful weather prompts me to be active and I will soon be brimming with energy!
Today morning had been one such day, when a full fledged lunch was made, photographed and blogged! ;)


Lunch and Rain


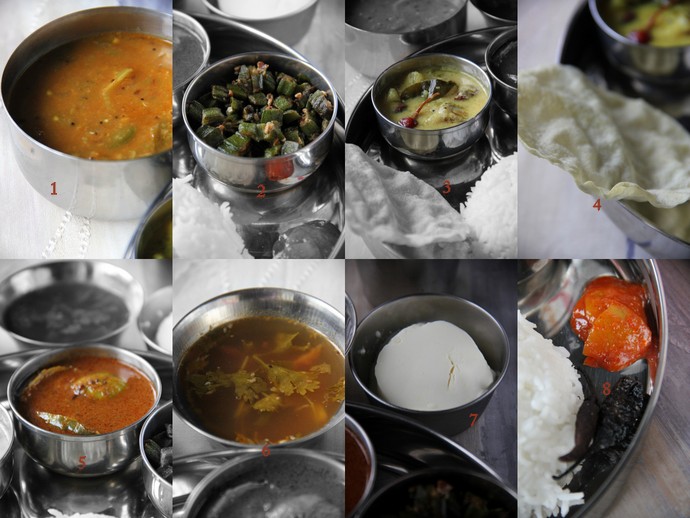
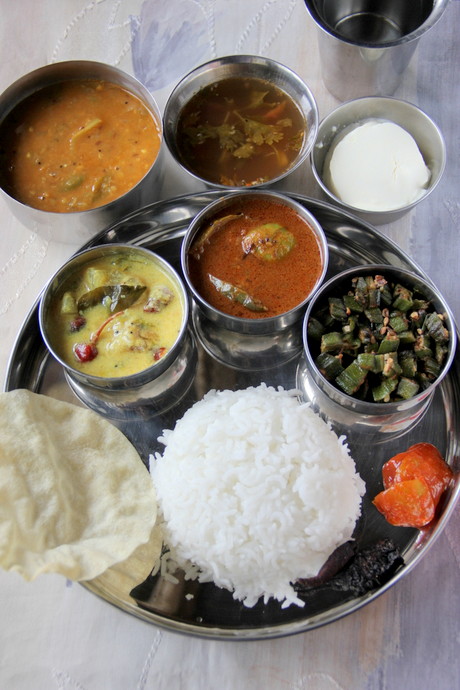
1. Pacha Thakkali Sambhar - The method is same as the Drumsticks/Murungakkai Sambhar. Raw garden fresh organic green tomatoes were used instead of drumsticks.

2. Vendakkai Vathakkal / Stir-fried ladies finger. I don't have the recipe yet, will post soon.

3. Poosanikkai Morkuzhambu . The recipe is here. I have also posted Bonda Morkuzhambu here.

4. Appalam.

5. Kathrikkai Puli Kuzhambu - I have the detailed recipe of Mochai-Kathiri-Murungai Kuzhambu here. I used only Kathirikkai/Brinjals today.

6. Rasam - Yes, it is the same Thakkali Poondu Rasam :)

7.Curd.

8.Lime pickle & Mor milagai- I have posted Citron/Narthangai pickle here. Lime is used to make this pickle instead of citron.

I also had Vazhaithandu Koottu and plain dal and forgot to add here. Anyhow it is fine not to overcrowd :). I didn't have a mood to make Payasam but had Maja Blanca, a Filipino dessert, to complete the meal.


Lunch and Rain


Oh yeah! I am geering up for the Christmas Bakes..... :)

Read More »

Tuesday, December 10, 2013

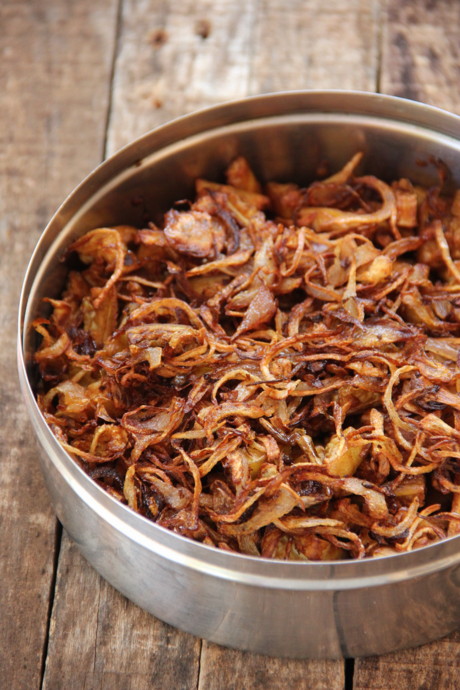
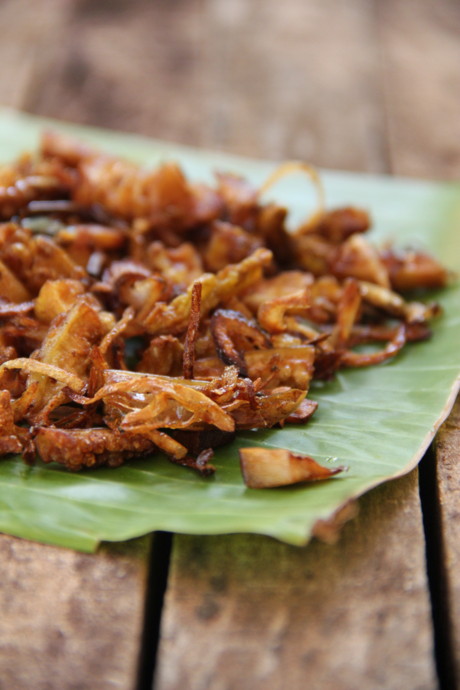
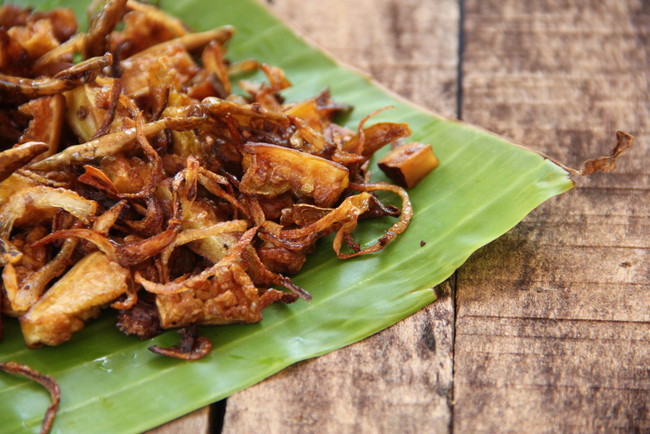
Easy Kerala Pavakka Roast / Deep Fried Bitter Gourd with Onions


Pavakka Roast


Many of amma's recent side dishes are seasonal. She makes yummy dishes during one of our visits and while on your next, she has a handful of new ones! The funniest part is that she forgets how she made a particular dish, we would have thoroughly enjoyed during our previous holiday with her. That's her :). Very quick and smart in learning a recipe and very forgetful :)

I pictured this pavakka roast she made during our last visit. Our maid Suma helped her with this one and while I am blogging I am dismissing the thought of reconfirming the recipe with her simply because she would have already forgotten about this :)
Typing simple the recipe with the aid of a crude note I made then along with the abundant step wise pictures I clicked along that day.. :)

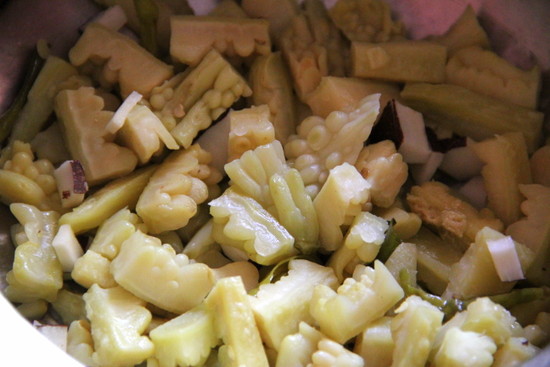
I have noted that in Kerala, the bitter gourd is sliced long while in Tamil Nadu the vegetable in sliced round and thin for making the dry roasted version.


Pavakka Roast


 Kerala Pavakka Roast
Serves 2-3
Time needed 40 minutes

You Need:

Bitter gourd/ Pavakka - Sliced long as one inch pieces. Need not be very thin. - 2 cups
Coconut bits/thenga kothu - 1tbsp
Big onions - sliced thin- 1 cup, heaped
Green chilles- 3-4 slit lengthwise
Coconut oil- 1/2- 3/4 cup- to fry
salt - to taste

Method:

Pavakka Roast


Boil bitter gourd in just enough water adding green chillies and salt and cook till half done. Drain excess water and add in the coconut bits.


Pavakka Roast

Keep ready the sliced onions. Heat oil in a wok and begin with 1/2 cup of boiled 'pavakka'. Keep the flame to minimum and continue frying till the pcs turn brown and crisp. Drain using a slotted spoon and arrange on a flat vessel. Repeat as batches until you are done with frying. In the remaining oil saute the onions till brown and crisp ( pour a little more oil if necessary) Drain the fried onions and top the fried 'pavakka'.


Pavakka Roast

Serve hot with steamed rice and sambhar 

Read More »

Wednesday, August 14, 2013

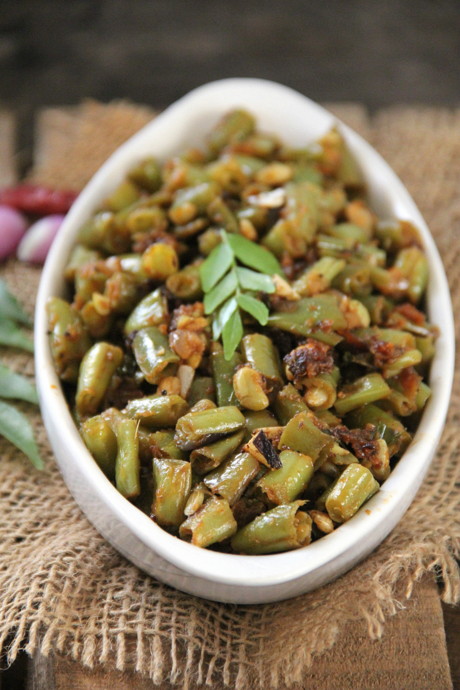
Beans Mezhukkupuratti / Kerala Style Stir-fried Beans


Beans Mezhukkupuratti


"Beans Mezhukkupuratti" is yet another authentic side dish from central Kerala. I am not very sure whether the recipe belongs to the Catholics or the Syrian Christians of the state, but all I know is that I grew up having this simple stir fry at least once a week!
This simple side dish has a wonderful flavour of garlic and shallots combined with the goodness of coconut oil and curry leaves and is flavourful and addictive. I can have this with a bowl of hot steamed rice without any accompaniments such as curries!

Straight to the recipe...
Read More »

Monday, February 18, 2013

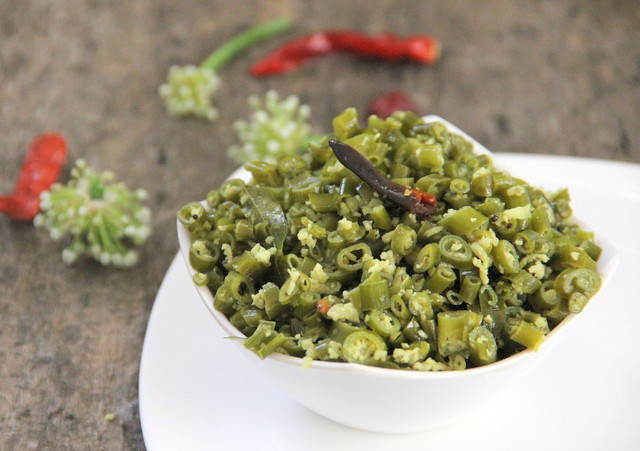
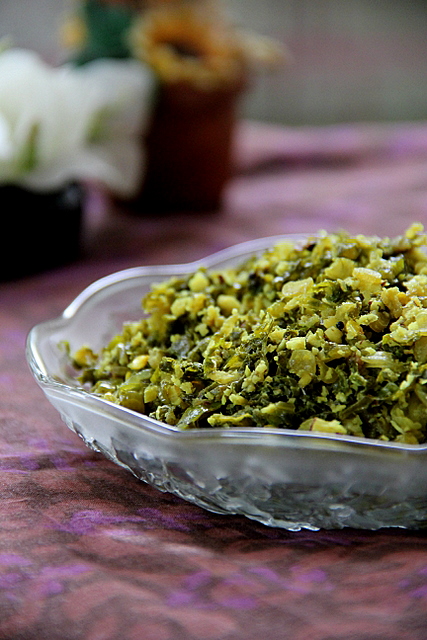
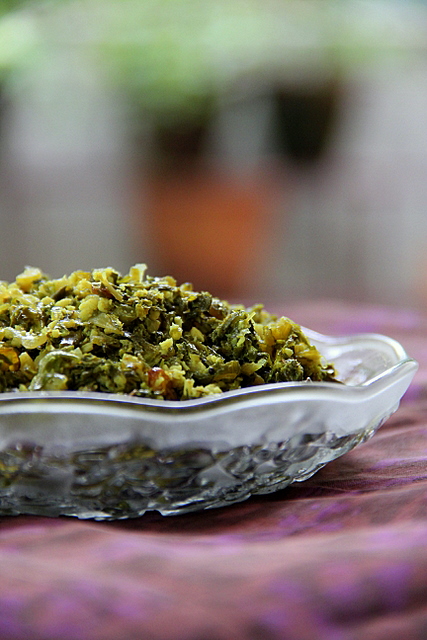
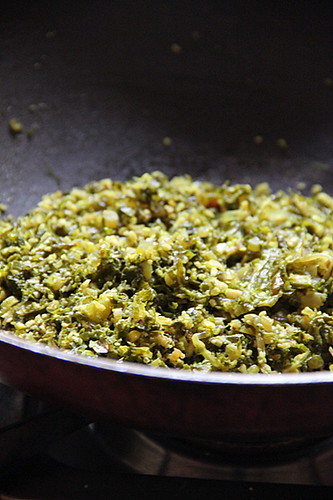
Ullithandu Thoran / Stir-fried Onion Greens


IMG_0581


I love Namakkal, the town I currently live, for many reasons. One of them is the availability of fresh greens. You name it the town has it. In every nook and corner. At the ends of each street!
My nearest vegetable shop is a 3 minute walk away where all kinds of greens are sold throughout the day!


ullithandu


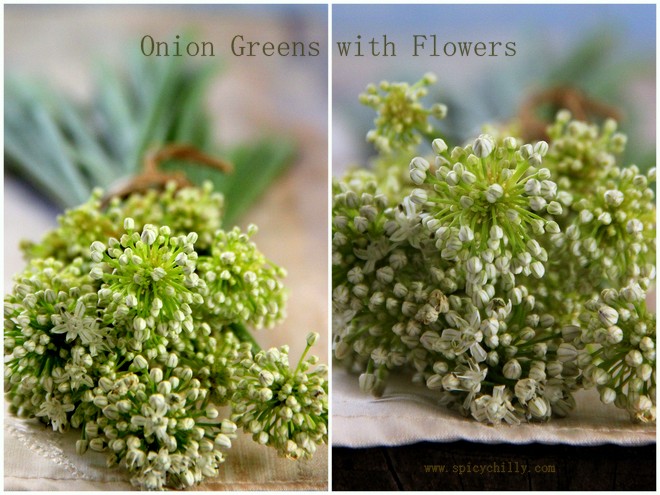
I found these onion greens and grabbed a bunch with primary thoughts of shooting the pretty flowers along with the long tender stem. They aren't spring onions but greens / stem of regular onions. The stem is fleshy, sturdy, fibrous  and crunchier than the spring onion greens, although they fall in the same family.

So, after shooting the pretty thing, I was naturally curious to know how they would taste, if cooked.

 I had come across Ullithandu or onion greens back in Kottayam, my native town, but amma hasn't tried cooking them. Anyway I was sure that Suma, amma's maid knew how to handle the greens.

I listened to her carefully on phone;

പൂവും തണ്ടിന്‍റെ മറ്റേ അറ്റവും വെട്ടി മാറ്റിയിട്ടു നല്ലോണം കഴുകണം. എന്നിട്ട് ചെറുതായി അരിയണം. ഒന്നോ രണ്ടോ  പച്ചമുളകും വെളുത്തുള്ളിയും കൂട്ടി ചതയ്ക്കണം. ഇതും, ചെറിയ അര മുറി തേങ്ങയുടെ പീര  , പിന്നെ കുറച്ച് മഞ്ഞളുപോടി , ജീരകപ്പൊടി, കറിവേപ്പില, ശകലം ഉപ്പ് എല്ലാംകൂടി അരിഞ്ഞ വെച്ച തണ്ടിന്‍റെ കൂടെ  തിരുമ്മി ചേര്‍ത്ത് വെയ്ക്കണം. ചീനച് ചട്ടി യില് എണ്ണ മൂപ്പിച്ച് കടുകുപോട്ടിചിച്ചിട്ടു ഒന്ന് രണ്ട് മുളകും പൊട്ടിച്ചിട്ട്  തിരുമ്മി വെച്ച ഉള്ളിത്തണ്ട് ചേര്‍ത്ത് വെള്ളം തളിച്ച് തട്ടിപ്പൊത്തി മൂടിവെച്ച് വേവിക്കണം. വേണെങ്കില് അവസാനം ഒരു മൊട്ട പൊട്ടിച്ചിട്ട് തോര്‍ത്തിയെടുക്കാം. 

Perfect!
I thanked her heartily and made a quick mental note of what she said , starting off straightaway..

Read More »

Friday, December 28, 2012

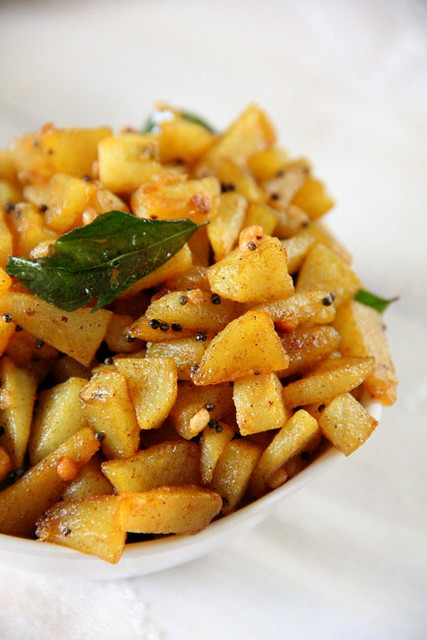
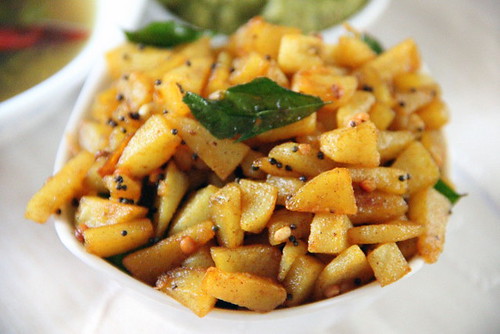
Easy Spicy Potato Roast


After the over doze of Christmas cakes, cookies, puddings and everything sweet, this potato roast served as an accompaniment for our simple meal, today.
This dish is something I make very frequently for children, particularly as a side dish for their pack away lunch. An absolute kid freindly accompaniment!

Today we woke up to see the cloudy dull morning.With no vegetables in the crisper, I decided to make this instantly, with plain hot rasam and fiery kothamalli chutney! :-)


Easy Potato Roast 
Serves two

Total time needed - 20 minutes
 [For Preparatory -10 minutes
 For Cooking -10 minutes]

Read More »

Wednesday, February 29, 2012

Mullangi Keerai (Radish Greens) Poriyal / Thoran


Radishes in the plant bed


The fully grown root veggie pops up the ground and is ready to be pulled out!


I wet the soil well and Yay!  I harvested my own radish (radishes, but pictured only one) in the kitchen garden!
I never knew the greens are edible and badly wanted to make good use of the healthy organic greens. I decided to make poriyal / thoran, which is gonna be my first attempt!


Here we go..


 So, to start with, slice away the radishes underneath and wash the greens well in running water.


Remove the hard stem (if you feel rough while chopping.The stems here were tender) and chop the greens. Mine were a little spiny and I noticed them getting soft while getting cooked!


Top it with green chillies, onions, turmeric powder, salt and coconut.


and mix gently with your fingers well to combine.


Heat oil in a kadai, splutter the mustard seeds, brown the urad dal and dump the green mixture.


Sprinkle some water, say, a tbsp and close with a lid once it starts steaming. Open the lid once every 3-4 mins now and then sprinkling a tbsp of water to keep it hydrated and not letting it turn too dry.


Radish greens need a longer time to get cooked; for about 15-20 minutes.


 They do wilt and change colour as any greens while getting cooked but still stay a bit crunchy!
 Yummy and healthy as well :)


Serve warm with steamed rice or Indian breads.
The leaves taste a li'l bitter, but flavorful!


Now, for the recipe all in one place..


You need:

A  bunch of radish greens (3 large cups +/- ,  loosely filled)
Green chillies- 3-4, slit  lengthwise and halved (you can susbstitute red chillies, which go better)
Turmeric powder- 1/4 tsp
Shallots- 10-15, sliced ( I used 1/2 big onion)
Salt- to taste
Grated coconut - 1/4 cup

To Season,

Oil-  a tbsp
Mustard seeds- 1/4 tsp
Urad dal- 1/2 tsp

Method:

Slice away the radishes and wash the greens well in running water.
Remove the hard stem (if you feel it rough while chopping.The stems here were tender) and chop the greens.Mine were a little spiny and I noticed them getting soft while getting cooked!
Top it with green chillies, onions, turmeric powder, salt and coconut and mix gently with your fingers well to combine.
Heat oil in a kadai, splutter the mustard seeds, brown the urad dal and dump the green mixture.

Sprinkle some water, say, a tbsp and close with a lid once it starts steaming.
Open the lid once every 3-4 mins now and then sprinkling a tbsp of water to keep it hydrated and not letting it turn too dry.

Radish greens need a longer time to get cooked; for about 15-20 minutes. They do wilt and change colour as any greens while getting cooked but still stay a bit crunchy!


Read More »

Friday, October 28, 2011

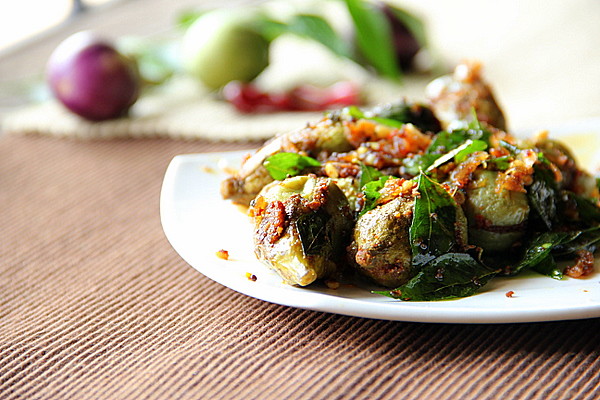
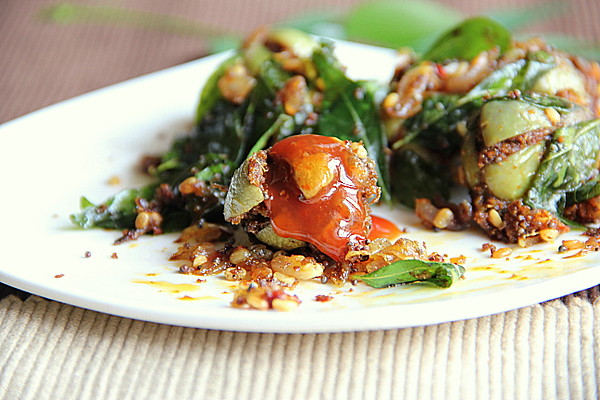
Kutti Kathrikkai Podi Curry / Stuffed & Stir-fried Baby Brinjals


I learnt this recipe from my ma in law. This had been a special dish reserved for special lunches as the process was considered elaborate in a joint family. We used to stuff  more than 50 brinjals, yet we enjoyed doing this as we always did this together and never felt tiring as we would have thought about it before we started.
The dish turns out perfect every time we make it and unlike the other dishes, this one is relished from the youngest till the oldest in the family! Even the brinjal haters enjoy this!

Preparation of the dish is never an elaborate one, if you start with a dozen or even two of those baby brinjals. The powder can be made prior and can be stored until you make the stir-fry and hence this becomes as easy as any vegetable side dish you make any day!

 You Need: 
(to serve a family of four)


Baby brinjals /kutty kathrikkai -25 numbers (weighs330 gms / about 3/4 lbs)

For the powder for stuffing, (yields 1/2 cup)

Oil- a tsp
Coriander seeds / kothamalli -  1/4 cup scant
Bengal gram dal / kadalai paruppu - 1/4 cup scant
Red chillies/ kayntha milagai 4-5 numbers
Curry leaves / karuveppilai - 2 sprigs
Cumin seeds-1/4 tsp (optional) I didn't add

To Season,

1-2 tbsps of oil
1/2 tsp mustard seeds
3/4 tsp urad dal
2-3 tbsps of thinly sliced small onions
2 sprigs of curry leaves

Now, for the step by step method...


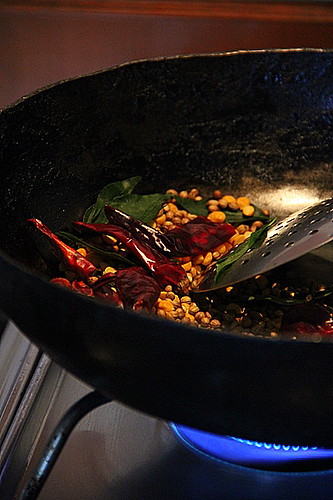
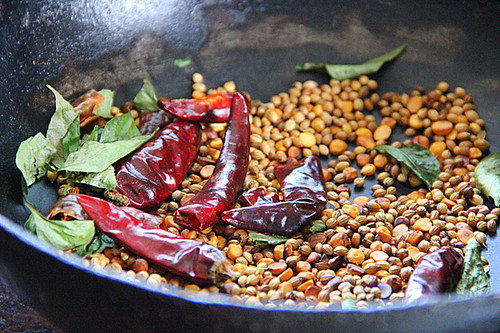
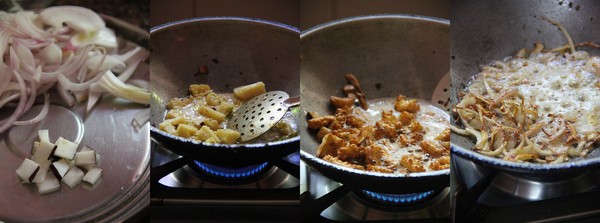
Drizzle a tsp of oil in your thick bottomed wok and fry the coriander seeds, dal, chillies and curry leaves all added together  in medium heat ...


until done.


Pulse into a coarse powder adding salt.
Ah!well, I used my Ammikkallu to powder as I had a power shut down while making lunch!
I can't tell you how much I hate doing this but had no other go even while I accept the perfectness of hand pounded powders!


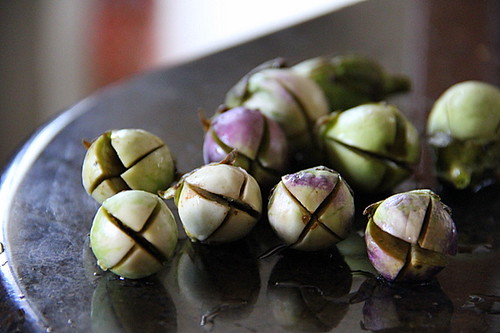
So now, you need to slit the baby brinjals as you see here. Check for worms while you do this and slice away the portions if you come across any!


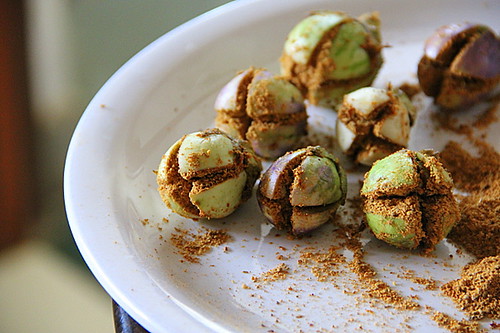
Stuff the slits with the powder, as much as you can.


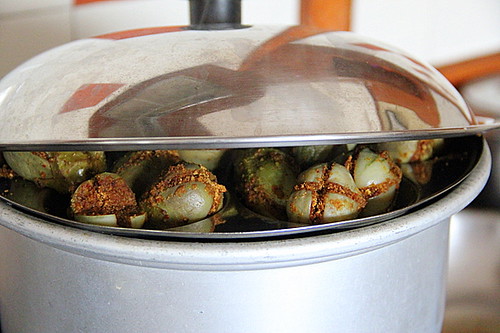
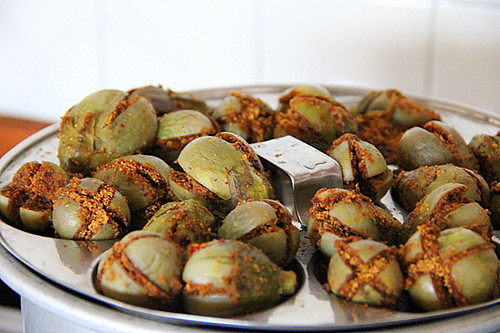
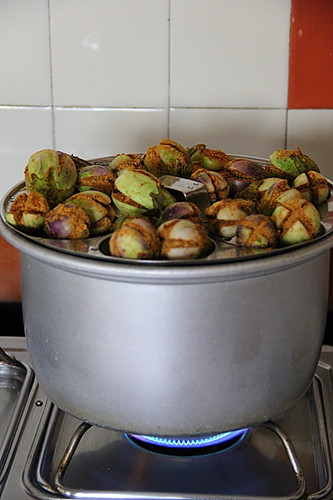
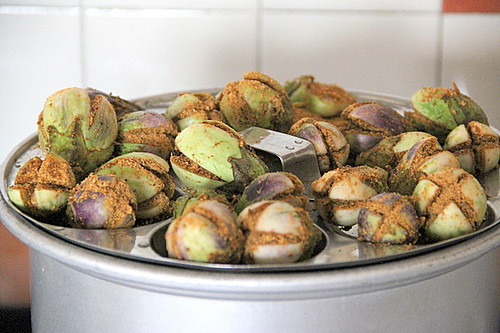
and arrange them carefully on your steamer plate with the brinjals placed horizontally or the stuffed sides slightly up. I used my rice cooker and idly steamer plate combo for steam cooking.


 Close with an appropriate lid to lock the steam while cooking.


Check after 10 minutes. The brinjals should have turned soft


and the purple ones would have turned ash green as well. Scroll up to that picture where I've arranged them before steaming and you can notice the difference in colour!


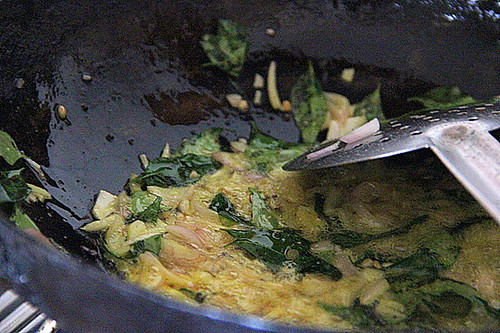
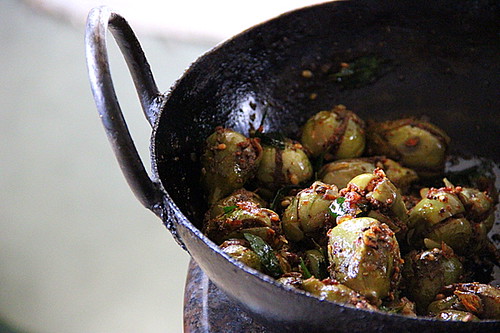
For seasoning, heat oil in the previous wok, crackle the mustard seeds, brown the urad dal, sauté onions and curry leaves and stir in the brinjals sautéing for a minute . The caramelized onions and the curry leaves coat the brinjals and the flavour is irresistible!


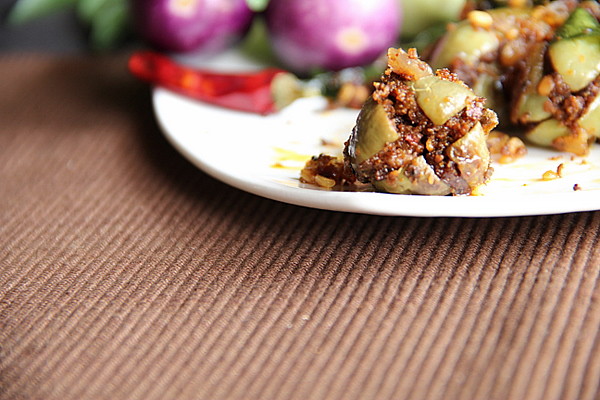
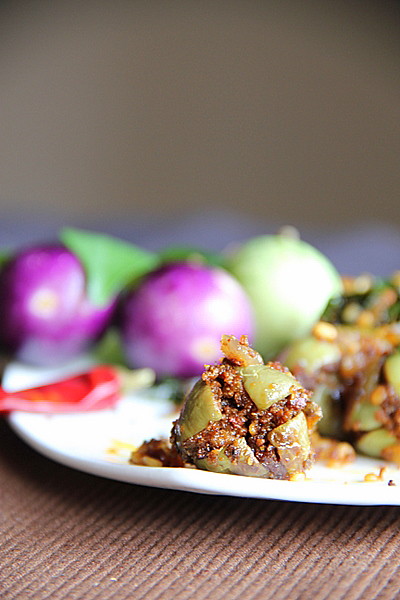
The stove top brinjals could not be photographed well while seasoning because of poor lighting. So here's a quick view of the finished dish placed on the counter edge.


Stuffed brinjals are served best with steamed rice and Indian breads!


But did I tell you I love to have them as a starter drenched in hot and sweet tomato chilly ketchup??

I could hardly wait to devour this one as soon the shot got over! ;)

Read More »

Thursday, April 14, 2011

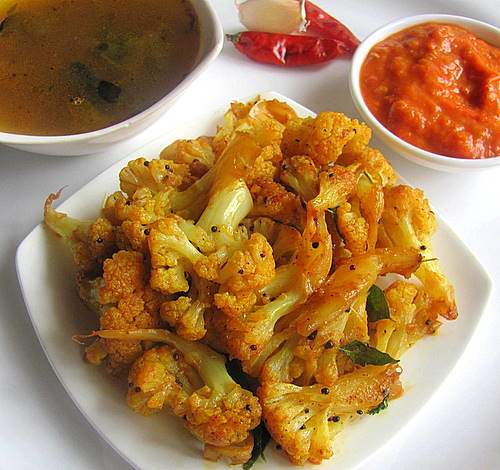
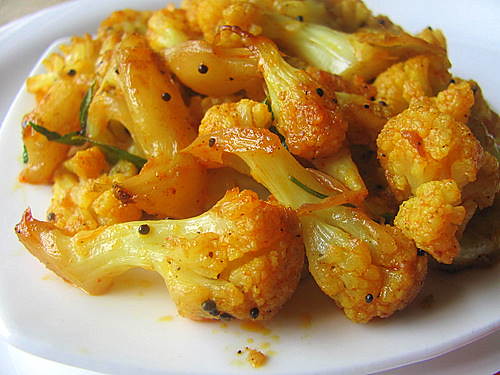
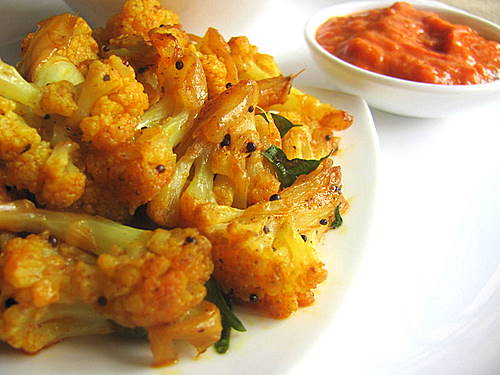
Easy Cauliflower Stir-fry without Onions


You are back home after a long day and have some left over rice or chappathis in your kitchen with no side dish, hungry and not so patient for an elaborate cooking, but lucky enough to have a fresh/ not so fresh cauliflower left in your vegetable tray, this would be one of the easiest dry accompaniment you may lay your hands upon. There is no hassle of slicing onions either, yet it tastes great!


Easy Cauliflower Stir-fry

Cauliflower, cut into small florets- 2 cups

To season:

Oil- 2 tbsps
Mustard seeds- 1/4 tsp
Turmeric powder- 1/4 tsp
Chilly Powder- 1/2 tsp (more or less acc to your spice level)
Pepper powder- 1/4 tsp
Garlic-1 large clove or 3 small, Crushed
Curry leaves / Cilantro
Salt- as needed


                                                   in the kadai with all the water evaporated..


Wash the florets well and keep aside. Heat oil in a kadai, splutter mustard seeds, throw in curry leaves, add the florets and sauté for a few seconds. Add the turmeric and chilly powders along with salt and 1/2 cup of water and close with a lid while it simmers. Here in TN, the vegetables cook a bit slow and so I needed 5 minutes to get them half cooked. Adjust the cooking time accordingly in yours. The florets have to get half cooked before you proceed to the next step, and that's it! :)
The water would have used up or even if not, dont worry, add the crushed garlic (close, if there's still some water at the bottom until evaporated) and lastly  the pepper powder and toss well. ( you can also sauté the florets for a longer time with some more oil drizzled. I didn't do it as I was...yup, Impatient! :))

If you don't have curry leaves in stock and hadn't added earlier, garnish with chopped cilantro.


Serve hot. You will never regret coming up this one and will end up making it again and again. Kids will enjoy this too!
   
Read More »
Related Posts Plugin for WordPress, Blogger...