Monday, November 28, 2011

' Bhagyam' makes Thuar Adai ~ a continuation of the previous post!


It is almost a couple of hours' drive to our ancestral village. The roads are extremely bumpy and I dislike the roller coaster ride to and fro mostly done on the same day. To shake off the terrible backache and the tiredness on the following day back home is a nightmare for me lately!
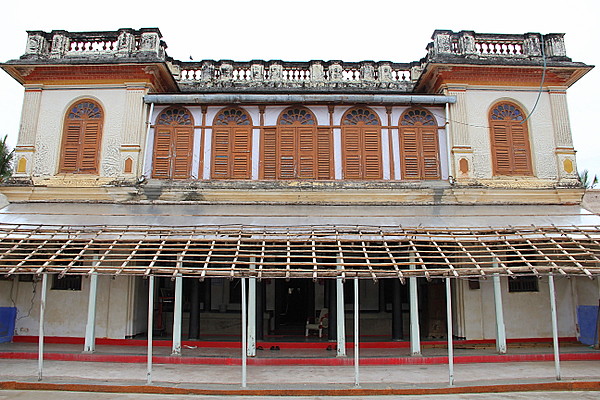
Still, the warmth of my inlaws, the charm of the village and the mansion becomes irresistible, each time V invites me to accompany!


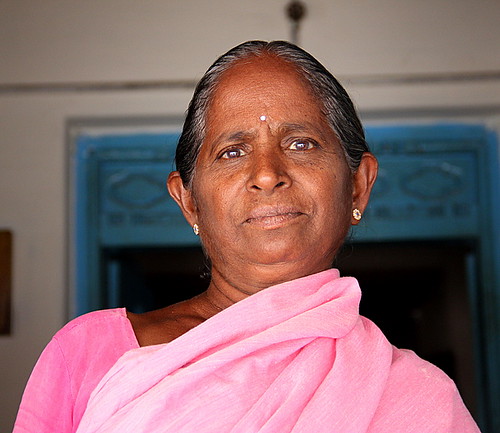
Bhagyam, one of the most reliable and sincere maids I have ever seen, is serving us for the past more than 30 years. A hardworker who never grumbles and serves pleasanly each and every member of the family with her smiling face, is a survivor of cancer a couple of years ago. She was given the best medication and was treated (royally) by V's cousin, a gynaec. Bhagyam, a widow, happily continues to serve my inlaws to her best, her health can support!


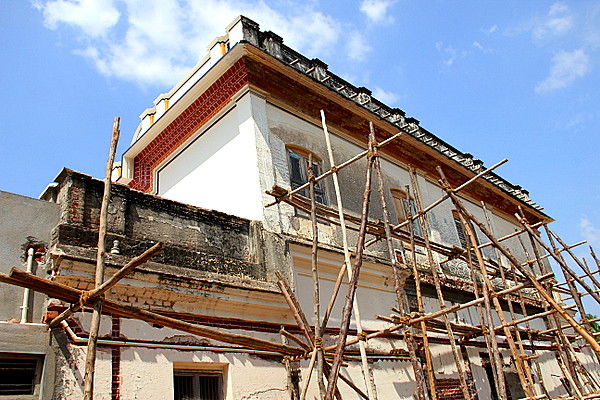
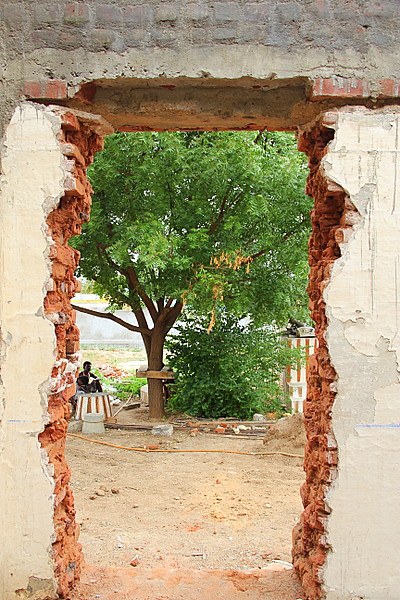
So, while this renovation was going on and V and his uncles were busy supervising the work and the workers, I was shooting around. Soon we were hungry! The store room and kitchen were almost demolished and with the limited items in the pantry, Bhagyam managed to make the family favourite, Thoor Adai with chutney while I made tea.

I am basically not a fan of adai, with the overpowering dal in them, I heartily dislike this considered-as-healthy south Indian crepe.
At the same time I admit fully the fact that I couldnt stop eating them until I had 4 large ones those came fresh out of the pan with some steaming  hot chai!
Bhagyam made more than 30 adais for 8 of us. I had scaled down the measurements of  the ingredients to 1/3rd here.

Thuar Adai
For 10 Adais
Recipe Source- Prema Athai (she insisted that the credits should go to her for being Bhagyam's tutor) :-)

 Ingredients:

 Parboiled Rice - 1 1/2 cups
 Thoor dal- 1/2 cup
 Red Chilies-10 nos
 Asafoetida - 3 fat pinches
 Salt - as needed
 Small onions- a handful- peeled and sliced
 Fresh curry and coriander leaves- as needed


Step by step method


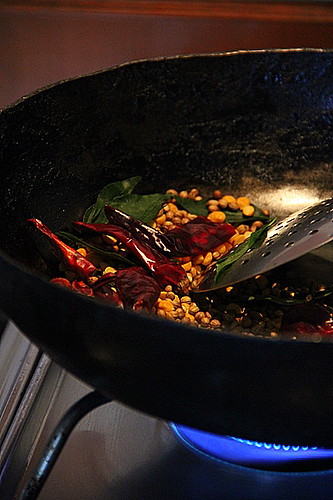
Wash rice and dal and soak together for 2 hours. Grind to thick coarse paste adding enough water with chillies, asafoetida salt.


Cut the small onions..


Wash and chop the greens. Stir in as needed..


into the thick adai paste in a larger vessel adding


 enough water to loosen to batter consistency.


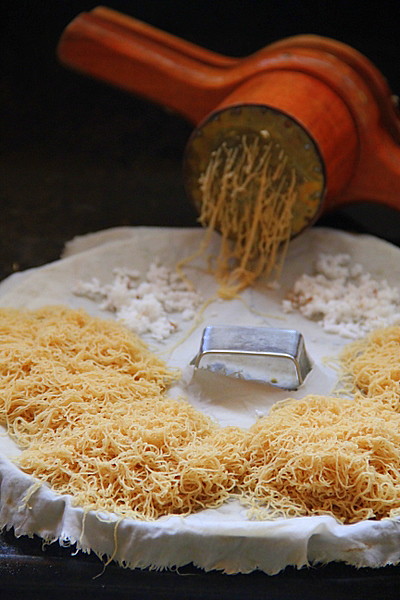
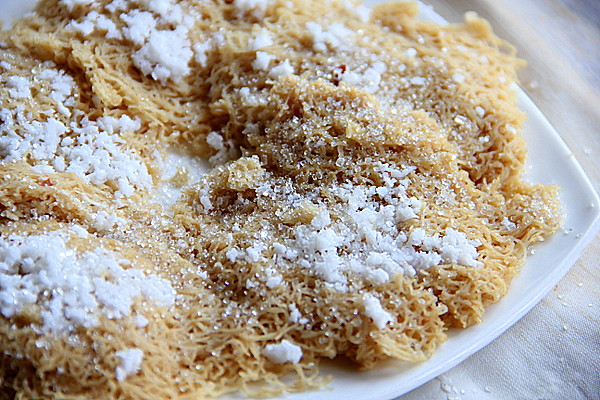
Pour  in a circular motion on the hot tawa.(You cannot spread the batter with the back of the ladle as for the dosa).


Loosen the edges and flip over while cooked


and let the other side get done. Adai takes a longer time to cook than the regular dosas..


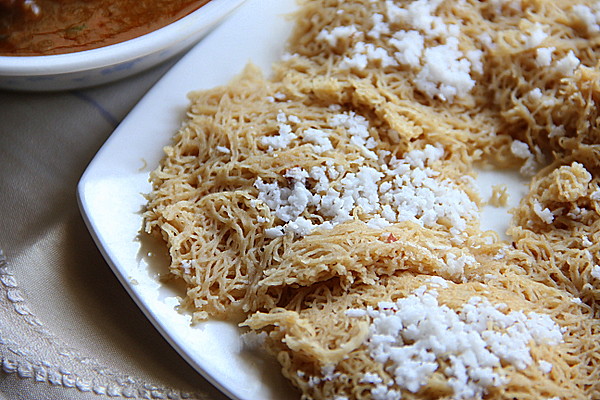
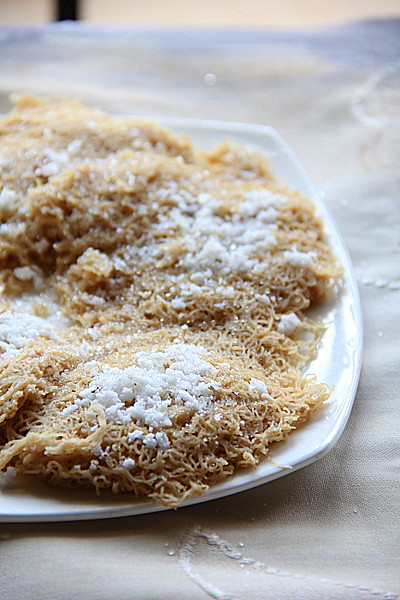
No fancy plates or glasses or counter tops for the photo shoot here, girls :)

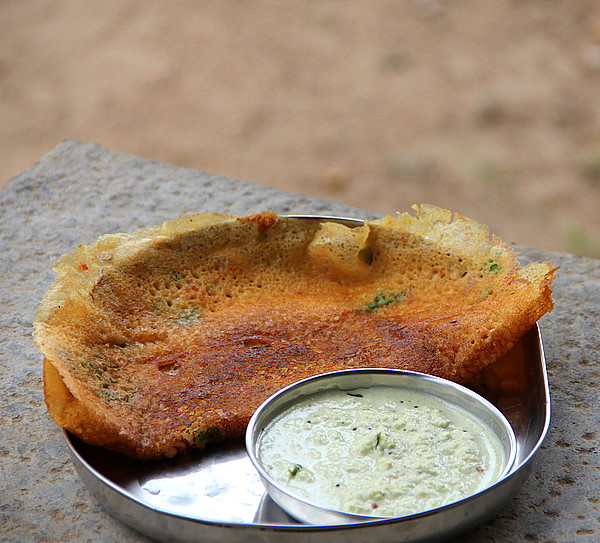
When I placed the plate(after selecting the best from the limited collection) on the stone bench (whew! no other counter tops worked) it was drizzling, and again, I had to rush back to the kitchen to mind the tea that was still on the stove top!

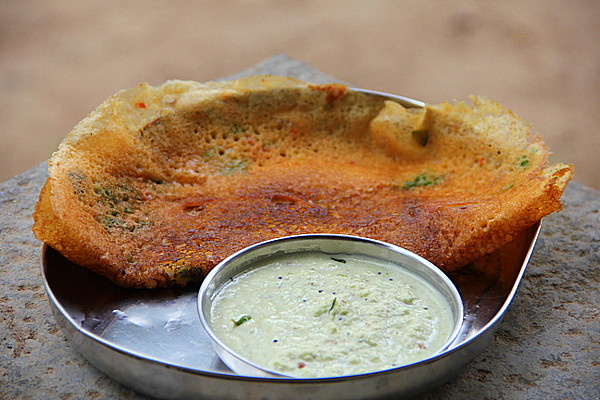
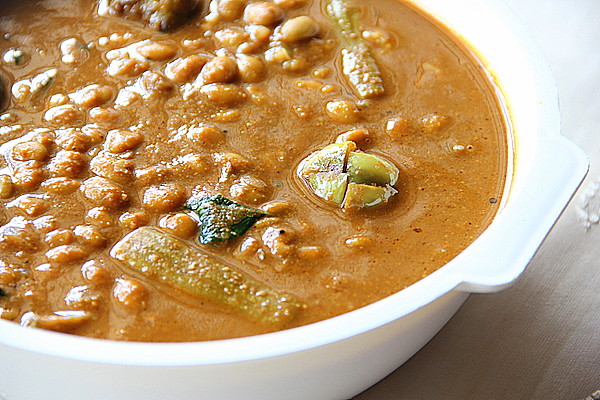
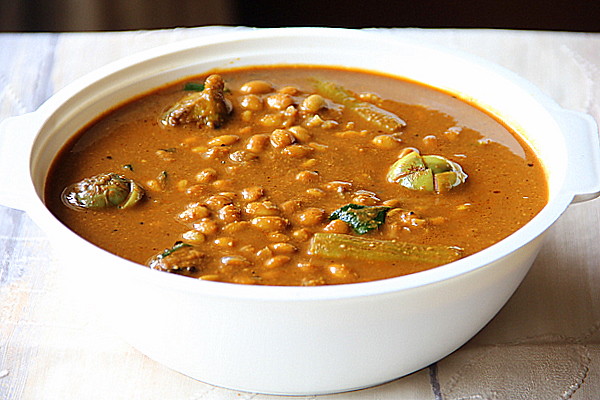
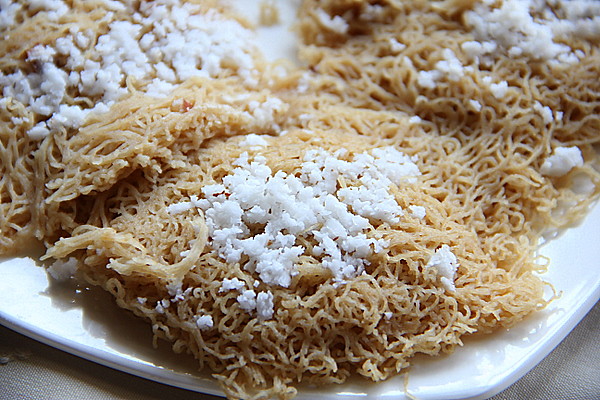
Adai was served with Coconut Chutney.
Other accompaniments that go well with Thoor Adai are Tomato Onion Chutney and Avial.

Read More »

Wednesday, November 23, 2011

Renovation of the Ancestral Bungalow ~ Part I


I am sure many of you  remember the ancestral home post done last year.

My in-laws who were living there have shifted to the near by town, again in a sweet apartment and are hale and happy with the modern facilities they were deprived of in the ancient house.

So what's happening with the 100 year old bungalow?

It's undergoing renovation with all the wood works and antiques being restored!
This massive responsibility is taken over by my husband and his uncles.


He wanted me to click, while the renovation is in progress, at intervals as he feels they would remain as a priceless treasure for posterity!

He again insisted me to share the same with my readers, though I had been reluctant about how much you would appreciate :)..

Anyway I thought of doing it as a few parts as the renovation progresses...


                                                                         The Entrance          


                                                              The centre of the house


                                                            The Backyard


                                            A pillar with wooden carvings, restored


                                                           The sepia effect here is natural!


                                                      Backyard view from inside the house

While husband was supervising the works with his uncle and I was clicking, Bhagyam the maid of the mansion was preparing some simple food for tea for all the hungry tummies.

Will keep you posted about that next!

Read More »

Friday, November 18, 2011

Mochai-Kathiri-Murungai Karakuzhambu


This  flavourful 'Tamil Kuzhambu' is very much associated with my inlaws' cuisine. I believe the base of this Kuzhambu is almost similar to any vegetarian  Karakuzhambu of the state.
Mochai and Murungai never falls in the same season, mochai available only in winter while murungai or the drumsticks are abundant only in summer. Somehow I was lucky enough to get hold of both mochai and murungai recently which prompted me to make the curry served with the main dishes Pal Pongal and Kambu Sadam on two different days.

V absolutely loves 'Pal pongal' and 'Kambu Sadam' and the combo, according to him, is ultimate!!


Serves- A small family

Ingredients:
Baby brinjals -5-6  or  2-3 regular ones if you don't get the smaller ones
Drumstick - 1 no
Mochai (dolicho beans)- fresh preferable, or dried if you don't get fresh ones- one small cup

Tamarind- a lime sized ball
Salt-to taste
To roast and grind to a very smooth paste
Oil-a tsp
Fenugreek seeds- 1/4 tsp
Coriander seeds -  3 tbsps (1/4 cup scant)
Thuar/ Bengal gram dal- 3 tsps
Red Chillies-8-10
Black Pepper corns- 1/2 tsp / or a few corns
Cumin seeds-1/2 tsp
Turmeric powder-1/2 tsp
Shallots- 5-6 nos
Garlic cloves- 2,3
Curry leaves-a sprig
To Season

Oil-1/4 cup
Mustard seeds-1/4 tsp
Asafoetida-less than 1/4 tsp
Curry leaves-a sprig

Method:

Preparation of the vegetables

Wash and soak Mochai (if you use the dried ones) over night and pressure cook in salt water until soft. Fresh ones don't need to be soaked.
Wash and cut drumstick into 3 inch pieces.
Wash the baby brinjals and cut the bottom part as a cross. Retain the green calyx and stem.
If you use regular brinjals, slice them breadth wise into 2 large pieces.

Cook the drumstick pieces in enough salted water and a little turmeric until half done and add along the brinjals cooking until just done. Keep aside.


Preparation of the Kuzhambu


1. Soak tamarind in warm water. Extract pulp.
2. Heat a tsp of oil as mentioned in the “roast and grind” list in a heavy bottomed kadai.
Roast the fenugreek and next the coriander seeds, dal and the red chillies in medium flame stirring all the time till the colour changes and the aroma spreads out.
3. Turn off the flame.
4. Throw in rest of the ingredients ; the pepper corn, cumin seeds, turmeric powder,
shallots, garlic and curry leaves in order, stirring the mixture heating them all up.The heat of the kadai is enough for this step.
5. Cool and grind to the smoothest paste with just enough water.
6. In a thick bottomed vessel, combine the above paste with the tamarind extract. Add salt. Let the curry be a little watery at this stage. Boil and simmer the kuzhambu well closed with a lid. After 10-15 minutes, Dunk the vegetables carefully into it. Simmer for a few minutes to let the spices seep into the vegetables.
7. Season the simmering kuzhambu by heating the ¼ cup of gingelly oil in the earlier kadai, used for roasting, splutter the mustard seeds, add asafoetida and throw in the curry leaves. Add to the curry.
Simmer for a few more minutes until the flavour emanates and the oil separates.


The 'Kuzhambu' served with 'Pal Pongal' and 'Thengai Thuvaiyal'. The traditional 'Pal Pongal' recipe in bronze pot is already posted here. The above was made in pressure cooker since the quantity was lesser and I will post the recipe soon!


When the curry was made another day and served with Kambu Sadam or the Millet Meal (I will post the recipe soon) with 'Murungai Thazhai Koottu' (drumstick leaves curry)


       Serves perfect with boiled rice and pappads as well! 
Read More »

Monday, November 14, 2011

Godhumai Idiyappam / Whole Wheat Flour String Hoppers


Healthy breakfast always goes a longer way. The easily digestible steamed food is not only nourishing but is apt for all ages.

Here is a breakfast which you can prepare within minutes. If you do not have the time to make a side dish for this one, simply drizzle fresh melted ghee and top with sugar. It will definitely be a change to your routine cereal and fruits!

Honestly I havent tasted this ever since. Neither I have seen my mom or in laws steaming wheat flour hoppers!
I was much prompted to try this after a phone call with V's cousin lately  after her beautiful narration of how it's prepared by her ma in law! So, being my first attempt I am still unsure whether I had perfected with the outcome but still couldn't stop me from sharing with you, about just how I made it!


Yields- 10-12 small idiyappams
Serves  2

Whole wheat flour- 1 cup
Salt- 1/4 tsp
Oil - a tsp
Coconut shavings- 1/4 cup or as needed
*Water 1 cup + 2tbsp


Fry the sieved dry flour in a thick/copper bottomed kadai to ensure even heating.(No oil is added)
Keep the flame low-medium and fry continuously. Within two minutes you will see streaks of flour turning dark brown at the bottom and sides even while you stir continuously!


Minimise the heat to low and continue for 8-10 minutes. Take care not to burn the flour!
I fried for 9 minutes, continuously and carried on for another minute in the heat of the pan.


Transfer the flour to a bowl and heat water with salt added. The water should be just hot and should not bubble as you see here.


*For 1 cup of flour, start with 3/4 cup and add the remaining water carefully, little by little. Stir in oil in between.
I needed 1 cup + 2 tbsps of water to make the dough.The amount of water depends upon the quality of the wheat flour as well. Prepare a soft warm dough using a ladle or a wooden stick.


Shape the dough into small cylinders with your fist before to ease into the presser.


Squeeze out the warm dough on your idiyappam plates over the sprinkled fresh coconut gratings.


Place over the steamer, on fire, and it's ready to be steamed.


Steam for about 10 minutes or until done.


Topple carefully inverting the plate with cooked idiyappams over another one.


Wheat Idiyappams go well with coconut based curries like Vegetable Ishtoo / Stew ,  Mutton Stew or Vegetable Khurma. I served with an onion based gravy which was fine too.


I loved it topped with melted ghee and lots of sugar :)


So, never bother if you don't have a side dish in hand..


                    The warm melted ghee and sugar combo is simply flavorful and delicious!

Note

Whole wheat flour with comparatively less gluten content makes the best idiyappams. I used Aashirvaad atta.

Never use boiling water for preparing the dough. Boiled water cooks the flour and makes it difficult to squeeze. The hoppers get  too soft and soggy too!
Fry the flour well. I fried for 9 minutes continuously and continued for another minute in the heat of the pan and am thinking of frying for 9-11 minutes over controlled flame and a minute without flame, the next time I try, making a total of 12 minutes frying time.

Wheat flour Idiyappam needs a little more time than the Rice Idiyappam to get cooked.So, give at least 10 -12 minutes cooking time.

Warmer the dough easier the squeeze. A smart cook can always preserve the heat of the dough, kept as a ball, in a hot box / casserole until the next batch is squeezed. Or one can squeeze out on a couple or more plates and steam the batches at the same time, thus acting fast.

Another method of preparation - Wheat flour is steamed for 20 mins,cooled and sieved, made into a dough and squeezed out. I haven't tried this method though!
Read More »

Saturday, November 12, 2011

Picture of the Week ~ Wedding


 The family gathered for yet another wedding which happened last week.
  Among the professionals clicking away to glory I managed to click a few candid shots which was circulated  and much appreciated by the family members.

Thought of sharing the album cover with you...

Read More »

Wednesday, November 9, 2011

Self Saucing Coffee and Chocolate Pudding


And here's another month of sweet punch with an interesting combination of coffee and cocoa baked into a fudgy treat!
Being in my hometown for a week, I never had an idea to bake this until this morning. But seeing amma's fridge stocked with cocoa, brown sugar (Swapna, I should thank you for this :)) fresh butter, walnuts and eggs I made up my mind to bake it right away.

Coffee and Chocolate Pudding
Recipe Source
Justine Kiggen, Peta Suzanne Oshry


1 cup flour
2 tsp baking powder
2 tsp cocoa
Pinch salt
½ cup brown sugar
2 tbsp butter, melted
½ cup milk
1 egg, beaten
50g hazelnuts, chopped (I used walnuts)

For the topping

½ cup brown sugar
3 tbsp cocoa
1 cup strong black coffee

1 Preheat oven to 180°C.
2 Sift together dry ingredients.
3 Stir through butter, milk, egg and hazelnuts until well combined.
4 Spoon batter into 4 ramekins.
5 Sprinkle over brown sugar and cocoa then pour over coffee but do not stir.
6 Bake for 20 minutes.
7 Dust with cocoa powder or cinnamon and sugar; serve with vanilla ice cream.( I avoided the dusting part and the ice cream and served it as it is)


I halved the original recipe and baked in 2 coffee cups.

I didn't bring along my camera this time and used my sister's Nikon Coolpix S2500 for these pictures which I felt quite handy and light. Though it cannot shoot as good the dslr, I am seriously thinking of using it for food pictures whenever home ;).

Read More »
Related Posts Plugin for WordPress, Blogger...