Showing posts with label Cakes. Show all posts

Friday, November 25, 2016

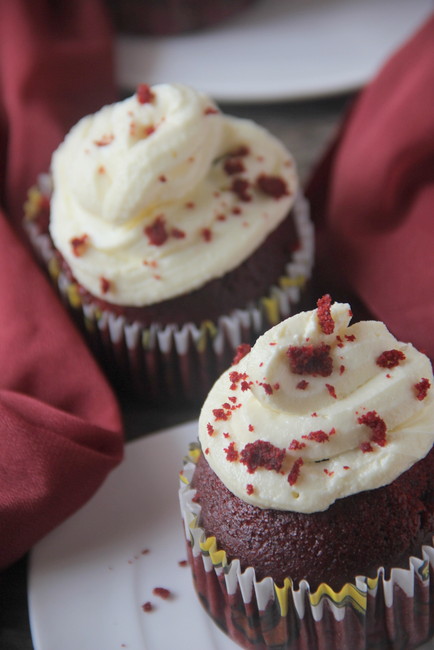
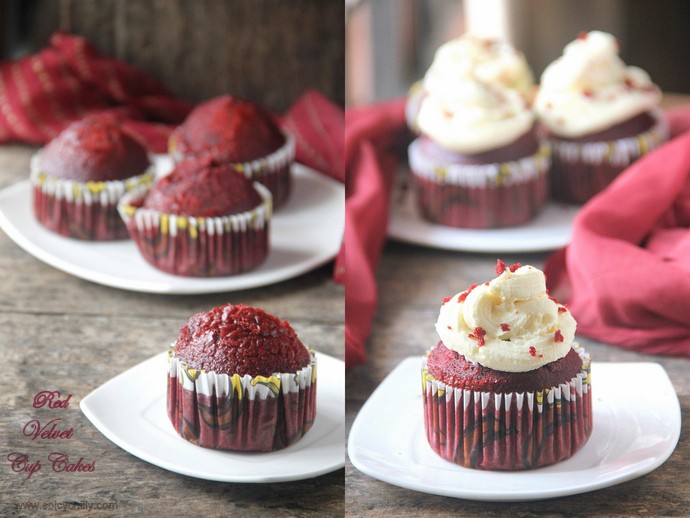
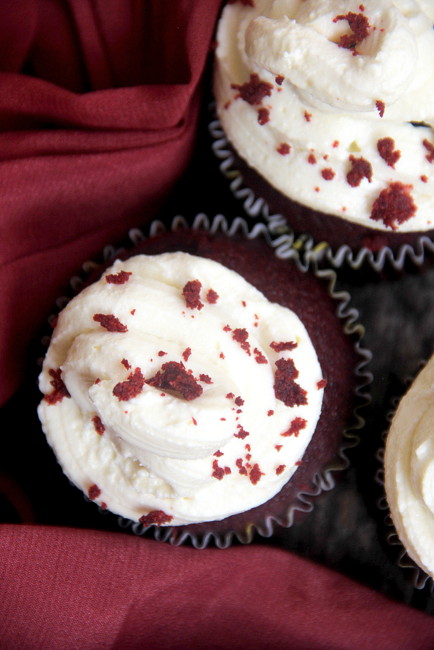
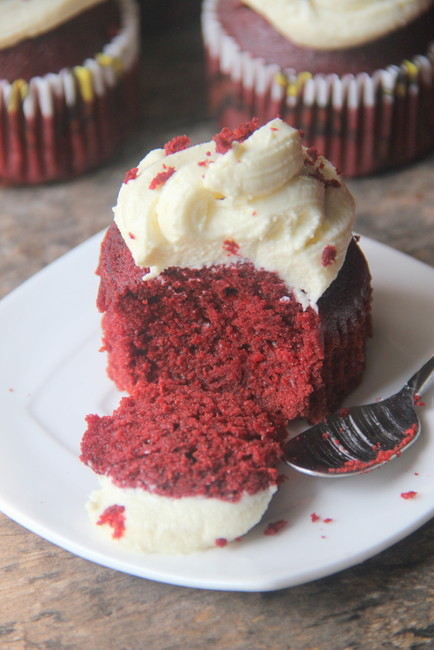
Red Velvet Cup Cakes with Cream Cheese Frosting


When, my bestie's kid, Nikita gave me the very first suggestion of Red Velvet Cake, I was apprehensive. For me they have to be topped/paired up with cream cheese. Nikita and me live in a town where there's no availability of these exotic products and finally I made up my mind to take it as a challenge and go for it! With Christmas just a month ahead, I was prompted to make these red cuties in cups, for a safer side. I am immensely happy with the final result and yeah will be making cakes instead of cuppies next :)

What is basically a Red Velvet Cake?
American in origin, red velvet cake is similar to chocolate cake with either a red, bright red or red-brown color. While it is similar to chocolate cake, a baking aficionado will be able to spot the difference. The primary differences are in the use of buttermilk instead of milk and less cocoa powder. The acids in buttermilk react with the antacid of baking soda to form gas bubbles, which creates a non-yeast leavening. This helps create the fluffy and moist texture that has made Red Velvet popular. Red Velvet cake is traditionally prepared as a layer cake topped with cream cheese or cooked roux icing.
The addition of acidic vinegar and buttermilk tends to better reveal the red anthocyanin in cocoa and keeps the cake moist, light, and fluffy. This natural tinting may have been the source for the name "red velvet!"
Common ingredients include buttermilk, vinegar, butter or oil, and flour for the cake, beetroot or red food coloring for the color. info from wiki.
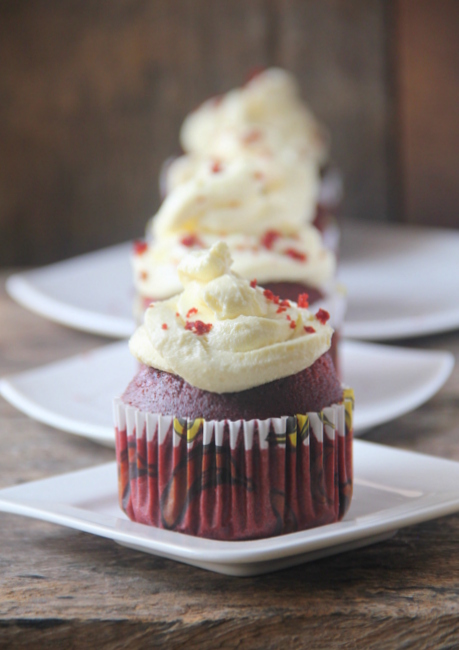


Red Velvet Cup Cakes with Cream Cheese Frosting

Source
Total Time:40 min
Prep:20 min
Cook:20 min
Yield:24 frosted cupcakes


Ingredients

2 1/2 cups all-purpose flour
1 1/2 cups sugar
1 teaspoon baking soda
1 teaspoon salt
1 teaspoon cocoa powder
1 1/2 cups vegetable oil
1 cup buttermilk, room temperature
2 large eggs, room temperature
2 tablespoons red food coloring
1 teaspoon white distilled vinegar
1 teaspoon vanilla extract

For the Cream Cheese Frosting:
1 pound cream cheese, softened ( scroll down for the homemade cream cheese recipe)
2 sticks butter, softened
1 teaspoon vanilla extract
4 cups sifted confectioners' sugar
Chopped pecans and fresh raspberries or strawberries, for garnish (or reserved cake crumbs)


To Make the Cake:
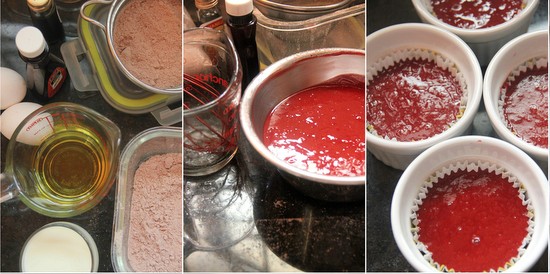

Preheat the oven to 350 degrees F. Line two (12-cup) muffin pans with cupcake papers.
In a medium mixing bowl, sift together the flour, sugar, baking soda, salt, and cocoa powder. In a large bowl gently beat together the oil, buttermilk, eggs, food coloring, vinegar, and vanilla with a handheld electric mixer. Add the sifted dry ingredients to the wet and mix until smooth and thoroughly combined.
Divide the batter evenly among the cupcake tins about 2/3 filled. Bake in oven for about 20 to 22 minutes, turning the pans once, half way through. Test the cupcakes with a toothpick for doneness. Remove from oven and cool completely before frosting.
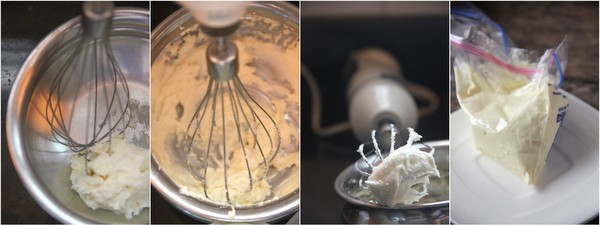


For the Cream Cheese Frosting:

In a large mixing bowl, beat the cream cheese, butter and vanilla together until smooth. Add the sugar and on low speed, beat until incorporated. Increase the speed to high and mix until very light and fluffy.
Frost the cupcakes with a butter knife or pipe it on with a big star tip.I cut 0.5cm of a corner of ziplock bag. and cut two small triangles , like this, -^-^- ,to make the star hole and piped on the cup cakes as you see.


Home-made cottage cheese to make cream cheese frosting:

I tried making the cream cheese at home as mentioned earlier. To make this, I used full fat milk (4.5% fat). I needed 1 litre of milk to make around 100 gms of cheese. Since I quartered the original recipe and baked 4 muffin sized cakes, this amount of cheese was more than enough after combining butter, sugar etc!

For 100 gms cheese

1 litre of full fat milk
1 tbsp white vinegar or 2 tbsp concentrated lemon juice
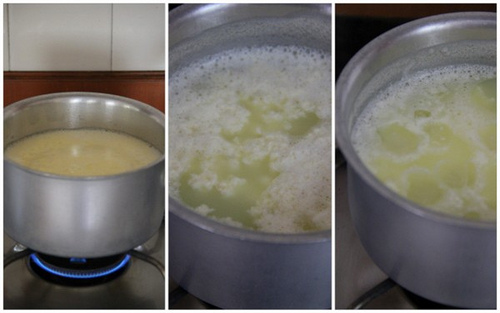

Cream Cheese
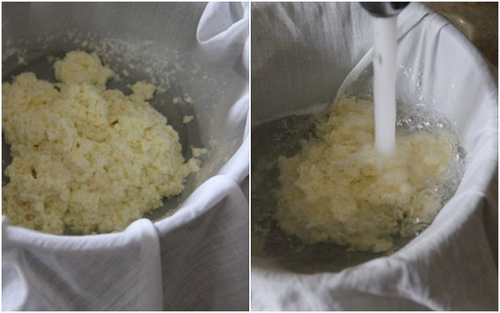
 Boil milk in a large and wide saucepan. While it starts to boil, reduce flame and let the milk simmer gently not alowing to boil over. Add vinegar/lemon juice to it. The solid part of the milk coagulates and the green whey separates. Give a gentle stir and remove the pan from heat.

Red Velvet Cup Cakes

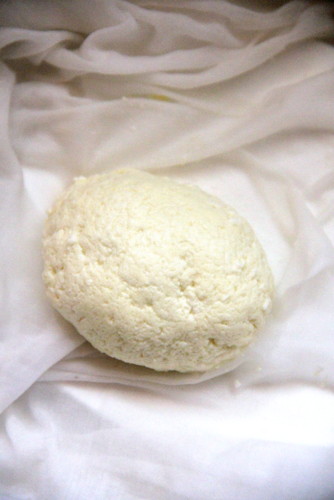
Pour it over a colander lined with cheese cloth. After the whey is filtered out, wash the cheese in running water to remove the acid. Tie the cloth and hang it to let drip the liquid part for 30 minutes. Open to see a ball of fresh cheese. I whipped butter, sugar and flavoured this cheese to make the Cream cheese frosting (scroll up)




Read More »

Saturday, August 3, 2013

Tea Cake


IMG_2325


Hugs to you, Eashwari..
This is already my personal favourite post of the year!
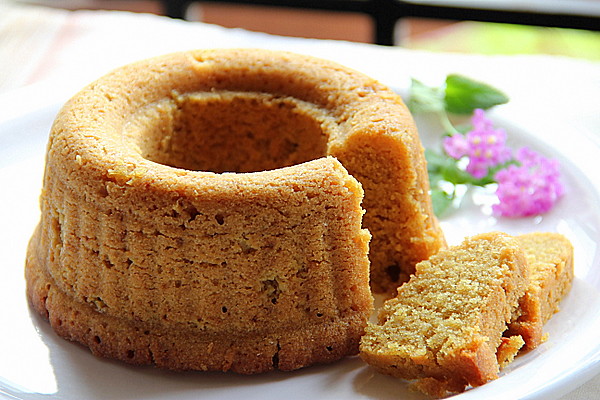
I love to name it Tea Cake. That's how amma calls it. She still has the flair to make the perfect tea cakes, airy and light with no luxury of eggbeaters or new age ovens those days. She used the (vintage!) glass horlicks mixer inherited from her ma-in-law; my granma, for beating egg whites to stiff peaks and a round oven that didn't have a timer or even a temperature control for baking her cake ever since I can remember or since past a few decades.
Neverthelessly my tea cakes turn out denser every time I bake in spite of modern beaters, whisks and ovens. I still am unsure where I fail to make this basic pound cake while I boast about baking ventures!

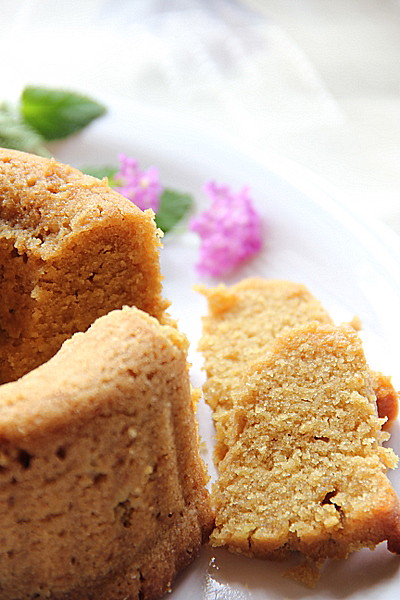
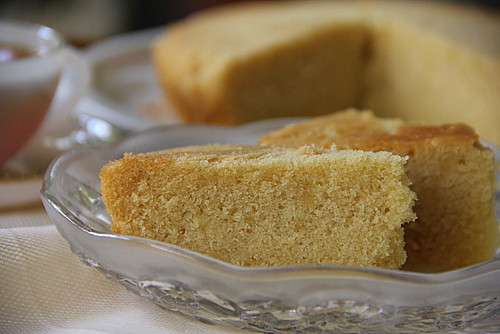
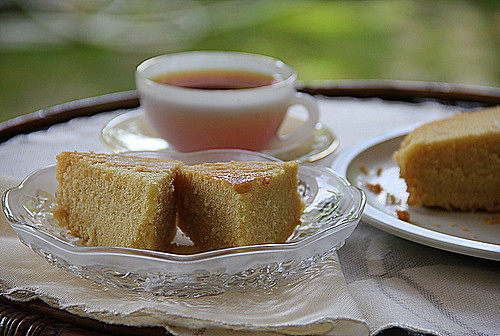
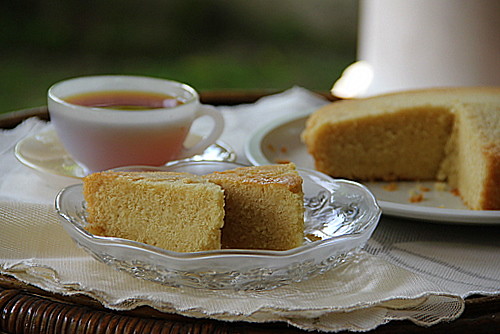
Recently I had a surprise box of freshly baked, warm pieces of simple tea cake,  neatly squared out, which had the loveliest texture, flavour and taste which I could relate to the best 'yellow vanilla pound cakes' savoured at many parts world wide and most importantly the cake amma makes!

The source point was Eashwari,  who is my friend for almost the past two decades; whom I had not recognised as a great baker! She runs her own pre-school and had had her hands  always full. On another note I get inspired the way she maintains her cute little home. In an artful way with all the simple contemporary, traditional stuff hanging here and there or  placed neatly on shelves and corners which merges with every single other piece around.

I rang her up, while the cake sent over by her, melted in my mouth bursting all its goodness. She explained the recipe which seemed to be like a simple pound cake made with a 40 year old egg beater and a 30 year old oven! Ah, so there lies the secret! The vintage appliances again!!

We fixed up a time convenient for both of us and over to her neat and systematic  kitchen...

IMG_2310

IMG_2320

Read More »

Monday, May 21, 2012

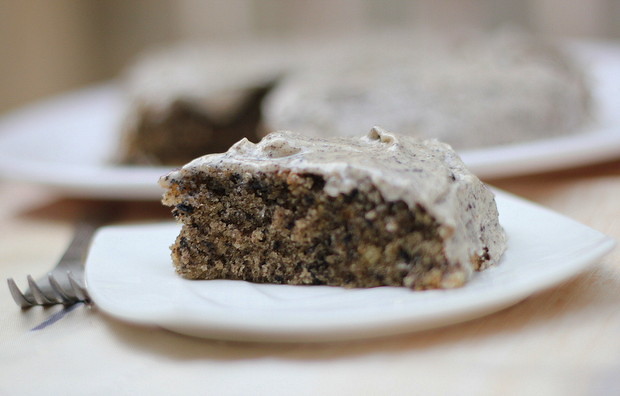
Frosted Oreo Cookie Cake


 My sudden cravings for fudgy chocolate cakes are giving way to Oreo cookies these days.It happens all of a sudden, I get dressed, walk steadily, barge in the nearest super market which is 8 mins away from home, grab a pack and munch on the way! Weird, but let me be honest about it.

Read More »

Tuesday, May 1, 2012

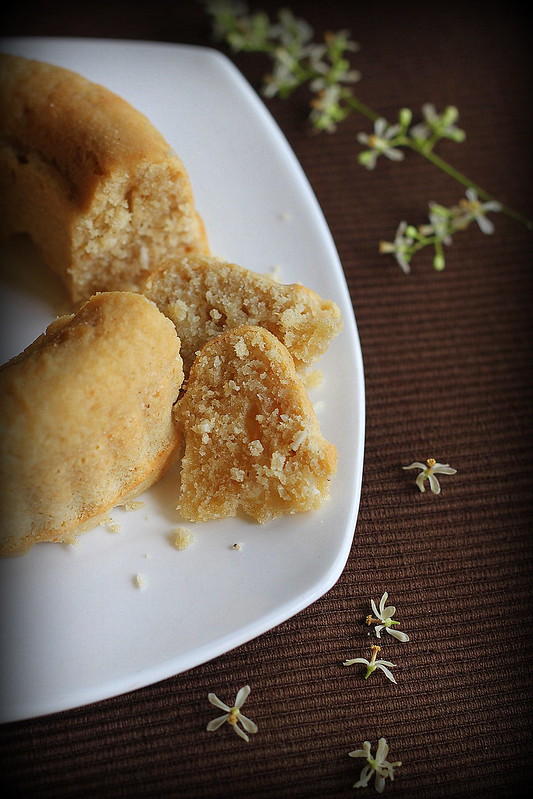
Whole wheat Coconut and Cashew cake baked with Coconut Oil


Ihappened to see this interesting combo ultimately made into perfect moist muffins in Dershana's space and I found myself whipping up the cake the very same day!
Dershana, a charming girl, hails from my native town, grew up in the same little community and completed her graduation from the same old college I had been, is my classmate Archana's cousin as well.
This interestingly combined cake batter, she admits, is her invention instilled by the demands of her cute little school going kid! So, obviously this is a kid friendly recipe.
The flavour of  fresh coconut, wheat, coconut oil and cardamom is a delicious melt in your mouth combo complimented by the richness of the cashews!
Read More »

Wednesday, November 9, 2011

Self Saucing Coffee and Chocolate Pudding


And here's another month of sweet punch with an interesting combination of coffee and cocoa baked into a fudgy treat!
Being in my hometown for a week, I never had an idea to bake this until this morning. But seeing amma's fridge stocked with cocoa, brown sugar (Swapna, I should thank you for this :)) fresh butter, walnuts and eggs I made up my mind to bake it right away.

Coffee and Chocolate Pudding
Recipe Source
Justine Kiggen, Peta Suzanne Oshry


1 cup flour
2 tsp baking powder
2 tsp cocoa
Pinch salt
½ cup brown sugar
2 tbsp butter, melted
½ cup milk
1 egg, beaten
50g hazelnuts, chopped (I used walnuts)

For the topping

½ cup brown sugar
3 tbsp cocoa
1 cup strong black coffee

1 Preheat oven to 180°C.
2 Sift together dry ingredients.
3 Stir through butter, milk, egg and hazelnuts until well combined.
4 Spoon batter into 4 ramekins.
5 Sprinkle over brown sugar and cocoa then pour over coffee but do not stir.
6 Bake for 20 minutes.
7 Dust with cocoa powder or cinnamon and sugar; serve with vanilla ice cream.( I avoided the dusting part and the ice cream and served it as it is)


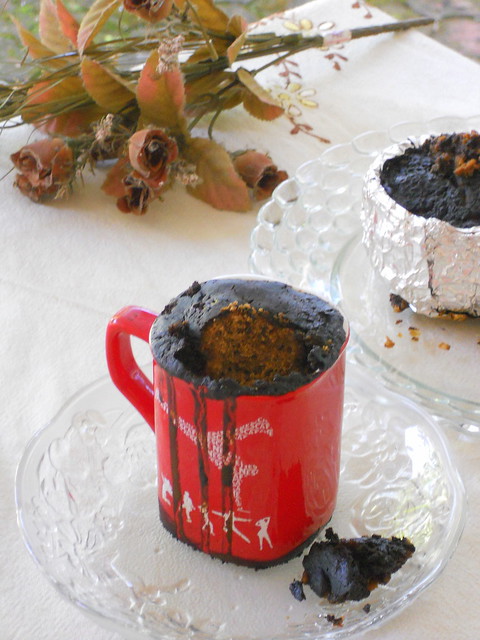
I halved the original recipe and baked in 2 coffee cups.

I didn't bring along my camera this time and used my sister's Nikon Coolpix S2500 for these pictures which I felt quite handy and light. Though it cannot shoot as good the dslr, I am seriously thinking of using it for food pictures whenever home ;).

Read More »

Monday, October 17, 2011

Eggless Wheat Cake (with Jaggery)


She looked sweet!
When I happened to see her first on the 'food fest' grounds a couple of months back, this girl was busy presenting her goodies on the plate. I watched her with a smile from some distance which she couldn't have possibly realised! Herself and me were among the 50 competitors who contested for the cooking contest arranged by the 'food fest' team.The ingredient for the day was 'wheat flour' (with which we were supposed to make something sweet!) Among the crowd of competitors she invariably stood out which would have probably caught my eyes!

I saw her working in a hurried way as she had to work with the toppings making it look perfect before we were asked to place the trays on the table for judgement. Since I was through with my wheat flour almond cookies, I walked up and offered help to this sweet girl who was already with her finishing touches.
I told her I would mind her handbags and things while she presents her plate on the table and she smiled and thanked me while hurrying off.

While we were waiting for the judge to arrive, we had a chat. She introduced herself as Namrata and talked about her native place. We talked as if we knew for ages.
After the judgement got over we exchanged what we made. She happily shared her wheat flour cake and chocolate bombs while I shared my cookies.

The cake as well as the chocolate bombs were simply irresistible!
I absolutely loved the cake which was moist and light with a different taste and much "Indianish".She said it was eggless and had jaggery instead of sugar!
I had always thought of a cake sweetened with jaggery and here I am with a perfect recipe!
I got excited and couldn't wait to grab the recipe from her!


Eggless Wheat Cake

Ingredients:

Wheat flour - 200gms
Jaggery - 1 cup (grated and loosely filled)
Milk - 1 cup (plus a tablespoon if you feel the batter too thick before transferring to the pan)
Oil - 1/2 cup ( sunflower or rice bran oil)
Soda - 1/2 teaspoon
Baking powder - 1/2 teaspoon
Vanilla - 1/2 tsp

Method:

Sieve flour, soda and  baking powder twice or thrice to combine or whisk in a bowl. Add jaggery and combine gently. Now it's the turn for the milk and the vanilla and lastly the oil. Use a spatula and combine gently.
Bake in a preheated oven for 25-30 minutes with temperature set to 180 deg C or until done while the skewer inserted comes out clean.


-->Namrata had used chocolate syrup and praline for topping the cake which went very well. If you wish to do the same, decrease the amount of jaggery to 3/4 cup.

-->Substitute milk with soy milk for a vegan version.


The result was announced later at night and for our pleasantest surprises we bagged the second and third prizes for the cookies and the choc bombs! :) :)

Read More »

Thursday, July 7, 2011

The Perfect Pound Cake


I simply loved the Perfect Pound Cake recipe,  the 'Sweet Punchers' had announced for the month.
The cake I started to bake as a teenager and that I make until now; probably the one I'd whipped up the most number of times...the simple vanilla or the tea cake I had learnt from my mom which calls for equal weights of the 4 major ingredients, flour, butter, eggs and sugar..

The measurements and method for the pound cake is slightly different, though...


and Hurray! WE baked the lovely, yummy, golden, cake, together to make it all the more special and sweeter! :)


Perfect Pound Cake
(Adapted from the The Cake Bible)

Ingredients


3 tablespoons Milk
3 large Eggs

1 ½ teaspoons vanilla
1 ½ cups sifted cake flour
¾ cup sugar
¾ teaspoon baking powder
¼ teaspoon salt
13 Tablespoons unsalted butter, softened [184 gms]


Directions
Preheat your oven to 350 F. Butter an 8 inch by 4 by 2.5 inch loaf pan, or any six cup loaf or fluted tube pan.
Lightly whisk together milk, eggs and vanilla in a medium bowl.
Place dry ingredients in a large bowl and mix on low speed for 30 seconds, until blended. Add the butter and half the egg mixture, and mix until dry ingredients are moistened. On medium speed, beat for one minute. This will aerate and develop the cake’s structure. Scrape down sides.

Add the remaining egg mixture in two batches, beating for 20 seconds between each addition. Scrape down sides.
Pour batter into prepared pan. Smooth surface with a spatula. Bake for 55-65 minutes (35-45 minutes if baking in a fluted tube pan), until a wooden toothpick inserted into the center comes out clean. Let cake cool on a rack in the pan for 10 minuets before inverting onto a greased wire rack. If using a loaf pan, flip the cake over so the top is up.
For making Cake flour at home - Take one cup of all purpose flour and remove 2 tbsp from it. Replace the 2 tbsp flour with cornflour and sift together 2-3 times.Cake flour is ready to use.


 I had badly wanted to bake the cake in loaf pans and cut into squares complaining about making in amma's round cake pan, but sis was more towards the quality of the cake rather than the shape :)


The power was going on and off during the beating part and the frothy dough had to wait for a long time to get into the hot oven while the power retrieved after 2 long hours!
Fortunately it didn't affect the texture of the cake!
 The soft, light and moist cake disappeared within 10 minutes after the photography session by the sisters, much before tea time :)

Read More »

Wednesday, June 1, 2011

Sticky Date Toffee Cake with Hot Toffee Sauce


With those busy days getting back, I am literally struggling to click a picture of something I cook, edit, type and blog!As like any active enthusiastic blogger, the drop of 'hits' terrifies me to an extend and urges to 'blog something at least from the drafts if you hold'.

I had badly wanted to bake this cake ever since Sis posted and got me a pack of brown sugar(since I don't get it in my town, bah!) during her following visit and urged me to make! Being an ardent 'date hater' I had second thoughts baking this, fearing the flavour of this dry fruit and when sis assured about the cake surprisingly not having that dominating flavour of dates, I made up my mind to lay my hands on it!

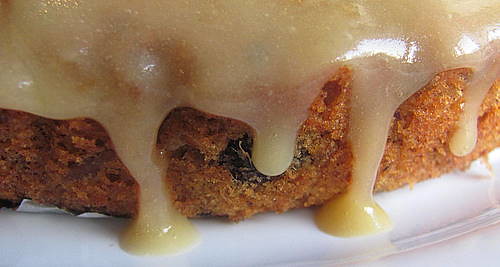
Alas! the cake tasted much better than I expected with the dominating flavour of orange and vanilla on the other hand and the invigorating taste of the hot toffee sauce making it all the more appealing, hiding the mild flavour of dates!

She has the step by step version of the recipe adapted from, A Passion for Baking by Marcy Goldman and all you have to do is hop on to her space to know how to bake this yummy cake!

Take my word, if you like those fruity Christmas cakes, you will seriously fall in love with this one!

Read More »

Tuesday, March 1, 2011

Devil's Food Cake for the Chocoholics!


It was half past midnight. V and me were getting back home chitchatting happily about the eventful Loyolites' meet. Suddenly I came across a pretty looking box sitting at the back seat of my car.I reached out for my mobile, searched the name Shobhna and queried, "hey, is this box yours? shall I just come across and give it back to you?"

"Don't do it Bharathy, it's for you. Open and enjoy," came the reply.

"I thought she left it behind while getting dropped" I explained to my better half.

Shobhna, one of my dearest pals among V's friends' wives, had come down with Sudhakar, her lively n cheerful hubby for the Loyolites' meet from Kodai.

Back home, I couldn't wait to open the cute box.
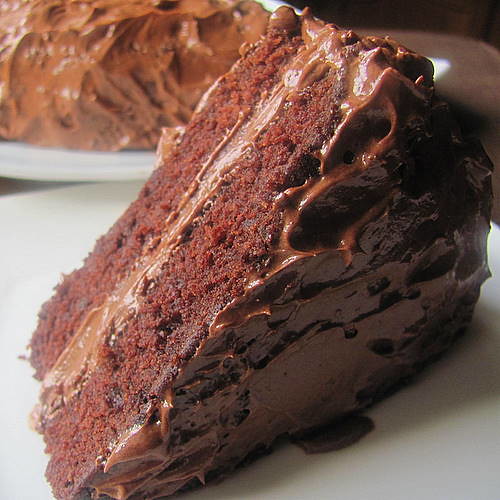
Yaaoo!! The Rich Moist Devil's Own Chocolate Cake!!
I squealed in delight! Believe me or not, I found licking my fingers clean after finishing half of it within a minute with a heavy burp, that too after the grand buffet dinner at the college meet.
It was the yummilicious Devil's cake I'd ever had!

I called up Shobhana the next day for the recipe which she explained. The ingredients and the method sounded almost exactly like Nigella's Granma's Devil's Food Cake, except for the slight difference in measurements, addition of coffee powder and the frosting.

I baked the cake thrice ever since and it came out perfectly delicious every time I did!

Try it if you are a chocoholic; you will never fail and ultimately will be baking it again and again!


Devil's Chocolate Cake to serve 6 regular people or 3 chocoholics ;)

Remember, you need 11 major ingredients to make the cake.

All purpose flour- 1 1/2 cups
Granulated sugar- 1 - 1 1/4 cup
Butter, softened- 1/2 cup (you may also use 1/4 cup butter + 1/4 cup oil)
Eggs- 2
Salt- a pinch
Baking powder- 1/4 tsp
Baking soda- 1 tsp
Vanilla essence- 1 tsp
Boiling water- 1 cup
Unsweetened cocoa powder- 1/2 cup ( I used Cadbury's)
Coffee powder- 1/2 tsp 

1. Boil a cup of water in a wide saucepan. Switch off the stove and dissolve coffee and cocoa powders well without any lumps. Keep aside to cool to room temperature.

2. Powder sugar. Sift the dry ingredients 3-4 times. (ie, flour + salt+ baking soda+ baking powder). Keep aside.

3. Position a rack in centre of the oven and pre-heat to 350 F/175 C. Grease and flour, two 8 inch cake pans.

4. In another wide n large bowl, beat butter until fluffy using an electric mixer and gradually add the powdered sugar. Beat in the eggs, one at a time; add the vanilla and beat again until light for a minute or two. Fold in the dry ingredients alternating with the cocoa mixture, beginning and ending with the dry ingredients.

5. Divide batter between the prepared pans, smoothing the tops. Bake for 25-30 minutes, until the tops spring back when lightly touched and a skewer inserted in the centre comes out with just a few crumbs clinging to it ( read it again, and it's not like the usual cake test where the skewer has to come out neat n clean)

6. Do not over bake or the cakes will become dry and will lose that 'touch' of the Devil ;)

7. Cool the pans on a wire rack.Run a knife around the edges to loosen from the pans and turn layers out on the rack, placing one upside down and the other right side up.


For the Easy Chocolate Frosting: (makes 400 gms)

Butter, softened- 200 gms
Confectioners sugar- 150 gms
Unsweetened cocoa powder- 3 tablespoons
Vanilla- 1/2 tsp

Cream butter and sift in sugar and cocoa powder. Add vanilla and mix well until soft and creamy. You may add 3-4 tsps of milk little by little if you find the frosting too thick. Be careful or it may turn out to be runny.

* I never measure when it comes to frosting and the measurements above are approximate. I start with 100 gms/ half cup of butter, add 1/4-1/2 cup of sugar, 2 tbsps cocoa and proceed doing taste tests in between increasing the quantity, slowly. I avoid the addition of vanilla since contented with the 'chocolatey home made butter' flavored frosting.


To Frost the Cake:

1. Brush any loose crumbs from the layers and place one upside down on a serving plate. Spread with some of the frosting. Centre the remaining layer, right side up over the top.

2. Use remaining frosting to coat top and sides making decorative swirls around sides and over the top.

3. Chill to set frosting but return to room temperature before serving.


Read More »

Thursday, October 7, 2010

Molten Chocolate Lava Cakes!


I happened to read somewhere that chocolate lava cake was the result of a major culinary disaster; the dessert meant to be individual chocolate cakes which didn't get cooked well resulting in a soft runny chocolaty centre. The resulting "uncooked centred" cake was duly favourited by the baker as well his guests!

Obviously being in my should-try-once list I was excited when Divya announced the recipe for October's sweet punch! The very Molten Chocolate Lava Cake!

So here we have to be careful not to cook the cake 'a little too much' thereby resulting in a 'well cooked centred' chocolate cake ;)

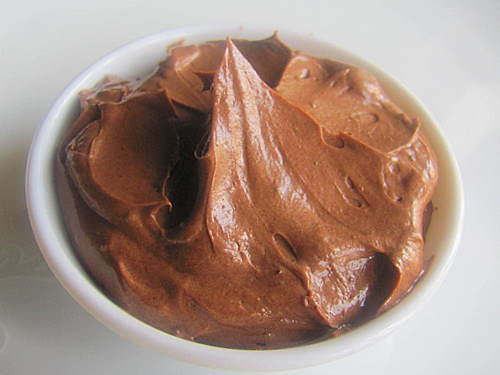
Preparing the batter was a breeze. For the very first time I enjoyed melting chocolates in my double boiler milk cooker, the baking bars brought down by my sister.
As mentioned earlier I wanted to cook them carefully to get used to the baking time and chose to bake them one by one. The first ramekin got cooked a little too much with 19 minutes, while the second one was too mushy with 15 minutes. Now I knew the time and controlled it as 17 minutes. Remember, the baking time varies according to your oven model and setting.


Only when I placed the cake on the plate did I realise that the uncooked centre was sticking at the bottom, resulting in a 'not so smooth finished top part'. Besides, the cakes failed to hold their shapes :( letting down my expectations of having those firm dark cakes with the lava flowing out, beautifully!
When the 5th ramekin hopped out hot from the oven, I couldn't wait any longer.....
..scroll down to the last but one picture, please ;)


Molten Lava Cake (yielded 5 ramekins for me)
Recipe source - showmethecurry.com

Ingredients:

Semi-Sweet Baking Chocolate – 4 oz (113g)
Butter – 4 oz (113g)
Eggs – 2
Sugar – 1/3 cup (75 g)
All-purpose Flour – 1/4 cup (40g)
Butter – for greasing ramekins

Method:

Method:

1. In a double boiler, melt chocolate.
2. In a medium mixing bowl, beat Eggs and Sugar until light and fluffy.
3. Once chocolate is melted, remove pan from heat and add in butter. Mix until the butter melts fully.
4. Add chocolate/butter mixture into the eggs, add all-purpose flour and mix until well incorporated.
5. Butter bottom and sides of ramekins (small glass/porcelain bowls) and pour in mixture about 3/4 way full.
6. Place ramekins on a baking tray and bake at 350 degrees Fahrenheit (180 C) for 10 – 15 minutes. Shorter for gooey (molten) inside, longer for stiff inside.
7. Serve hot with vanilla ice cream.


The little 'over baked' lava cake on the farther end! The rest of them waiting to get in the oven!


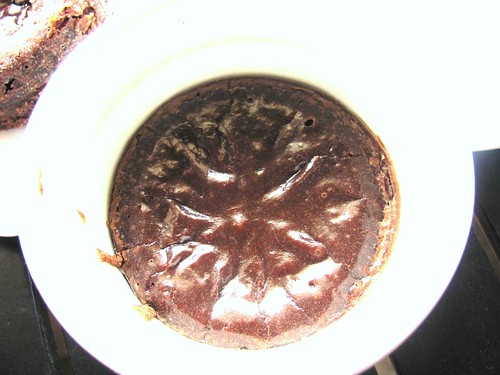
A bit over exposed :) but just to have a peep into the ramekin at that 'rightly baked' molten lava cake..


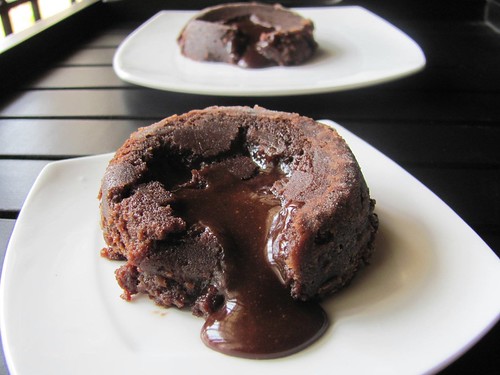
..confirmed by digging in a spoon and licking it clean ;)
Warning: Extremely Hot Product- No burning tongues please ;)


P.S - Some people find it gross to have cakes with uncooked centers[not me too Divya :)!!] and feel the lava is nothing but uncooked batter.I have a solution for that too--if you feel so too,just place a chocolate chunk in between--pour half the batter into the ramekin and place a chocolate chunk,and pour the remaining batter and cook for a longer time than mentioned.You could also place cold ganache in between,choices are numerous!!


Read More »

Monday, June 7, 2010

A Sweet Punch ~ Tiramisu Cake!!


This enters Spicy Tasty's Sizzling Summer Contest.

Updated on 8th July 2010

The Picture of the entry is being selected as one among the best 12 !! (yay)

Please Vote for me HERE, where the Tiramisu Cake is numbered 6 :)


Thanks in Advance, Friends! :)

now for the recipe...


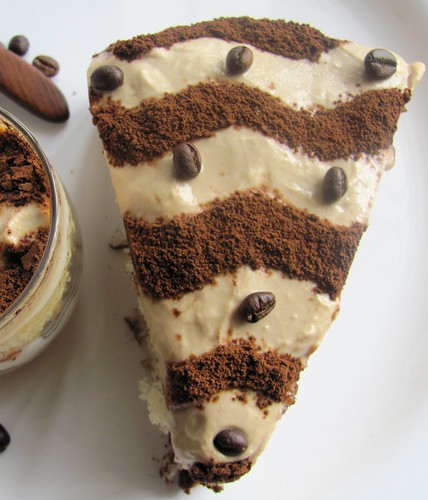
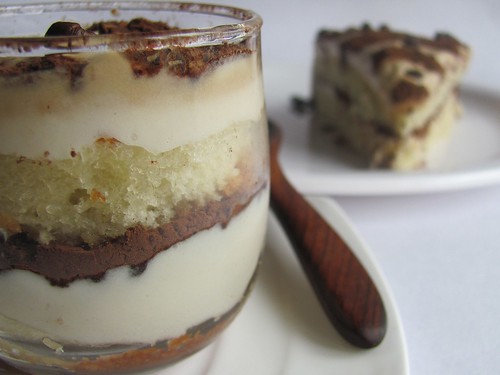
The Rich Mocha and Creamy flavoured soft moist Cake pieces with a hint of Liquor that adds a Classic Touch to the taste and this is when you have an Explosion of Chocolate on your tongue!

You Either 'Love' Tiramisu or 'Hate' it!

Obviously I fell in Love with this comforting traditional dessert served with style, in all its 'glamour', a decade ago, while fine dining with my man in one of those elite French restaurants at Champs-Elysees.

I never had in my distant most dreams that I would ever try baking this heavenly dessert, as I am for sure, Never a Daring Baker!

It took a while to overcome my fears of making mascarpone from fresh cream, as we don’t get the cheese as such in the vicinity of at least around 350 kms!

and finally I succeeded in making 6 0z of Mascarpone from Amul Fresh Cream!


About ' A Sweet Punch'!

Well, they have a passion-it's baking!

They have a mission-it's making baking simpler for everyone. So they(Ria, Maria and Divya) will be trying a variety of baked goodies one of each month of the year!

All I needed next was a gentle push when it comes to venturing new recipes esp when it comes to baking and thus I got into ‘A Sweet Punch’, when Ria had sent over the step by step recipe of the Classic Tiramisu!


Tiramisu Cake

Baking: From My Home to Yours by Dorie Greenspan

For the cake layers:

2 cups cake flour

2 teaspoons baking powder

1/8 teaspoon baking soda

1/4 teaspoon salt

1 1/4 sticks (10 tablespoons) unsalted butter, room temperature

1 cup sugar

3 large eggs

1 large egg yolk

1 1/2 teaspoons pure vanilla extract

3/4 cup buttermilk

For the espresso extract:

2 tablespoons instant espresso powder

2 tablespoons boiling water

For the espresso syrup:

1/2 cup water

1/3 cup sugar

1 tablespoon amaretto, Kahlua, or brandy

For the filling and frosting:

1 8-ounce container mascarpone (store-bought or homemade)

1/2 cup confectioners’ sugar, sifted

1 1/2 teaspoons pure vanilla extract

1 tablespoon amaretto, Kahlua, or brandy

1 cup cold heavy cream

2 1/2 ounces bittersweet or semisweet chocolate, finely chopped, or about 1/2 cup store-bought mini chocolate chips

Chocolate-covered espresso beans, for decoration (optional)

Cocoa powder, for dusting

Getting ready:

Center a rack in the oven and preheat the oven to 350 degrees F. Butter two 9×2 inch round cake pans, dust the insides with flour, tap out the excess, and line the bottoms of the pans with parchment or wax paper. Put the pans on a baking sheet.

To make the cake:


  • Sift together the cake flour, baking powder, baking soda, and salt.

  • Working with a stand mixer, preferably fitted with a paddle attachment, or with a hand mixer in a large bowl, beat the butter on medium speed until soft and creamy.

  • Add the sugar and beat for another 3 minutes. Add the eggs one by one, and then the yolk, beating for 1 minute after each addition. Beat in the vanilla; don’t be concerned if the mixture looks curdled. Reduce the mixer speed to low and add the dry ingredients alternately with the buttermilk, adding the dry ingredients in 3 additions and the milk in 2 (begin and end with the dry ingredients); scrape down the sides of the bowl as needed and mix only until the ingredients disappear into the batter. Divide the batter evenly between the two pans and smooth the tops with a rubber spatula.

  • Bake for 28 to 30 minutes, rotating the pans at the midway point. When fully baked, the cakes will be golden and springy to the touch and a thin knife inserted into the centers will come out clean. Transfer the cakes to a rack and cool for about 5 minutes, then run a knife around the sides of the cakes, unmould them, and peel off the paper liners. Invert and cool to room temperature right-side up.


To make the extract:

  • Stir the espresso powder and boiling water together in a small cup until blended. Set aside.
  • To make the syrup:
  • Stir the water and sugar together in a small saucepan and bring just to a boil. Pour the syrup into a small heatproof bowl and stir in 1 tablespoon of the espresso extract and the liqueur or brandy; set aside.

To make the filling and frosting:

Put the mascarpone, sugar, vanilla, and liqueur in a large bowl and whisk just until blended and smooth.

Working with the stand mixer with the whisk attachment or with a hand mixer, whip the heavy cream until it holds firm peaks. Switch to a rubber spatula and stir about one quarter of the whipped cream into the mascarpone. Fold in the rest of the whipped cream with a light touch.

To assemble the cake:

If the tops of the cake layers have crowned, use a long serrated knife and a gentle sawing motion to even them. Place one layer right-side up on a cardboard round or a cake plate protected with strips of wax or parchment paper. Using a pastry brush or a small spoon, soak the layer with about one third of the espresso syrup. Smooth some of the mascarpone cream over the layer – user about 1 1/4 cups – and gently press the chopped chocolate into the filling. Put the second cake layer on the counter and soak the top of it with half the remaining espresso syrup, then turn the layer over and position it, soaked side down, over the filling. Soak the top of the cake with the remaining syrup.

For the frosting, whisk 1 to 1 1/2 tablespoons of the remaining espresso extract into the remaining mascarpone filling. Taste the frosting as you go to decide how much extract you want to add. If the frosting looks as if it might be a little too soft to spread over the cake, press a piece of plastic wrap against its surface and refrigerate it for 15 minutes or so. Refrigerate the cake too.

With a long metal icing spatula, smooth the frosting around the sides of the cake and over the top. If you want to decorate the cake with chocolate-covered espresso beans, press them into the filling, making concentric circles of beans or just putting some beans in the center of the cake.

Refrigerate the cake for at least 3 hours (or for up to 1 day) before serving – the elements need time to meld.

Just before serving, dust the top of the cake with cocoa.


After notes

How “Punching” was it ?

To make Tiramisu from scratch demanded 2 days plus a day of refrigeration and thus a total of 3 whole days were required. So calculate the time you need to start with time you intend to serve the dessert.

The sponge cake came out perfectly!.soft, spongy, moist, melt in the mouth,which I’d baked on Day-1, around noon. At night, I made the Mascarpone.

Day-2 was planned for cutting and layering the cake to turn it magically into Tiramisu.

When I was layering the cheese, the room temperature was 40 deg C. Yes, the peak summer day of T.N. I had much difficulty working with it as it was turning to be a watery creamy something. Pushing the whole thing into the freezer once in every 2 minutes helped a little, but then we had a power shut down of full 4 hours at a stretch!. Soon I found myself filling and frosting the cake with my head squeezing into the freezer compartment wide open ;)..

Whew!! it was tiring, absolutely, as the grated chocolate, supposed to be layered over the cheese, was melting fast turning out to be a lump of soft something, again,giving me a shock..

I was forced to use sprinkled chocolate powder as the nearest alternative.

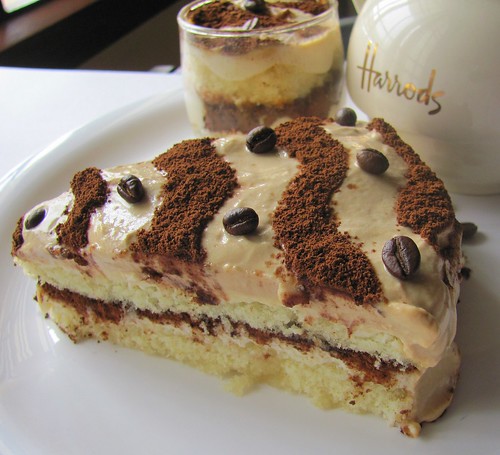
Again, the topmost layer (cream with mocha) doesn't show up much, as a layer(which I badly wanted to) in the picture as it refused to stand firm above the slice! :)


Using chocolate chips was a last option, as we dislike biting into them in soft desserts.

I substituted home made grape wine for the alcohol part.

To wrap up, I am immensely happy and satisfied with the final outcome, the Perfect Tiramisu a beginner can ever make!

Read More »

Wednesday, December 2, 2009

Praline Vanilla Sponge Gateau


Hope most of you are getting ready for Christmas; trees, gifts, carols, Christmas cake; busy chopping and soaking dry fruits in rum.,.eagerly awaiting the festival and all fun which is just around the corner! :)..

I had a fresh bowl of home made butter and cashew nuts, quite enough to ignite the baker in me to catch up with the season's spirit, sugar coated with Ria's lovely looking Gateau sitting pretty here :)!.


To be honest, I lack confidence when it comes to baking sponge cakes as I'd flawed once long back during my teen days, which ended up in a promise that I would never bake the same in my life again..;)!..

Well, Ria's Praline Vanilla Sponge Gateau broke my hard hearted promise and here's the final verdict! :)..

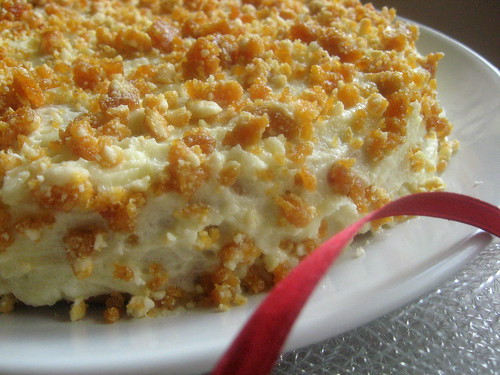
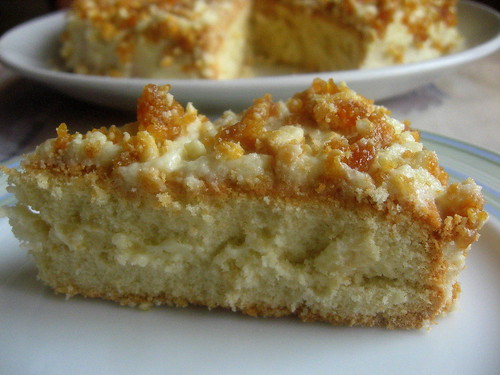
The prettiest and yummiest cake I'd ever baked so far.The Vanilla flavour of the base cake, the butter icing and the crunchy praline bits on top when bitten into, was absolutely,.... Heaven!!.


I baked the cake last Saturday, on the day of Eid, as Children were home and wilfully came forward with the "beating" part ;).

Sadly I flawed again with the sponge cake, the mistake I feel was might've happened while whipping (kids, :) who can always be easily blamed :), were fighting for their chance pushing and pulling the bowl almost all the time allotted for continuous beating while their mom who was pre heating the oven, 'carefully' set the temperature 'wrong' and baked for a longer time than it should .. ;)!.

For all the wonderful daring bakers and cake lovers here...
Believe me! This is a Keeper!... :)!..Thank You Ria!.
Read More »
Related Posts Plugin for WordPress, Blogger...