Showing posts with label Sweets. Show all posts

Wednesday, February 15, 2017

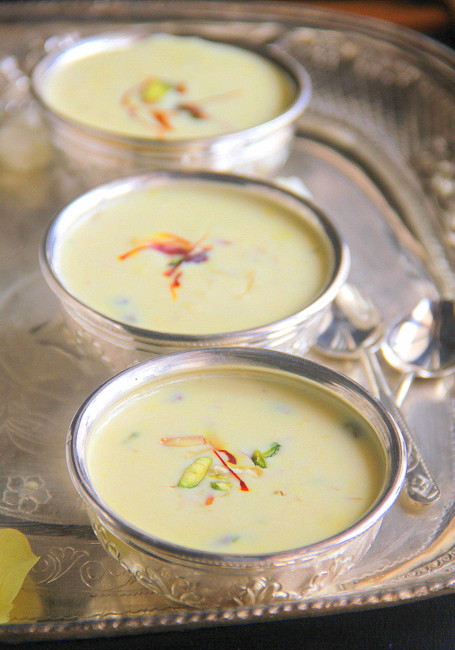
Paal Poli ~ Pooris Soaked in Sweetened n Flavored Milk!


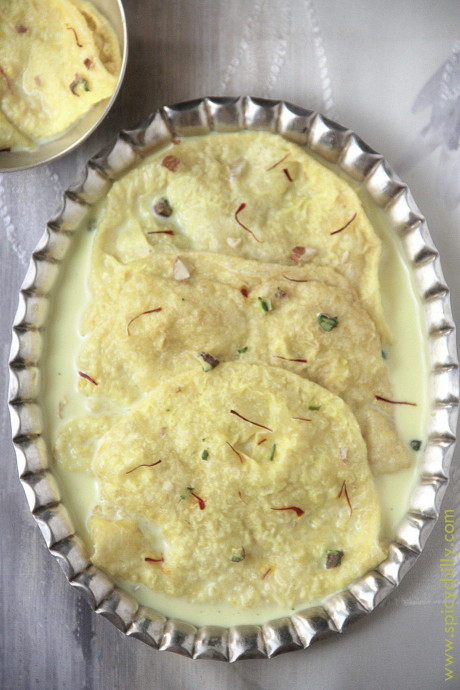
As the name says it all, Paal Poli is a  dessert made by soaking fried pooris in flavoured milk. Yes, it's just simple as it sounds! The best Paal Polis, I savoured are the ones made by my son-in law's grand ma, who resides in her beautiful ancestral home, in the neighboring village, Peruvalanallur! These cuties were what she opted to make, while throwing the feast for her grand kids. My husband and myself  couldn't make it to the village for her heartwarming lunch as the post wedding paraphernalia had  left us thoroughly exhausted. Back from the village late evening, my daughter hopped in with a lovely container in which soft paal polis were packed, with loads of love and care. I could feel that when the first bite hit my taste buds, and ah! I found myself devouring the heavenly morsels!!
I called her up, the next minute and typed the recipe, right away in my blogger. The simplicity of the dish surprised me that I had to suppress my urge to rush into the kitchen, knead the dough, fry the pooris and soak them, immediately!!

It had been been several months since then and had wanted to prepare the sweet as the first recipe for the year, but then got postponed. Better late than never!

Peruvalanallur athai's Paal poli, recreated, with lots and lots of love... :)


Paal Poli 

Makes 8 large or 10 medium or 13 small sized pooris
Serves 4-6

 Prep time: 20 mins
 Standing time; dough: 1-2 hours
 Soaking time of the finished dessert: at least an hour to *one day

Ingredients:

100 gms all Purpose Flour / Maida -  ( this is between 3/4 to 1 cup)
2 tbsps rava (sooji/semolina) ( not roasted)
A pinch of yellow food colour
50-60 ml luke warm water

Oil- for deep frying

600 ml milk (I used milk with 3% fat content)
1/4 cup heaped white sugar
A fat pinch saffron

A few almonds and pistachios, chopped, to garnish


Method:

Paal Poli

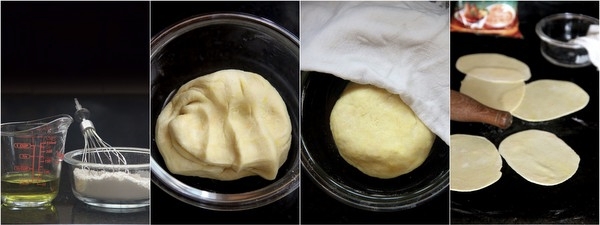
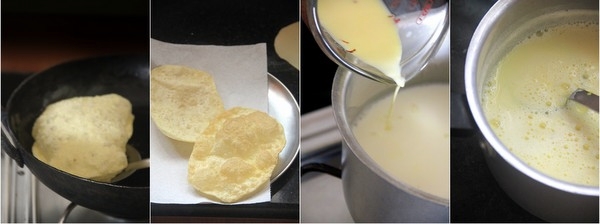
Whisk together maida and rava in a bowl. Measure 60 ml of water in a microwavable jug and warm a bit. Just to make it luke warm. Dissolve a pinch of edible yellow food colour. Add to the flour mix little by little and knead well until you get a soft pliable dough like poori dough. I needed exactly 55 ml of water. Make into into a ball and cover with a wet kitchen towel or  cling film and rest it for 2 hours. We do not want the ball to get dried up in the outsides. So make sure you cover it to retain the moisture. After a couple of hours, knead again and roll equal sized balls ( 8 or 10 or 13 acc to your size preference) I divided into 8 balls to make larger pooris. Also I had spread them into slightly elongated ones than perfect rounds, since as to get larger semicircles as we fold them into half for serving.


Paal Poli

Heat oil for frying the pooris. Fry one at a time. Let them the soft and not crisp. Drain in paper towels so as to absorb excess oil. Keep them aside.
Soak saffron strands in 1/4 cup hot milk for 10 minutes. Heat the remaining milk in a sauce pan. Add sugar followed by the saffron milk and bring to a boil. Simmer for a minute in low flame and switch off. You don't have to thicken the milk.


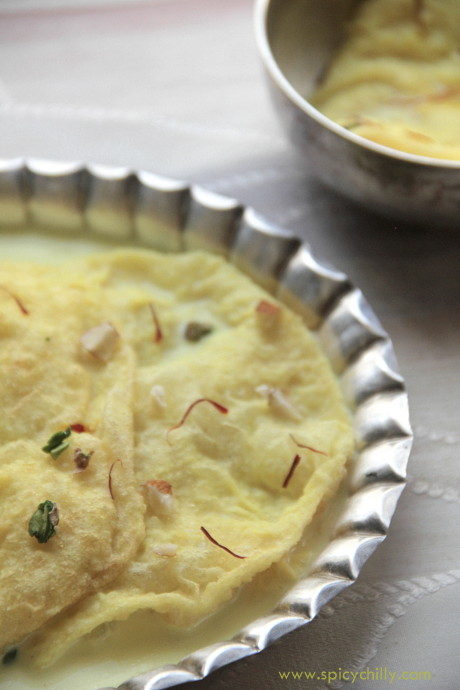
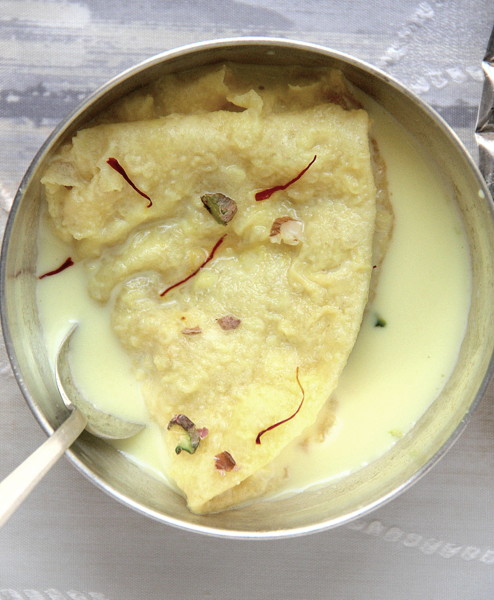
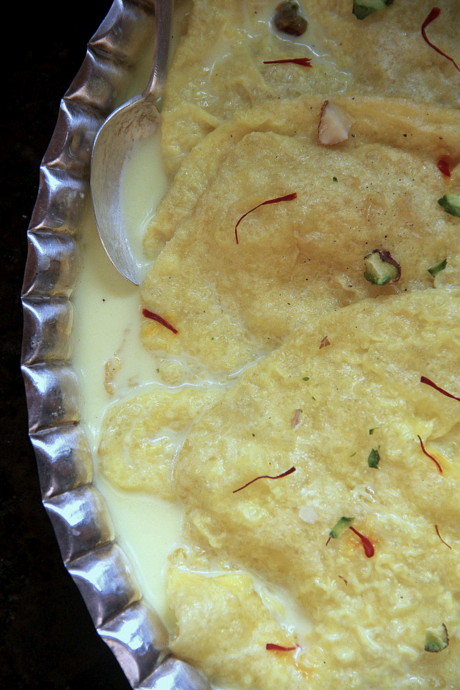
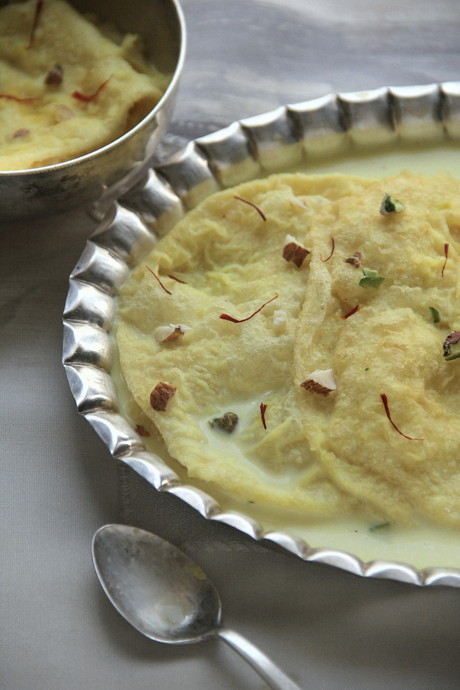
Arrange the pooris in a tray, half folded and pour the hot milk over them generally so as to soak them. after an hour you may need to add more, as they absorb the milk. Whole pooris soaked in milk as such weren't looking pretty in pictures. So had to revise the garnish idea to make the dessert prettier. Thanks to Raks, my lovely buddy  :))) for the pretty looking garnish idea :).


They have to get soaked at least for 2 hours before serving. *You can prepare Paal polis,
 soak them up the previous day and refrigerate, for your guests. Thus, your dessert is done, hours ahead!  Oh yeah! I love them chilled :)

 Garnish with chopped nuts (microwave for a minute and toss). Sprinkle a few strands of saffron before you serve.
Sure to receive compliments!


Read More »

Tuesday, November 15, 2016

Madakku san ~ The Coconut filled Pancakes of Kerala!


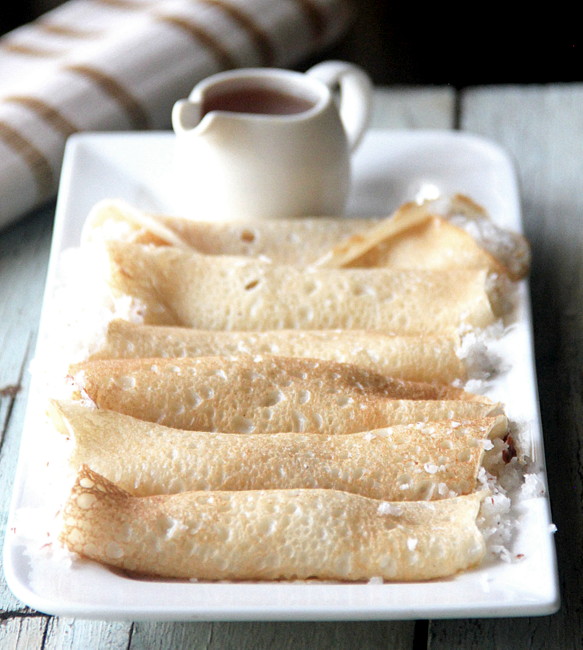
These delectable coconut crepes evoke fond memories of my teen years back in my home town, Kottayam! Madakku san was a regular 'after the school tea time snack', for children back home at 4 or 5 in the evening in Christian households. Our neighbour Kunjumol aunty used to make the best madakku san ever, that the taste still lingers in my taste buds! I believe the delicacy hasn't yet disappeared from the tables of Syrian Christian homes, while I wish to recreate the dish after decades, here in my space.

Central Kerala is one of the places in South India, highly inflluenzed by the  English culture during the foreign rule which has thrown its impact over the cuisine. A major part of the Central Kerala Christian menu is at least a fusion of the Anglo-Malayalee food preferences.
Madakku san dish is closely related to the Westernised pancakes, predominantly the batter part combined with the addition of fresh coconut, making it the fusion combo :). It  has the name, Mutta Kuzhalappam , meaning rolled egg pan cakes, as well!

Down to the recipe....


Madakku san
 Serves a family of 4
 Prep time- 5 minutes
 Cooking and assembly- 25 minutes

Get ready with:

 1 1/2 cups Maida or All purpose flour
 1 egg
 2 tbsps sugar
 3 fat pinches of table salt
 *1/2 cup milk
 *1 - 1 1/2cups Water


 For the filling:

 2 cups loosely filled freshly grated coconut
 Half of 1/4 tsp cardamom powder
 4 tsps sugar


Method:


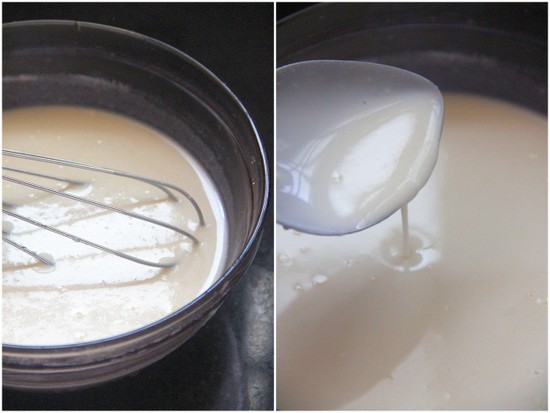
Beat the egg with a whisk in a bowl. Add flour, milk, water, salt and sugar to it and blend well to make it a thin runny batter. for 1.5 cups flour, you may need around 2 cups of liquid (milk and water combined). Probably you can add the milk first and carry on with a careful addition of water until to make the batter of the right consistency.


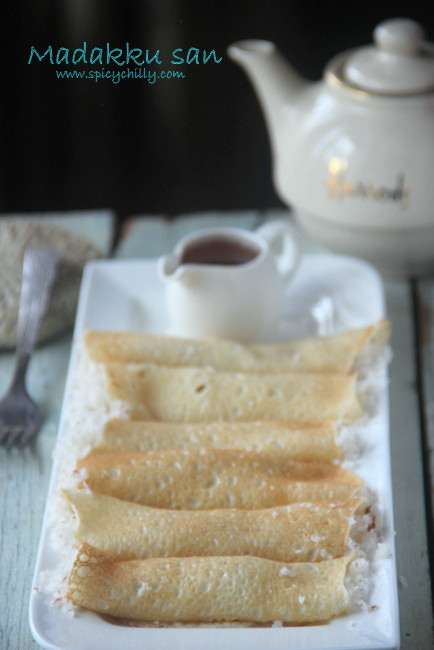
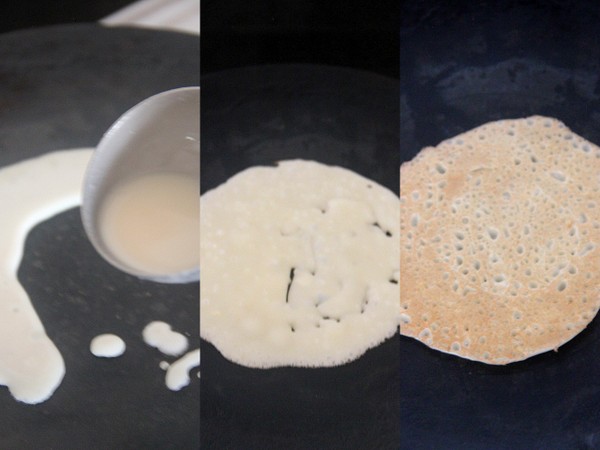
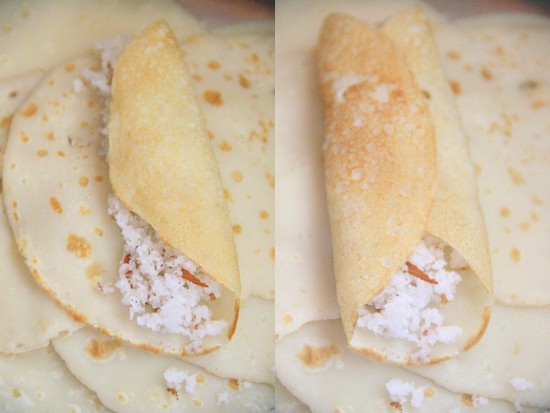
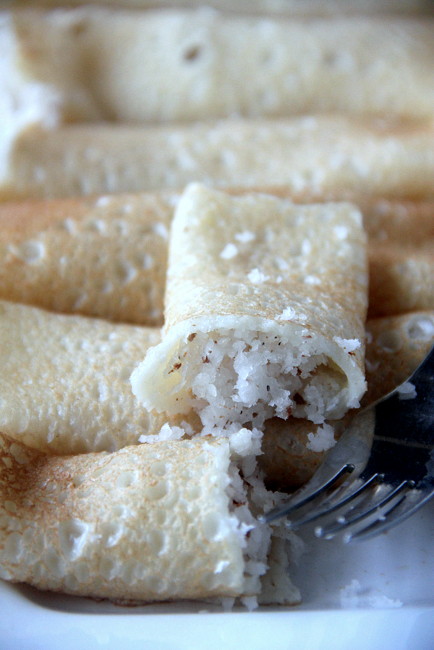
Heat a griddle or a tawa. Take a ladleful of batter and pour in a circular motion to complete the circle. Put the fire low.Flip the pan cake carefully over and cook the other side. Only if the batter is in the right consistency you will see the holes on one side and brown dots on the other side ( as in the picture below)  after cooking the pan cakes. make them one by one. Arrange them on a flat plate.


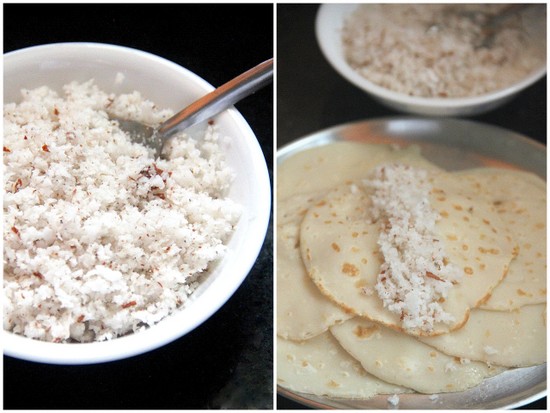
Prepare the filling. Combine the coconut, cardamom and sugar in a bowl. Spoon the filling on each of the crepes, in the centre from one end to the other as in the picture.


Bring one side over to cover one half and close the other half.  No rules about this part and you may roll it like your yoga mat too :). Just see that the filling is secured.


Madakku san

Drizzle maple syrup or honey and serve warm with tea of coffee.

Aparna, this post is for you!

Read More »

Tuesday, October 25, 2016

Basundi


According to Wiki, Basundi the traditional sweet prepared from milk, belongs to the states, Karnataka, Gujarat and Maharashtra and is similar to the preparation of the North Indian Rabri.
I already have the recipe of Rabri in my Rasagulla post. When I asked one of my Maharashtrian friend about the difference between the both, she mentioned about the Rabri being thicker and creamier and Basundi. Addition of dry fruits or lime or other fruity flavours gives versatility to Basundi which again serves as an accompaniment to pooris!

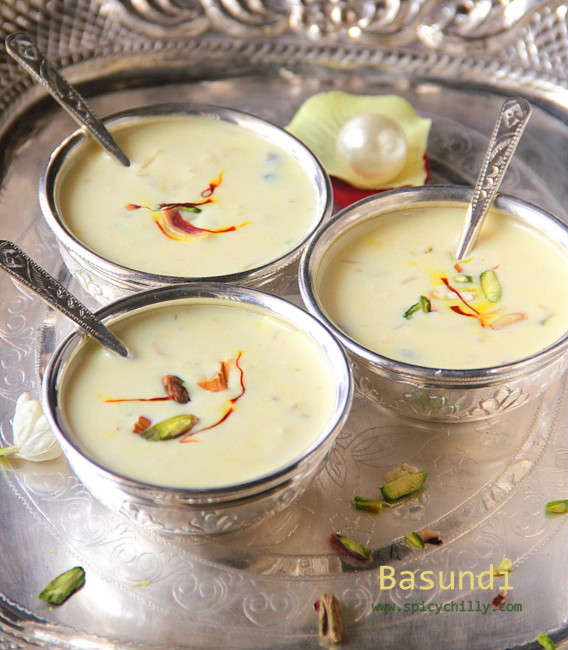
So, Basundi is all about boiling fresh full fat milk, bringing down to half its level, cooked with slivers of nuts, sweetened with white sugar and flavoured with cardamom and nutmeg.


Basundi
Total time needed- 40 mins 
Yield - Fills two 200ml cups


Get ready with:

 1 litre Full fat Milk
 1/4 cup scant Sugar
 A tablespoon each of slivered nuts, Pistachios, Almonds and Cashews. Reserve a few pieces if you wish to garnish.
 A few strands of saffron soaked in 2 tbsps warm milk
 Two fat pinches of freshly ground cardamom
 A pinch of powdered nutmeg (I didn't use)


How to make:


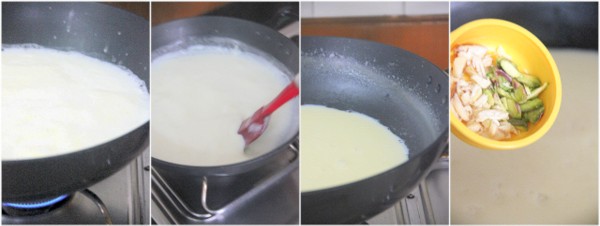
Start with boiling the milk in a wide non stick kadai. Lower the flame and taking utmost care, not to burn the cream in the base, stir along well.Scrape the edges as well and combine with the milk all along. Reduce the quantity to almost half.  I needed 25 minutes to reach this point. Add the nuts and stir along.


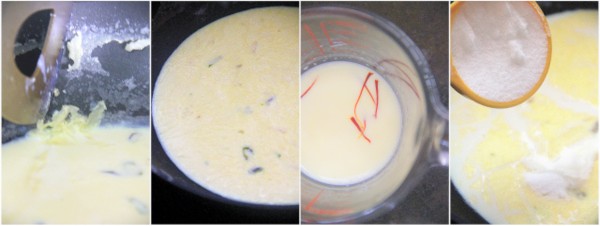
Simmer for a few minutes. Keep stirring and scraping. I switched off the flame and took a break here as my hands were aching a bit ;). Soak a few saffron strands in two tablespoons of warm milk. Reserve. Back to the milk, add sugar and stir in.


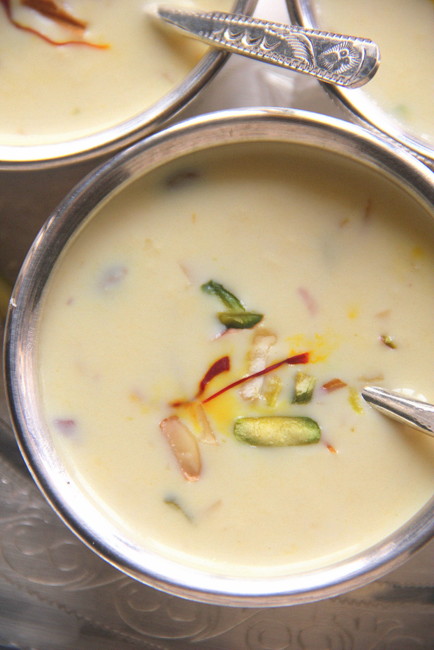
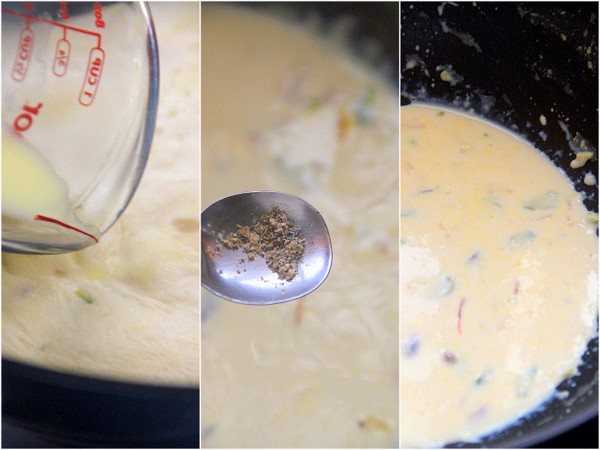
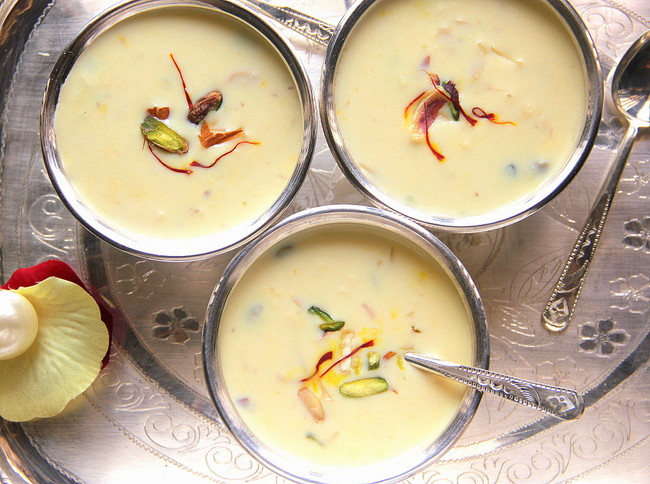
Addition of sugar makes the milk thinner. So, simmer for 3 minutes in minimum flame. Add in milk with the soaked saffron followed by the freshly ground cardamom powder. Put off heat. You can get an idea of the finished hot Basundi from the the final picture. Its thick,  nutty, creamy and has a mild yellow hue.


Serve warm or chilled! 


          Notes:

  •  If you feel, the traditional method of boiling down the milk and preparing Basundi, elaborate, you can use 1/4 - 1/2 cup of sweetened condensed milk, stirred in with the milk. Cut down on the amount of sugar in that case.
  • Stir the milk continuously while simmering down, taking extra care to scrape the base gently to prevent browning of the milk fat. If you ever come across that, switch off the stove and filter milk to remove them. 
  • Usage of wide nonstick pans, make the work easier. I needed 45 minutes for the whole process for 1.250 litres of full fat milk.The whole idea of stirring up rich Basundi is to preserve the cream / malai while boiling milk. Keep scraping the sides and bottom and combine with the simmering milk all the while. You can even switch it off in mid point as I did :) to relax a bit and start again after an hour or so. The thick cream or malai on top can be stirred along :)
  • Basundi can be made a day or two earlier if you wish to serve your guests. Keep it chilled and airtight.


Read More »

Tuesday, October 21, 2014

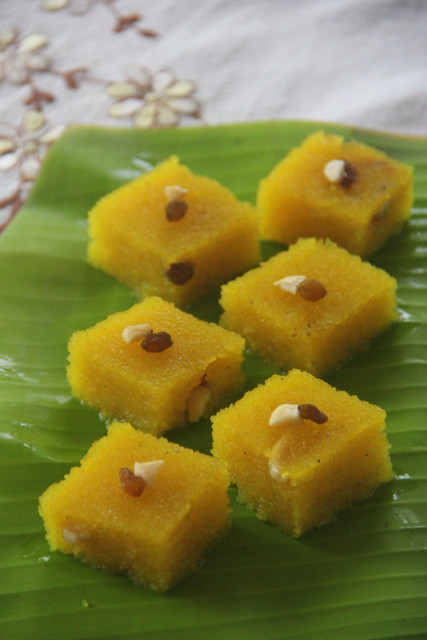
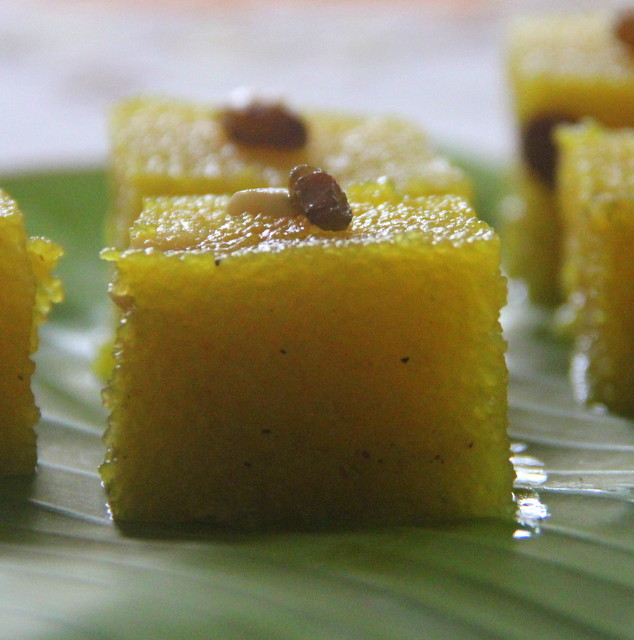
Rava Kesari


Rava Kesari


I have been a sporadic blogger for the year. After my daughter's marriage, I had to take all my efforts to bring myself  back here. At least the festivals propelled much! Now that the pompous Diwali just around the corner has left me in my mom's house, 'in no cooking mood but lots of time in hand' mode, I decided to make one of the easiest sweets, Rava Kesari.
Mom happily agreed to share her version and this is how we made just a few hours back :)


Rava Kesari


Rava Kesari
For 20 squares
Total time needed - 20 minutes


Ingredients:

Sooji / Rava - 1/2 cup
Sugar - 1 cup
Ghee – 1/4 cup
Water - 3 to 3 and a half cups
Yellow kesari color - 2 pinches
Cardamom/elaichi Powder - 2 fat pinches
Cashews and raisins - a few

Method:


Rava Kesari

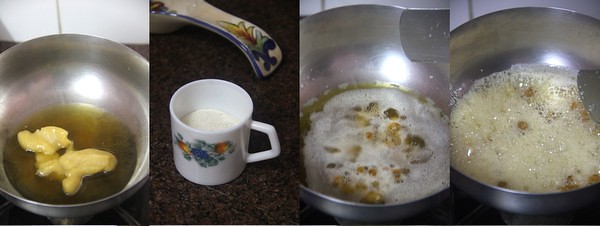
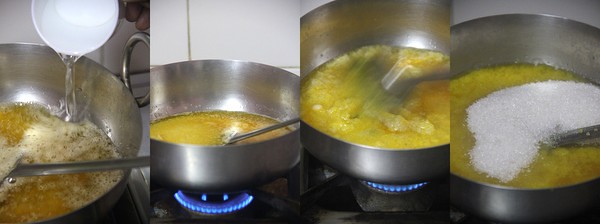
Heat 1/4 cup ghee in a non-stick (preferable) or a thick bottomed kadai. Measure rava and keep ready. Fry halved cashews until golden brown followed by raisins for a few seconds until they plump up. You may not need to remove them. Just dump in rava ( frothes up in hot ghee) and sauté for a few seconds. Thus you are roasting it.


Rava Kesari

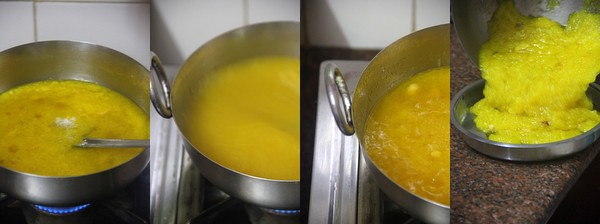
Stir in the measured water. Add food colour dissolved in a teaspoon of water. Stir all the time to avoid lumps. Let the rava cook for 3 minutes in low fire. Add sugar and stir to combine.(This is important. Addition of sugar should be after the rava is cooked well, or else rava remains grainy  and uncooked)


Rava Kesari

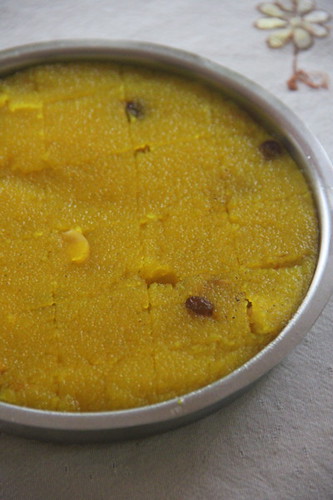
Stir along cardamom powder. Keep stirring not allowing the mass to get stuck at the bottom. By this time the kesari turns into a glossy mass. Transfer to a tray or a one inch deep plate.


Rava Kesari

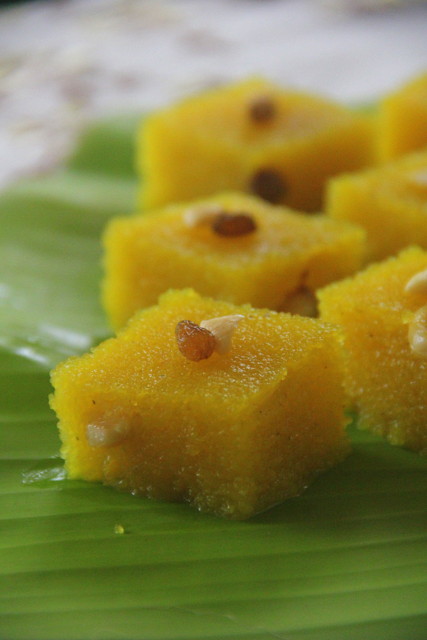
Let it cool completely and cut into squares or diamonds .Transfer to your plate and enjoy!


Rava Kesari

 Wishing You A Very Happy Deepavali!

Read More »

Tuesday, October 29, 2013

Ghee Mysore pak


Ghee Mysore Pak


I was introduced to making a variety of sweets during my early years of marriage, as a young daughter in law. In a joint family there was always the need of home made sweets and snacks. During festival time, ma-in-law and ammayi ( her mom) would plan out meticulously what all to prepare and how. We mostly had an 'Iyer' or a Brahmin who is supposedly and expert to make the diwali goodies, who turned up a week before the D-day and starts off with much pomp. He would come prepared with his 'edupidi' or assistants who would give him a helping hand throughout. The firewood was set at our back yard, with a high roofed 'shamiana' to ward off unexpected showers of the month, and the Iyer would start off with his simple prayers. The whole process of making sweets and snacks, in mounts, would go for at least 5 days but those were the times I really loved! I used to simply watch in awe the way the 'edupidis' roll out ladoos from hot boondhi, the way Iyer squeezes out jalebis and does the final mix up of the 'mixture' as heaps! Ma- in- law took the complete responsibility of shopping the ingredients, dividing the whole bunch of goodies and shared with our relatives, friends and workers at home. My part was mostly to help her packing the stuff and making some extra sambhar, rasam and koottu for the Iyer and his assistants while I prepared the lunch for the family.
Those were the days ignorant of blogging and I missed to capture those scenes live to share with you! They remain as memories. These days it is getting harder to find a good cook that we simply order the sweets and snacks out to commercial joints.
Ever since blogging years, I make it a point to make at least a sweet for the festival at home, which I can share in my blog. 'Bhajji' and 'Rava Kesari' are always unavoidable on the Diwali day, anyway!

This year, I resorted to Ghee Mysore Pak for blogging. To start learning how to make the same, I depended completely upon my neighbour, Rama Aunty and her daughter Hari. Aunty is more than a neighbour with her much timely help and motherly affection. Hari is my favourite! :)
Hari made sure she mastered the art of making the sweet and went for at least half a dozen trial and errors. She sent me a sample of her every trial and I could visibly see the difference in the quality of sweet improving each time. Finally, the lovely mom and talented daughter summoned me home with all the ingredients of the all time delicacy. Since they handled the whole of stove top, all I did conveniently was the photo shoot! I realised how difficult it would be if I had tried the same and handled the photography single handed!


Ghee Mysore Pak


Mysore Pak
Yields 20 rectangles +/-
Total Time needed- 20-25 minutes

1 cup Besan / Kadalai Mavu-
2 cups melted ghee + 2-3 tbsp for adding in the last stage
1-2 tsps of ghee to grease the pan
2.5 cups sugar
3/4 cup water (this is related to quantity of sugar and not besan)


Ghee Mysore Pak
Measure besan


Ghee Mysore Pak
Dry roast lightly for a minute in medium heat, stirring continuously. Transfer to a dry tray. Besan should have slightly more than bearable heat if you do a 'touch test'.


Ghee Mysore Pak
Transfer besan to a metal sifter or to a metal sieve. (do not transfer to a nylon based sieve as it melts down due to the high heat of the besan!)


Ghee Mysore Pak
Transfer sugar to the same pan, pour water and let it boil together.


Ghee Mysore Pak
Stir now and then to dissolve sugar completely and minimise the flame to low.


Ghee Mysore Pak
While the sugar and water mix comes to a boil, grease the pan with melted ghee. This is the pan onto which you need to transfer the piping hot mysore pak right from the stove


Ghee Mysore Pak
The stage to attain is 'one string consistency' or 'pisukku padam'. This is the most important part which decides the consistency of the final outcome. So, be very careful to get it right.
The sugar water solution, after a few minutes (say, 4-7 minutes, that is: medium heat until the crystals dissolve and later in low flame;) froths up, and comes to a rolling boil as in the middle picture. Keep the flame to minimum at this point and you can see the solution turning thicker. The three pictures were shot within a minute so the stage attains in seconds after the solution starts frothing!
The solution should be sticky if you feel a few drops between the tips of your index finger and thumb. The stage has reached in the third picture above. Since the liquid is really hot, take care not to burn your fingers.


Ghee Mysore Pak
Immediately not letting to go to the next stage of syrup, add one cup of ghee.


Ghee Mysore Pak
and mix well along.


Ghee Mysore Pak
Sift in flour using sifter with one hand and a whisk to stir avoiding lumps, with the other hand.


Ghee Mysore Pak
The sifting in and vigorous mixing should take place simultaneously! It's better to have a helping hand if you are a first timer for this part!


Ghee Mysore Pak
Whisk briskly at this stage.


Ghee Mysore Pak
You can use a flat headed ladle while it thickens.


Ghee Mysore Pak
add the remaining one cup ghee 1/4 cup at a time between 3-5 minutes of continuous stirring.

Ghee Mysore Pak
You will finish the ghee as 3-4 batches while stirring.


Ghee Mysore Pak
 Keep the flame low while the mixture starts thickening and bubbles up.


Ghee Mysore Pak
Continuous stir is the most important and a bit laborious task at this point.


Ghee Mysore Pak
This stage attains within 2-3 minutes of the previous stage. Watch the edge of the pan while stirring. The mix leaves the edges or when you see 'honey comb like holes', appearing along the edges while stirring, the final stage has reached!
You may drizzle 2-3 tbsps of ghee at this point to make an extra rich Mysore Pak. But if you need to concentrate too much on the final stage, it's fine, skip it! :)


Ghee Mysore Pak
Transfer the hot lava :) to the greased tray.


Ghee Mysore Pak
Its quite natural for the sweet to froth up soon after the transfer because of the high heat.


Ghee Mysore Pak
 If it does, tap the pan gently on the counter and it settles down!


Ghee Mysore Pak

Cool for 10 minutes to get rid of the piping heat and slice mark nicely to the deep bottom. It is important to slice mark while the sweet is hot or very warm. The warm/cooled down sweet tends to break into powder and makes it tough to shape. Also, take care to slice mark deep enough to touch the base of the metal since the pieces may stick up again, due to the high heat around the base. You may not be able to slice perfectly as in shops. No worries, machines do for them :). Our imperfect rectangles are perfect heart warmers, instead :)


Ghee Mysore Pak


Notes: 

1. Mysore Pak made in non-stick pans lack the natural grainy texture. Hence we used Indolium pan. The sweet needs some crude heat with metal can offer and non-stick bases cannot!

2. 10 minutes was needed for attaining 'pisukku padam' ( the sugar syrup consistency) in low-medium flame when we tried double the quantity, of the above recipe.Therefore, for the above measurement I have written down, the time needed for the one string stage or the 'pisukku padam' will be around 4-6 minutes.

3. The sifting in and whisking process demanded 20 minutes when we made.

4. Hence the total time taken on stove was 33 minutes in exact for the doubled recipe. It may not get cut down to half the time if the recipe is halved ( the above quantity I'd mentioned), but will take around 20-25 minutes from start to finish.

If you feel the recipe explained so far, will give a very sweet mysore pak:

I tried with the measurement of 1:1:1 (besan : sugar : ghee) and it faired quite well. Just follow the same steps above while on stove stop. While making the surar syrup, add water enough to immerse the sugar. Reserve 1/4 part of the ghee to add to the pan just before you remove the sweet from the stove. This moistens and gives the sweet a better melt-in-the mouth texture.
This measurement will give you the rich ghee flavoured mysore pak which I personally prefer.

Ramaunty and Hari, this post would not have been possible with you two. I have no words to thank you both!

Ghee Mysore Pak


Read More »
Related Posts Plugin for WordPress, Blogger...