Showing posts with label Desserts. Show all posts

Wednesday, February 15, 2017

Paal Poli ~ Pooris Soaked in Sweetened n Flavored Milk!


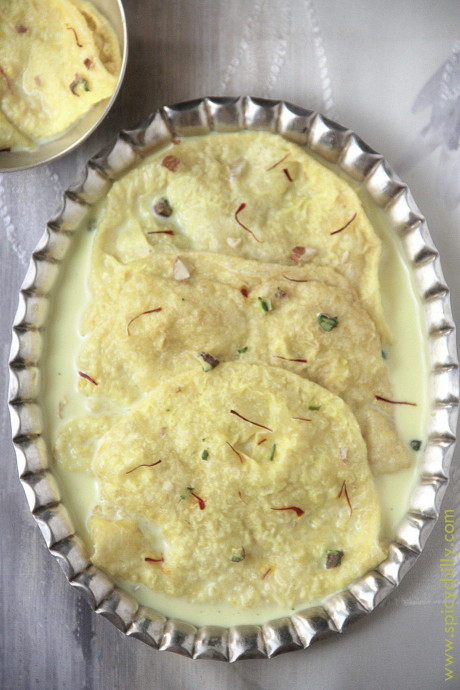
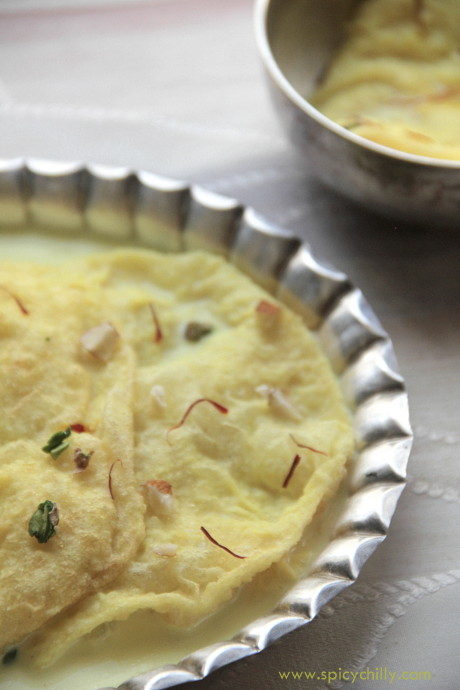
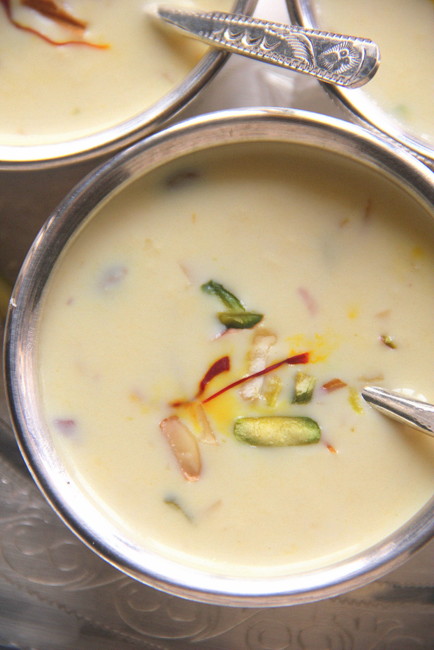
As the name says it all, Paal Poli is a  dessert made by soaking fried pooris in flavoured milk. Yes, it's just simple as it sounds! The best Paal Polis, I savoured are the ones made by my son-in law's grand ma, who resides in her beautiful ancestral home, in the neighboring village, Peruvalanallur! These cuties were what she opted to make, while throwing the feast for her grand kids. My husband and myself  couldn't make it to the village for her heartwarming lunch as the post wedding paraphernalia had  left us thoroughly exhausted. Back from the village late evening, my daughter hopped in with a lovely container in which soft paal polis were packed, with loads of love and care. I could feel that when the first bite hit my taste buds, and ah! I found myself devouring the heavenly morsels!!
I called her up, the next minute and typed the recipe, right away in my blogger. The simplicity of the dish surprised me that I had to suppress my urge to rush into the kitchen, knead the dough, fry the pooris and soak them, immediately!!

It had been been several months since then and had wanted to prepare the sweet as the first recipe for the year, but then got postponed. Better late than never!

Peruvalanallur athai's Paal poli, recreated, with lots and lots of love... :)


Paal Poli 

Makes 8 large or 10 medium or 13 small sized pooris
Serves 4-6

 Prep time: 20 mins
 Standing time; dough: 1-2 hours
 Soaking time of the finished dessert: at least an hour to *one day

Ingredients:

100 gms all Purpose Flour / Maida -  ( this is between 3/4 to 1 cup)
2 tbsps rava (sooji/semolina) ( not roasted)
A pinch of yellow food colour
50-60 ml luke warm water

Oil- for deep frying

600 ml milk (I used milk with 3% fat content)
1/4 cup heaped white sugar
A fat pinch saffron

A few almonds and pistachios, chopped, to garnish


Method:
Paal Poli

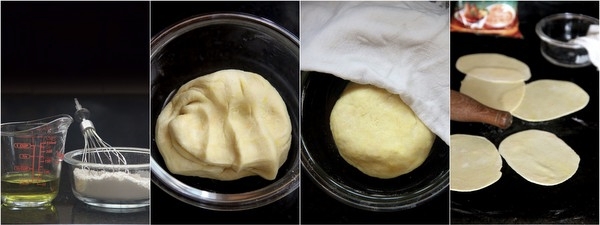
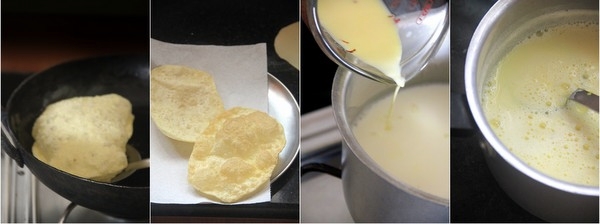
Whisk together maida and rava in a bowl. Measure 60 ml of water in a microwavable jug and warm a bit. Just to make it luke warm. Dissolve a pinch of edible yellow food colour. Add to the flour mix little by little and knead well until you get a soft pliable dough like poori dough. I needed exactly 55 ml of water. Make into into a ball and cover with a wet kitchen towel or  cling film and rest it for 2 hours. We do not want the ball to get dried up in the outsides. So make sure you cover it to retain the moisture. After a couple of hours, knead again and roll equal sized balls ( 8 or 10 or 13 acc to your size preference) I divided into 8 balls to make larger pooris. Also I had spread them into slightly elongated ones than perfect rounds, since as to get larger semicircles as we fold them into half for serving.

Paal Poli

Heat oil for frying the pooris. Fry one at a time. Let them the soft and not crisp. Drain in paper towels so as to absorb excess oil. Keep them aside.
Soak saffron strands in 1/4 cup hot milk for 10 minutes. Heat the remaining milk in a sauce pan. Add sugar followed by the saffron milk and bring to a boil. Simmer for a minute in low flame and switch off. You don't have to thicken the milk.
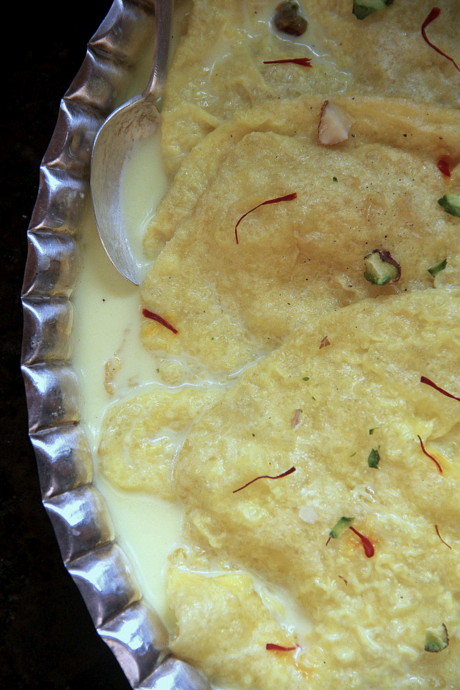


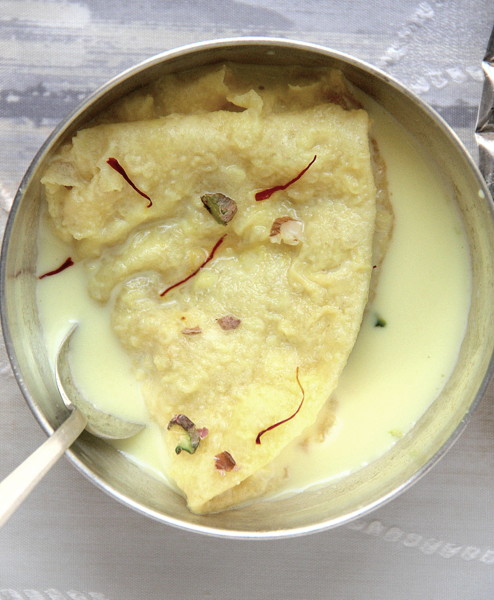
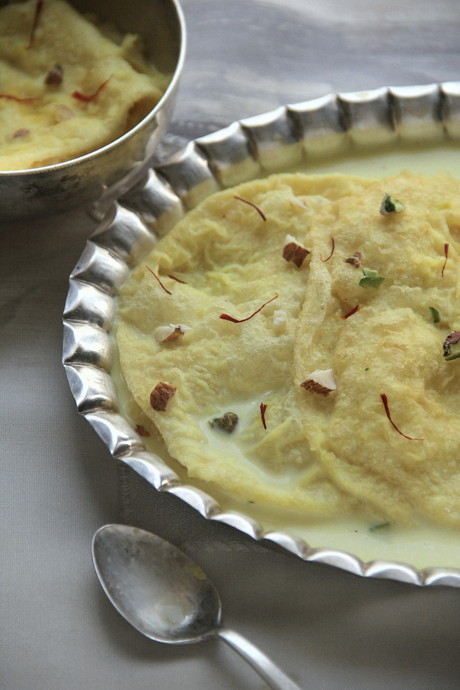
Arrange the pooris in a tray, half folded and pour the hot milk over them generally so as to soak them. after an hour you may need to add more, as they absorb the milk. Whole pooris soaked in milk as such weren't looking pretty in pictures. So had to revise the garnish idea to make the dessert prettier. Thanks to Raks, my lovely buddy  :))) for the pretty looking garnish idea :).


They have to get soaked at least for 2 hours before serving. *You can prepare Paal polis,
 soak them up the previous day and refrigerate, for your guests. Thus, your dessert is done, hours ahead!  Oh yeah! I love them chilled :)

 Garnish with chopped nuts (microwave for a minute and toss). Sprinkle a few strands of saffron before you serve.
Sure to receive compliments!

Read More »

Tuesday, October 25, 2016

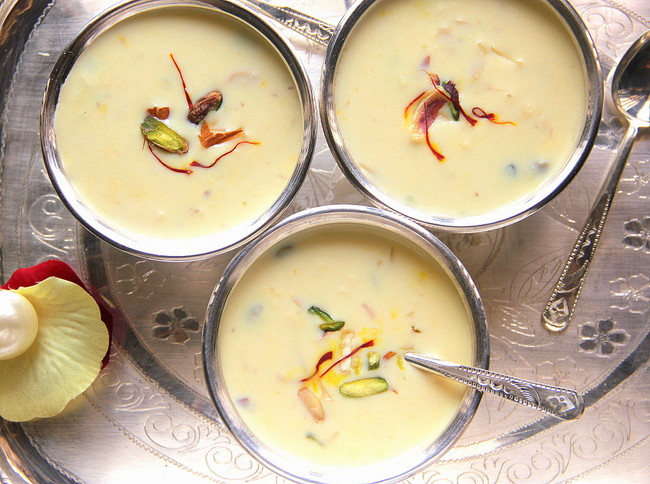
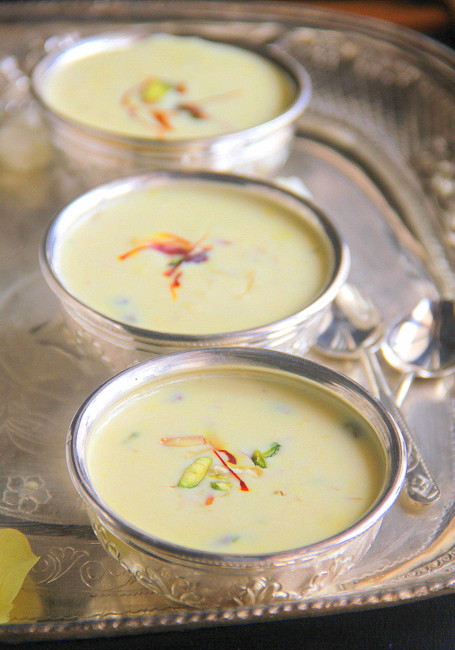
Basundi


According to Wiki, Basundi the traditional sweet prepared from milk, belongs to the states, Karnataka, Gujarat and Maharashtra and is similar to the preparation of the North Indian Rabri.
I already have the recipe of Rabri in my Rasagulla post. When I asked one of my Maharashtrian friend about the difference between the both, she mentioned about the Rabri being thicker and creamier and Basundi. Addition of dry fruits or lime or other fruity flavours gives versatility to Basundi which again serves as an accompaniment to pooris!

So, Basundi is all about boiling fresh full fat milk, bringing down to half its level, cooked with slivers of nuts, sweetened with white sugar and flavoured with cardamom and nutmeg.


Basundi
Total time needed- 40 mins 
Yield - Fills two 200ml cups


Get ready with:

 1 litre Full fat Milk
 1/4 cup scant Sugar
 A tablespoon each of slivered nuts, Pistachios, Almonds and Cashews. Reserve a few pieces if you wish to garnish.
 A few strands of saffron soaked in 2 tbsps warm milk
 Two fat pinches of freshly ground cardamom
 A pinch of powdered nutmeg (I didn't use)


How to make:


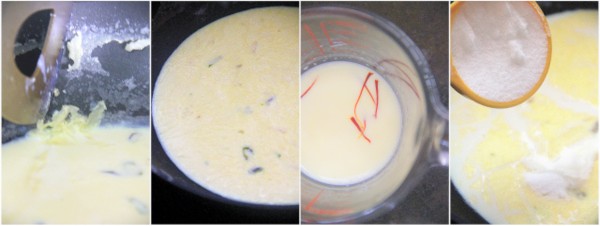
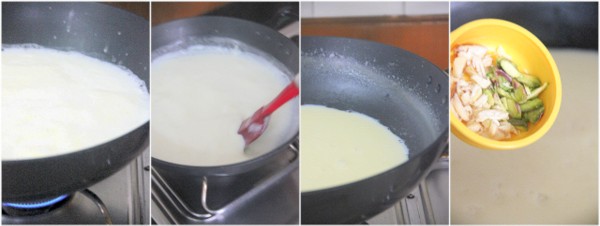
Start with boiling the milk in a wide non stick kadai. Lower the flame and taking utmost care, not to burn the cream in the base, stir along well.Scrape the edges as well and combine with the milk all along. Reduce the quantity to almost half.  I needed 25 minutes to reach this point. Add the nuts and stir along.


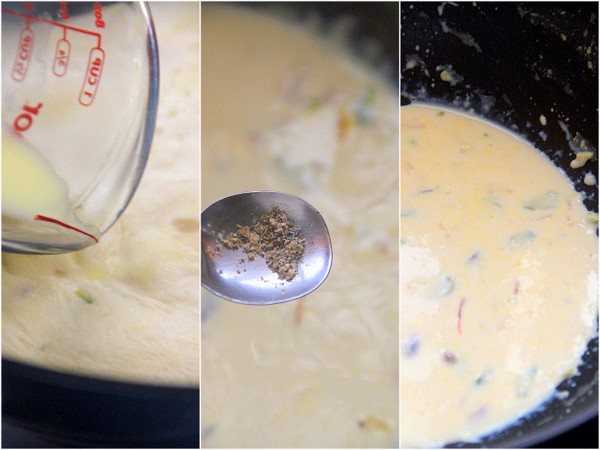
Simmer for a few minutes. Keep stirring and scraping. I switched off the flame and took a break here as my hands were aching a bit ;). Soak a few saffron strands in two tablespoons of warm milk. Reserve. Back to the milk, add sugar and stir in.


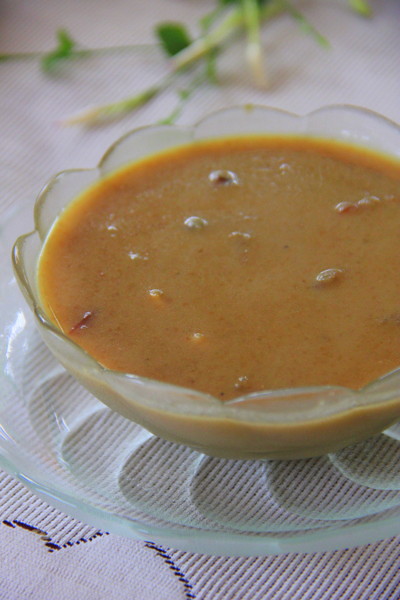
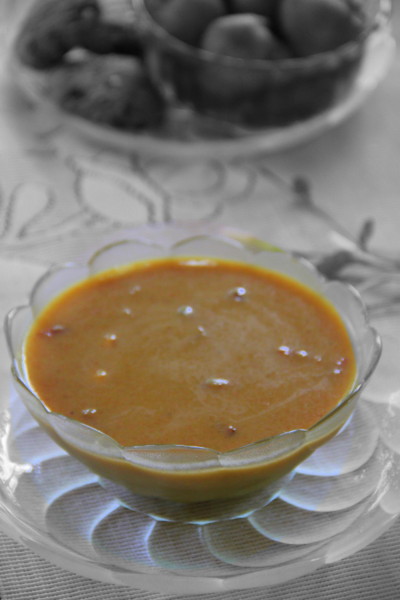
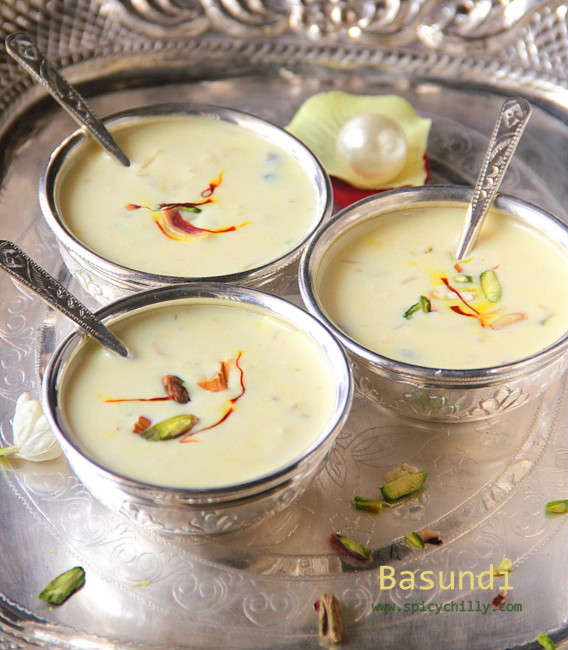
Addition of sugar makes the milk thinner. So, simmer for 3 minutes in minimum flame. Add in milk with the soaked saffron followed by the freshly ground cardamom powder. Put off heat. You can get an idea of the finished hot Basundi from the the final picture. Its thick,  nutty, creamy and has a mild yellow hue.


Serve warm or chilled! 


          Notes:

  •  If you feel, the traditional method of boiling down the milk and preparing Basundi, elaborate, you can use 1/4 - 1/2 cup of sweetened condensed milk, stirred in with the milk. Cut down on the amount of sugar in that case.
  • Stir the milk continuously while simmering down, taking extra care to scrape the base gently to prevent browning of the milk fat. If you ever come across that, switch off the stove and filter milk to remove them. 
  • Usage of wide nonstick pans, make the work easier. I needed 45 minutes for the whole process for 1.250 litres of full fat milk.The whole idea of stirring up rich Basundi is to preserve the cream / malai while boiling milk. Keep scraping the sides and bottom and combine with the simmering milk all the while. You can even switch it off in mid point as I did :) to relax a bit and start again after an hour or so. The thick cream or malai on top can be stirred along :)
  • Basundi can be made a day or two earlier if you wish to serve your guests. Keep it chilled and airtight.


Read More »

Friday, June 3, 2016

Mango Panna Cotta


I always thought Panna Cotta was a 'difficult to make' dessert. But then now I realize, it isn't. As a teen, I was obsessed with whipping up perfect puddings: caramel, mousse, tender coconut and had this flair to play with the hidden ingredient, agar agar or gelatin, which gave the body to the comforting desserts in various forms and flavours.

Coming to Panna Cotta, which means cooked cream, as you all might know, is an Italian dessert, a basic one made of milk and cream, thickened and moulded by gelatin and flavoured with rum, coffee, vanilla etc.
Generally, you might have come across 'Coulis' ( pronounced /kuːˈliː/ koo-LEE; French) is a form of thick sauce made from puréed and strained vegetables or fruits. The interesting note about this dessert is that it is quite a versatile one, means, once you get the hang of making the basic  pudding, you can be creative with it.

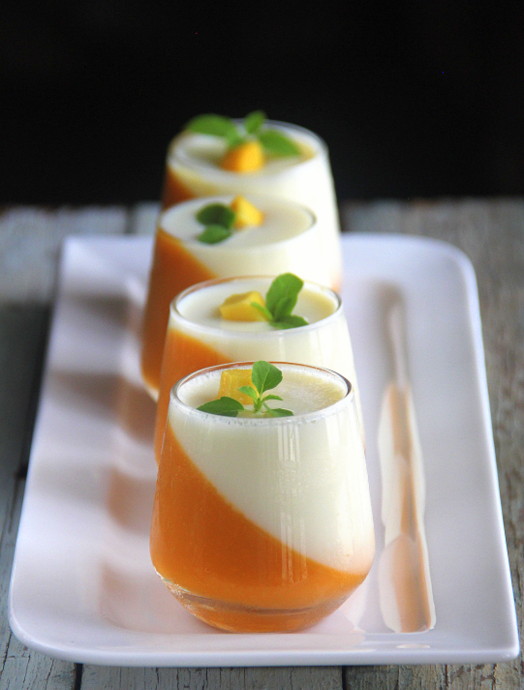
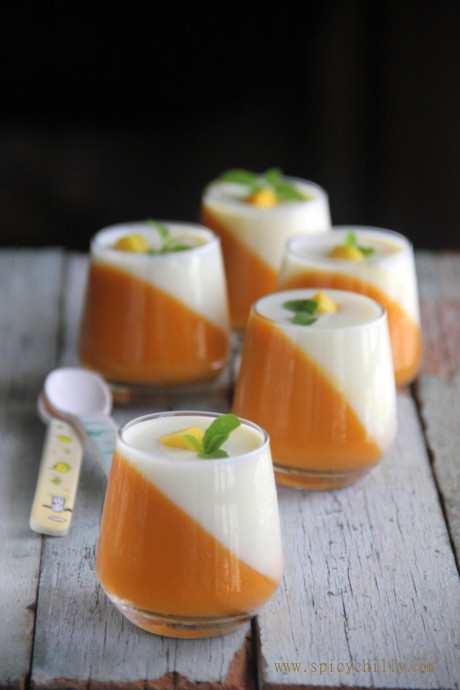
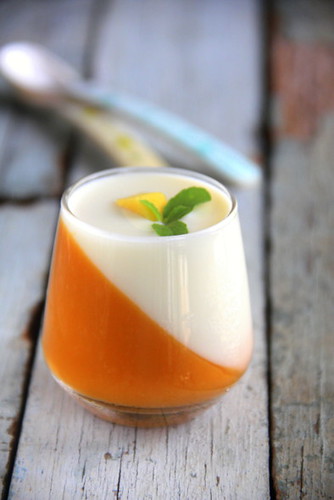
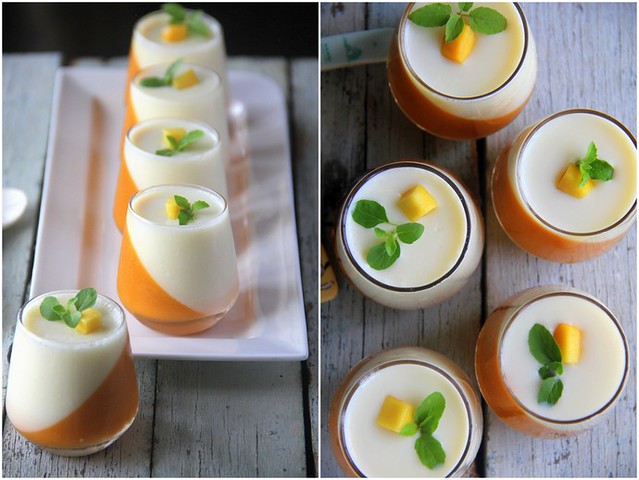
Now, coming to Mango Panna Cotta, as the name sounds, is a combination of mango coulis and cooked milk and cream flavoured with vanilla both set individually by gelatin.You can set it in a pudding dish as layers, Mango Coulis(which is set by gelatin) as the base and with milk and cream on top, the other way round, more of mango and less of milk and cream mix and vice versa. Anyways, I can assure, it tastes yummy. Its easier than you think, though the whole thing seems complicated. You can pleasantly surprise your guests setting them in individual glass cups, as I have done and yes, you will have compliments pouring in! :)


Mango Panna Cotta
For 5 small individual servings 


Before we start, let me tell you, I used 5 glass cups of 100 ml each. Hence I prepared 250 ml of mango pulp and 250 ml of milk and cream mixture to fill them all.

For Mango Coulis

A 250 ml cup Mango Pulp made from de-skinned chunks of fresh mangoes ( Ripe mangoes like alphonso render that bright yellow hue)
1-3 tsps Powdered Sugar or according to your sweet level. ( I did not add as the mangoes were sweet enough)
1 tsp of gelatin (soaked in 3 tbsps of cold water for 30 minutes in refrigerator to bloom)

For the Milk Mixture

150 ml Full fat milk
100 ml Heavy Cream ( I used Amul fresh cream )
2-3 tsps of sugar ( I used 2)
1 tsp of gelatin (soaked in 3 tbsps of cold water for 30 minutes in refrigerator to bloom)
1/2 tsp vanilla extract


Mix up and set


Part 1- Mango Coulis

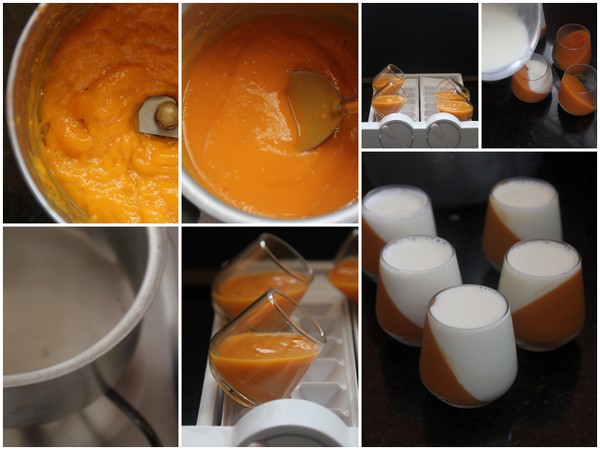
Mix in sugar while you pulp the mango cubes. Take out the 1tsp gelatin from the refrigerator and melt gently in  a pan in low and controlled flame on stove top. Transfer the mango pulp to this and combine in low heat just under the boiling point or remove from fire before it starts to bubble. This is to ensure that the ingredients are incorporated well.

Whisk gently while cooling down.While luke warm, transfer the mix gently to tilted glasses. I used my ice tray to hold the 45 deg position. Secure mouths with cling wraps. With utmost care, return to the refrigerator, holding the position :). I held my breath while doing it ;). Leave undisturbed for 4-6 hours until firm.

Part 2- Milk and Cream

Combine cream, milk and sugar and bring to a gentle boil, in low flame stirring until the sugar dissolves. Switch off.
Repeat the above step for melting gelatin.
Take out the 1tsp gelatin from the refrigerator and melt gently in another pan, in low and controlled flame. Stir in this to the above milk mixture along with vanilla.

Whisk gently while the mixture cools down. Take out the mango coulis glasses which are set well enough. Pour in the milk mixture carefully to fill the mango layer on top. Place them back to chill as such in standing position. Secure with cling wraps. Milk mix gets set within a couple of hours.
Serve chilled topped with mango slices and young mint leaves.


 Notes:

I haven't tried with agar agar. A 5-7 gm sheet should suffice for the above quantity. You need to divide it into equal portions and soak in warm-hot water. Melt on stove top bringing to gentle simmers, until it dissolves completely. Finally combine with the mango coulis and milk mixture, separately. Remember, you do it for both as different batches with an interval of 6 hours. If done in one go, it solidifies as it is.

Perfect panna cottas are softly firm or a bit wiggly rather than hard and firm.

I personally prefer it less sweet and so added minimum sugar.


Read More »

Monday, October 27, 2014

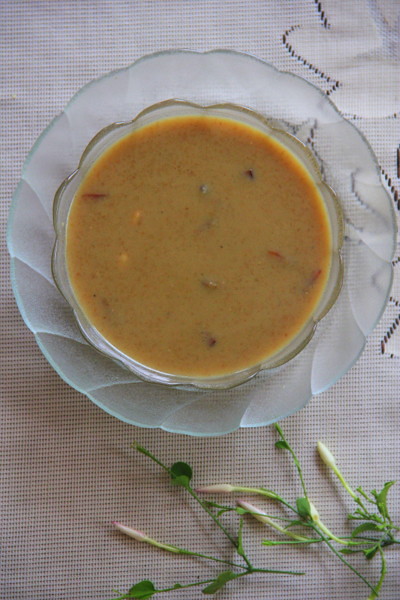
Godhambu Rava Payasam / Wheat Rava Payasam (with coconut milk and jaggery).


Godhambu Rava Payasam

If Amma decides to cook on a festival day, we can expect a feast. She would spend hours of hard work in her kitchen, expecting less help from others, comes out with the authentic festival recipes.
This Diwali she thus made this yummy and creamy Godhambu Rava Payasam along with crispy 'parippu vadas' and sweet 'pal vadas' paired up with an elaborate lunch spread!
Since I am a great fan of traditional payasams with the heavenly dominant flavour of coconut milk, I got my camera and notes ready to follow her cooking steps...

Over to the recipe..


Godhambu Rava Payasam

Godhambu Rava Payasam

Yields- Seven 250ml cups
Preparation time- 45 minutes
Cooking time - 30 minutes

Get ready with:

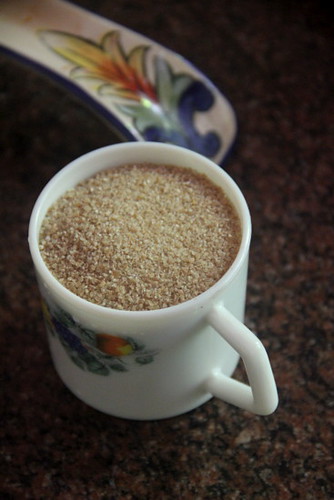
Wheat rava / gothambu rava - 1 cup

*Coconut milk-for this, we need 1 large coconut that would yield at least 4 cups shavings
Or you may go ahead with canned/tetra packed coconut milk.

Jaggery / nadan sarkara -300 gms

Dried ginger powder /chukku podi - 1/2 tsp
Cardamom powder / elakka podi - 1/2 tsp

Method:

*
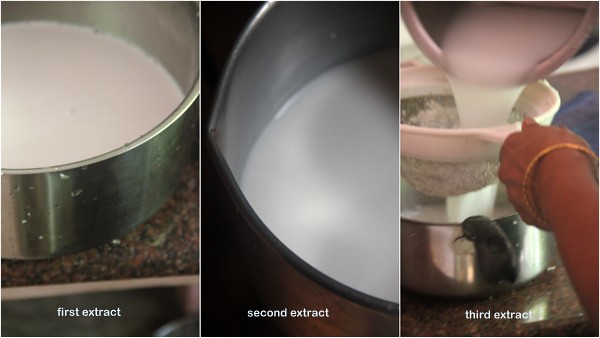
Extraction of coconut milk (I recommend this method for this traditional recipe)

Godhambu Rava Payasam

We have to extract milk from a large coconut which yields 4 cups of shavings.
How to extract milk is here, featured by sis following mom.
For this recipe we need 2 cups of thick and creamy first extract,
                                    4 cups of second extract
                                                and
                                    3 cups of slim third extract

If you use canned milk, dilute accordingly and divide them into 3 consistencies as above


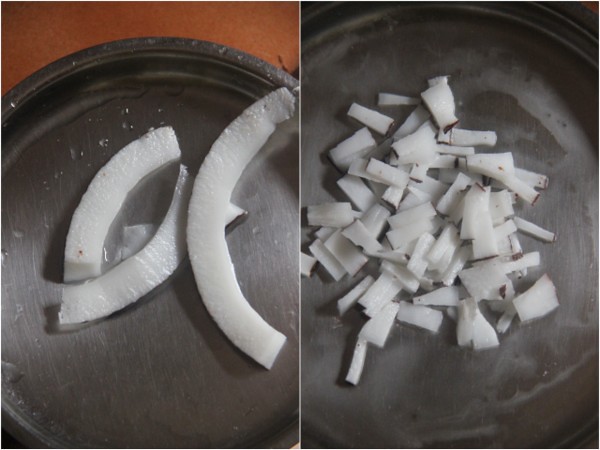
Thengakothu (coconut bits)

Godhambu Rava Payasam

Loosen thin strips of coconut from its shell which yields 3 tsps of bits, after the strips are cut. Set this aside.


Godhambu Rava Payasam

Transfer rava to a deep, wide and thick bottomed pan. I used a 5ltr pressure cooker body.


Godhambu Rava Payasam

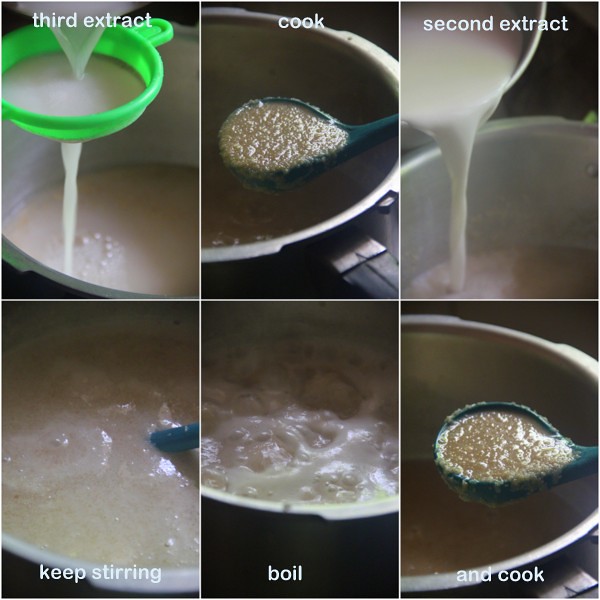
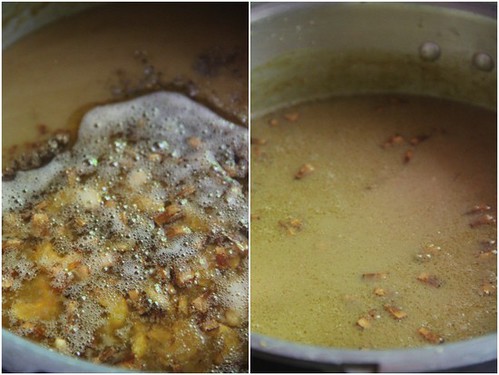
Cook rava in 3 cups of third extract for around  8-10 minutes. You need not close the pan. Add second extract. Keep stirring and simmer cook further for 8-10 minutes.

Prepare the jaggery syrup simultaneously

Godhambu Payasam

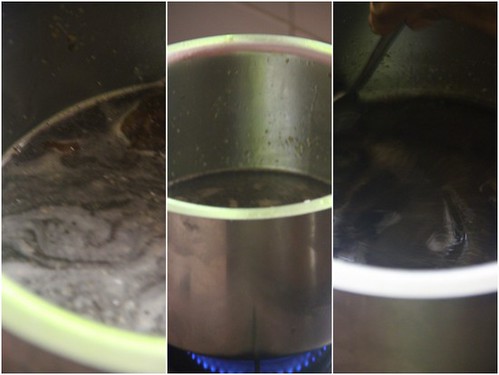
Crush jaggery into small lumps. Add a cup of water and bring to a simmer. Stirring now and then, melt the lumps completely. This will take around 10 minutes.


Godhambu Rava Payasam

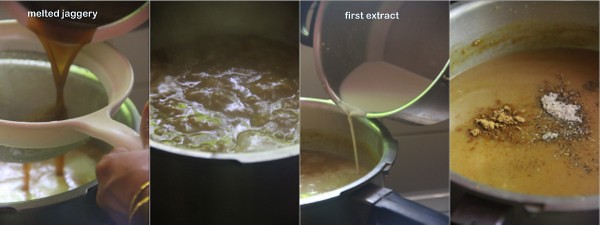
Strain melted jaggery ( the one you see here has a metal mesh. Do not use plastic mesh as the piping hot syrup will destroy it. If you use plastic ones, wait till the syrup cools downs and then strain) and add along the payasam. Simmer for 8 minutes stirring all the the time until the payasam gets thicker. Add the thickest first extract and stir along switching off the stove. Add dried ginger powder, cardamom powder and combine.


Godhambu Rava Payasam

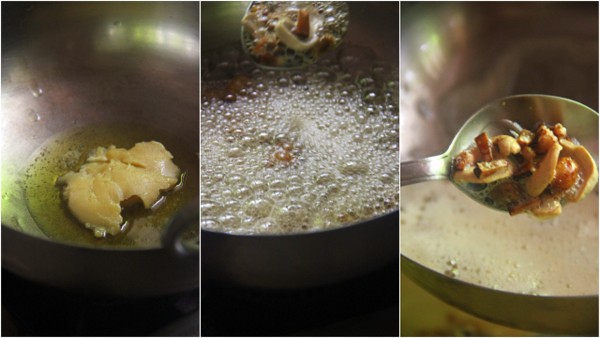
Melt 3 tsps of ghee in a small pan. Dump in the coconut bit pieces previously set aside. When it browns well, add halved cashews and fry until they turn golden brown. The coconut bits should be one or two shades darker brown in colour.


Godhambu Rava Payasam

Pour over the payasam and combine gently.


Godhambu Rava Payasam

Godhambu Rava Payasam tends to get thicker while cooling down. Refrigeration makes it creamier. If you prefer thicker and sweeter version, serve hot or cold in katoris or small dessert bowls. If you find it too thick and sweet, you may add a cup of hot or warm cow's milk to make it thinner and less sweeter to serve in cups or large bowls.
Read More »

Friday, August 24, 2012

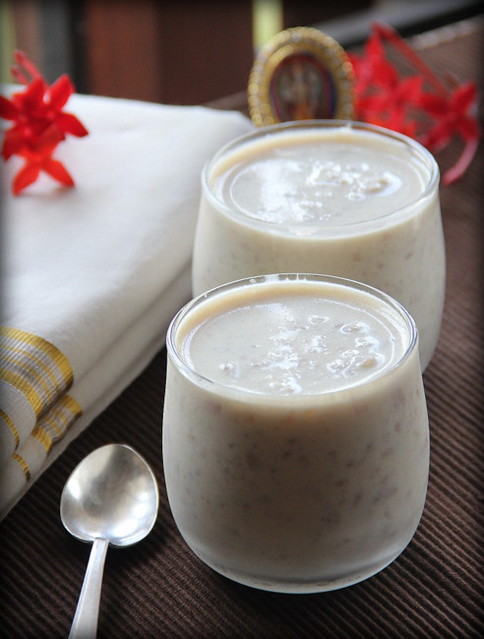
Aval Payasam for Thiruvonam!


I am EXCITED!
...when I imagine the crispers and store rooms and pantries of every Malayalee around the globe, brimming with vegetables, fruits and groceries...children dressed in all colours flying kites and enjoying the newly tied swings... some of them still busy preparing for the Athappoo, the beautiful floral carpet... the last minute shopping... last minute garment alterations at the tailors'....

Thiruvonam !!

Read More »

Saturday, January 7, 2012

Banoffee Pie


I was more than excited the minute I came to know that my friend Swapna's recipe had been chosen as the month's recipe by the Sweet Punch team! I had wanted to try this when she posted the recipe but as always, never took the effort of making the same lazing out :).

  When the recipe was announced, I planned to make the dessert during Christmas, so that children would be around, but then with the cakes and cookies all flowing in I wasn't quite motivated. Moreover I had by hands unbelievably full during the hoildays.

Finally I got ready with the ingredients and started whipping up the dessert 2 days back..


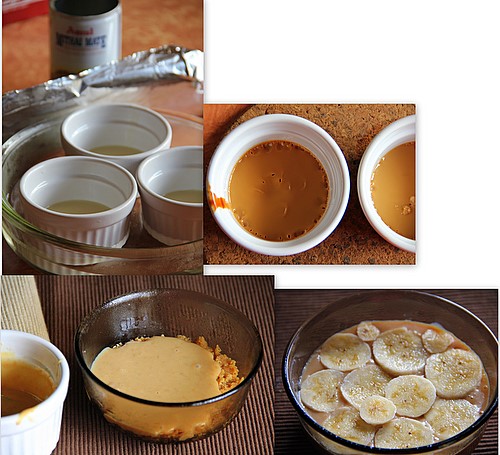
For the Dulce le Lechey, I adapted David Lebovitz's method as I felt to be more convenient and safe. Unfortunately my glass dish placed on the water bath on a pan didn't sit inside my small sized oven and I was forced to make it poured in individual ramekins made to sit in the glass dish made as the hot water bath, in turn.
The Dulce was a bit over done for me as I left it more than the time mentioned, my carelessness :), and I diluted with a table spoon of warm milk and condensed milk to bring it to the right consistency. I forgot to add the salt as suggested but again it was fine.


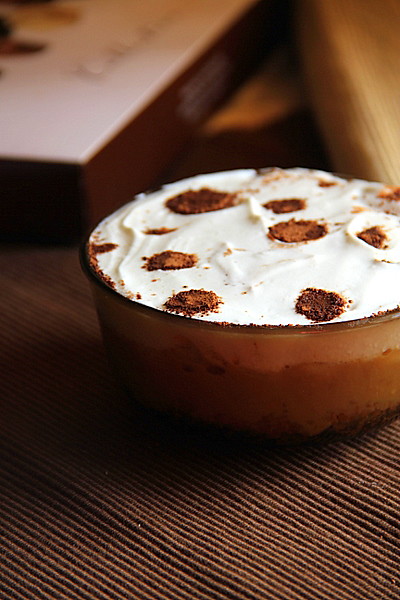
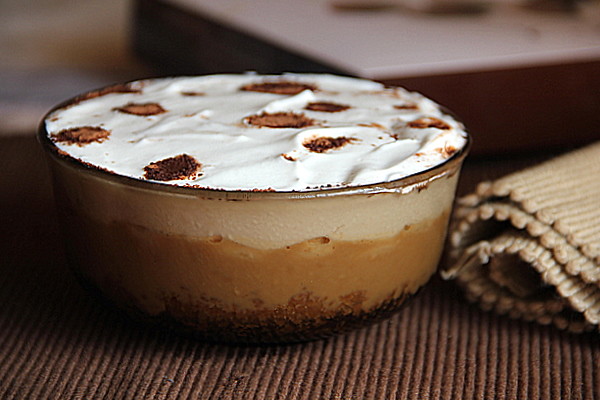
Banoffee Pie
Source- Swapna's Cuisine
Quantity - Halved
Serves- a small family

Below is the complete recipe:-

Ingredients:

Condensed Milk-1 can (400gm)
Bananas-3nos, large
Whipped Cream-2 cups
Digestive biscuits -200gms
Butter-100gms
Grated chocolate or Cocoa powder to decorate
Chocolate sauce to drizzle on top (optional)

Method:

To make Dulce the Leche (pronounced dulchay the laychay), put the can of condensed milk, unopened, in a large pan, cover with water, bring to boiling point and boil for 3 hours, topping up with boiling water from a kettle as needed. Ensure that the can remains covered in water, as otherwise there is a risk of the can bursting open. Remove and leave to cool completely. You can make this ahead of time or even boil several tins at one go and store the unopened cans in the fridge for several months. This is the traditional way of making Dulce the Leche.
Mix melted butter and powdered biscuit. Line a pie dish with this mixture and keep it in the fridge for some time. (For a crunchy biscuit base you can bake this for 10 minutes at 160 deg C. ).
Open the cooled can of condensed milk, which will have turned to toffee. Spread this over the layer of biscuit.
Peel and thinly slice the bananas, and arrange in a layer over the toffee.
Whip the cream until thick and stiff and spread over the bananas.
Finally, decorate with grated chocolate or dust the cocoa powder on top using a sieve. Drizzle with chocolate sauce (optional).

Serve.

Chilling hardens the whipped cream. If you prefer such, have like wise!


Though Swapna had been assuring about the irresistible taste, being a weight watcher, at least for the time being, I was worried counting the high calories contained in the dessert!
Soon after the photography session I licked clean the spoon you see up in the first picture ;) and then was prompted to dig out more! two more..nah..three more and the bowl was packed off to the neighbourhood!

Verdict from the neighbour's family - Absolutely lovely dessert! looking forward to more! but more quantity for next time please! :)

That says it all! :)

If you need more feedback I would rate this as a rich, creamy, melt in the mouth dessert!
The combined flavour of the salt n sweet biscuit base, the creamy  rich dulce, the sweet sour ripe banana bits and the smooth cream topping compliments to the core and proves to be a high threat to the milk/sweet lovers! ;)


Author's note:

The caramel is not supposed to ooze out from the dessert as you see. I diluted the dulce a bit too much... the whole thing should stay firm as layers when sliced.
I avoided chocolate sauce as in the recipe, wanting to create a design of neat circles of chocolate powder dusted on top. I do have the circles and the chocolate powder dusted, but of course not neat as expected! Pardon :)

For the full recipe, I prefer to use an increased amount; 600 gms of digestive biscuits for the base, but cut down butter to 75 gms :). 
Read More »

Wednesday, October 5, 2011

Tender Coconut Pudding


 The pictures of this recipe are Food Gawked and TasteSpotted.
 The recipe was also tagged by the Foodbuzz 


This pudding unties a bundle of sweet memories in me! I can hardly remember when and where exactly I tasted tender coconut pudding, first in my life, may be in one of the Christian weddings, but I had hugged the taste ever since it melted on my taste buds when I was a teen. It contains no eggs and this should be the reason why it was so simple and unbelievably comforting! Getting the recipe was not a big task coz this was a regular dessert in many of the Christian homes in Central Kerala. I jotted down the recipe then but I lost it in due course of time...

This is a recreation of the recipe from the basic mousse pudding where I had substituted the coconut and water. It was simple and hassle free... a 'no chance to go wrong' recipe. I had wanted to try this for the past two decades and believe me, it turned out perfect and left me absolutely excited in my very first attempt itself!

Tender Coconut Pudding (eggless)
yields 25 medium squares.(Serves 10.. coz no one can stop with two ;))

 Get ready with :

1 tin sweetened condensed milk = 400gms = 300ml   I used Amul Mithai Mate
*Sugar- 1/4 cup scant (not more than 6 tsps if you prefer less sweet)
China grass / agar agar- 10 gms
Thick (non fat preferable) milk -2 tins; measured in the condensed milk tin.
Tender coconut water- 1 tin
Tender coconut meat - 1/2 cup
(you may need 2 large Tender Coconuts for the water and the meat)


Step by step method


To begin with ,cut china grass into one inch long strips. Rinse and soak in hot tender coconut water for 1- 2 hours.


Let the coconut you scrape out be tender and transparent rather than the opaque whitish matured ones.


Boil milk, condensed milk and sugar together.


Once it boils, simmer just for a few seconds giving a stir in between.


Heat tender coconut water in which the china grass had been soaked and melt it bringing the coconut water to gentle boil. I could melt it within 2 minutes of gentle simmer. Too much of boiling destroys the natural texture and flavour of the coconut water. It is tough to melt down the grass strands completely. A few might remain at the bottom and you may strain and grind it in a mixie before combining with the milk mixture. I didn't do this and combined as it was..


which brought up after the mixing along with the fine tender coconut pieces. These strands are harmless and doesn't alter the texture and the taste of the pudding. When you mix the china grass solution and the milk mixture, let them both be of the same temperature; either warm or luke warm.
 So, after you mix it all together pour in a flat squarish  shallow glass container and not like what I did coz it will be difficult to unmould and slice into serving sizes.


Freeze for 5 minutes and then place it on the normal refrigerator compartment to chill for about 30-45 minutes until it is set. Do not over freeze or chill as it hardens the pudding.


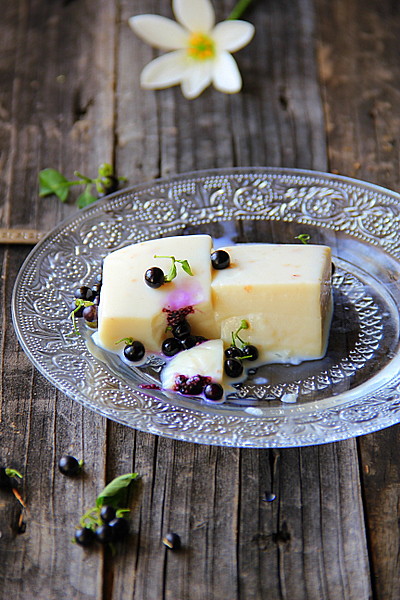
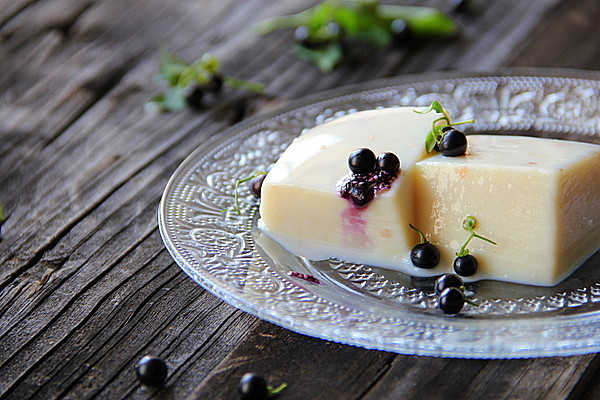
I toppled the bowl gently and it moulded out pretty clean.


Umm.. not bad...


Slice into serving portions. Did I tell you, I halved the original recipe? Mine yielded 16 unequal portions.
You can also use ramekins or small individual bowls for setting the pudding. You need not unmould too.


You may serve the pudding as it is.Transferring into plates is not an easy job as they are soft 'flubbers' :)


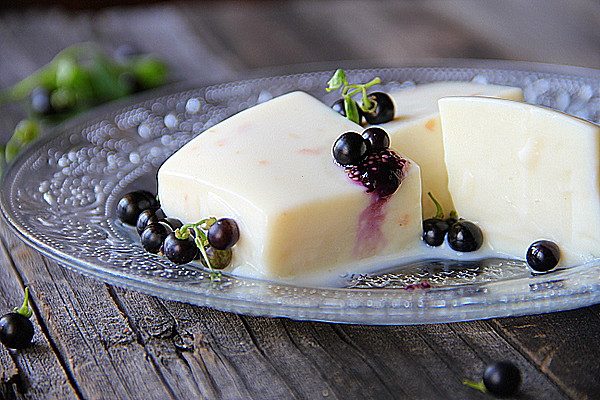
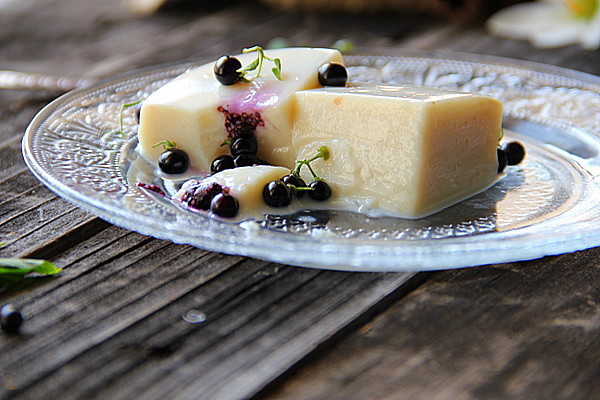
The berries are fresh from my garden. My vegetable garden is going crazy these days and I have topped the fruits for a colour contrast and make it  look glamorous.

Another reason of these fruits getting into the dessert is because Raks insisted to have either fruits or veggies in them. ...and all I have is coconut :)...
Well,  Raks as you all know is an awesome blogger with a wonderful variety of recipes, a girl who never fails to encourage most of the bloggers around with her warm and sincere comments. She had been surprisingly regular in mine though I skipped visiting hers many a times. This dessert is specially made for her event, Celebrate Sweets September 2011 event coz she really deserves something sweet and very special! :)..


Note:

 The pudding tastes better, * less sweet. However you can check the sweet level before you freeze and can add more if you want to.
I had added no flavours like vanilla as it just tastes good without a flavouring. The mild natural flavour of tender coconut is irresistible!
You can enjoy the pudding topped with cut fruits, berries or even praline.
I like it as it is :)
Read More »
Related Posts Plugin for WordPress, Blogger...