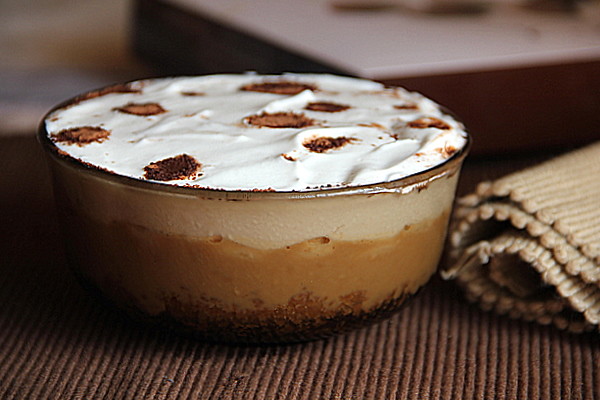
Showing posts with label Cream. Show all posts

Friday, June 3, 2016

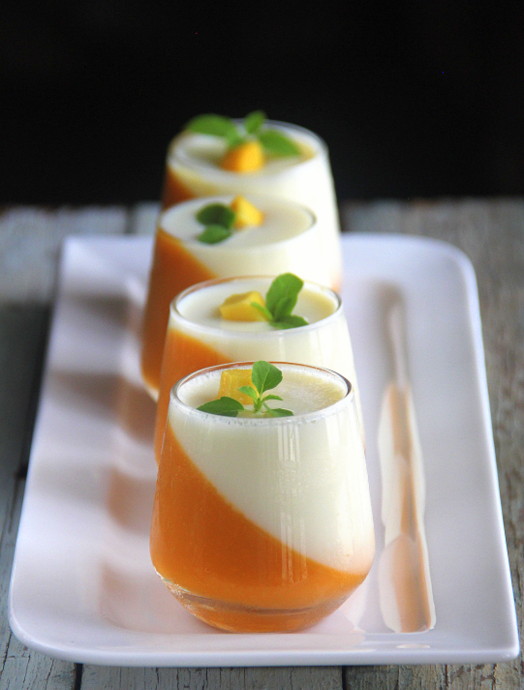
Mango Panna Cotta


I always thought Panna Cotta was a 'difficult to make' dessert. But then now I realize, it isn't. As a teen, I was obsessed with whipping up perfect puddings: caramel, mousse, tender coconut and had this flair to play with the hidden ingredient, agar agar or gelatin, which gave the body to the comforting desserts in various forms and flavours.

Coming to Panna Cotta, which means cooked cream, as you all might know, is an Italian dessert, a basic one made of milk and cream, thickened and moulded by gelatin and flavoured with rum, coffee, vanilla etc.
Generally, you might have come across 'Coulis' ( pronounced /kuːˈliː/ koo-LEE; French) is a form of thick sauce made from puréed and strained vegetables or fruits. The interesting note about this dessert is that it is quite a versatile one, means, once you get the hang of making the basic  pudding, you can be creative with it.

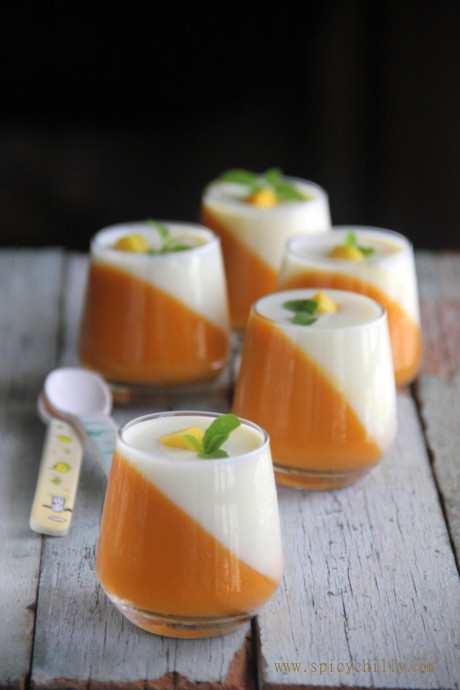
Now, coming to Mango Panna Cotta, as the name sounds, is a combination of mango coulis and cooked milk and cream flavoured with vanilla both set individually by gelatin.You can set it in a pudding dish as layers, Mango Coulis(which is set by gelatin) as the base and with milk and cream on top, the other way round, more of mango and less of milk and cream mix and vice versa. Anyways, I can assure, it tastes yummy. Its easier than you think, though the whole thing seems complicated. You can pleasantly surprise your guests setting them in individual glass cups, as I have done and yes, you will have compliments pouring in! :)
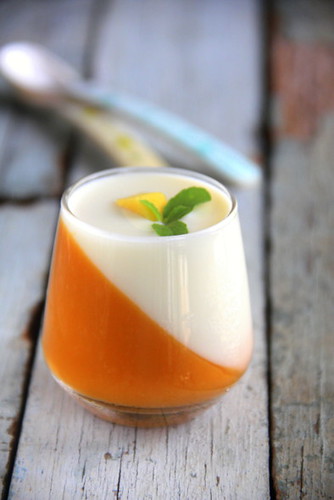


Mango Panna Cotta
For 5 small individual servings 


Before we start, let me tell you, I used 5 glass cups of 100 ml each. Hence I prepared 250 ml of mango pulp and 250 ml of milk and cream mixture to fill them all.

For Mango Coulis

A 250 ml cup Mango Pulp made from de-skinned chunks of fresh mangoes ( Ripe mangoes like alphonso render that bright yellow hue)
1-3 tsps Powdered Sugar or according to your sweet level. ( I did not add as the mangoes were sweet enough)
1 tsp of gelatin (soaked in 3 tbsps of cold water for 30 minutes in refrigerator to bloom)

For the Milk Mixture

150 ml Full fat milk
100 ml Heavy Cream ( I used Amul fresh cream )
2-3 tsps of sugar ( I used 2)
1 tsp of gelatin (soaked in 3 tbsps of cold water for 30 minutes in refrigerator to bloom)
1/2 tsp vanilla extract


Mix up and set
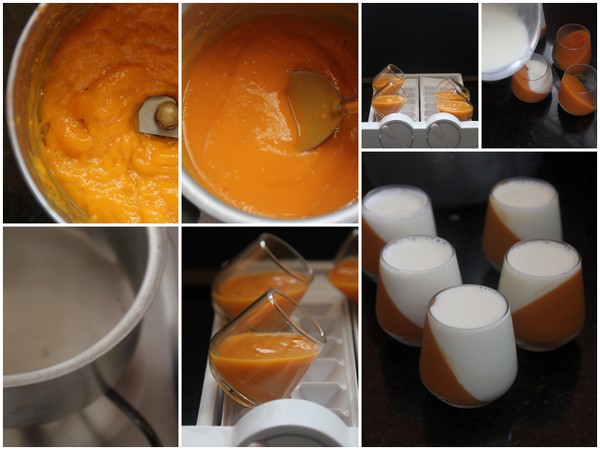


Part 1- Mango Coulis

Mix in sugar while you pulp the mango cubes. Take out the 1tsp gelatin from the refrigerator and melt gently in  a pan in low and controlled flame on stove top. Transfer the mango pulp to this and combine in low heat just under the boiling point or remove from fire before it starts to bubble. This is to ensure that the ingredients are incorporated well.

Whisk gently while cooling down.While luke warm, transfer the mix gently to tilted glasses. I used my ice tray to hold the 45 deg position. Secure mouths with cling wraps. With utmost care, return to the refrigerator, holding the position :). I held my breath while doing it ;). Leave undisturbed for 4-6 hours until firm.

Part 2- Milk and Cream

Combine cream, milk and sugar and bring to a gentle boil, in low flame stirring until the sugar dissolves. Switch off.
Repeat the above step for melting gelatin.
Take out the 1tsp gelatin from the refrigerator and melt gently in another pan, in low and controlled flame. Stir in this to the above milk mixture along with vanilla.

Whisk gently while the mixture cools down. Take out the mango coulis glasses which are set well enough. Pour in the milk mixture carefully to fill the mango layer on top. Place them back to chill as such in standing position. Secure with cling wraps. Milk mix gets set within a couple of hours.
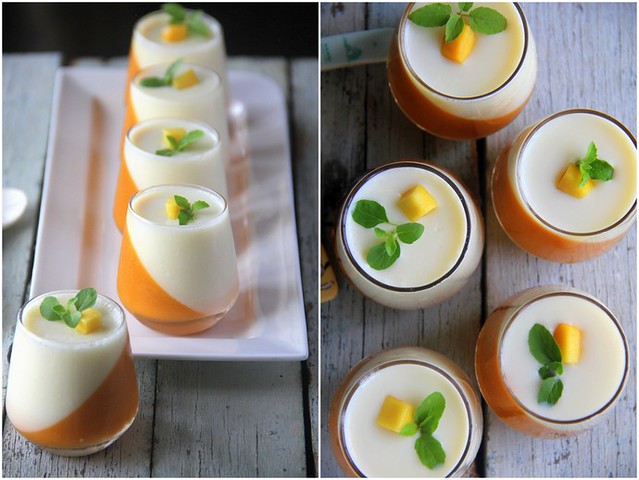
Serve chilled topped with mango slices and young mint leaves.


 Notes:

I haven't tried with agar agar. A 5-7 gm sheet should suffice for the above quantity. You need to divide it into equal portions and soak in warm-hot water. Melt on stove top bringing to gentle simmers, until it dissolves completely. Finally combine with the mango coulis and milk mixture, separately. Remember, you do it for both as different batches with an interval of 6 hours. If done in one go, it solidifies as it is.

Perfect panna cottas are softly firm or a bit wiggly rather than hard and firm.

I personally prefer it less sweet and so added minimum sugar.


Read More »

Tuesday, December 24, 2013

Bienenstich Kuchen (German Bee Sting Cake)


Bienenstich Kuchen


This month marks 12 months of baking breads together and given that’s it’s also a season when there’s a lot of festive baking done in parts of the country and the world, Aparna thought we could bake something special this month. And the choice falls for Bienenstich Kuchen or what’s also known as the German Bee Sting Cake!
Bienenstich is not really a bread but a traditional German sweet yeasted cake that has a baked on topping of crunchy almond toffee-like layer and filled with a vanilla pastry cream. Bienenstich is traditionally eaten as dessert and also served with tea or coffee.
Bienenstich means “bee sting” in German and probably got its name from the honey flavoured topping that it typical of this yeasted cake. There are however some interesting stories connected to it. One story is that the German baker who was creating this recipe came across a bee (possibly attracted by the honey) and was stung by it and decided to name the cake after the incident!
Another story is that a group of German bakers stopped invaders from entering a neighbouring village, sometime in the 15th century, by throwing beehives at them. IN order to celebrate their victory, they created the original version of the Bienenstich.


The Bienenstich is made with enriched brioche-like dough that’s typical for yeasted cakes which means that it contains a lot of butter, some milk and eggs. I have reduced the egg to one in the recipe. If you do use eggs you can use one more (total of 2 eggs) but you might need to add one or two tbsps. more of flour to the dough. On the other hand if you don’t use eggs, please leave it out. It will make a slight difference to the texture but not too much.
This yeasted cake is typically filled with pastry cream which is a mix of custard and whipped cream. I have used an egg-free version that uses custard powder but feel free to use your preferred recipe for custard using eggs.
You may also like to use butter cream, Bavarian Cream or Diplomat Cream. Remember the cake is a bit heavy so your filling should not be runny or too soft or it will not be able to carry the weight of the upper cake layer. You can also add fruit (strawberry, kiwi, mango, etc) to your “cream” layer even though this is not traditional.


Bienenstich Kuchen


I have baked my Bienenstich in ramekins and served individually but you can also bake it in a round or a square tin and cut it out into squares like we do with brownies.

One of the problems of this yeasted cake is making sure the filling is strong enough to take the weight of the upper layer. The other problem is cutting the Bienenstich into slices or squares without the filling squishing out ad making a mess of everything.
The first problem can be taken care of by using a filling that will hold up and not using too much filling. The whipped cream can be stabilized with cornstarch (or agar or gelatin if you use it). You can always thing the remaining fillng and serve it with the Bienestich as a sauce.
The second problem can be taken care of by placing the lower layer of the cake on the serving plate and then makinge a collar around it with a double layer of parchment paper that should be a little taller than the height of your finished Bienenstich. Now spread the filling over the lower layer evenly.
Then pre-cut your upper almond toffee layer into slices or squares depending on the shape of your Bienenstich. Now place the slices/ squares on top of the filling so it looks like the top layer is whole. Refrigerate this for at least a couple of hours before serving. When ready to serve, remove the parchment collar, and use the slices/ squares as a guide and cut through the filling right to the bottom.

Note: If you cannot find sliced almonds where you live (as in my case), you can make them at home. They will not be as thin as the store-bough version but I personally prefer my home made variety.

Blanch almonds by dropping them in just boiled hot water (not in boiling water, but boiling water that has just been taken off the heat). If you boil them, they will cook and become soft. Let them sit in the water for about 5 minutes. Then drain the water off and rinse once in cold water. Strain well. The skins of the almonds should feel a little loose and look wrinkled now. Pinch each almond at the broad end with thumb and forefinger and the skin should slip off easily.
Let the almonds dry out on a kitchen towel in an airy place for about half an hour. Then lay each almond down on its flat side and, using a sharp knife, slice as thinly as you can. There you have your sliced almonds.


Bienenstich Kuchen


BienenstichKuchen (German Bee Sting Cake)
To serve 6-8
Recipe Source- Aparna 

Ingredients:

For the Pastry Cream Filling:
250ml milk (I used 3%)
3tbsp sugar
3 tbsp vanilla flavoured custard powder
200 ml cream (I used 40% fat)
1 tbsp corn-starch

For the Dough:

1/4 cup milk (I used 3%)
100gm butter, at room temperature
2 cups all-purpose flour
2 tbsp sugar
1 egg
3/4 tsp salt
1 1/4 tsp instant yeast

For the Honey-Almond Topping:

50 gm butter
1/3 cup sugar
2 tbsp honey
1 tsp vanilla extract
2/3 cup almonds, sliced* (see Note above)

Method:

Bienenstich Kuchen

Make the custard for the filling first. This can be made the previous day and refrigerated till required.
Keep aside 1/4 cup of milk, and put the remaining milk and the sugar in pan. Over medium heat, bring this to a boil while stirring frequently to dissolve the sugar. In the meanwhile, dissolve the custard powder in the 1/4 cup of milk. Add this in a stream, to the boiling milk and keep whisking so that no lumps are formed.
Keep whisking until the custard becomes very thick. Take the pan off the heat and let the custard cool to room temperature. Whisk it on and off so it stays smooth. If it does become lumpy after cooling, use a hand blender to make it smooth. Transfer to a bowl, cover and refrigerate.
Once you are ready to fill the Bienenstich, whip 200ml of cream till soft peaks form. Then add the corn-starch and whip till it forms stiff peaks. Whisk the custard to make sure it is smooth. Gently fold the cream into the custard. If you feel it is too soft, refrigerate for a couple of hours and then use.


Bienenstich Kuchen

To make the dough, heat the milk until it is quite hot but not boiling. Cut the butter into pieces and add to the milk, stirring it until the better melts completely. Let it cool a little.
In the meanwhile, put the flour, sugar, salt and the yeast in the bowl of your processor. Run a couple of times to mix well and then add the egg (leave the egg out if you don’t use it). Run again till the egg has also mixed well. Now add the butter-milk mixture (it should be warm, not hot) and the then knead till it forms a smooth and soft (loose) brioche-like dough that’s just short of sticky. It should come way from the sides of the bowl and be easy to handle.
Shape the dough into a ball and place it in a bowl. Cover loosely and let it rise for about 1 1/2 to 2 hours. This dough will rise quite well but not to double or as much as your regular bread dough.

Deflate the dough, and shape again to a smooth ball. Place it in a8”spring form cake tin lined with parchment. It is important to do this otherwise the topping will make the bread/ cake sticky and difficult to unmould. Flatten the dough a little, pressing down lightly so that the dough fits the cake tin. It doesn’t matter if its not touching the sides like batter does. Let it rise for about 30 to 45 minutes. It will not rise very much and look a little puffy.


Bienenstich Kuchen

Prepare the topping while the dough rises. Melt the butter, sugar, honey and vanilla in a small pan, over medium heat. Keep stirring frequently and it will start bubbling up. Let it cook for about 3 minutes or so until it turns to a light beige colour. Add the sliced almonds, and stir well till the almonds are well coated. Take the pan off the heat and let it cool a bit. The mixture will become quite thick.


Bienenstich Kuchen

Now get ready to bake the bread/ cake. Once the dough has risen, use a spoon take bits if the topping (it will be quite thick, like a sticky fudge) and distribute it uniformly over the surface. If there are small gaps they will get covered once the bread/ cake is baking.


Bienenstich Kuchen

Bake at 180C (350F) for about 25 to 35 minutes until the top is golden brown and bubbling. A cake tester through the centre should come out clean. Let the cake cool in the pan for abpout 15 minutes. Then gently loosen the sides with a spatula and unmould. Let it cool completely on a rack.


Bienenstich Kuchen

When it has cooled completely, slice the cake into two equal layers carefully, using a very sharp knife. Spread the pastry cream on the lower layer and top with the upper layer and refrigerate till ready to serve.


Bienenstich Kuchen


Read More »

Saturday, January 7, 2012

Banoffee Pie


I was more than excited the minute I came to know that my friend Swapna's recipe had been chosen as the month's recipe by the Sweet Punch team! I had wanted to try this when she posted the recipe but as always, never took the effort of making the same lazing out :).

  When the recipe was announced, I planned to make the dessert during Christmas, so that children would be around, but then with the cakes and cookies all flowing in I wasn't quite motivated. Moreover I had by hands unbelievably full during the hoildays.

Finally I got ready with the ingredients and started whipping up the dessert 2 days back..


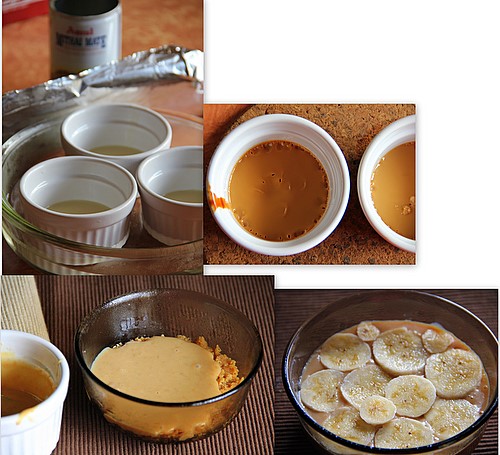
For the Dulce le Lechey, I adapted David Lebovitz's method as I felt to be more convenient and safe. Unfortunately my glass dish placed on the water bath on a pan didn't sit inside my small sized oven and I was forced to make it poured in individual ramekins made to sit in the glass dish made as the hot water bath, in turn.
The Dulce was a bit over done for me as I left it more than the time mentioned, my carelessness :), and I diluted with a table spoon of warm milk and condensed milk to bring it to the right consistency. I forgot to add the salt as suggested but again it was fine.


Banoffee Pie
Source- Swapna's Cuisine
Quantity - Halved
Serves- a small family

Below is the complete recipe:-

Ingredients:

Condensed Milk-1 can (400gm)
Bananas-3nos, large
Whipped Cream-2 cups
Digestive biscuits -200gms
Butter-100gms
Grated chocolate or Cocoa powder to decorate
Chocolate sauce to drizzle on top (optional)

Method:

To make Dulce the Leche (pronounced dulchay the laychay), put the can of condensed milk, unopened, in a large pan, cover with water, bring to boiling point and boil for 3 hours, topping up with boiling water from a kettle as needed. Ensure that the can remains covered in water, as otherwise there is a risk of the can bursting open. Remove and leave to cool completely. You can make this ahead of time or even boil several tins at one go and store the unopened cans in the fridge for several months. This is the traditional way of making Dulce the Leche.
Mix melted butter and powdered biscuit. Line a pie dish with this mixture and keep it in the fridge for some time. (For a crunchy biscuit base you can bake this for 10 minutes at 160 deg C. ).
Open the cooled can of condensed milk, which will have turned to toffee. Spread this over the layer of biscuit.
Peel and thinly slice the bananas, and arrange in a layer over the toffee.
Whip the cream until thick and stiff and spread over the bananas.
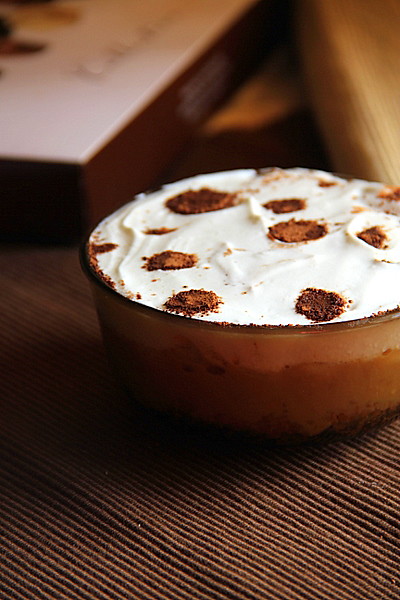
Finally, decorate with grated chocolate or dust the cocoa powder on top using a sieve. Drizzle with chocolate sauce (optional).

Serve.

Chilling hardens the whipped cream. If you prefer such, have like wise!


Though Swapna had been assuring about the irresistible taste, being a weight watcher, at least for the time being, I was worried counting the high calories contained in the dessert!
Soon after the photography session I licked clean the spoon you see up in the first picture ;) and then was prompted to dig out more! two more..nah..three more and the bowl was packed off to the neighbourhood!

Verdict from the neighbour's family - Absolutely lovely dessert! looking forward to more! but more quantity for next time please! :)

That says it all! :)

If you need more feedback I would rate this as a rich, creamy, melt in the mouth dessert!
The combined flavour of the salt n sweet biscuit base, the creamy  rich dulce, the sweet sour ripe banana bits and the smooth cream topping compliments to the core and proves to be a high threat to the milk/sweet lovers! ;)


Author's note:

The caramel is not supposed to ooze out from the dessert as you see. I diluted the dulce a bit too much... the whole thing should stay firm as layers when sliced.
I avoided chocolate sauce as in the recipe, wanting to create a design of neat circles of chocolate powder dusted on top. I do have the circles and the chocolate powder dusted, but of course not neat as expected! Pardon :)

For the full recipe, I prefer to use an increased amount; 600 gms of digestive biscuits for the base, but cut down butter to 75 gms :). 
Read More »
Related Posts Plugin for WordPress, Blogger...