Tuesday, November 15, 2016

Madakku san ~ The Coconut filled Pancakes of Kerala!


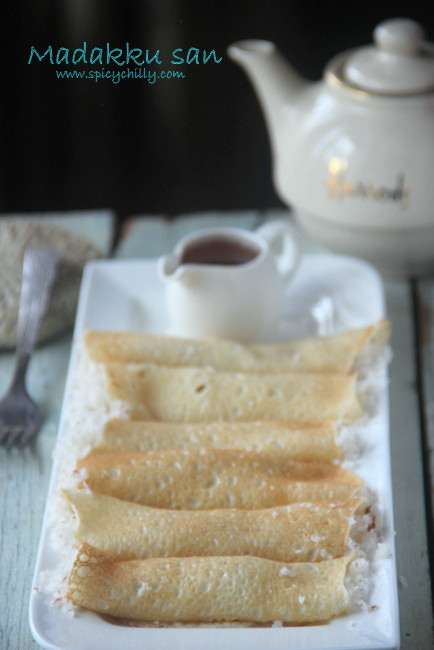
These delectable coconut crepes evoke fond memories of my teen years back in my home town, Kottayam! Madakku san was a regular 'after the school tea time snack', for children back home at 4 or 5 in the evening in Christian households. Our neighbour Kunjumol aunty used to make the best madakku san ever, that the taste still lingers in my taste buds! I believe the delicacy hasn't yet disappeared from the tables of Syrian Christian homes, while I wish to recreate the dish after decades, here in my space.

Central Kerala is one of the places in South India, highly inflluenzed by the  English culture during the foreign rule which has thrown its impact over the cuisine. A major part of the Central Kerala Christian menu is at least a fusion of the Anglo-Malayalee food preferences.
Madakku san dish is closely related to the Westernised pancakes, predominantly the batter part combined with the addition of fresh coconut, making it the fusion combo :). It  has the name, Mutta Kuzhalappam , meaning rolled egg pan cakes, as well!

Down to the recipe....


Madakku san
 Serves a family of 4
 Prep time- 5 minutes
 Cooking and assembly- 25 minutes

Get ready with:

 1 1/2 cups Maida or All purpose flour
 1 egg
 2 tbsps sugar
 3 fat pinches of table salt
 *1/2 cup milk
 *1 - 1 1/2cups Water


 For the filling:

 2 cups loosely filled freshly grated coconut
 Half of 1/4 tsp cardamom powder
 4 tsps sugar


Method:
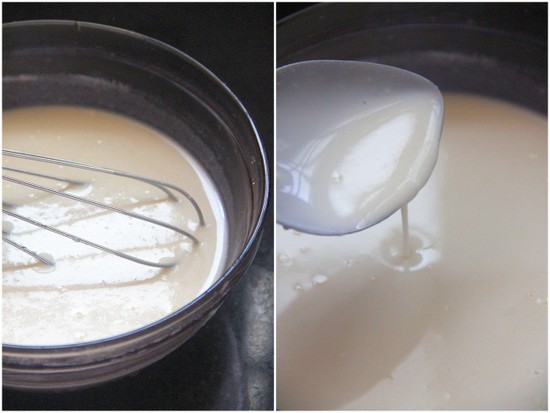


Beat the egg with a whisk in a bowl. Add flour, milk, water, salt and sugar to it and blend well to make it a thin runny batter. for 1.5 cups flour, you may need around 2 cups of liquid (milk and water combined). Probably you can add the milk first and carry on with a careful addition of water until to make the batter of the right consistency.
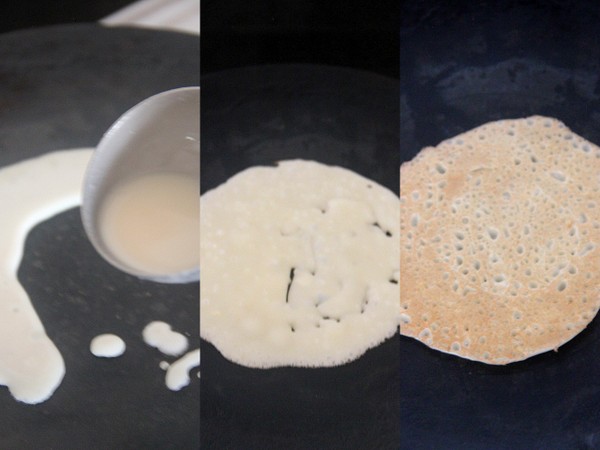


Heat a griddle or a tawa. Take a ladleful of batter and pour in a circular motion to complete the circle. Put the fire low.Flip the pan cake carefully over and cook the other side. Only if the batter is in the right consistency you will see the holes on one side and brown dots on the other side ( as in the picture below)  after cooking the pan cakes. make them one by one. Arrange them on a flat plate.
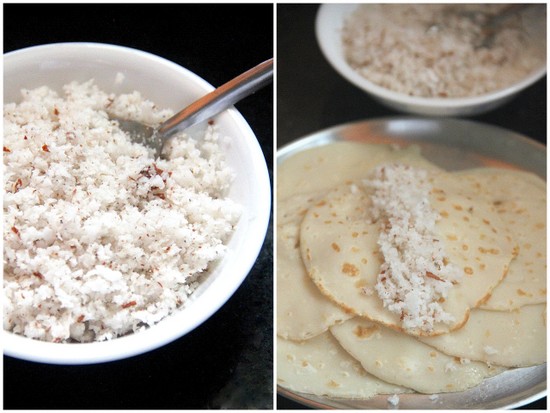


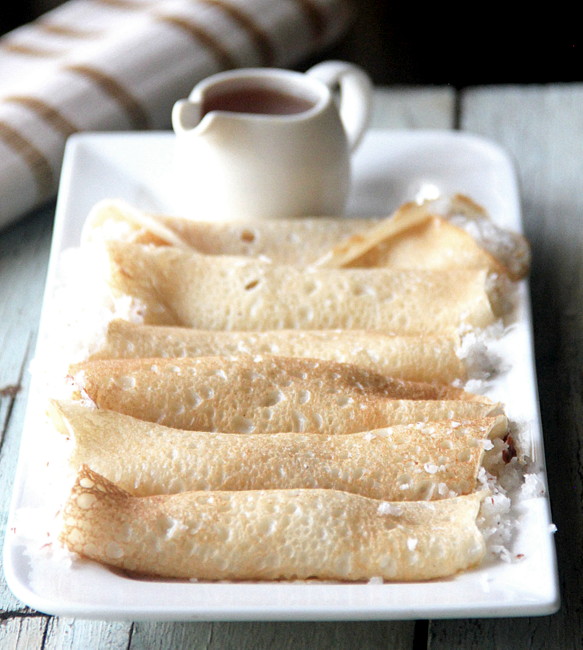
Prepare the filling. Combine the coconut, cardamom and sugar in a bowl. Spoon the filling on each of the crepes, in the centre from one end to the other as in the picture.
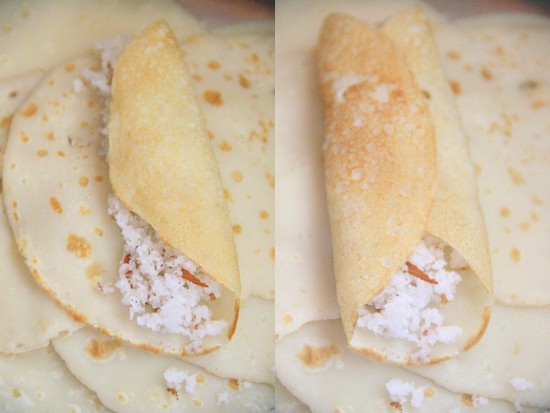


Bring one side over to cover one half and close the other half.  No rules about this part and you may roll it like your yoga mat too :). Just see that the filling is secured.
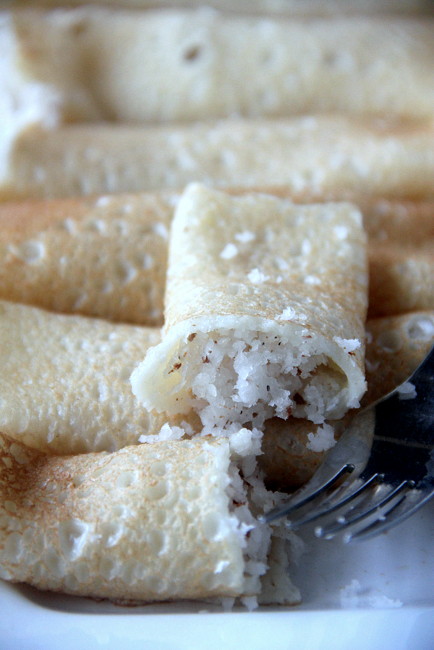

Madakku san

Drizzle maple syrup or honey and serve warm with tea of coffee.

Aparna, this post is for you!

Read More »

Saturday, October 29, 2016

Deepavali Mutton Kuzhambu


While all the Hindu festivals are related with feasts, sweets, snacks and goodies of whatever kind, it has to be all of vegetarian origin. Plants, leaves, flowers and fruits. But this festival Deepavali or Diwali has an 'excuse'. The Tamilians, especially, the Southies cook lamb on this day and serve for breakfast as Mutton Kuzhambu and/or mutton biriyani for lunch/dinner.

Back in my parents' home, amma used to make mutton thovaram, an amazing sidedish made with pieces of boneless mutton cubes sauteed to perfection with coconut and jeera with a touch of chillies. I had seldom celebrated Diwali with my parents ever since my marriage and had been continuously missing out on these delicacies! Here in my family, my in-laws follow a much traditional pattern, holding strictly, the vegetarian concept! Mutton and Deepavali put together is considered blasphemous ;)..though V smiles at the disappointment I have every time, every year on the D day :). To top the bad luck, the full moon day or the amavasya fell on the same day calling for feasts made with country vegetables even with no onion and garlic and sans 'English kay' like beans, carrots, potatoes... :)

I always wished to source out a South Tamilnadu deepavali mutton recipe and recreate for my space. This recipe is from Eshwari my friend, who hails from down South and makes this authentic Virudhunagar style dish for her family, every Diwali morning!

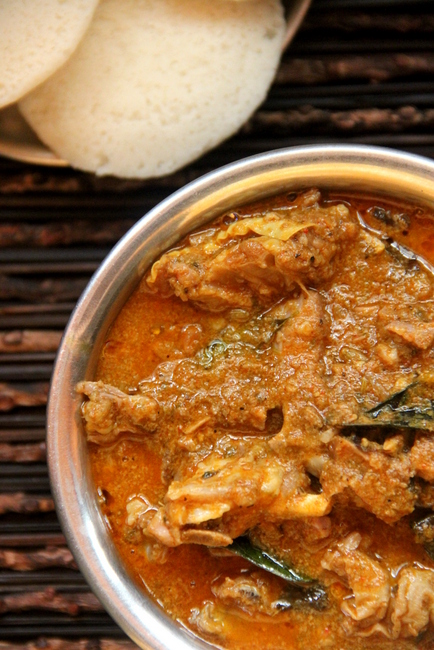
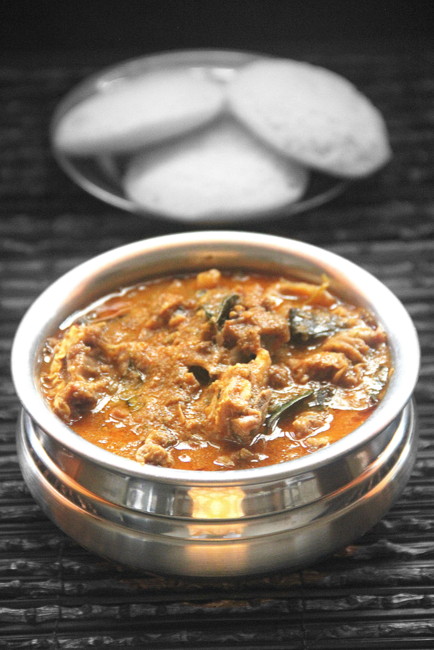
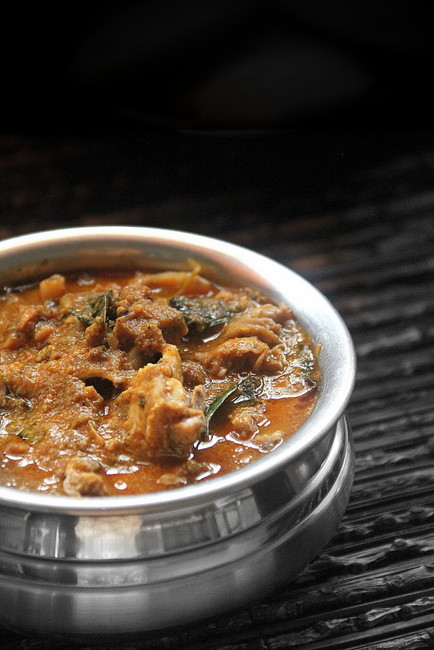
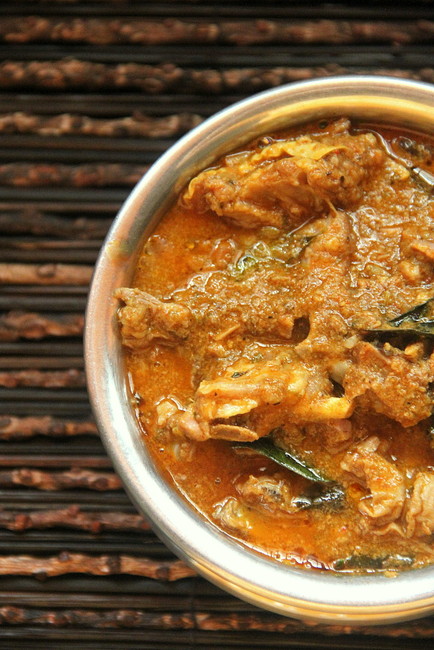
I should admit, this dish is one of the authentic mutton curries, I have tasted; with that balanced taste and aroma of the cinnamon and fennel, subtly dominating the combined flavours of ginger garlic with a touch of earthiness contributed by the lastly stirred in, mildly roasted and crushed jeera n pepper powders! What I really loved with this recipe is the generous addition of  pearl onions and the final cooking in coconut milk! Irresistible!


Virudhunagar Deepavali Mutton Kuzhambu

Prep time- 20 mins
Cooking time-40 mins
Total time needed- 1 hr
Serves 3


You Need:

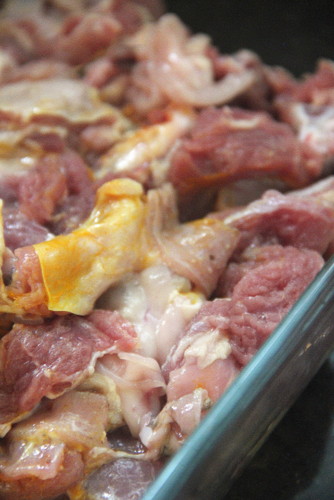
1/2 kg Mutton / Attukari with bones, cut into small pieces
1/4 tsp turmeric powder


To dry roast
1/2 tsp coarsely crushed pepper corns / milagu
1/2 tsp coarsely crushed Jeera / jeerakam
A sprig curry leaves

To season
3 tbsps Sesame seed oil /  Nallennai
1/2 tsp Fennel seeds / Sombhu
1 inch pc Cinnamon /pattai, crushed coarsely ( I used Ceylon Cinnamon / Surul Pattai )
1/2 tsp crushed ginger / inji
1/2 tsp crushed garlic /poondu
Chopped pearl onions / chinna vengayam, enough to fill a 200 ml cup
2 green chillies, sliced lengthwise
2 tbsps red chilly powder / milagai thool
1/2 tbsp coriander powder / malli thool
A sprig curry leaves / karuveppilai
A fat pinch of turmeric powder
7-8 cilantro / malli thazhai, whole herb,  roots removed

Freshly grated coconut enough to fill loosely a 200 ml cup OR 250 ml medium thick coconut milk

1 tsp Kosher salt / Kallu uppu


Method:


Wash and drain the meat pieces. Blend along 1/4 tsp of turmeric powder. Let it stand for at least 30 minutes.


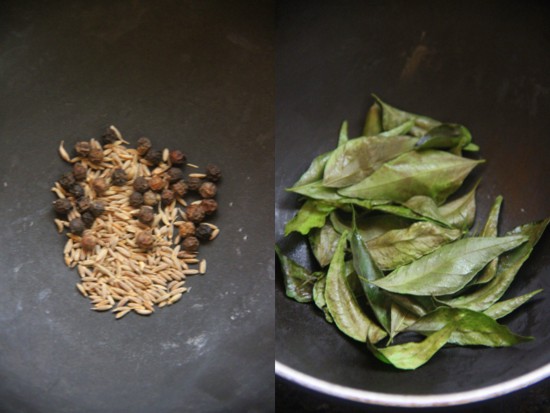
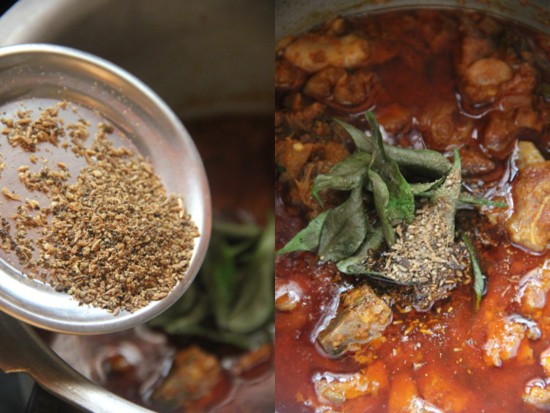
Dry roast pepper corns and jeera for a minute until the aroma emanates. Remove and roast the curry leaves in 4 drops of sesame seed oil. Remove and keep aside. We are going to use it for garnishing.


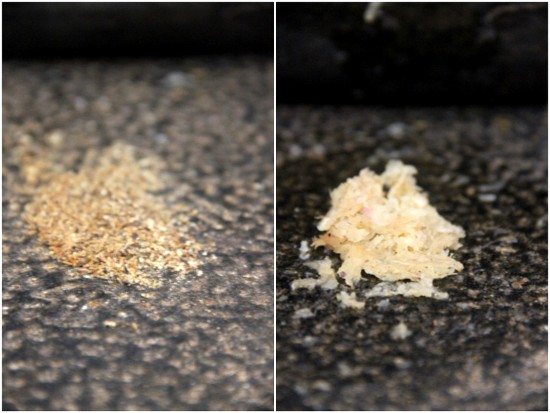
Coarsely grind of pulse the jeera and pepper in your mixer. Crush ginger -garlic as well. You can also use ginger garlic paste. I used my stone mortar (ammikkallu).


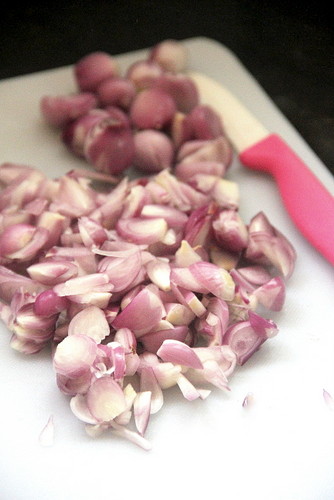
Chop pearl onions lengthwise, thin. Keep aside.


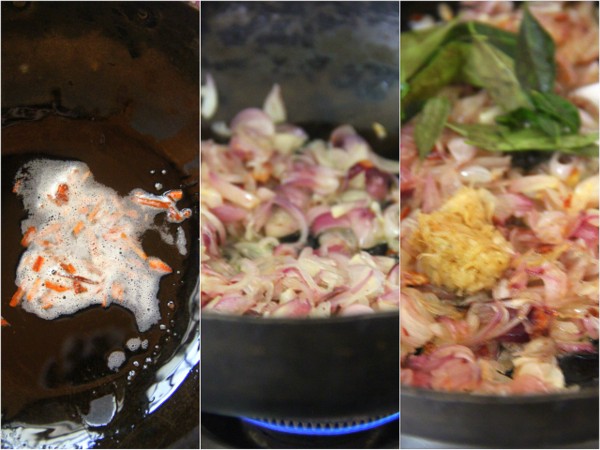
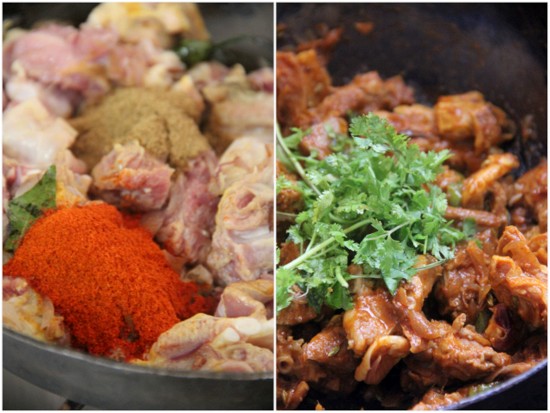
Heat 3 tbsps sesame oil in a wide thick bottomed kadai. Throw in crushed cinnamon ( Ceylon cinnamon is brittle and has a milder flavour. It can be crushed with finger tips too ) and fennel seeds. Saute sliced small onions. While golden brown, add the fresh sprig of curry leaves ( not the roasted ones ) and the ginger garlic paste. Saute for a minute.


Now add the red chilly, coriander and the turmeric powders along with the salt. Mix well and heat up the whole thing to blend well in low flame for 3 minutes adding the cilantro. No need to chop the herb, leave them a bit long.


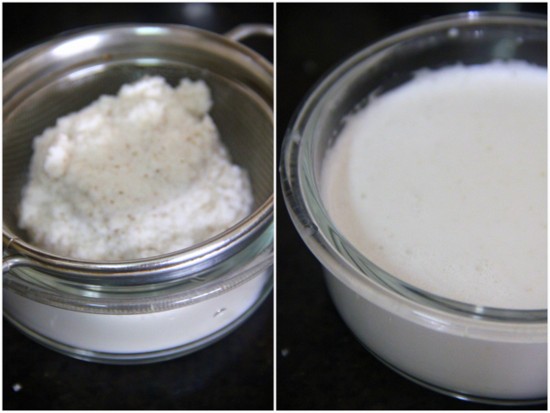
Extract 250 ml coconut milk from the grated coconut. You need not separate 1st and 2 nd milk or thick and thin milk. Just have them together in medium thickness.


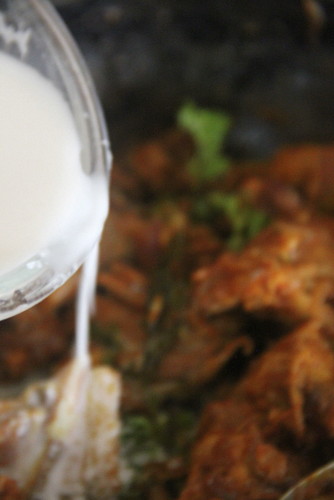
Add along the curry. Mix well and transfer to a pressure cooker.


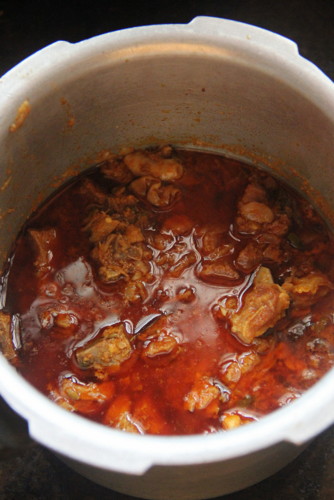
Cook in full flame until one whistle. Lower the flame to minimum and keep on fire for 20-25 minutes or until the chunks are cooked soft! Open. Voila !! You are sure to confront a sexy red curry topped with oil ;) with a full blast aroma! Slide out a piece of meat and check the doneness. If not, give a stir and return to the stove top and cook for some more time. You need not add any water.


Throw in the roasted curry leaves, along with the powdered cumin and pepper. Stir gently to combine. Check salt at this point. Transfer to a serving bowl. Your Virudhunagar Mutton Kuzhambu is all ready to be served hot with idlies or dosas.


Note:


  • This recipe calls for sesame seed oil or nallennai for the authentic taste.
  • Do not compromise on the onions. Yes, it has to be small onions / pearl onions which fills loosely a 250 ml cup so that once sliced it yields a 200 ml cup.
  • I have used freshly extracted coconut milk from freshly grated coconut shavings. You may use canned milk or 3- 3.5 tbsps of coconut milk powder mixed in warm water. The whole idea is to have a medium thickcoconut milk.
  • The amount of ginger garlic paste is lesser when compared to meat curries in this one. This is to bring out the flavour of spices! Do not skip the final addition of the roasted n crushed cumin-pepper mix. My friend insisted on rock salt / Kosher salt / 'kallu uppu' instead of the regular table salt. Seems this salt combined with the spices add to the authenticity of the dish!


Read More »

Tuesday, October 25, 2016

Basundi


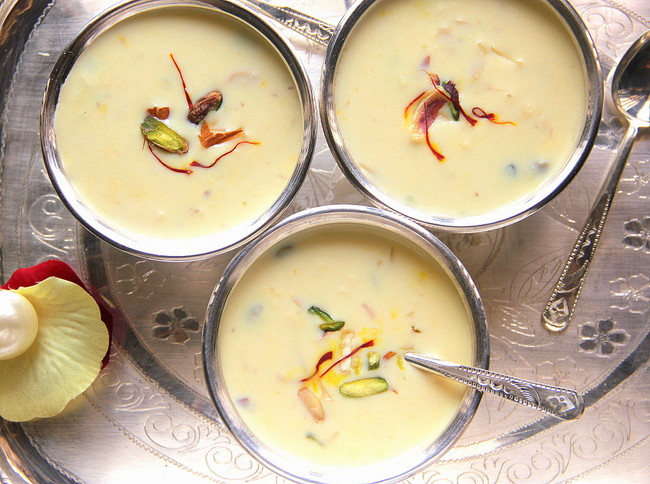
According to Wiki, Basundi the traditional sweet prepared from milk, belongs to the states, Karnataka, Gujarat and Maharashtra and is similar to the preparation of the North Indian Rabri.
I already have the recipe of Rabri in my Rasagulla post. When I asked one of my Maharashtrian friend about the difference between the both, she mentioned about the Rabri being thicker and creamier and Basundi. Addition of dry fruits or lime or other fruity flavours gives versatility to Basundi which again serves as an accompaniment to pooris!

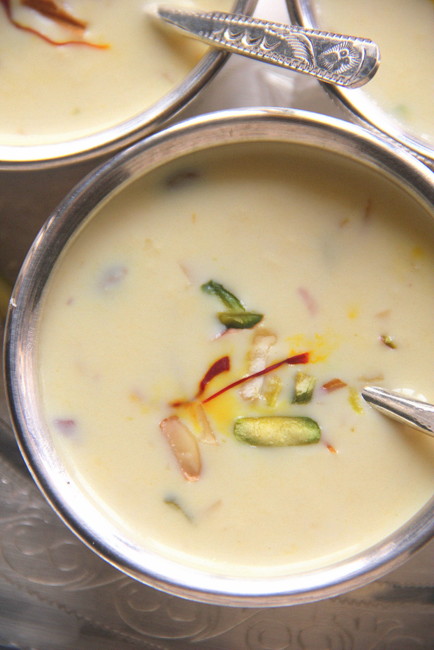
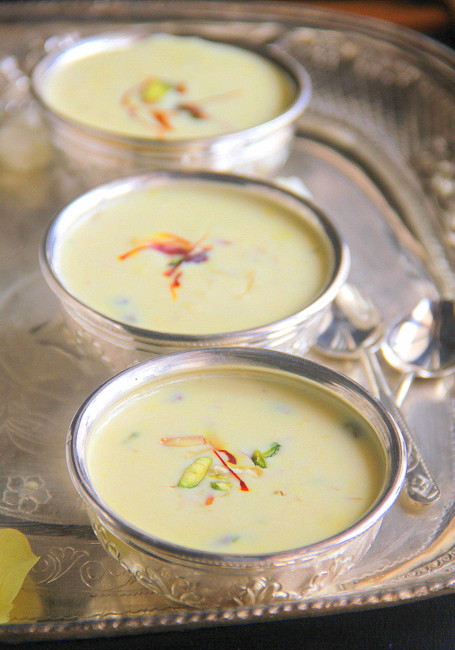
So, Basundi is all about boiling fresh full fat milk, bringing down to half its level, cooked with slivers of nuts, sweetened with white sugar and flavoured with cardamom and nutmeg.


Basundi
Total time needed- 40 mins 
Yield - Fills two 200ml cups


Get ready with:

 1 litre Full fat Milk
 1/4 cup scant Sugar
 A tablespoon each of slivered nuts, Pistachios, Almonds and Cashews. Reserve a few pieces if you wish to garnish.
 A few strands of saffron soaked in 2 tbsps warm milk
 Two fat pinches of freshly ground cardamom
 A pinch of powdered nutmeg (I didn't use)


How to make:


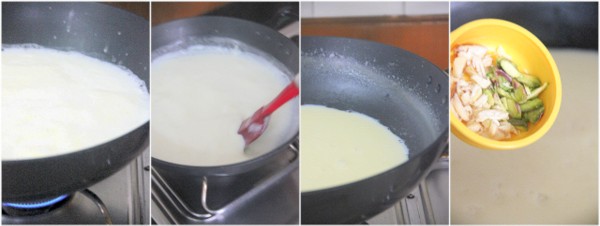
Start with boiling the milk in a wide non stick kadai. Lower the flame and taking utmost care, not to burn the cream in the base, stir along well.Scrape the edges as well and combine with the milk all along. Reduce the quantity to almost half.  I needed 25 minutes to reach this point. Add the nuts and stir along.


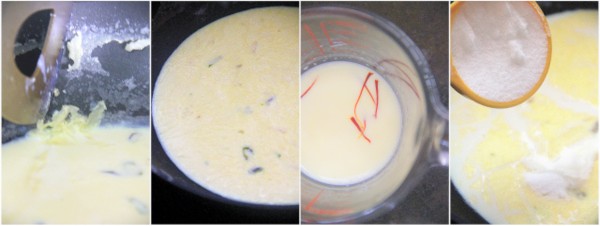
Simmer for a few minutes. Keep stirring and scraping. I switched off the flame and took a break here as my hands were aching a bit ;). Soak a few saffron strands in two tablespoons of warm milk. Reserve. Back to the milk, add sugar and stir in.


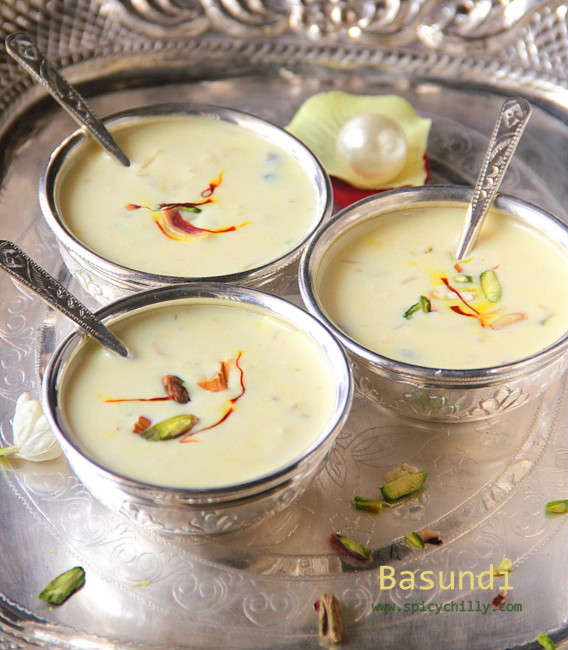
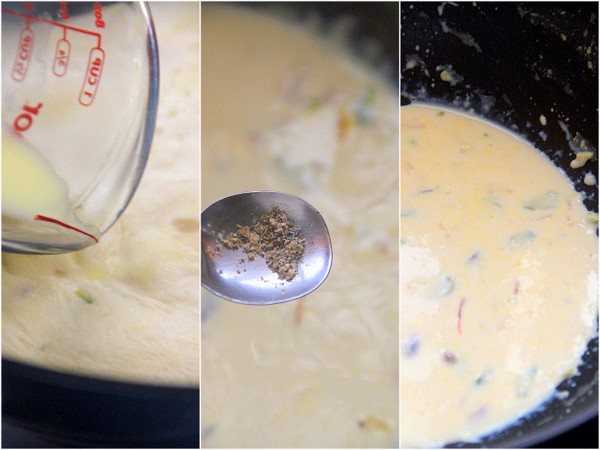
Addition of sugar makes the milk thinner. So, simmer for 3 minutes in minimum flame. Add in milk with the soaked saffron followed by the freshly ground cardamom powder. Put off heat. You can get an idea of the finished hot Basundi from the the final picture. Its thick,  nutty, creamy and has a mild yellow hue.


Serve warm or chilled! 


          Notes:

  •  If you feel, the traditional method of boiling down the milk and preparing Basundi, elaborate, you can use 1/4 - 1/2 cup of sweetened condensed milk, stirred in with the milk. Cut down on the amount of sugar in that case.
  • Stir the milk continuously while simmering down, taking extra care to scrape the base gently to prevent browning of the milk fat. If you ever come across that, switch off the stove and filter milk to remove them. 
  • Usage of wide nonstick pans, make the work easier. I needed 45 minutes for the whole process for 1.250 litres of full fat milk.The whole idea of stirring up rich Basundi is to preserve the cream / malai while boiling milk. Keep scraping the sides and bottom and combine with the simmering milk all the while. You can even switch it off in mid point as I did :) to relax a bit and start again after an hour or so. The thick cream or malai on top can be stirred along :)
  • Basundi can be made a day or two earlier if you wish to serve your guests. Keep it chilled and airtight.


Read More »

Tuesday, October 18, 2016

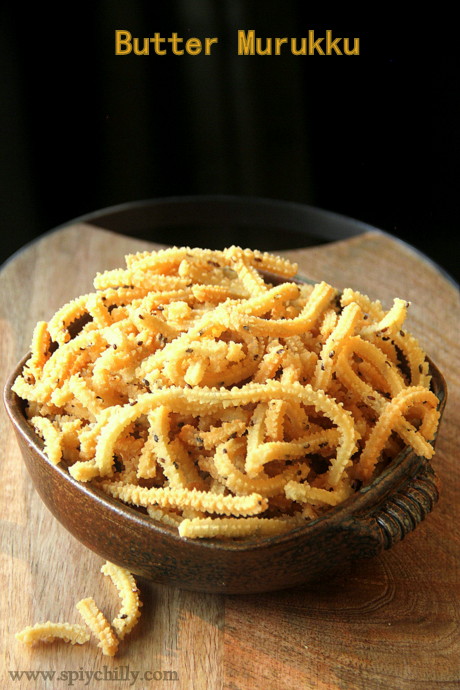
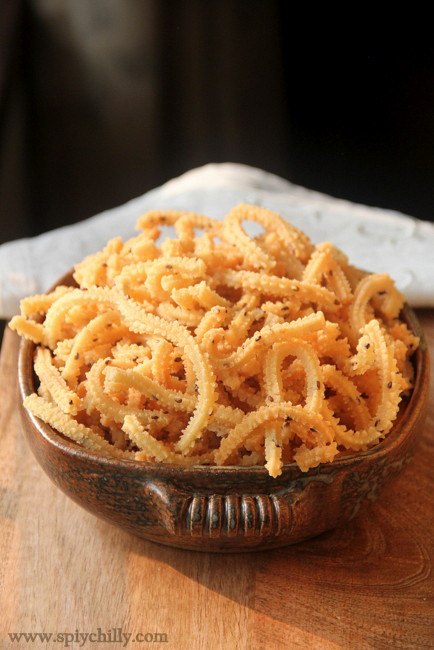
Butter Murukku ~ An easy to make Murukku / Chakli recipe for Diwali


It had been a while since I posted a recipe in my space. If to give reasons, there are a few; travel being the main one :), yes, to the far west end of the globe for about a quarter. While I still tide over the jet lag and tiredness coated with the wonderful memories of meeting a few of the wonderful blogger pals in Bay Area, I got prompted to get back to posting a Diwali recipe.
I am not an expert in making 'chaklis' or 'murukku' and decided to roll up my sleeves to attempt a simplest one to begin with. A simple family favourite with the recipe sourced out from one of my husband's aunts, who passed over the measurements in 'padi' or the traditional Tamil measuring cups which in turn were carefully scaled down to cup and tablespoon measures here :)

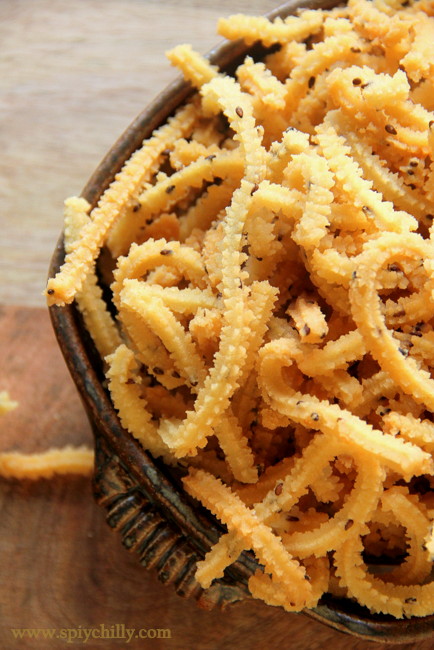
'Butter Murukku' is easy to make than you presume and you will realize the homemade ones, far better in taste and texture than the store bought counterparts.


Butter Murukku
 Prep time 15 mins
 Cooking time 30 mins
 Yields a 500 ml bowl loosely heaped


 Ingredients

 1 cup Rice flour or Arisi mavu, not roasted- I used store bought raw rice powder.
 1 heaped tbsp Besan or Kadalai mavu
 1 heaped tbsp *Roasted gram flour or Pottukadalai mavu -(refer method down)
 1/4 tsp Hing or Perungayappodi
 3/4 tsp Cumin (Jeerakam) or Sesame seeds (Ellu) - I used Sesame seeds

 1 tbsp unsalted butter at room temp
 125 ml  water at room temp
 1/2 tsp table salt


Method


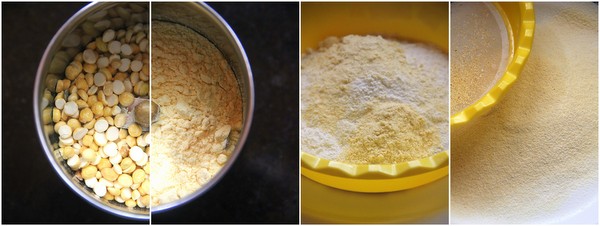
*Measure 1/4 cup of  Roasted gram, place in your food processor or a dry mixie jar and powder well.
Measure the rice flour, besan and the powdered gram flour (do not use the whole powder. just measure a heaped tbsp for our purpose) in a separate bowl and sieve to discard the grainy particles of the grams.


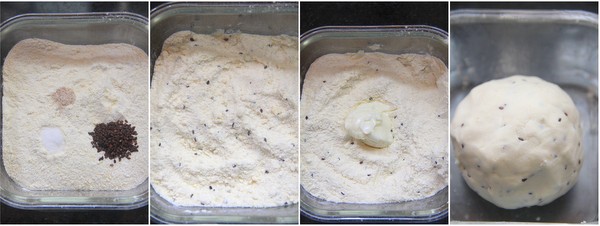
Transfer to a bowl and add hing, salt and the sesame seeds. Mix to combine with a whisk or use your finger tips. Next, rub in butter, combine evenly in the dry flour mixture and lastly add the water little by little to form a soft ball. I needed exactly 125 ml. But be careful with the measurement and be warned; it can slightly vary according to the quality of the flour used. The ball should neither be too hard nor soft. The consistency should be almost the same as 'Idiyappam' dough. Check salt at this point.


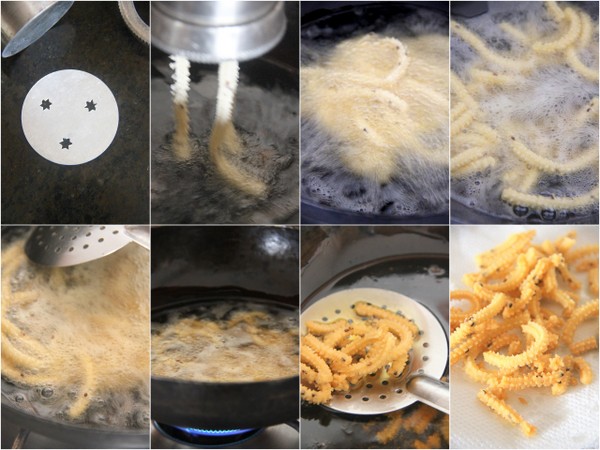
 Pick out the star designed disc and fix with the murukku press. Grease the insides of the cylinder and outsides of presser with a few drops of oil. Heat oil in a wide and thick bottomed kadai. To check the right temperature of the oil, pinch and drop a tiny ball of dough into the hot oil. The oil is in the right temperature, if it rises up immediately with a sizzle and not smoky. Fill half of the cylinder with the dough and press gently in a slow wide circular motion into the hot oil. It should sizzles you see in the picture. This murukku generally falls as broken pieces, though it happened to be intact for me :). Do not disturb for a few seconds and wait for the initial sizzle to calm down, may be for 15-20 seconds. Lower the flame if oil is smoky. Gently turn the murukku pieces in the oil until they attain a light golden hue of the morning sunlight. Drain and transfer to a tray or a flat plate lined with paper towels. Let it cool down completely before you transfer into an airtight container. Enjoy with a steaming cup of coffee or tea :)


Read More »

Friday, June 3, 2016

Mango Panna Cotta


I always thought Panna Cotta was a 'difficult to make' dessert. But then now I realize, it isn't. As a teen, I was obsessed with whipping up perfect puddings: caramel, mousse, tender coconut and had this flair to play with the hidden ingredient, agar agar or gelatin, which gave the body to the comforting desserts in various forms and flavours.

Coming to Panna Cotta, which means cooked cream, as you all might know, is an Italian dessert, a basic one made of milk and cream, thickened and moulded by gelatin and flavoured with rum, coffee, vanilla etc.
Generally, you might have come across 'Coulis' ( pronounced /kuːˈliː/ koo-LEE; French) is a form of thick sauce made from puréed and strained vegetables or fruits. The interesting note about this dessert is that it is quite a versatile one, means, once you get the hang of making the basic  pudding, you can be creative with it.

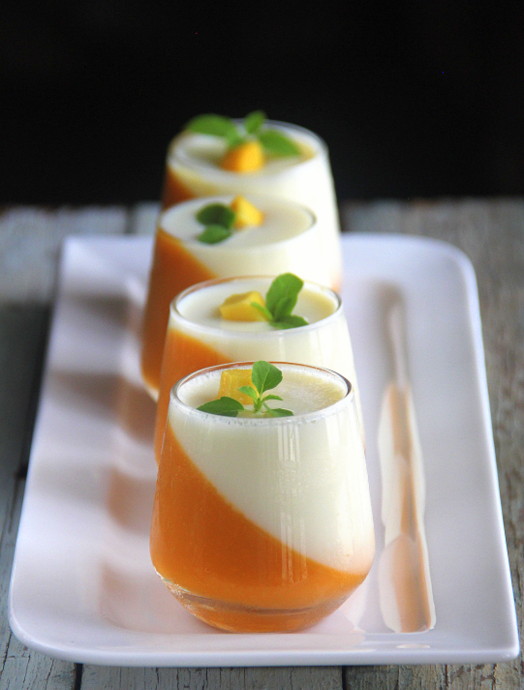
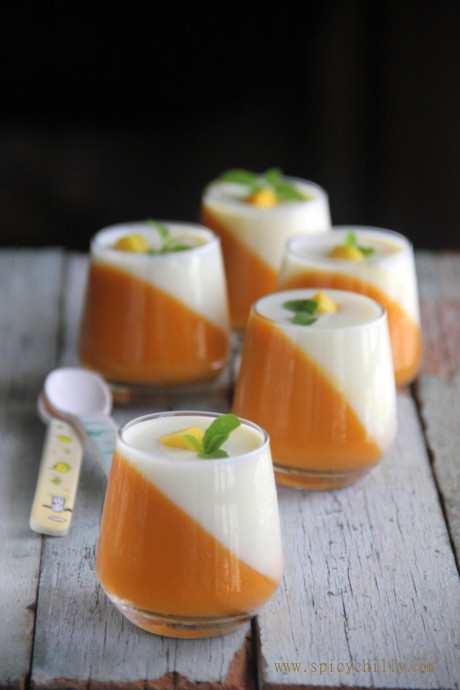
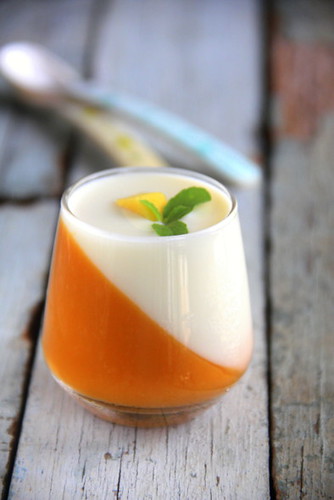
Now, coming to Mango Panna Cotta, as the name sounds, is a combination of mango coulis and cooked milk and cream flavoured with vanilla both set individually by gelatin.You can set it in a pudding dish as layers, Mango Coulis(which is set by gelatin) as the base and with milk and cream on top, the other way round, more of mango and less of milk and cream mix and vice versa. Anyways, I can assure, it tastes yummy. Its easier than you think, though the whole thing seems complicated. You can pleasantly surprise your guests setting them in individual glass cups, as I have done and yes, you will have compliments pouring in! :)


Mango Panna Cotta
For 5 small individual servings 


Before we start, let me tell you, I used 5 glass cups of 100 ml each. Hence I prepared 250 ml of mango pulp and 250 ml of milk and cream mixture to fill them all.

For Mango Coulis

A 250 ml cup Mango Pulp made from de-skinned chunks of fresh mangoes ( Ripe mangoes like alphonso render that bright yellow hue)
1-3 tsps Powdered Sugar or according to your sweet level. ( I did not add as the mangoes were sweet enough)
1 tsp of gelatin (soaked in 3 tbsps of cold water for 30 minutes in refrigerator to bloom)

For the Milk Mixture

150 ml Full fat milk
100 ml Heavy Cream ( I used Amul fresh cream )
2-3 tsps of sugar ( I used 2)
1 tsp of gelatin (soaked in 3 tbsps of cold water for 30 minutes in refrigerator to bloom)
1/2 tsp vanilla extract


Mix up and set


Part 1- Mango Coulis

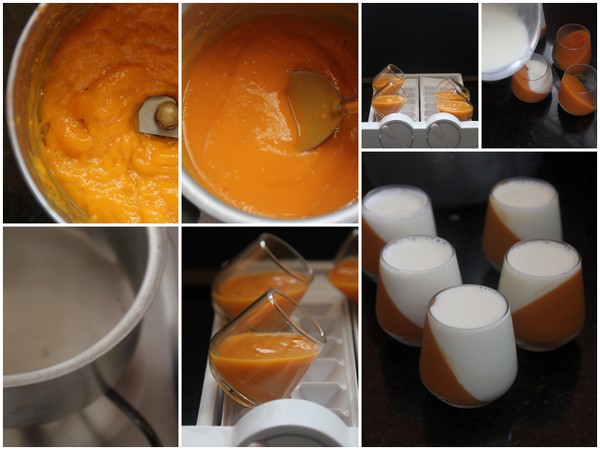
Mix in sugar while you pulp the mango cubes. Take out the 1tsp gelatin from the refrigerator and melt gently in  a pan in low and controlled flame on stove top. Transfer the mango pulp to this and combine in low heat just under the boiling point or remove from fire before it starts to bubble. This is to ensure that the ingredients are incorporated well.

Whisk gently while cooling down.While luke warm, transfer the mix gently to tilted glasses. I used my ice tray to hold the 45 deg position. Secure mouths with cling wraps. With utmost care, return to the refrigerator, holding the position :). I held my breath while doing it ;). Leave undisturbed for 4-6 hours until firm.

Part 2- Milk and Cream

Combine cream, milk and sugar and bring to a gentle boil, in low flame stirring until the sugar dissolves. Switch off.
Repeat the above step for melting gelatin.
Take out the 1tsp gelatin from the refrigerator and melt gently in another pan, in low and controlled flame. Stir in this to the above milk mixture along with vanilla.

Whisk gently while the mixture cools down. Take out the mango coulis glasses which are set well enough. Pour in the milk mixture carefully to fill the mango layer on top. Place them back to chill as such in standing position. Secure with cling wraps. Milk mix gets set within a couple of hours.
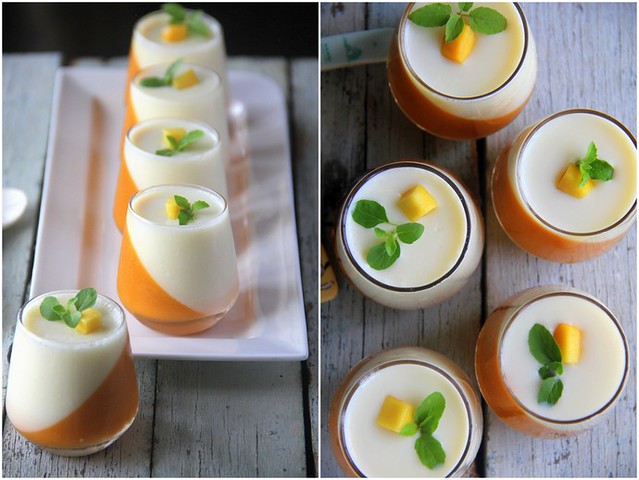
Serve chilled topped with mango slices and young mint leaves.


 Notes:

I haven't tried with agar agar. A 5-7 gm sheet should suffice for the above quantity. You need to divide it into equal portions and soak in warm-hot water. Melt on stove top bringing to gentle simmers, until it dissolves completely. Finally combine with the mango coulis and milk mixture, separately. Remember, you do it for both as different batches with an interval of 6 hours. If done in one go, it solidifies as it is.

Perfect panna cottas are softly firm or a bit wiggly rather than hard and firm.

I personally prefer it less sweet and so added minimum sugar.


Read More »
Related Posts Plugin for WordPress, Blogger...