
 Home
Home
 Recipe Index
  Kerala Recipes
 Tamil Recipes
 Our Cooking Station
 About
About 


Friday, February 10, 2012

Wednesday, February 8, 2012
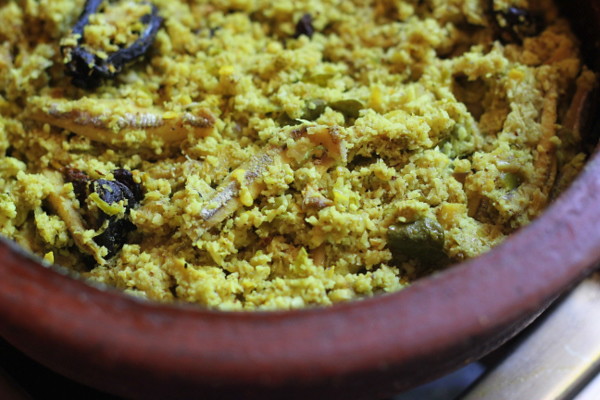
Meen Peera / Fish with Shredded Coconut
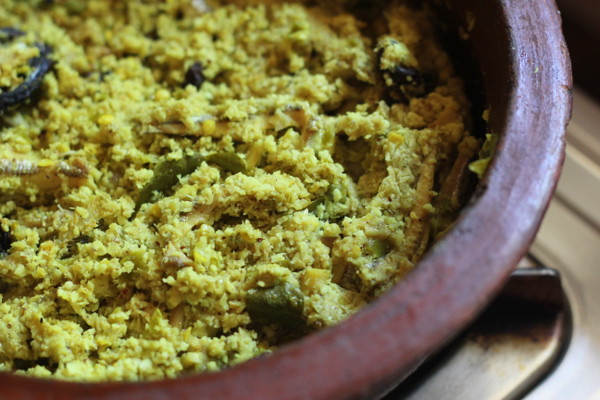
Meen Peera is a popular dish belonging to the Christian households of Central Kerala. As any fish dish, I have grown up savouring meen peera right from my childhood days and still one among the favourites!
Traditionally meen peera is made with Netholi or anchovies but any small fish should serve fine too.
The combined flavour of cooked fish with the coarse coconut in which the juices of chilles, 'kudampuli', coconut oil and curry leaves all melded in becomes irrestitible to any fish lover in the state!
Ingredients:
Fish-(anchovies is used here) - 1/2 kg , cleaned
Kudampuli (kokum) - 3 to 4 pieces
Coconut oil - 2 tbsp
Curry leaves - 2 sprigs
Salt to taste
To Grind Coarsely
Freshly grated coconut - 1 to 1 1/2 cups
Turmeric powder - 1/2 tsp
Green chillies - 7 or 8 numbers
Small onions - 6-7, sliced
Ginger - 1" piece, sliced
Garlic - 10 small cloves, sliced
Method:
Wash the kudampuli and soak in 1/2 cup of warm water for 10-15 minutes.
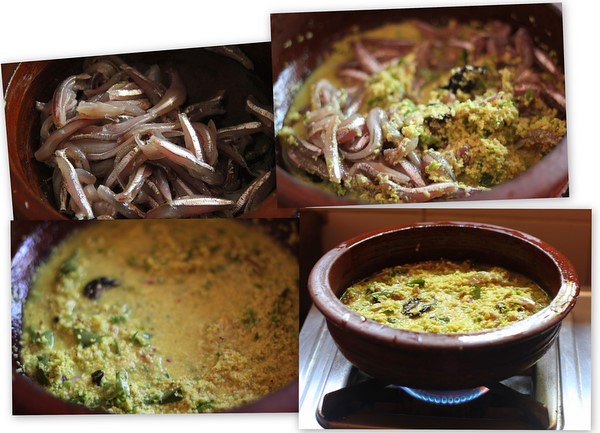
Pulse the green chillies, small onions, ginger and garlic for not more than 3-5 sec, followed by the coconut and turmeric powder added in. Let the whole mixture be coarse and dry. No water is added during grinding.
Transfer ground paste to a flat earthern vessel / meen chatti or a thick-bottomed utensil. To this, mix in the kudampuli (and the water in which it was soaked) along with fish and the curry leaves and salt. Drizzle 1 tbsp of coconut oil to avoid the curry sticking to the bottom. Cook on medium heat for about 10-15 minutes until the fish is cooked. Drizzle the rest of the coconut oil or the remaining 1 tbsp over the curry. Serve hot with steamed rice.
Thursday, February 2, 2012
Fudgy Chocolatey Brownies
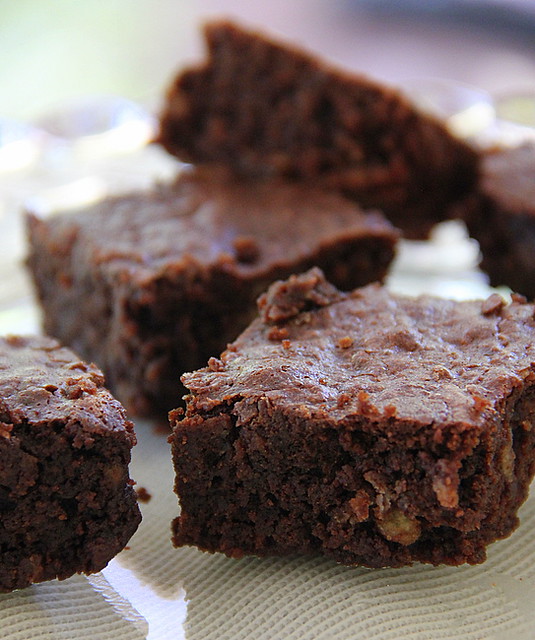
There are four reasons for this post.
1. I had wanted to make one of the best brownies for my cousin's daughter, who is carrying; home made brownies being her favourite.
2. I was in Kottayam past week and had lots of free time and patience and was motivated to try out a new brownie recipe.
3. Swapna. She'd already tried this and approved. Passed me over the recipe instantly when I requested.
4. Spicy Chilly is shifted to an own domain!
I had wanted to do it pretty long back but then the .com status wasn't available. Since not quite happy with the others like .net, .info etc, I had been postponing the shift.
A couple of days back I noticed the change of blogspot.in attached to the blog URL. So why not give another try? And to my pleasantest surprise the URL www.spicychilly.com was available!!!
I couldn't wait to register. The blog is still in transition and would take another day or be ready as soon as I post this to grace the occasion :)
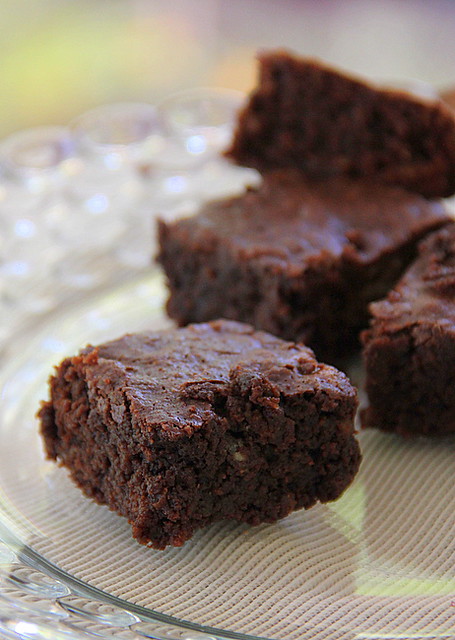
Fudgy Chocolatey Brownies
Source- Chocolatechic
The way the batter is prepared is different from any other brownie recipes. Half of the eggs and sugar are mixed in with the chocolate, while the other half are beaten until they double in volume and are as light as a sponge. Whipping the eggs creates the surprisingly creamy, soft and definitely fudgy texture.
- 1 c. all-purpose flour
- 1 tsp salt
- 2 sticks unsalted butter, cut into 16 pieces
- 4 oz. unsweetened chocolate, coarsely chopped
- 2 oz. bittersweet chocolate, coarsely chopped ~I used Hershey's semi-sweet
- 2 c. sugar (scant, if you use semi sweet chocolate)
- 1 tsp. pure vanilla extract
- 4 large eggs

Center a rack in the oven and preheat the oven to 350º F. Put a 9 inch square baking pan (I used Pyrex for this) on a baking sheet. Whisk flour and salt together.
Set a heat proof bowl over a saucepan of gently simmering water, put the butter and chocolate in. Stir frequently until the ingredients are just melted-you don’t want them to get so hot that the butter separates. Add 1 c. sugar and whisk gently just to incorporate it, then remove the bowl from the pan of water. Stir in the vanilla and transfer to a large bowl.
Put the remaining cup of sugar into the bowl of a stand mixer or a medium bowl and whisking a whisk, stir in the eggs. Switch to a rubber spatula and little by little add half of the sugar-egg mixture to the warm chocolate, stirring very gently without stopping-you don’t want the heat of the chocolate to cook the eggs.
With the whisk attachment or with a hand mixer, or have your chef son beat the reaming sugar and eggs on medium-high for about 3 minutes, or until they double in volume. Using a spatula and a light touch, fold the whipped eggs into the chocolate, stopping just short of blending them in completely.
Sprinkle the dry ingredients over the batter and delicately fold them in, working only until they disappear. Scrape the batter into the pan and smooth the top with the spatula.
Bake for 25-28 minutes, or until the top looks dry. Poke a thin knife into the center and take a peek: The brownies should be only just set and still pretty gooey.
Transfer the pan to a rack and cool to room temperature.
The brownies are fragile and best cut in the pan. Cut eighteen 1½ x 3 inch bars.
(I had halved the batter and baked twice dividing them into 1½ x 1½ inch bars).

Tuesday, January 24, 2012
Semia / Vermicelli Upma
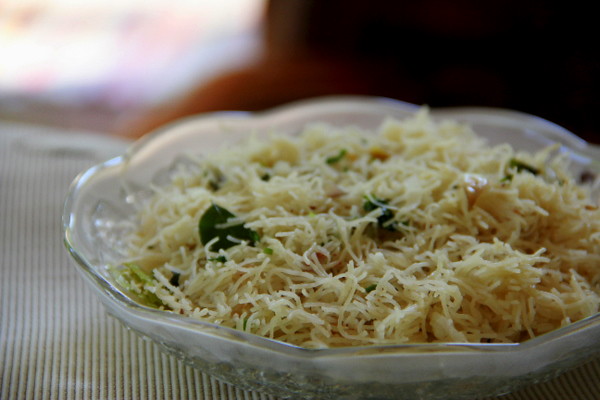
I have been keeping the recipe typed and the pictures of this post drafted for the past 4 days ever since amma made, back home and I had been wondering what to type for the intro part! Oh yeah, most of the times my mind gets blocked when it comes to this and badly want to proceed to the recipe directly..
So, this what amma made for breakfast in a jiffy and I loved the preparation though not a fan of regular upmas or even semia upmas. I had wanted to post the step by step for this one but was away for the morning walk and by the time I came back amma had arranged the food in the glass bowl asking me to take the picture :)
And now for the recipe part she had gotten ready with:
Roasted vermicelli- 200 gms or 3 cups +/-
Water- 500 ml
Salt- as needed
To Season
Oil- 3 tbsp
Mustard seeds- 1/4 tsp
Urad dal- 1/2 tsp
Ginger, minced finely- 1/2 tsp
Green chillies- 3, slit lengthwise
Curry leaves - a sprig
Chopped coriander - to garnish
Freshly grated coconut - 2 tbsps (optional; tis the Kerala way)
Method:
Heat oil to season in a non stick kadai, splutter mustard seeds, brown the urad dal, followed by the minced ginger and the green chillies. Stir for a few seconds and throw in the curry leaves. Now pour the water. Bring it to boil, adding salt.Stir in the vermicelli stirring to combine the whole ingredients taking care not to form any lumps and close the kadai with a lid. Reduce the flame and cook until done. The semia would have cooked soft absorbing the water and see to it the strands aren't sticky and stay separate. Top the Upma with the freshly grated coconut ( which is purely optional), yes she used it, garnish with finely chopped coriander leaves and serve hot with coconut chutney.

Variations
You may add onions while seasoning. A large big onion sliced lengthwise will be apt for the mentioned amount of vermicelli. Saute the onion after ginger and green chillies and proceed...
Saturday, January 7, 2012
Banoffee Pie


I was more than excited the minute I came to know that my friend Swapna's recipe had been chosen as the month's recipe by the Sweet Punch team! I had wanted to try this when she posted the recipe but as always, never took the effort of making the same lazing out :).
When the recipe was announced, I planned to make the dessert during Christmas, so that children would be around, but then with the cakes and cookies all flowing in I wasn't quite motivated. Moreover I had by hands unbelievably full during the hoildays.
Finally I got ready with the ingredients and started whipping up the dessert 2 days back..
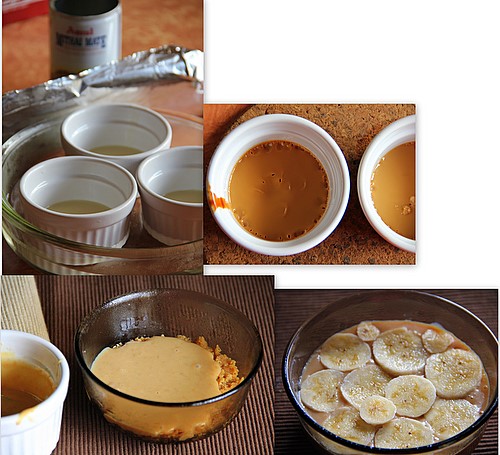
For the Dulce le Lechey, I adapted David Lebovitz's method as I felt to be more convenient and safe. Unfortunately my glass dish placed on the water bath on a pan didn't sit inside my small sized oven and I was forced to make it poured in individual ramekins made to sit in the glass dish made as the hot water bath, in turn.
The Dulce was a bit over done for me as I left it more than the time mentioned, my carelessness :), and I diluted with a table spoon of warm milk and condensed milk to bring it to the right consistency. I forgot to add the salt as suggested but again it was fine.
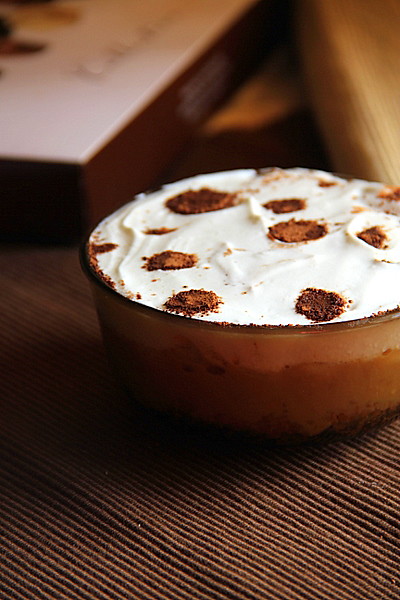
Banoffee Pie
Source- Swapna's Cuisine
Quantity - Halved
Serves- a small family
Below is the complete recipe:-
Ingredients:
Condensed Milk-1 can (400gm)
Bananas-3nos, large
Whipped Cream-2 cups
Digestive biscuits -200gms
Butter-100gms
Grated chocolate or Cocoa powder to decorate
Chocolate sauce to drizzle on top (optional)
Method:
To make Dulce the Leche (pronounced dulchay the laychay), put the can of condensed milk, unopened, in a large pan, cover with water, bring to boiling point and boil for 3 hours, topping up with boiling water from a kettle as needed. Ensure that the can remains covered in water, as otherwise there is a risk of the can bursting open. Remove and leave to cool completely. You can make this ahead of time or even boil several tins at one go and store the unopened cans in the fridge for several months. This is the traditional way of making Dulce the Leche.
Mix melted butter and powdered biscuit. Line a pie dish with this mixture and keep it in the fridge for some time. (For a crunchy biscuit base you can bake this for 10 minutes at 160 deg C. ).
Open the cooled can of condensed milk, which will have turned to toffee. Spread this over the layer of biscuit.
Peel and thinly slice the bananas, and arrange in a layer over the toffee.
Whip the cream until thick and stiff and spread over the bananas.
Finally, decorate with grated chocolate or dust the cocoa powder on top using a sieve. Drizzle with chocolate sauce (optional).
Serve.
Chilling hardens the whipped cream. If you prefer such, have like wise!
Though Swapna had been assuring about the irresistible taste, being a weight watcher, at least for the time being, I was worried counting the high calories contained in the dessert!
Soon after the photography session I licked clean the spoon you see up in the first picture ;) and then was prompted to dig out more! two more..nah..three more and the bowl was packed off to the neighbourhood!
Verdict from the neighbour's family - Absolutely lovely dessert! looking forward to more! but more quantity for next time please! :)
That says it all! :)
If you need more feedback I would rate this as a rich, creamy, melt in the mouth dessert!
The combined flavour of the salt n sweet biscuit base, the creamy rich dulce, the sweet sour ripe banana bits and the smooth cream topping compliments to the core and proves to be a high threat to the milk/sweet lovers! ;)
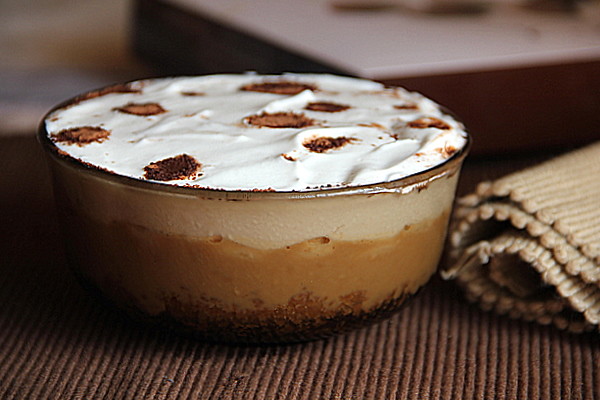
Author's note:
The caramel is not supposed to ooze out from the dessert as you see. I diluted the dulce a bit too much... the whole thing should stay firm as layers when sliced.
I avoided chocolate sauce as in the recipe, wanting to create a design of neat circles of chocolate powder dusted on top. I do have the circles and the chocolate powder dusted, but of course not neat as expected! Pardon :)
For the full recipe, I prefer to use an increased amount; 600 gms of digestive biscuits for the base, but cut down butter to 75 gms :).
Subscribe to:
Posts (Atom)


