Thursday, May 27, 2010

How I made Mascarpone Cheese at Home


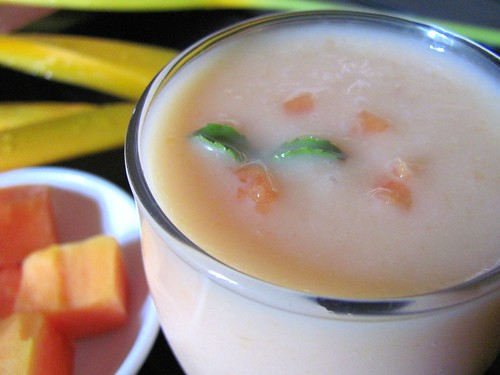
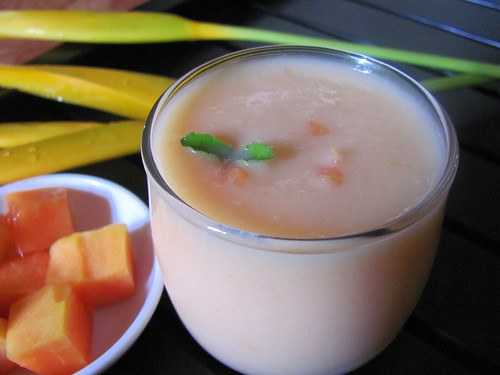
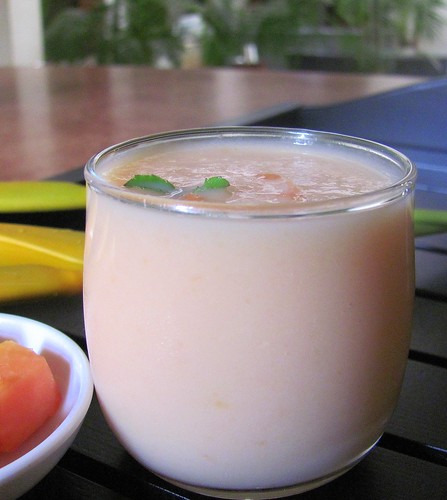
Yes, we can easily make Mascarpone cheese from Amul Fresh Cream, readily available in almost all retail chains in India. After a tiring hunt for Mascarpone cheese in Chennai, I consoled myself thus, as I knew the cheese wouldn't survive while transportation, even if I could get it. :(

To make 6 oz or 3/4 cup or a large orange sized ball of cheese:

Amul Fresh Cream(25%)- 300 ml (one and a half tetra packs)
Fresh lime juice- a tbsp

Well, Amul Fresh Cream confronts us as 200 ml tetra packs sitting pretty on general racks of major stores and I was lucky enough to grab two of them from Spencers Daily of Gandhi Nagar during my latest Chennai visit ( no luck in Besant Nagar, my usual place).

I opened both the packs, emptied the first one completely and half from the second one (a total of 300ml) into my 1.5 ltr milk cooker, (remember Indian milk cookers are the perfect double boilers) removed the 'whistle' as I din't really want the shrill disturbing noise while stirring the cream ;).

Placing the cooker with cream on a medium high flame, I waited till the cream started simmering, expecting to see bubbles on the sides of the pan as I was told. To my disappointment I failed to spot the bubbles even after 20 minutes and I was at a risk of boiling off the water completely from the double boiler. The cream was really HOT and added a tbsp of fresh lime juice. Gentle stirs but no fine streaks of separation of whey from the solid protein!!!.

I was losing my heart!

Yeah, I found myself stirring the cream continuously on a mild flame and could see the cream getting thicker, but still no streaks of liquid part!

Next, I placed the damp cheese cloth, folded twice, on a metal sieve which I placed carefully on a bowl.I poured the hot thick cream carefully on the sieve,lined with cheese cloth.

Alas! I could hear that wonderful sound of liquid trickling down from the sieve!!!...
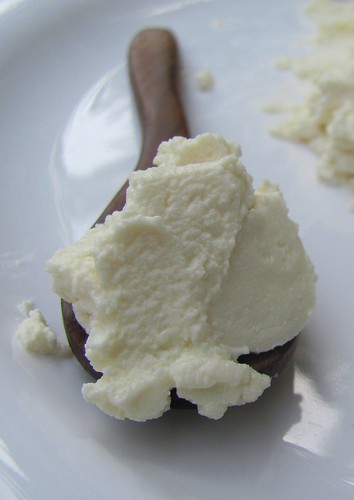
YAY!! Not a disaster, for sure!..the cream had the consistency of 'hung curd' at this stage.

I refrigerated the whole set, overnight and was overjoyed to see the firm cheese(yay) and whey, down in the bowl which measured almost 20 ml :)


Hugs to my sweet girls, Swapna, Ria and Divya for clearing my silliest doubts and for making the post, Possible! :).
Read More »

Tuesday, April 27, 2010

Papaya Milkshake

The temperature has been found soring even higher this week touching the absolute 40 deg C.

Breakfasts are more of toasts and fruits along with fresh, plain, chilled yogurt or mildly spiced buttermilk, fruit juices or preferably shakes. I still had the remaining half of a Ripe Papaya, the first half which I served with the toasts, yesterday.

Today when Pongal, Chutney and some Puligojju barged in as the breakfast menu the papayas went into the cold milk which came out pretty as Chilled Papaya Milk Shake.

I have never made this before and was so refreshing and filling (I skipped Pongal and the accompaniments) and absolutely comforting.In spite of being a Papaya Hater, I Loved this drink since it didn’t have that ‘strong flavour’ of the fruit; the part, a papaya hater really dislikes.


Here’s how I made the drink,

Boiled and Chilled, Fat free milk- 3 cups

Ripe papaya , cut into half inch cubes-a large cup(more or less)

Sugar- 7-8 tsps or as you prefer

Ice cubes- a few

Powder sugar. Pulse/whip the fruit along with it.Add the ice cubes and the chilled milk and pulse again until well blended.Pour into glasses and enjoy the fresh milk shake.

It is not advisable to store the ‘shake’ as you might be doing with the other fruit shakes as this one tends to get curdled soon, though edible. I presume it is due to the enzyme Papain, present in the fruit which does so while blended with milk.

This goes to Srivalli's Thanda Mela, the summer drinks event, celebrating 3 years of her successful blogging and to Indrani's Spotlight event of Summer Food and Drinks.


Just a few shots to see what sunlight can do to this Drink...


Something which really interested me with the drink was the change of colours I noticed while I placed the glass near the window, the usual spot.

It had more of a rich golden yellow-orange hue.

...........
.......
....


...while with the lesser light, the papaya shake looked naturally pretty with its mild pink colour.

.........
....


When all the 3 colours of the drink; ‘golden yellow-orange-pink’, combined, were captured.


'Pretty' healthy drink...na?? ;)

Read More »

Sunday, April 11, 2010

Simple Lentil and Vegetable Soup


The Hot Summer days are back with the fierce merciless sun spitting out 'Fire!'
I dare to stay a longer time in the kitchen with elaborate meals and it's definitely not a good time to whip up soups.
Invariably my family prefers a comforting bowl of any vegetarian soup for dinner after a heavy Sunday lunch, irrespective of the season.

And now with my Blog which has just turned 3, I surprisingly realize I’d never posted a single ‘Soup recipe’ till date!!
So, here’s a 'Simple', 'Nourishing Bowl' of Soup with 'no butter', 'white sauce' or any 'thickening agent'.
This 'low calorie comfort soup' recipe serves 4 large bowls.

To Start -

Get ready with 1/3 cup of red or green lentils, rinse and soak in luke warm water for an hour or so and pressure cook till soft with water at least twice the depth of the lentils.

You need 2 cups of Vegetables in all.

So,
Mince Finely, a few leaves of Spinach, a small piece of Cabbage, Carrot, 1 or 2 Beans, 1/4th of a Capsicum,a Cauli flowerette(Sorry! if there isn’t such a term in the English Dictionary :)) a button mushroom, half tomato(I avoided this), a few fresh coriander leaves, a small onion,a large clove of garlic and half a green chilly(optional).
Feel free to throw in a tbsp of fresh peas and corn kernels each….and yeah!..if you are lucky enough to find a cube of paneer smiling at you in the freezer, cut it into tiny bits(after immersing in a bowl of hot water for a few minutes) and let her join the above ;)


Transfer the above chopped veggies to the cooked gram. The water level should at least be an inch above them. Add enough salt and pressure cook till one whistle. Remove from fire and let the steam vent out by itself.
Open, check salt and serve hot with freshly crushed black pepper.

This is one of the most comforting and easiest soups which you can never stop with just one-soup-bowl-serving :).


Let the soup be watery. If you prefer Broth, simply strain, and Slurp on with pieces of bread or bun, dunked in.

Read More »

Sunday, March 28, 2010

Homemade Indian Flavoured Pizza!


Making a Pizza from scratch, rich in Indian flavours has been a long time dream for me.

And then Lavi announced the theme for the lovely event of Global Kadai and I was all set to venture this beautiful looking food.
Moreover, the overwhelming response from my dear blogger buddies in savoury buns, the recent post and the sudden expertise I gained in handling yeast on flour propelled me to come up with the fullest energy! :)

So here we go…

For the preparation of the Pizza Base I substituted Whole Wheat Flour with the regular All Purpose Flour.

Ingredients for the Pizza Base

A large cup of Wheat Flour (makes 2 medium sized pizzas)
¼-½ cup of Luke warm water
½ tsp active dry yeast
½ tsp each of sugar
A pinch of salt
2 tsps of Homemade Ghee(no olive oil here so as to make it more Indian) ;)

Mix ½ tsp of active dry yeast in ½ cup of luke warm water along with sugar and salt and kept it aside in a warm place undisturbed for 30 minutes.The frothy layer would have formed on top.(I used Hodgson Mill active dry yeast which works well with whole grain flours)


In a bowl containing the wheat flour, add the yeast solution as well as the melted butter and knead well into a soft pliable dough.Taste the dough and add more salt or sugar if you need.Brush melted butter on top the dough and keep it aside for 2 hours.The dough would have acquired double the size after this time.Punch down the dough to remove air and roll it out to make 1cm thick pizza base.I spread the dough with my fingers leaving the edge around a little thicker, since I preferred thin and crispy inside with soft and 'bready' edge.Prick it with a fork here and there and bake for 5-6 minutes in 180 deg C in a pre heated oven. Remove and keep aside the ‘pre baked’ pizza base.


Ingredients for the Pizza Sauce

A tbsp of oil
4 Ripe red tomatoes (less sour variety)-4- cut into bite sized pieces
1 Big onion
4-5 cloves of garlic
2-3 tbsps of water
½ tsp of dried herbs-I substitiuted Indian herbs- a few fresh Coriander and Tulsi leaves.
Salt- as needed
A pinch of freshly ground pepper


Chop onion and garlic, fry in the oil, red chillies next and the tomatoes.Saute until they turn soft and mushy.Add 2 tbsps of water if you want a runny sauce. Simmer.
Stir in the herbs,salt and pepper powder.Cool and grind to a smooth paste/sauce.

For The Topping, I used

Roasted Bell Pepper (insert a skewer across, roast in direct flame, rub off the black skin and cut into small cubes)


  • *Paneer Tikka ( I tried tawa method)- Scroll down for the recipe.
  • Corn
  • Roasted Bell Pepper- inspired by the post here.
  • Sliced Button Mushrooms
  • Finely minced Small Onions and Garlic
  • Homemade Ghee- drizzled here and there
  • Chilly flakes
  • Coriander leaves.
  • Cheese-I used mozarella cheese slices.


*Paneer Tikka

100 gms Paneer, cubed into 9 equal pieces.
A tsp of yogurt
1/2 tsp ginger garlic paste
A fewdrops of lime juice
1/4 tsp Chaat masala powder
1/2 tsp Tandoori masala
A pinch of Black pepper powder
Salt to taste
Ref oil to drizzle while cooking on Tawa

Mix the ingredients (except paneer) to form a thick paste.Marinate the paneer pieces with the paste evenly smeared (liberally) on them for half an hour.


Heat a tawa or a griddle and place the pieces 3-4 at a time.Drizzle a few drops of oil.


Turn the pieces carefully, so as to ensure that all the sides are cooked evenly and browned well on the surface. Repeat as batches.Once it cools down cut the chunks each into 9 pieces and use as the pizza topping.

Assembling the Pizza before Baking


Spread the Sauce over the pre baked pizza base. Sprinkle the toppings in the list in that order ending it up with cheese topping.Preheat the oven to 240 deg C , often the full blast in any oven. Bake the Pizza for abt 10-12mins or until the cheese melts. Check the pizza often to make sure it doesn't overcook or burn.

Remove from the oven and serve warm.

The roasted bell pepper, paneer tikka along with the crunchy bits of onion and garlic was Heaven, still bitten deep into the flavourful ghee enriched topping as well as the thin n crispy wheat flour base was YUM!..


Lavi, this is prepared specially for the Global Kadai event you host for the month :)
Global Kadai is an event started by Cilantro.
Read More »

Saturday, March 20, 2010

Mini Savoury Buns


My first attempt of making buns and I'm absolutely happy with the final outcome which made me feel…
...hmm not bad..for the first time..:)


Here's how I made them...

I mixed ½ tsp of active dry yeast in luke warm water along with ½ tsp of sugar and a pinch of salt and kept it aside in a warm place undisturbed for 30 minutes.
The frothy layer formed on top proving the quality of yeast(whew) :)

In a bowl containing a cup of all purpose flour I added 1/2 tsp sugar and 1/4 tsp salt.
A tbsp of finely cut fresh coriander leaves, ¼ tsp of chilly flakes,a large clove of garlic; minced and a few tiny bits of green chillies were thrown in along with 2 tsps of melted butter.
The flour and the spice mixture was kneaded well to a soft pliable dough using the frothy yeast solution.Spiced up buns need to be salty but I love them 'balanced':) though I wanted a little salty ones this time.
The dough was less salty. I was too lazy to add more and knead all over again..


I coated some melted butter on the inside base of a micro wave safe bowl, placed the dough in it and after giving a mild roll, kept aside for 2 hrs in the micro wave oven after giving it a 10 sec warm up and covered the bowl with a towel.


After a couple of hours I took out the bowl from the oven.The dough had doubled in size.I punched it down so as to remove the trapped in air and gave it a gentle knead.


Next, I divided it into 9 equal balls (golf ball sized), placed in a greased baking pan(you can also use parchment paper) and brushed melted butter on top of each.


I kept it covered for another 30 minutes until they rose a bit more.

Sprinkled some sea salt on top of each.(remember, the dough was less salty)
Believe me!.. this tastes Great!.. when bitten into the salty crusty top and the less salty soft insides is Divine!! :)

Finally they were baked in a preheated oven for about 30 mins set to 200 deg C (oven temp varies..mine is the old fashioned electric oven which demands a little more heat and time.. :))

The buns had acquired a golden brown colour by now.I removed them from the pan, cooled down a bit and coated some more melted butter for that extra glaze for these err photos ;)


We enjoyed the warm spicy buns for the breakfast with a hot pot of coffee :)
Biting into the garlic bits and chillies along with the bursting flavour of coriander was.......
Heaven!! :)


These Mini Savoury Buns were prepared for Rachel's Bread Baking Day (BBD) #28.
BBD is an event created by Zorra.

I am happy to be a part of JFI after a long time.
So,
Suma, this is for you too, for JFI- Breakfast, you host for the month of March.
JFI is the brain child of Indira.
Read More »
Related Posts Plugin for WordPress, Blogger...