Showing posts with label Christmas specials. Show all posts

Tuesday, December 19, 2017

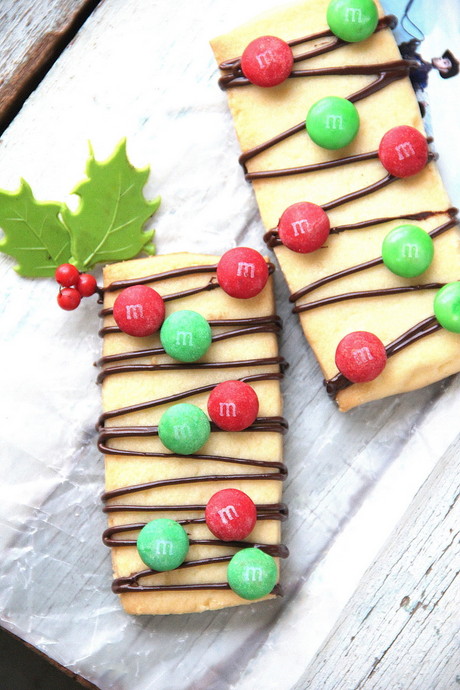
M&M Shortbread Cookies


Thanks to my friends who always chanced upon this space for a new recipe, a news or some form of update for the past few months. After the 10th year of active blogging, it was a sense of contentment that I decided to take a break and blog occasionally, though the hibernation got extended. ๐Ÿ˜Š.
So, now with the Christmas time, I decided to bake something that I could share with my friends. Hence it had to be simple and good to eat which stores well too. The weekend was allotted for the purpose. I took out my cookie cutters and holding the stars and the trees wondered what I really should do with them. Shortbread? HmmYes!! Next, browsed a bit and chanced on a swanky recipe, that started working on me!
M&M's aren't easily available, in this town but I decided to go for a hunt. We had alternatives of these candies, but I was a little adamant to get them. The search rested when I found a few sachets which were super expensive, at least 4 times that the original price I used to get them in US!! Anyhow, it's the victory of the hunt that matters!๐Ÿ˜‰

The basic dough for Shortbread is universal. The 3 main ingredients; sugar, butter and flour are in the ratio of 1 : 2 : 4 , meaning for one part of powdered or confectioners sugar, you need to knead along 2 parts of butter and 4 parts of flour. Simple! Scale down according to your needs and there you go!


M&M Shortbread Cookies


M&M Shortbread Cookies
Yields 6 bars of 10cms × 4cms
Prep time - 15 minutes
Baking time - 20-25 minutes
For topping- 20 minutes
Total time- 1 hour

You need:

1/4 cup powdered sugar
1/2 cup unsalted butter, softened
1 cup flour
A pinch of table salt
optional: 1/2- 1 tsp water
40 M&M minis, preferably reds and greens for topping
A few squares of Baking chocolate,chopped, for drizzle (I used Van Houten)

Preheat oven to 350ยบF.
Beat together the butter and powdered sugar (a stand mixer is great for this, as the powdered sugar will make quite a mess if you're using a hand mixer).
Slowly add the flour (about a half cup at a time), mixing a bit in between each addition.
The mixture will look crumbly at first, but the dough will come together after a few minutes. If needed, add water (starting for 1/2 tsp) to help dough form. I really didn't need water. However,beware of adding to much. This dough should not be sticky. It should be soft and made into a flat thick coin with no cracks between your thumb and forefinger.

Turn dough onto a lightly floured silicone baking mat or parchment paper and roll out to a 1/4" thick rectangle. Using the parchment or baking mat, life the dough onto a baking sheet (leave the parchment or silicone mat as the lining). Cut dough into 6 rectangles.
Bake for 20-25 minutes until edges begin to turn a light golden brown.
Let cool completely. on a wire rack.
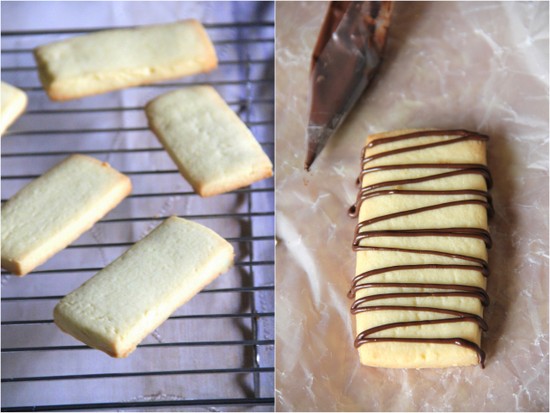

Melt the chocolate  in a double boiler or in a MW as you prefer and drizzle on the cookies.
Top with M&M's.


Note:

  • The ratio of sugar:butter:flour in the above recipe is 1/4:1/2:1
  • The original recipe calls for 1/4 cup of M&M's to be kneaded along the dough. I preferred to top them instead.
  • The amount of flour varies a bit depending about the quality, I needed a few tsps extra flour to bring about the right dough consistency.
  • Also, I wasn't too confident to do a neat drizzle and hence piped the melted chocolate.


                                      ๐Ÿ˜Š Happy Baking, Happy Holidays, Stay Blessed ๐Ÿ˜Š


Read More »

Friday, November 25, 2016

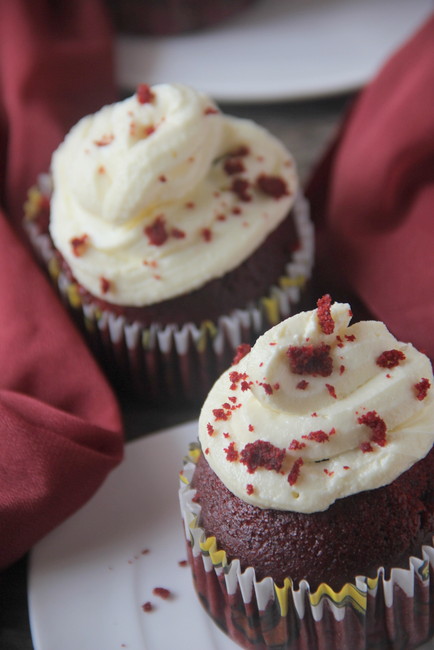
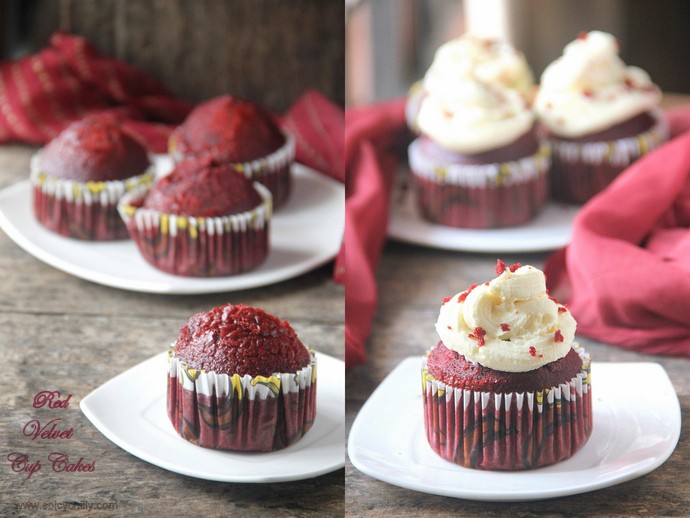
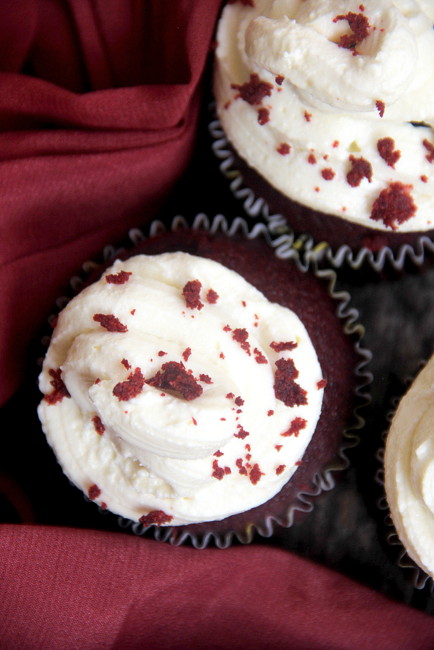
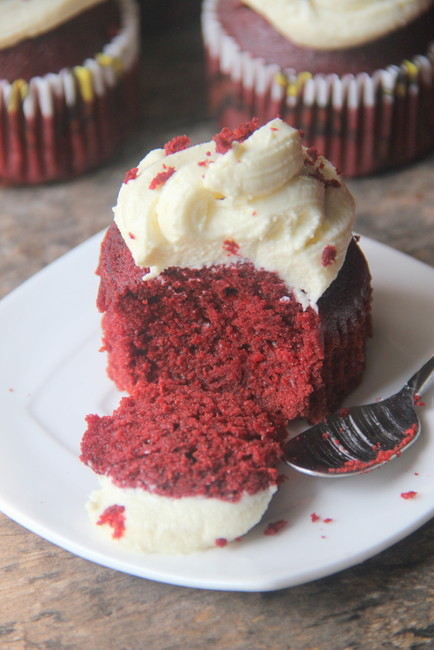
Red Velvet Cup Cakes with Cream Cheese Frosting


When, my bestie's kid, Nikita gave me the very first suggestion of Red Velvet Cake, I was apprehensive. For me they have to be topped/paired up with cream cheese. Nikita and me live in a town where there's no availability of these exotic products and finally I made up my mind to take it as a challenge and go for it! With Christmas just a month ahead, I was prompted to make these red cuties in cups, for a safer side. I am immensely happy with the final result and yeah will be making cakes instead of cuppies next :)

What is basically a Red Velvet Cake?
American in origin, red velvet cake is similar to chocolate cake with either a red, bright red or red-brown color. While it is similar to chocolate cake, a baking aficionado will be able to spot the difference. The primary differences are in the use of buttermilk instead of milk and less cocoa powder. The acids in buttermilk react with the antacid of baking soda to form gas bubbles, which creates a non-yeast leavening. This helps create the fluffy and moist texture that has made Red Velvet popular. Red Velvet cake is traditionally prepared as a layer cake topped with cream cheese or cooked roux icing.
The addition of acidic vinegar and buttermilk tends to better reveal the red anthocyanin in cocoa and keeps the cake moist, light, and fluffy. This natural tinting may have been the source for the name "red velvet!"
Common ingredients include buttermilk, vinegar, butter or oil, and flour for the cake, beetroot or red food coloring for the color. info from wiki.


Red Velvet Cup Cakes with Cream Cheese Frosting

Source
Total Time:40 min
Prep:20 min
Cook:20 min
Yield:24 frosted cupcakes


Ingredients

2 1/2 cups all-purpose flour
1 1/2 cups sugar
1 teaspoon baking soda
1 teaspoon salt
1 teaspoon cocoa powder
1 1/2 cups vegetable oil
1 cup buttermilk, room temperature
2 large eggs, room temperature
2 tablespoons red food coloring
1 teaspoon white distilled vinegar
1 teaspoon vanilla extract

For the Cream Cheese Frosting:
1 pound cream cheese, softened ( scroll down for the homemade cream cheese recipe)
2 sticks butter, softened
1 teaspoon vanilla extract
4 cups sifted confectioners' sugar
Chopped pecans and fresh raspberries or strawberries, for garnish (or reserved cake crumbs)


To Make the Cake:


Preheat the oven to 350 degrees F. Line two (12-cup) muffin pans with cupcake papers.
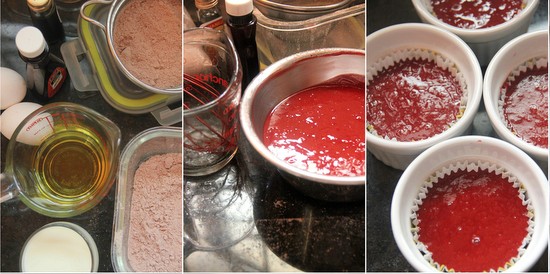
In a medium mixing bowl, sift together the flour, sugar, baking soda, salt, and cocoa powder. In a large bowl gently beat together the oil, buttermilk, eggs, food coloring, vinegar, and vanilla with a handheld electric mixer. Add the sifted dry ingredients to the wet and mix until smooth and thoroughly combined.
Divide the batter evenly among the cupcake tins about 2/3 filled. Bake in oven for about 20 to 22 minutes, turning the pans once, half way through. Test the cupcakes with a toothpick for doneness. Remove from oven and cool completely before frosting.


For the Cream Cheese Frosting:

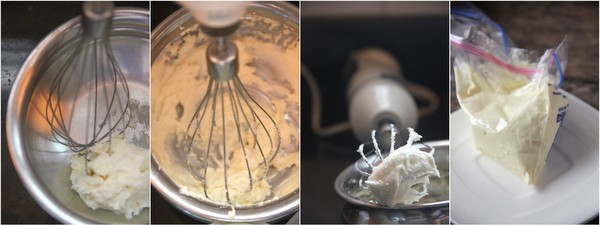
In a large mixing bowl, beat the cream cheese, butter and vanilla together until smooth. Add the sugar and on low speed, beat until incorporated. Increase the speed to high and mix until very light and fluffy.
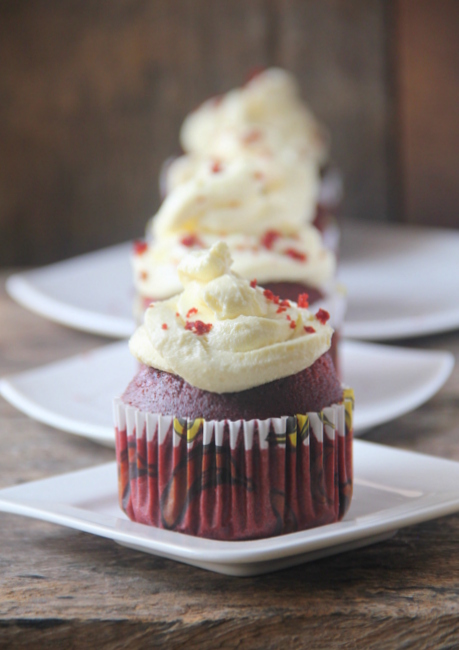
Frost the cupcakes with a butter knife or pipe it on with a big star tip.I cut 0.5cm of a corner of ziplock bag. and cut two small triangles , like this, -^-^- ,to make the star hole and piped on the cup cakes as you see.


Home-made cottage cheese to make cream cheese frosting:

I tried making the cream cheese at home as mentioned earlier. To make this, I used full fat milk (4.5% fat). I needed 1 litre of milk to make around 100 gms of cheese. Since I quartered the original recipe and baked 4 muffin sized cakes, this amount of cheese was more than enough after combining butter, sugar etc!

For 100 gms cheese

1 litre of full fat milk
1 tbsp white vinegar or 2 tbsp concentrated lemon juice


Cream Cheese
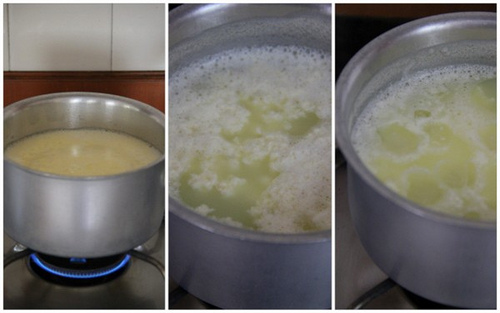
 Boil milk in a large and wide saucepan. While it starts to boil, reduce flame and let the milk simmer gently not alowing to boil over. Add vinegar/lemon juice to it. The solid part of the milk coagulates and the green whey separates. Give a gentle stir and remove the pan from heat.

Red Velvet Cup Cakes

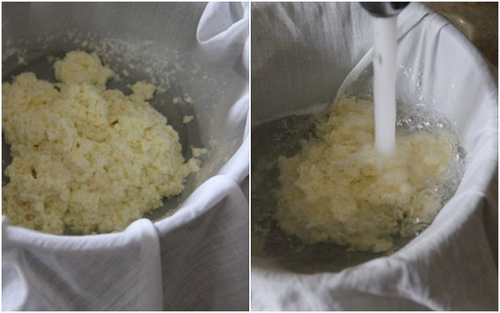
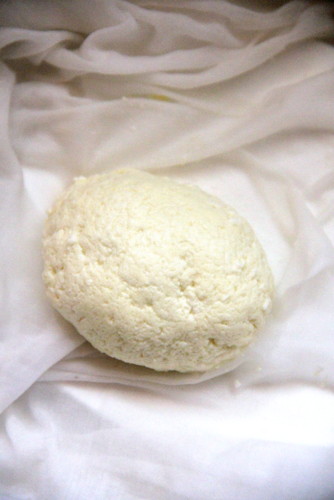
Pour it over a colander lined with cheese cloth. After the whey is filtered out, wash the cheese in running water to remove the acid. Tie the cloth and hang it to let drip the liquid part for 30 minutes. Open to see a ball of fresh cheese. I whipped butter, sugar and flavoured this cheese to make the Cream cheese frosting (scroll up)


Read More »

Thursday, December 31, 2015

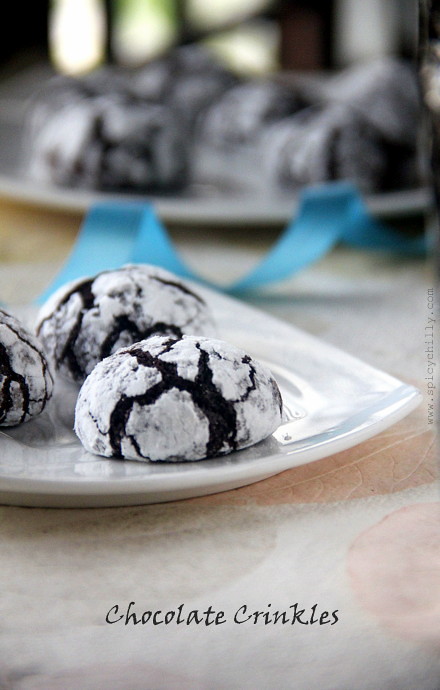
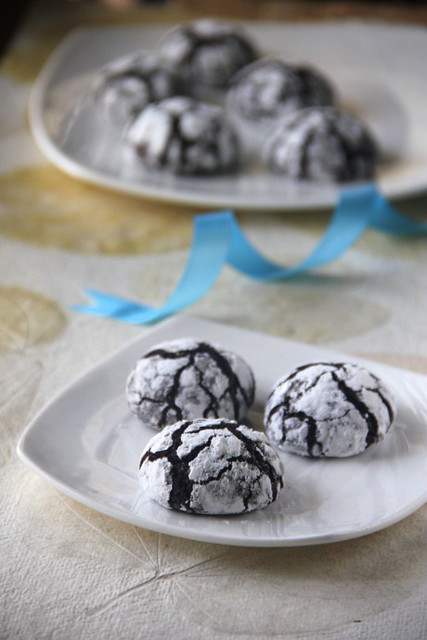
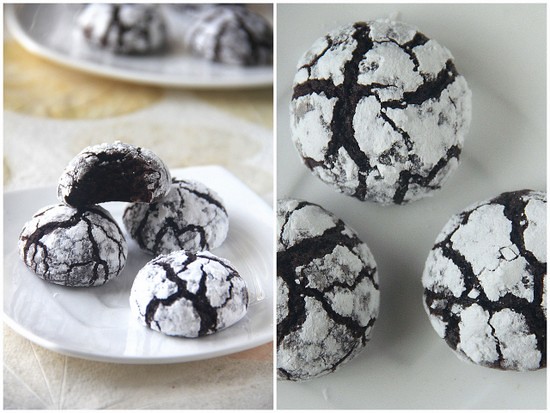
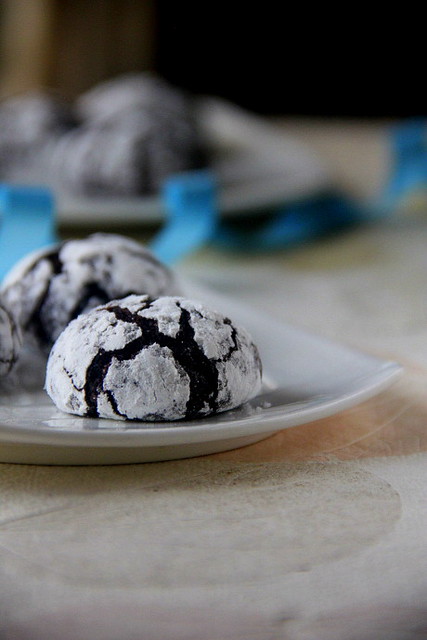
Chocolate Crinkles


Crinkle Cookies


Wish you all had a wonderful Christmas day and still enjoying the Christmas time!
I see a beautiful Christmas pudding with flambรฉ which I describe as highly exotic in my dear friend's space. My eyes get hooked at those cookies in the corner of the picture. Ah! not to search in the picture she had posted up there, the one she sent me soon after the laborious baking. I ask her about it and she explains. I take her for granted and tell her that I wish to bake this and post  for Christmas. She laughs, because that wasn't a request, but a statement from me. The baking got slightly postponed, guess qualifies for the new year. So, let me thank and dedicate this to Swapna, my buddy, whole heartedly, for motivating and guiding me through to update in my space after months!

The source she mentioned was different, which demanded chocolate chips which I ran out stock and followed this site, verbatim, for the Crackle or Crinkle Cookies.


Crinkle Cookies

Chocolate Crinkles 
 Makes around 30

 Ingredients:

 150 g plain flour
 60 g cocoa (I used Valrhona for intense hue and flavor)
 1 teaspoon baking powder
 pinch of salt
 200 g caster sugar
 60 g unsalted butter, chilled and diced
 2 free-range eggs, lightly beaten
 1 teaspoon vanilla extract
 100 g icing sugar


Method:


Sift the flour, cocoa, baking powder, salt and sugar into a large bowl. Rub the butter into the flour mixture with your fingertips until it clumps together and resembles coarse breadcrumbs.
Whisk together the egg and vanilla together, then add to the flour mixture. Mix with a large metal spoon until combined, then cover with plastic film and refrigerate for 30 minutes.
Preheat the oven to 200°C (Gas Mark 6). Line two baking trays with baking paper.
Sift the icing sugar into a bowl. Scoop the dough in a 1 tbsp measuring spoon and shape into balls ( almost walnut-sized). Drop into the icing sugar, tossing until well coated. Place on the baking trays, leaving about 5 cm between each to allow for spreading. Bake for 10–12 minutes or until just set when lightly touched. Cool on the trays for 5 minutes before transferring to wire racks to cool completely. The cookies will crack on cooling. Store in an airtight container for up to 5 days.


Crinkle Cookies


Crinkle Cookies


These delicious fudgy biscuits are so named because they are dipped in icing sugar before going into the oven. During baking, the cookies expand slightly, resulting in a wonderful crackled look.

And yes, here's wishing you all a healthy, happy and fun-filled year ahead!

Read More »

Wednesday, December 19, 2012

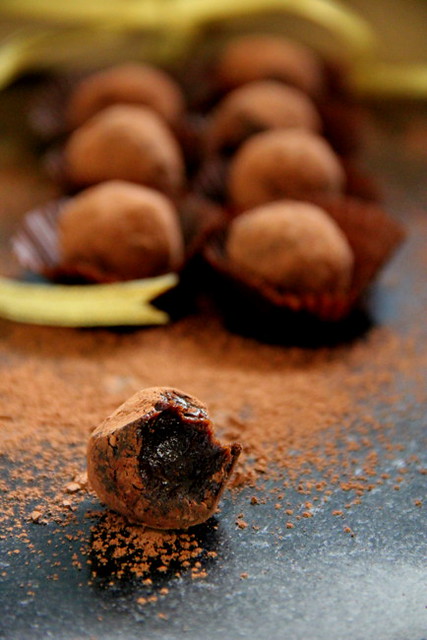
Date & Cocoa Raw Truffles


There are a few recipes you come across while surfing that develop an instant urge to try. It isn't the impatient need to savour but to t.r.y (and b.l.o.g right away if you are an obsessive blogger)
Sometimes it's because of the simplicity of the recipe; at times being classic and mostly we get hooked because of its elegance and the way it is presented.
Date & Cocoa Raw Truffles are one of those I came across a while back and couldn't wait to try (and blog) because of its simplicity, elegance, being classy and classic presentation.

Read More »

Saturday, December 15, 2012

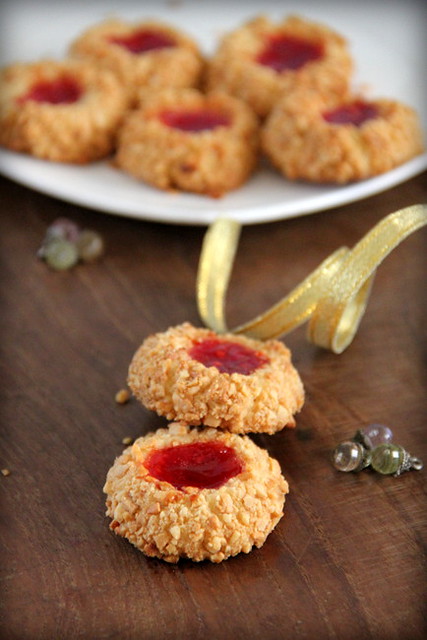
Thumbprint Cookies


My son loves anything jam-centred. He has them as a meal apart snacking them. Surprisingly he wanted cookies instead of cakes this Christmas and I found myself searching for a simple cookie recipe of his kind.

"Thumbprint Cookies are a very popular holiday cookie. They are made with a shortbread-like dough that is formed into balls and then rolled in either finely chopped nuts or dried coconut. The name 'thumbprint' comes from the fact you use your "thumb" to make an indentation into each ball of dough and then fill it with jam."
Read More »

Wednesday, March 21, 2012

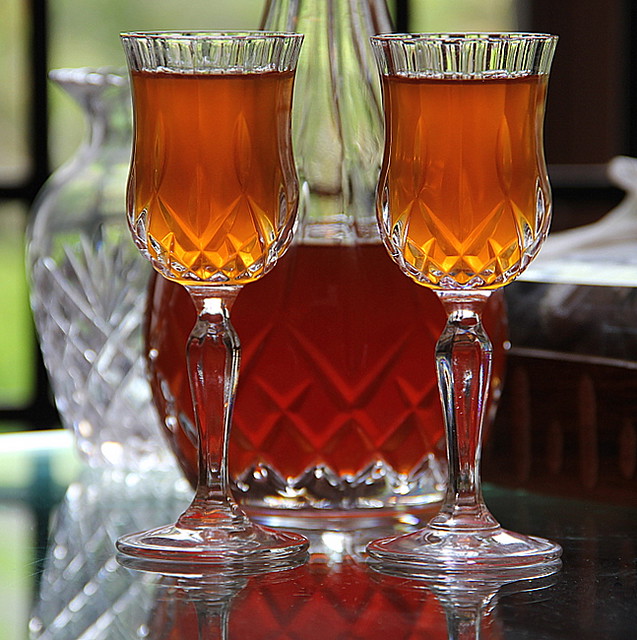
Homemade Gooseberry Wine


                                                        Tastespotted , Foodgawked


Amla or nellikka wine needs no introduction to a Malayalee as it is a common and simple delicacy, brewed at almost all the Christian houses of central Kerala for years during the festival seasons of Easter, Christmas or otherwise.
This had been a recipe which I had wanted to share with you for such a long time and here we go...

Nellikka / Gooseberry Wine (without yeast)
Recipe courtesy- Seba, one of my closest pals in town.

Yield - Three 750 ml wine bottles, +/-

Get ready with:-
Gooseberry / Amla / Nellikka- 1 kg
Sugar- 1kg
Water- 1 litre


 Preparation of the sugar syrup.
Mix sugar and water to a rolling boil in a saucepan. Switch off stove. Cool down the syrup to room temperature. Strain to remove any impurities. Keep aside.

Preparation of the berries.
Wash the gooseberries well in running water. Spread on a kitchen towel and wipe them one by one completely dry with a clean and dry piece of cloth.

Assembly
Layer the them in a dry, clean sundried bharani (which I had used in one of the pickle recipes )or the traditional earthen pot. Pour the cooled sugar syrup over the berries in the bharani. Close the bharani with its loose lid with a cloth tied around the mouth.

Fermentation
 Stir the mixture everyday with a wooden ladle. If you happen to see a fungal layer on top, which is unusual but may happen for beginners, skim /discard carefully from the surface.
The wine needs to ferment for 21 days.
Strain the mixture using a clean and dry muslin cloth. Retain the berries after liquid part has passed through. Transfer a few at a time to a broad and deep metal sieve and extract the pulp gently from them. You might find them soft as soaked in the wine or a few may be broken too. Discard the remains.

Colouring the wine by caramelising.
The wine thus filtered has a light amber colour or the colour of  tears, to be precise!
Caramelising is done to add the colour of the final wine to improve the looks, making it look sexier ;)

 Sugar- 1 cup
 Hot water -1/2-3/4 cup

Place a clean dry wok on medium fire. Transfer sugar to it and stir continuously till it melts and acquires a golden brown- reddish brown hue. burn. Now, add  hot water to this syrup (take care and stay a little away while doing this as it bubbles up) little by little and mix well. There would be lumps at this stage but you can see the colour getting deepened to a more reddish brown colour. Return to low heat and melt them completely by a gentle simmer. The syrup should not boil much or thicken (as a thick syrup doesn't blend with the wine). Cool and add this whole syrup to the wine. Combine well.
The wine would have attained a beautiful deep red colour, now.
Aging of wine enhances the taste and improves the colour.

Check also Swapna's recipe where the uncaremelised wine had acquired its hue naturally as a result of aging!


Photo Sharing and Video Hosting at Photobucket Wine is the most healthful and most hygienic of beverages" -- Louis Pasteur
                  
Read More »

Saturday, December 25, 2010

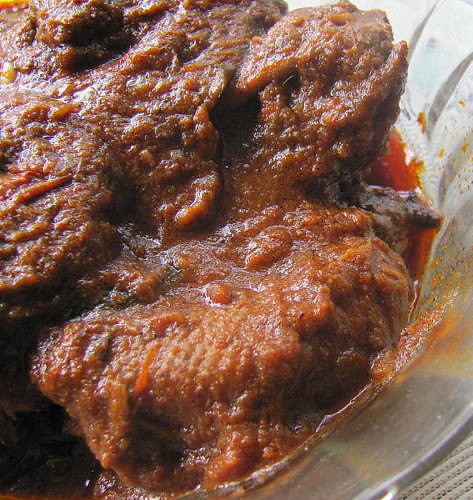
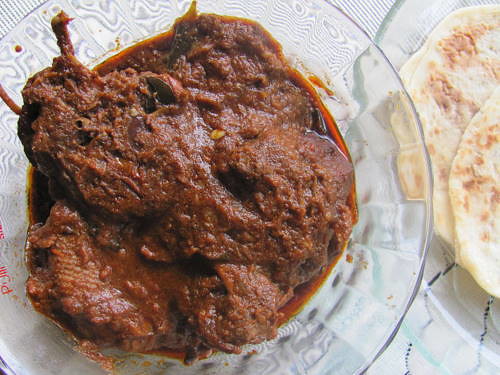
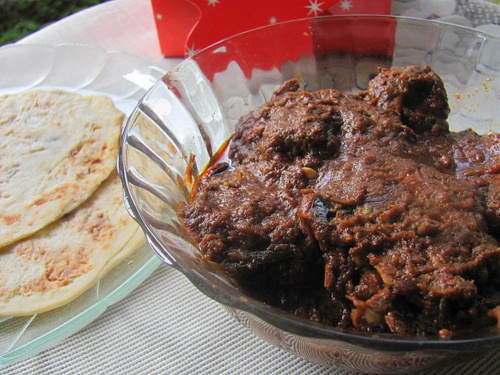
Nadan Tharavu Roast / Kerala Duck Roast


The Season of Christmas is here again; the Santa, presents, cakes, Christmas trees, lights, stars, tinsel and baubles, all surrounded, making us feel the same spirit of merriment in the air!

The numberless ideas those vaguely popped in as a result of "what's to bake and blog for Christmas?"in my brain, froze when this flashed right on time, early morning, the Christmas eve!

What's better than this Nadan Tharavu Roast or Kerala Duck Roast, the authentic, traditional dish served for Christmas lunch in the Christian houses of Kerala?

Scoot to the crowded bazar all soaked in festivity, for a quick shopping to get the raw materials which weren't in stock.


Nadan Tharavu Roast/ Kerala Duck Roast

Ingredients:

Duck,(Nadan Tharavu preferable) cut into large pieces- 1 kg
Coconut Oil- 2 tbsps
Cinnamon- 2 one inch pcs
Cloves- 2
Cardamom- 2
Big Onions- 5 large or 450 gms- minced
Garlic- 8-10 cloves - finely minced
Ginger- 2 one inch pcs- finely minced
Green Chillies- 2-3 Split length wise until 3/4th
Ripe Tomatoes- 4- cut into small pieces
Curry powder/meat masala powder- 2 tbsps
Garam masala powder- 1/2- 3/4 tsp
Pepper powder- 1 tsp
Turmeric powder- 1/2 tsp (add only if not included in the curry powder)
Curry leaves - a sprig or two
Salt- to taste


Coconut Oil- 1/2 - 3/4 cup- to deep fry the pieces

Method:

Heat the 2 tbsps of coconut oil in a wide thick bottomed kadai. Sautรฉ minced onions until brown followed by ginger, garlic, green chillies, tomatoes and the powders. Mix well and sautรฉ again for a minute or two so as to get rid of the raw smell of the powders.Throw in curry leaves. Add 2 cups of water (more or less) and bring to a boil. Add the duck pieces and close with a lid adding enough salt and simmer until the pieces are cooked.

Heat the 1/2 cup oil in the adjacent stove.Open the lid of the simmering curry, carefully spooning out the poultry pieces alone and deep fry one or 2 at a time. Take care not to fry much. Return the fried pieces to the curry.Simmer without the lid until the oil separates and the gravy coats the pieces.


Duck Roast tastes best if let stand for at least 4-5 hrs before serving.

Reheat and serve with rice, appam or any Indian bread.

The bowl is soon off to the table all set for the Christmas lunch! :)

Yes, I am in Kottayam for the holidays ;) and this is prepared specially for The Kerala Kitchen.


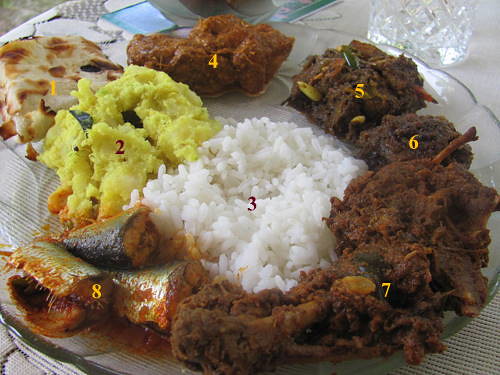
1. Butter nan (store bought)
3. Boiled white rice
4. Butter chicken
5. Pork Roast
6. Chicken Roast
7. Duck Roast


Here's Wishing you All a Very Merry, Fun Filled and Feasty Christmas!
Read More »

Tuesday, December 22, 2009

Chocolate Chip Cookies


City sidewalks, busy sidewalks, dressed in holiday style, in the air there's a feeling of Christmas, children laughing, people passing, meeting smile after smile and on every street corner you'll hear,- Silver Bells,... it's Christmas Time in the City, Ring-a-Ling, hear them sing, soon it will be Christmas Day!

There are hundreds upon hundreds of recipes for cookies that bring the Season to life, but I guess these simple chocolate chip cookies probably capture the spirit of the season as good as those yummy fruit cakes all out here...:)...

Here's how I made two dozens of these cuties..:)

All purpose flour- a heaped cup
Egg-1
Brown sugar-1/4 cup
Baking powder-half tsp
Salt- a pinch
Chocolate chips
Butter -1/2 cup
Walnuts/Pecans coarsely chopped -1/2 cup(I added walnuts to the second batch and is purely optional)
Semi sweet chocolate chips-3/4 cup
Pure vanilla extract- 1/2 tsp


  • Cream the butter in a bowl using an electric mixer. Add the sugar, beat until fluffy for a couple of minutes. Beat in egg followed by the vanilla.
  • Combine flour, baking soda and salt in another bowl. Add this to the butter-egg mixture and beat until well blended. Add the chocolate chips and the nuts.Blend well.
  • This will be a soft dough and so needs to be refrigerated for around 20 minutes or until firm.
  • Make equal sized balls out of the dough and place leaving a 3 inch gap, as they flatten while getting baked, on a prepared cookie sheet, in a preheated oven. Mine got baked at a temperature set at 375 deg F (190 deg C) for about 10 minutes.Remove once the edges turn slightly brown.The centre will be soft, but once cooled they are sure to get a bit hardened.Let cool completely before removing from the cookie sheet.


Wishing you all a Blessed Christmas and a Very Happy New Year!..:)
Read More »

Wednesday, December 2, 2009

Praline Vanilla Sponge Gateau


Hope most of you are getting ready for Christmas; trees, gifts, carols, Christmas cake; busy chopping and soaking dry fruits in rum.,.eagerly awaiting the festival and all fun which is just around the corner! :)..

I had a fresh bowl of home made butter and cashew nuts, quite enough to ignite the baker in me to catch up with the season's spirit, sugar coated with Ria's lovely looking Gateau sitting pretty here :)!.


To be honest, I lack confidence when it comes to baking sponge cakes as I'd flawed once long back during my teen days, which ended up in a promise that I would never bake the same in my life again..;)!..

Well, Ria's Praline Vanilla Sponge Gateau broke my hard hearted promise and here's the final verdict! :)..

The prettiest and yummiest cake I'd ever baked so far.The Vanilla flavour of the base cake, the butter icing and the crunchy praline bits on top when bitten into, was absolutely,.... Heaven!!.


I baked the cake last Saturday, on the day of Eid, as Children were home and wilfully came forward with the "beating" part ;).

Sadly I flawed again with the sponge cake, the mistake I feel was might've happened while whipping (kids, :) who can always be easily blamed :), were fighting for their chance pushing and pulling the bowl almost all the time allotted for continuous beating while their mom who was pre heating the oven, 'carefully' set the temperature 'wrong' and baked for a longer time than it should .. ;)!.

For all the wonderful daring bakers and cake lovers here...
Believe me! This is a Keeper!... :)!..Thank You Ria!.
Read More »

Thursday, December 11, 2008

Mexican Wedding Cookies!..

No Christmas is complete without cookies, so lets bake some!!..Says the sweet lady here :) .

This interesting recipe was found out from her place :)..
Keeping the page open, I rushed to the stores to make sure I was equipped with the raw materials..and YES!..; I couldn’t wait any longer…
Of course we don’t have any lovely snow fall here to compliment, but the season of festivity, the winter..…alas!!..they were real melt-in-the-mouth, perfect with a cup of hot tea.

The original recipe source- Mexican Wedding Cookies by Paula Deen from http://www.foodnetwork.com/

To yield 15-20 cookies

Get ready with:

1/2 cup unsalted butter, at room temperature
1/4 cup confectioners’ sugar, plus more for coating baked cookies
1/2 teaspoon vanilla extract
3/4 cup all-purpose flour, plus more for dusting hands
1/2 cup pecans, chopped into very small pieces (I used walnuts)

Method:

Preheat the oven to 275 degrees F. Line cookies sheets with parchment paper.
Using an electric mixer, cream the butter and sugar at low speed until it is smooth. Beat in the vanilla. At low speed gradually add the flour. Mix in the pecans with a spatula. With floured hands, take out about 1 tablespoon of dough and shape into a crescent or a shape of your choice. Continue to dust hands with flour as you make more cookies. Place onto prepared cookie sheets. Bake for 40 minutes. When cool enough to handle but still warm, roll in additional confectioners' sugar or use a small strainer to dust in. Cool on wire racks.

Sharmi, these were baked specially for your lovely Cookie Baking Event. :).

Planning to bake another batch, fresh, this weekend as I am visiting my parents in Kerala for Christmas holidays. Feelling really proud to have thus entered dear Happy Cook's very first and sweet event of Home Made Christmas Gifts :) .

Read More »

Sunday, December 23, 2007

Home Made Grape Wine


"God made only water, but man made wine." -- Victor Hugo

My passion for wine started right from the childhood days having grown up in a Town with the majority of Christian Communities!..

There are hundreds of methods of making wine all over the world, but I've strictly stuck to the Central Kerala recipe, here.I would highly recommend this method as this had been cent percent successful to me with the Perfect Outcome!!.

"People spend too much time tasting wine; not enough time drinking it" --Andre Tchelistcheff

Yes, I am in the above category of "people”.. not a lover of wines but would love to sip a little, sense and appreciate the deep taste of the heavenly drink!..
My own proverb for wine would be-
'Knowing and appreciating wine can be compared to the knowledge of appreciating Diamonds…as it needs skill to differentiate between the good, better and the best!..'

And so when my better half turned back a couple of months ago with a box fully packed with bunches of deep red juicy grapes fresh from the vineyards, I was overjoyed!!
A part of it was passed over to relatives, a part went to make Grape juice preserve and a part was saved to make Wine!..

I made a litre of Grape wine from:

Red Grapes (with seeds)-300gms
Sugar-300 gms
Water-800 ml-boiled and cooled

Active dry yeast granules-2 tsps
Water boiled and warm-100ml-for dissolving the yeast

Wheat a tbsp(optional)
1 egg white(optional-I avoided)
Sugar for colouring-4 tsps more or less

Fermenting Wine.


Clean & wash grapes well.Remove the stalks.Wipe them dry one by one and crush with your finger tips.
Transfer the crushed grapes in a ceramic jar(I used the traditional Bharani, cleaned well enough and sun dried)..Add half the quantity of sugar (150 grams),water,egg white yeast dissolved in water and wheat.Mix well using a clean sun dried wooden spatula.Keep this airtight for 3 weeks(21 days) stirring with the wooden spatula every alternative day.

On the 22nd day, strain the mixture using a muslin cloth and discard the pulp. Add the balance sugar to the wine.


Wine 'before' and 'after' colouring.

Colouring the wine by caramelisation.

In a clean dry wok, add the sugar kept for colouring (3 tsps) – place on fire, stirring continuously till the sugar melts and acquires a deep reddish brown hue; taking care not to burn.Now add about 1-2 tbsps of hot water to this syrup little by little and mix well.Cool and add this whole syrup to the wine. Mix well.The wine would have attained a beautiful deep red colour by now.
Store the wine in a clean bottle closed with a cork & use. There would be a cloudy formation towards the bottom of the bottle.Need not worry.Pour out to wine glasses carefully not to disturb the sediment as far as possible.

The uncaramelised glass of wine you see here is slightly cloudy as it was poured out from the bottom.I reserved just 200 ml before colouring, to blog :) and finally ended up in disturbing the fine sediment :D..

"I made wine out of raisins so I wouldn't have to wait for it to age." -- Stephen Wright

Well, I too was a little impatient to wait till three weeks.So I actually used 3 tsps of yeast and fermented for just 10days as the temperature was quite warm here. I would taste the wine every time while stirring the jar and strained the wine when it reached its stage of fermentation(10 days).This strictly depends upon the outside temperature, the amount of sugar and yeast in the mixture.Wheat(starch) and egg white(protein) are used to speed up the process.I avoided both.

Photo Sharing and Video Hosting at Photobucket Wine is the most healthful and most hygienic of beverages" -- Louis Pasteur

Wishing You all a Merry Christmas !...

Read More »

Friday, December 21, 2007

Mexican Hot Chocolate


When I prefer chocolate in cakes,V opts hot chocolates, while my kids are not real fans of the same!..

Any brand goes fine for a real chocolate lover. But Monbana was one of them which I instantly fell in love with, esp the hot chocolat poudre they offer.Purely French in origin,we tasted this first during one of our transits in Paris CDG.The hot chocolate was heavenly and refreshing which wiped off our chillness n weariness in just a few seconds!!.

I read somewhere that the Mexicans use a pinch of red chilly/cayenne pepper powder along with their hot chocolates.I didn’t whip it up with the drink but garnished, though the original recipe here had not suggested the same.

You need:

2 cups milk
1/4 teaspoon ground cinnamon
1 cinnamon stick
1-ounce semisweet chocolate ( I used Monbana Chocolat en poudre)
3 drops vanilla extract(omitted as the above contains natural vanilla extract)
Whipped cream, for garnish

Method:

In a heavy saucepan, heat the milk, ground cinnamon and cinnamon stick until simmering. Add the chocolate and let melt(added the powder and brought to boil). Remove from heat and add vanilla extract(This step was skipped ).Transfer to mugs and serve with whipped cream.Sprinkle a pinch of red chilly powder over the cream.


This goes to JFI-Chocolates for Deepz of Letz Cook.

Besides ground cinnamon and a whole stick while boiling, I thought of using cinnamon spoon too. So, Sunita, I am there for Think Spice-think Cinnamon as well!.:)

Eating chocolate daily also appears to lower the risk of miscarriage in pregnant women. To top up, it has a good impact on baby, as well!.
Easy Crafts,this is also for your novel and unique Food during Pregnancy Event!.
The chocolate powder is a readymix.The recipe- vegetarian, healthy, simple and quick not involving any kind of strainful activity for the pregnant woman.

I am also qualified for cute girl Bindya's My Favourite Things event!..:D

Errr…anyone hosting chillies, milk or sugar in any of your events at present please??? ;)
Read More »
Related Posts Plugin for WordPress, Blogger...