Showing posts with label Bakes. Show all posts

Tuesday, December 19, 2017

M&M Shortbread Cookies


Thanks to my friends who always chanced upon this space for a new recipe, a news or some form of update for the past few months. After the 10th year of active blogging, it was a sense of contentment that I decided to take a break and blog occasionally, though the hibernation got extended. 😊.
So, now with the Christmas time, I decided to bake something that I could share with my friends. Hence it had to be simple and good to eat which stores well too. The weekend was allotted for the purpose. I took out my cookie cutters and holding the stars and the trees wondered what I really should do with them. Shortbread? HmmYes!! Next, browsed a bit and chanced on a swanky recipe, that started working on me!
M&M's aren't easily available, in this town but I decided to go for a hunt. We had alternatives of these candies, but I was a little adamant to get them. The search rested when I found a few sachets which were super expensive, at least 4 times that the original price I used to get them in US!! Anyhow, it's the victory of the hunt that matters!😉

The basic dough for Shortbread is universal. The 3 main ingredients; sugar, butter and flour are in the ratio of 1 : 2 : 4 , meaning for one part of powdered or confectioners sugar, you need to knead along 2 parts of butter and 4 parts of flour. Simple! Scale down according to your needs and there you go!


M&M Shortbread Cookies


M&M Shortbread Cookies
Yields 6 bars of 10cms × 4cms
Prep time - 15 minutes
Baking time - 20-25 minutes
For topping- 20 minutes
Total time- 1 hour

You need:

1/4 cup powdered sugar
1/2 cup unsalted butter, softened
1 cup flour
A pinch of table salt
optional: 1/2- 1 tsp water
40 M&M minis, preferably reds and greens for topping
A few squares of Baking chocolate,chopped, for drizzle (I used Van Houten)

Preheat oven to 350ºF.
Beat together the butter and powdered sugar (a stand mixer is great for this, as the powdered sugar will make quite a mess if you're using a hand mixer).
Slowly add the flour (about a half cup at a time), mixing a bit in between each addition.
The mixture will look crumbly at first, but the dough will come together after a few minutes. If needed, add water (starting for 1/2 tsp) to help dough form. I really didn't need water. However,beware of adding to much. This dough should not be sticky. It should be soft and made into a flat thick coin with no cracks between your thumb and forefinger.

Turn dough onto a lightly floured silicone baking mat or parchment paper and roll out to a 1/4" thick rectangle. Using the parchment or baking mat, life the dough onto a baking sheet (leave the parchment or silicone mat as the lining). Cut dough into 6 rectangles.
Bake for 20-25 minutes until edges begin to turn a light golden brown.
Let cool completely. on a wire rack.


Melt the chocolate  in a double boiler or in a MW as you prefer and drizzle on the cookies.
Top with M&M's.


Note:

  • The ratio of sugar:butter:flour in the above recipe is 1/4:1/2:1
  • The original recipe calls for 1/4 cup of M&M's to be kneaded along the dough. I preferred to top them instead.
  • The amount of flour varies a bit depending about the quality, I needed a few tsps extra flour to bring about the right dough consistency.
  • Also, I wasn't too confident to do a neat drizzle and hence piped the melted chocolate.


                                      ðŸ˜Š Happy Baking, Happy Holidays, Stay Blessed 😊


Read More »

Friday, November 25, 2016

Red Velvet Cup Cakes with Cream Cheese Frosting


When, my bestie's kid, Nikita gave me the very first suggestion of Red Velvet Cake, I was apprehensive. For me they have to be topped/paired up with cream cheese. Nikita and me live in a town where there's no availability of these exotic products and finally I made up my mind to take it as a challenge and go for it! With Christmas just a month ahead, I was prompted to make these red cuties in cups, for a safer side. I am immensely happy with the final result and yeah will be making cakes instead of cuppies next :)

What is basically a Red Velvet Cake?
American in origin, red velvet cake is similar to chocolate cake with either a red, bright red or red-brown color. While it is similar to chocolate cake, a baking aficionado will be able to spot the difference. The primary differences are in the use of buttermilk instead of milk and less cocoa powder. The acids in buttermilk react with the antacid of baking soda to form gas bubbles, which creates a non-yeast leavening. This helps create the fluffy and moist texture that has made Red Velvet popular. Red Velvet cake is traditionally prepared as a layer cake topped with cream cheese or cooked roux icing.
The addition of acidic vinegar and buttermilk tends to better reveal the red anthocyanin in cocoa and keeps the cake moist, light, and fluffy. This natural tinting may have been the source for the name "red velvet!"
Common ingredients include buttermilk, vinegar, butter or oil, and flour for the cake, beetroot or red food coloring for the color. info from wiki.


Red Velvet Cup Cakes with Cream Cheese Frosting

Source
Total Time:40 min
Prep:20 min
Cook:20 min
Yield:24 frosted cupcakes


Ingredients

2 1/2 cups all-purpose flour
1 1/2 cups sugar
1 teaspoon baking soda
1 teaspoon salt
1 teaspoon cocoa powder
1 1/2 cups vegetable oil
1 cup buttermilk, room temperature
2 large eggs, room temperature
2 tablespoons red food coloring
1 teaspoon white distilled vinegar
1 teaspoon vanilla extract

For the Cream Cheese Frosting:
1 pound cream cheese, softened ( scroll down for the homemade cream cheese recipe)
2 sticks butter, softened
1 teaspoon vanilla extract
4 cups sifted confectioners' sugar
Chopped pecans and fresh raspberries or strawberries, for garnish (or reserved cake crumbs)


To Make the Cake:


Preheat the oven to 350 degrees F. Line two (12-cup) muffin pans with cupcake papers.
In a medium mixing bowl, sift together the flour, sugar, baking soda, salt, and cocoa powder. In a large bowl gently beat together the oil, buttermilk, eggs, food coloring, vinegar, and vanilla with a handheld electric mixer. Add the sifted dry ingredients to the wet and mix until smooth and thoroughly combined.
Divide the batter evenly among the cupcake tins about 2/3 filled. Bake in oven for about 20 to 22 minutes, turning the pans once, half way through. Test the cupcakes with a toothpick for doneness. Remove from oven and cool completely before frosting.


For the Cream Cheese Frosting:

In a large mixing bowl, beat the cream cheese, butter and vanilla together until smooth. Add the sugar and on low speed, beat until incorporated. Increase the speed to high and mix until very light and fluffy.
Frost the cupcakes with a butter knife or pipe it on with a big star tip.I cut 0.5cm of a corner of ziplock bag. and cut two small triangles , like this, -^-^- ,to make the star hole and piped on the cup cakes as you see.


Home-made cottage cheese to make cream cheese frosting:

I tried making the cream cheese at home as mentioned earlier. To make this, I used full fat milk (4.5% fat). I needed 1 litre of milk to make around 100 gms of cheese. Since I quartered the original recipe and baked 4 muffin sized cakes, this amount of cheese was more than enough after combining butter, sugar etc!

For 100 gms cheese

1 litre of full fat milk
1 tbsp white vinegar or 2 tbsp concentrated lemon juice


Cream Cheese
 Boil milk in a large and wide saucepan. While it starts to boil, reduce flame and let the milk simmer gently not alowing to boil over. Add vinegar/lemon juice to it. The solid part of the milk coagulates and the green whey separates. Give a gentle stir and remove the pan from heat.

Red Velvet Cup Cakes

Pour it over a colander lined with cheese cloth. After the whey is filtered out, wash the cheese in running water to remove the acid. Tie the cloth and hang it to let drip the liquid part for 30 minutes. Open to see a ball of fresh cheese. I whipped butter, sugar and flavoured this cheese to make the Cream cheese frosting (scroll up)


Read More »

Thursday, December 31, 2015

Chocolate Crinkles


Crinkle Cookies


Wish you all had a wonderful Christmas day and still enjoying the Christmas time!
I see a beautiful Christmas pudding with flambé which I describe as highly exotic in my dear friend's space. My eyes get hooked at those cookies in the corner of the picture. Ah! not to search in the picture she had posted up there, the one she sent me soon after the laborious baking. I ask her about it and she explains. I take her for granted and tell her that I wish to bake this and post  for Christmas. She laughs, because that wasn't a request, but a statement from me. The baking got slightly postponed, guess qualifies for the new year. So, let me thank and dedicate this to Swapna, my buddy, whole heartedly, for motivating and guiding me through to update in my space after months!

The source she mentioned was different, which demanded chocolate chips which I ran out stock and followed this site, verbatim, for the Crackle or Crinkle Cookies.


Crinkle Cookies

Chocolate Crinkles 
 Makes around 30

 Ingredients:

 150 g plain flour
 60 g cocoa (I used Valrhona for intense hue and flavor)
 1 teaspoon baking powder
 pinch of salt
 200 g caster sugar
 60 g unsalted butter, chilled and diced
 2 free-range eggs, lightly beaten
 1 teaspoon vanilla extract
 100 g icing sugar


Method:


Sift the flour, cocoa, baking powder, salt and sugar into a large bowl. Rub the butter into the flour mixture with your fingertips until it clumps together and resembles coarse breadcrumbs.
Whisk together the egg and vanilla together, then add to the flour mixture. Mix with a large metal spoon until combined, then cover with plastic film and refrigerate for 30 minutes.
Preheat the oven to 200°C (Gas Mark 6). Line two baking trays with baking paper.
Sift the icing sugar into a bowl. Scoop the dough in a 1 tbsp measuring spoon and shape into balls ( almost walnut-sized). Drop into the icing sugar, tossing until well coated. Place on the baking trays, leaving about 5 cm between each to allow for spreading. Bake for 10–12 minutes or until just set when lightly touched. Cool on the trays for 5 minutes before transferring to wire racks to cool completely. The cookies will crack on cooling. Store in an airtight container for up to 5 days.


Crinkle Cookies


Crinkle Cookies


These delicious fudgy biscuits are so named because they are dipped in icing sugar before going into the oven. During baking, the cookies expand slightly, resulting in a wonderful crackled look.

And yes, here's wishing you all a healthy, happy and fun-filled year ahead!

Read More »

Friday, February 13, 2015

Shortbread Hearts for the Valentines!


Shortbread Hearts
                                                                       Foodgawked, Tastespotted       

For me, cookie dough is a kid's play-doh. The more the creative, more the products. More the interest, more the ways to dress 'em up
Some name them, sexy. Some, romantic ; a few, delectable.
 I love semi-formals or smart casuals when it comes to clothing. Enterprising ladies and gentlemen dressed in semi-formals.  My mind relates these choco-dipped cookies to them.

Most of you would have heard about shortbread. Scottish in origin, this is a kind of biscuit which is baked traditionally using one part of white sugar, two parts of butter and three parts of flour; all by weight. No chemical leavening agents such as baking powder or soda get into this.


Anyway, now that it's much looked forward Valentines week, we should be talking about hearts, roses, love, beauty, fragrance and whatever related to it :)


Shortbread Hearts


Shortbread Cookies
From- Joy of baking
Bakes 25 hearts


You Need:

1 cup all-purpose flour

A fat pinch of salt

1/2 cup unsalted butter, room temperature

1/2 cup powdered (confectioners or icing) sugar

1/2 teaspoon  pure vanilla extract


For Chocolate Dipped Shortbreads:

3 ounces (90 grams) semi sweet or bitter-sweet chocolate, finely chopped


How to make:


Shortbread Hearts


In the bowl of your electric mixer (or with a hand mixer), beat the butter until smooth and creamy or for a minute. Add the sugar and beat until smooth. Beat in the vanilla extract. Gently stir in the flour mixture just until incorporated. Flatten the dough into a disk shape, wrap in plastic wrap, and chill the dough for at least an hour or until firm.

Preheat oven to 350 degrees F (177 degrees C) with the rack in the middle of the oven. Line two baking sheets with parchment paper.

On a lightly floured surface roll out the dough into a 1/4 inch (.6 cm) thick circle. Cut into rounds or other shapes using a lightly floured cookie cutter. Place on the prepared baking sheets and place in the refrigerator for about 15 minutes. (This will firm up the dough so the cookies will maintain their shape when baked.) Bake for 8 - 10 minutes, or until cookies are very lightly browned. Cool on a wire rack.

For Chocolate Dipped Shortbreads: Place 1.5 ounces (45 grams) of the finely chopped chocolate in a heatproof bowl and place it over a saucepan of simmering water. Once the chocolate has melted, remove it from the heat. Add the remaining chocolate and stir with a wooden spoon until it has completely melted and is smooth and glossy. Taking one cookie at a time, dip one end of each cookie in the melted chocolate and place it on a parchment lined baking sheet. Once all the cookies have been dipped in the chocolate, place the baking sheets in the refrigerator for about 10 minutes, or until the chocolate has hardened.

Shortbread cookies with keep in an airtight container for about a week or they can be frozen.

Stephanie is again there with the video and the elaborations, if you might need a look upon.


Shortbread Hearts

                                                                To the Valentines of the world

                                                                                        Love twice in your lifetime. 
                                                                                              Now.  And for ever!


Read More »

Tuesday, December 24, 2013

Bienenstich Kuchen (German Bee Sting Cake)


Bienenstich Kuchen


This month marks 12 months of baking breads together and given that’s it’s also a season when there’s a lot of festive baking done in parts of the country and the world, Aparna thought we could bake something special this month. And the choice falls for 
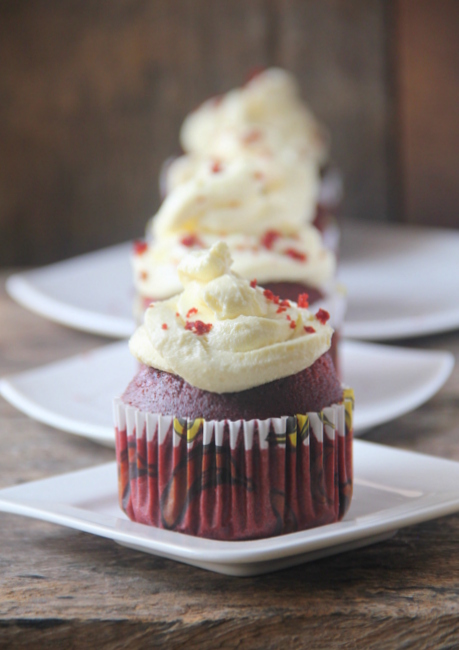
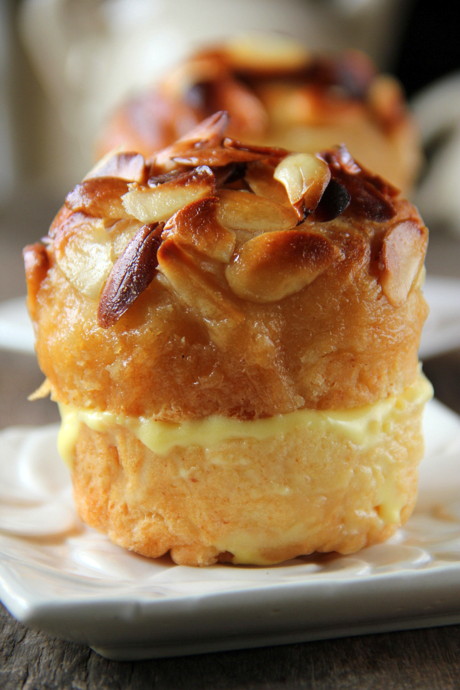
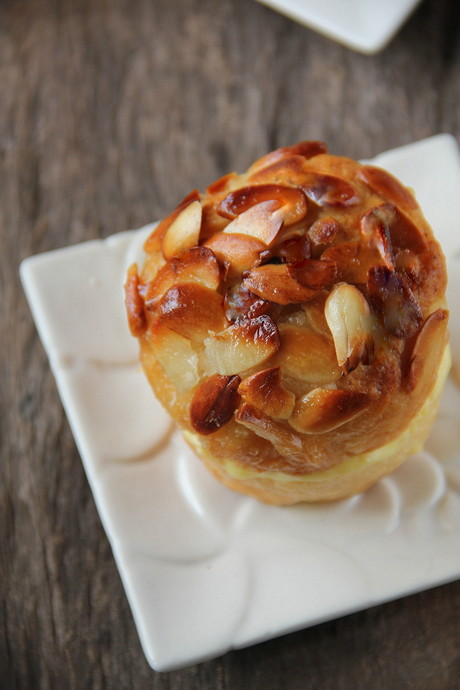
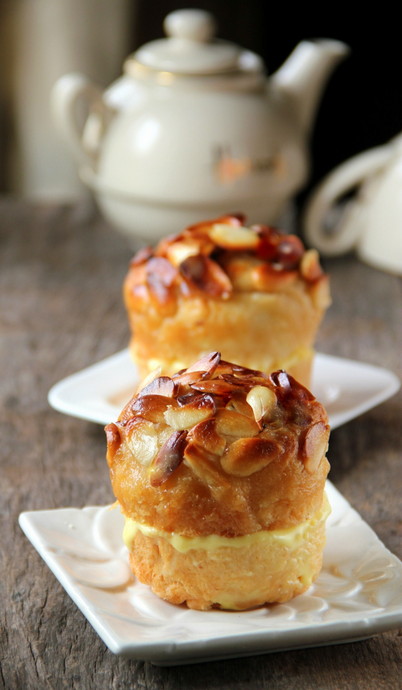
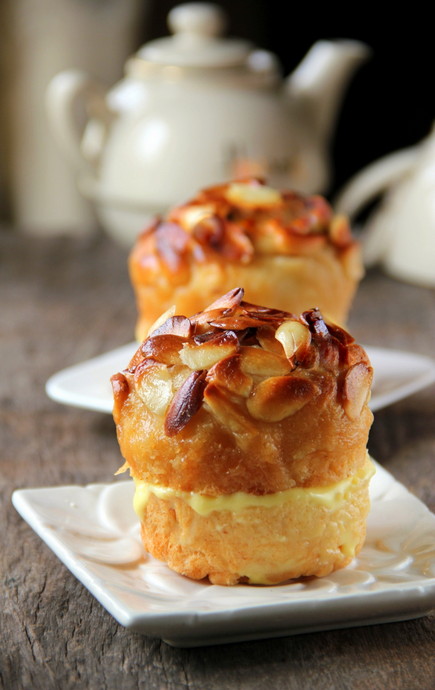
Bienenstich Kuchen or what’s also known as the German Bee Sting Cake!
Bienenstich is not really a bread but a traditional German sweet yeasted cake that has a baked on topping of crunchy almond toffee-like layer and filled with a vanilla pastry cream. Bienenstich is traditionally eaten as dessert and also served with tea or coffee.
Bienenstich means “bee sting” in German and probably got its name from the honey flavoured topping that it typical of this yeasted cake. There are however some interesting stories connected to it. One story is that the German baker who was creating this recipe came across a bee (possibly attracted by the honey) and was stung by it and decided to name the cake after the incident!
Another story is that a group of German bakers stopped invaders from entering a neighbouring village, sometime in the 15th century, by throwing beehives at them. IN order to celebrate their victory, they created the original version of the Bienenstich.


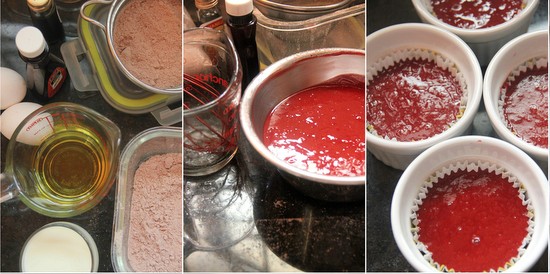
The Bienenstich is made with enriched brioche-like dough that’s typical for yeasted cakes which means that it contains a lot of butter, some milk and eggs. I have reduced the egg to one in the recipe. If you do use eggs you can use one more (total of 2 eggs) but you might need to add one or two tbsps. more of flour to the dough. On the other hand if you don’t use eggs, please leave it out. It will make a slight difference to the texture but not too much.
This yeasted cake is typically filled with pastry cream which is a mix of custard and whipped cream. I have used an egg-free version that uses custard powder but feel free to use your preferred recipe for custard using eggs.
You may also like to use butter cream, Bavarian Cream or Diplomat Cream. Remember the cake is a bit heavy so your filling should not be runny or too soft or it will not be able to carry the weight of the upper cake layer. You can also add fruit (strawberry, kiwi, mango, etc) to your “cream” layer even though this is not traditional.


Bienenstich Kuchen


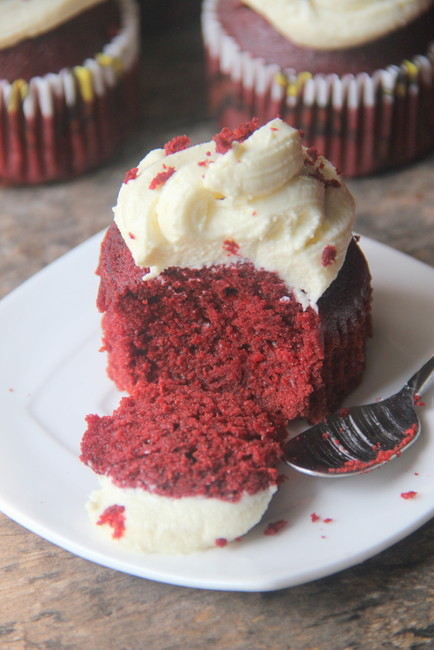
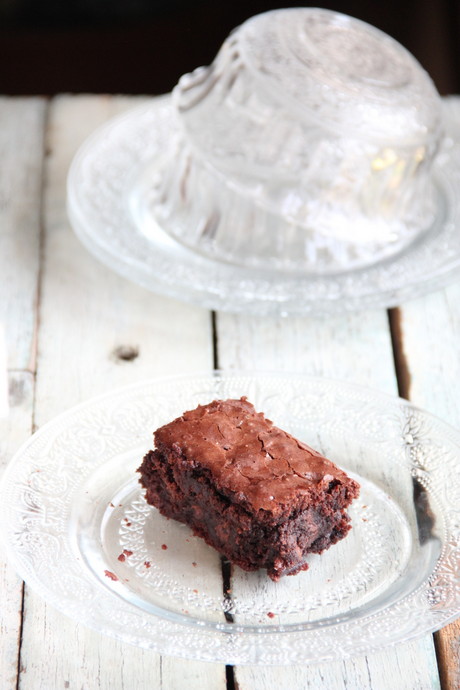
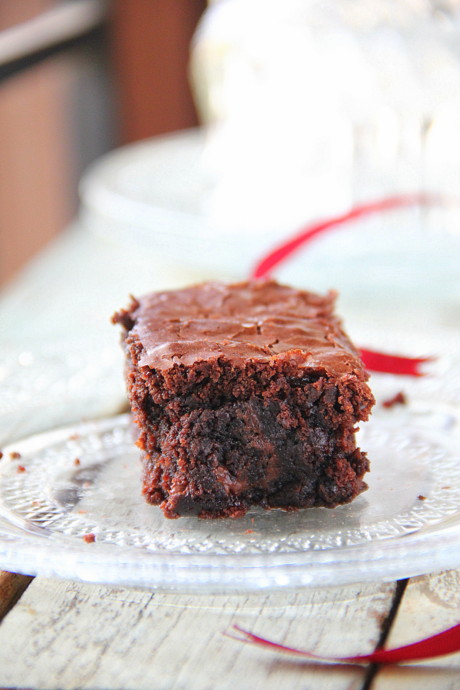
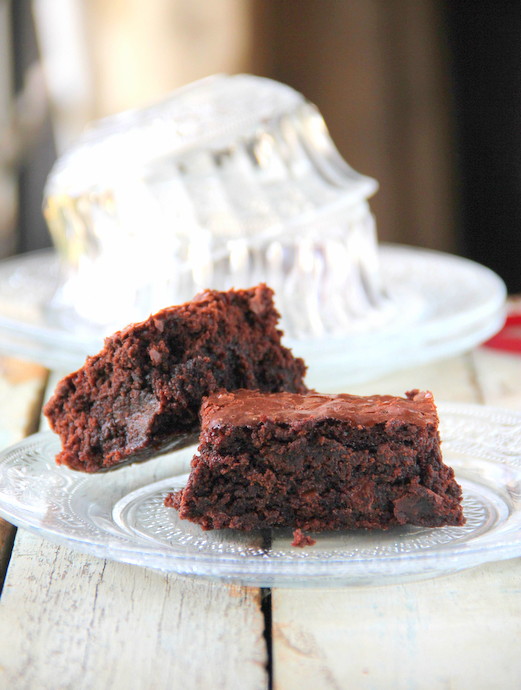
I have baked my Bienenstich in ramekins and served individually but you can also bake it in a round or a square tin and cut it out into squares like we do with brownies.

One of the problems of this yeasted cake is making sure the filling is strong enough to take the weight of the upper layer. The other problem is cutting the Bienenstich into slices or squares without the filling squishing out ad making a mess of everything.
The first problem can be taken care of by using a filling that will hold up and not using too much filling. The whipped cream can be stabilized with cornstarch (or agar or gelatin if you use it). You can always thing the remaining fillng and serve it with the Bienestich as a sauce.
The second problem can be taken care of by placing the lower layer of the cake on the serving plate and then makinge a collar around it with a double layer of parchment paper that should be a little taller than the height of your finished Bienenstich. Now spread the filling over the lower layer evenly.
Then pre-cut your upper almond toffee layer into slices or squares depending on the shape of your Bienenstich. Now place the slices/ squares on top of the filling so it looks like the top layer is whole. Refrigerate this for at least a couple of hours before serving. When ready to serve, remove the parchment collar, and use the slices/ squares as a guide and cut through the filling right to the bottom.

Note: If you cannot find sliced almonds where you live (as in my case), you can make them at home. They will not be as thin as the store-bough version but I personally prefer my home made variety.

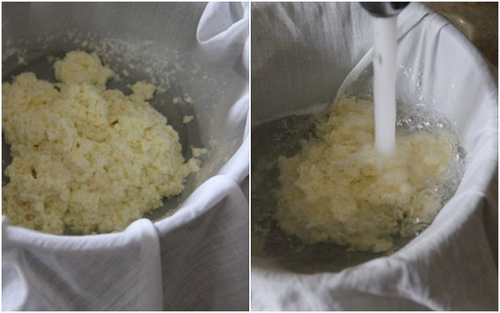
Blanch almonds by dropping them in just boiled hot water (not in boiling water, but boiling water that has just been taken off the heat). If you boil them, they will cook and become soft. Let them sit in the water for about 5 minutes. Then drain the water off and rinse once in cold water. Strain well. The skins of the almonds should feel a little loose and look wrinkled now. Pinch each almond at the broad end with thumb and forefinger and the skin should slip off easily.
Let the almonds dry out on a kitchen towel in an airy place for about half an hour. Then lay each almond down on its flat side and, using a sharp knife, slice as thinly as you can. There you have your sliced almonds.


Bienenstich Kuchen


BienenstichKuchen (German Bee Sting Cake)
To serve 6-8
Recipe Source- Aparna 

Ingredients:

For the Pastry Cream Filling:
250ml milk (I used 3%)
3tbsp sugar
3 tbsp vanilla flavoured custard powder
200 ml cream (I used 40% fat)
1 tbsp corn-starch

For the Dough:

1/4 cup milk (I used 3%)
100gm butter, at room temperature
2 cups all-purpose flour
2 tbsp sugar
1 egg
3/4 tsp salt
1 1/4 tsp instant yeast

For the Honey-Almond Topping:

50 gm butter
1/3 cup sugar
2 tbsp honey
1 tsp vanilla extract
2/3 cup almonds, sliced* (see Note above)

Method:

Bienenstich Kuchen

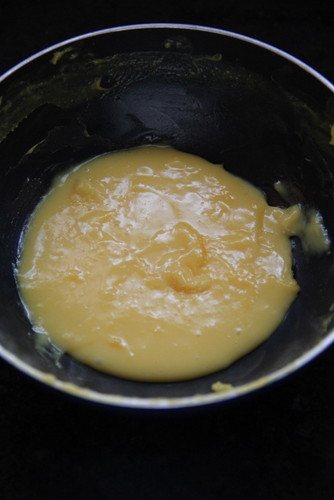
Make the custard for the filling first. This can be made the previous day and refrigerated till required.
Keep aside 1/4 cup of milk, and put the remaining milk and the sugar in pan. Over medium heat, bring this to a boil while stirring frequently to dissolve the sugar. In the meanwhile, dissolve the custard powder in the 1/4 cup of milk. Add this in a stream, to the boiling milk and keep whisking so that no lumps are formed.
Keep whisking until the custard becomes very thick. Take the pan off the heat and let the custard cool to room temperature. Whisk it on and off so it stays smooth. If it does become lumpy after cooling, use a hand blender to make it smooth. Transfer to a bowl, cover and refrigerate.
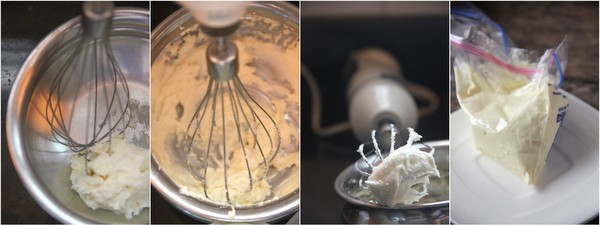
Once you are ready to fill the Bienenstich, whip 200ml of cream till soft peaks form. Then add the corn-starch and whip till it forms stiff peaks. Whisk the custard to make sure it is smooth. Gently fold the cream into the custard. If you feel it is too soft, refrigerate for a couple of hours and then use.


Bienenstich Kuchen

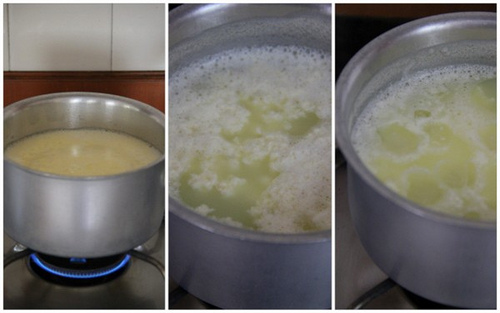
To make the dough, heat the milk until it is quite hot but not boiling. Cut the butter into pieces and add to the milk, stirring it until the better melts completely. Let it cool a little.
In the meanwhile, put the flour, sugar, salt and the yeast in the bowl of your processor. Run a couple of times to mix well and then add the egg (leave the egg out if you don’t use it). Run again till the egg has also mixed well. Now add the butter-milk mixture (it should be warm, not hot) and the then knead till it forms a smooth and soft (loose) brioche-like dough that’s just short of sticky. It should come way from the sides of the bowl and be easy to handle.
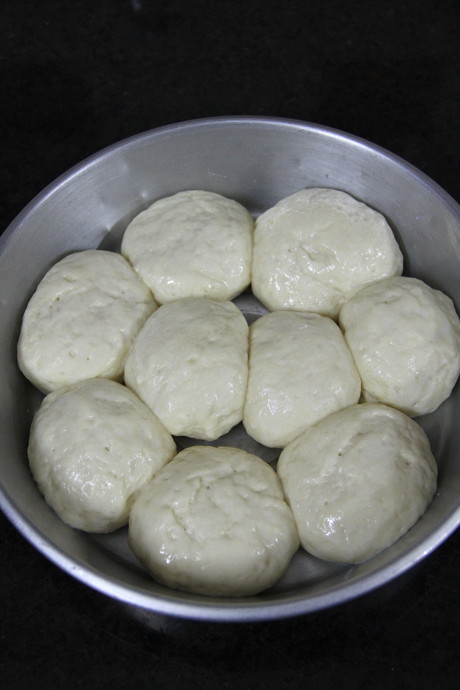
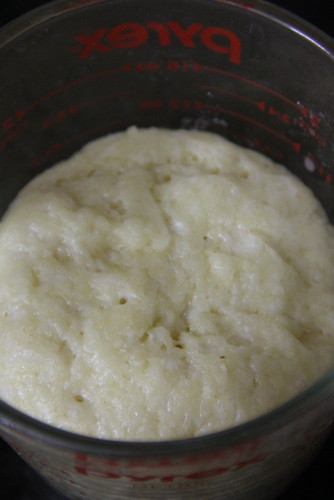
Shape the dough into a ball and place it in a bowl. Cover loosely and let it rise for about 1 1/2 to 2 hours. This dough will rise quite well but not to double or as much as your regular bread dough.

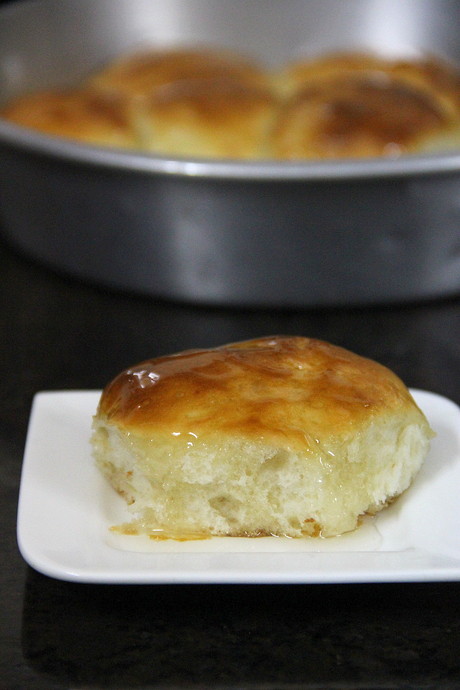
Deflate the dough, and shape again to a smooth ball. Place it in a8”spring form cake tin lined with parchment. It is important to do this otherwise the topping will make the bread/ cake sticky and difficult to unmould. Flatten the dough a little, pressing down lightly so that the dough fits the cake tin. It doesn’t matter if its not touching the sides like batter does. Let it rise for about 30 to 45 minutes. It will not rise very much and look a little puffy.


Bienenstich Kuchen

Prepare the topping while the dough rises. Melt the butter, sugar, honey and vanilla in a small pan, over medium heat. Keep stirring frequently and it will start bubbling up. Let it cook for about 3 minutes or so until it turns to a light beige colour. Add the sliced almonds, and stir well till the almonds are well coated. Take the pan off the heat and let it cool a bit. The mixture will become quite thick.


Bienenstich Kuchen

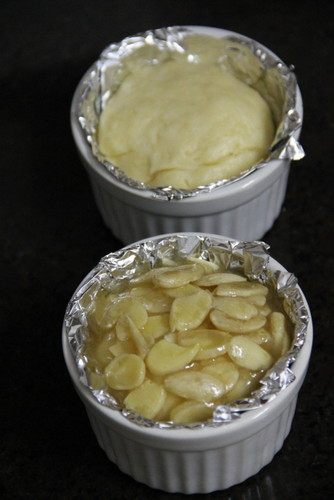
Now get ready to bake the bread/ cake. Once the dough has risen, use a spoon take bits if the topping (it will be quite thick, like a sticky fudge) and distribute it uniformly over the surface. If there are small gaps they will get covered once the bread/ cake is baking.


Bienenstich Kuchen

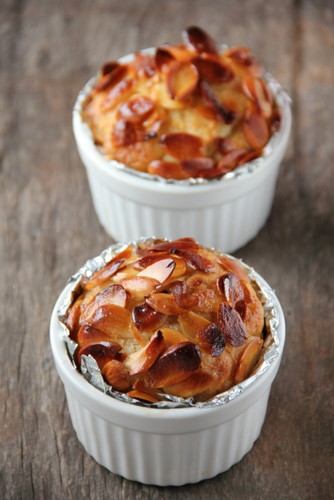
Bake at 180C (350F) for about 25 to 35 minutes until the top is golden brown and bubbling. A cake tester through the centre should come out clean. Let the cake cool in the pan for abpout 15 minutes. Then gently loosen the sides with a spatula and unmould. Let it cool completely on a rack.


Bienenstich Kuchen

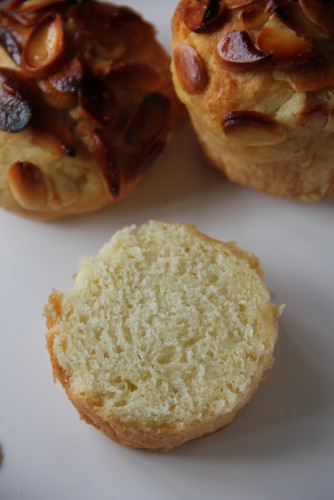
When it has cooled completely, slice the cake into two equal layers carefully, using a very sharp knife. Spread the pastry cream on the lower layer and top with the upper layer and refrigerate till ready to serve.


Bienenstich Kuchen


Read More »

Friday, December 20, 2013

Ghirardelli Triple Chocolate Brownies with Oreo Biscuits


Ghirardelli Triple Chocolate Brownies


My brother, sister and myself own the similar model phones .We are obsessive with this new age cross-platform mobile messaging app named whatsapp. Guess what? We exchange messages in a crazy way! We are based in 3 different countries with very different time zones and this app binds us unbelievably together! Now, brother bakes a brownie and shares the picture of the yummy chocolatey treat with his sisters in his brand new spring form pan.


This sister shoots an eye, demands for the recipe of the cake along with the pan :).The e(o)ver generous brother brings them all the way from the far west to the home town where he meets his sisters and parents. Bliss!

All this happened a month back when we had a week's break in Kottayam. The moments went zoom and the time flew past. Brother showed me a packet of Ghirardelli Triple Chocolate Brownie mix and told this was what he baked and shared via app. I squealed in delight and grabbed the packet!

I never had an idea to blog about this one as it's about an instant mix. Still I was prompted to shoot a few pictures to share in fb for Christmas and a few loving requests got me now to share in this space.
Now comes the important point which I hadn't shared earlier! I love fudgy heavy chocolate brownies and I mixed along 3-4 oreo biscuits along the batter ;)


Ghirardelli Triple Chocolate Brownies


Ghirardelli Triple Chocolate Brownies with Oreo Biscuits
Yields- 16 squares

You need:

1 pouch of Ghirardelli Triple Chocolate Brownie mix
4 Oreo biscuits, crumbled (I used my fingers)
1/3 Cup Water
1/3 Cup Vegetable Oil
1 Egg

Method:


Ghirardelli Triple Chocolate Brownies


Ghirardelli Triple Chocolate Brownies
Before and after baking


Preheat oven to 160 deg C or 325°F. Prepare 8” x 8” baking pan by lightly greasing or spraying with non-stick cooking spray.

 Blend water, oil and egg in a mixing bowl. Add brownie mix and crushed oreo biscuits and stir until moistened (about 20 strokes). Spoon batter into prepared pan and spread evenly.

 Bake for 45-50 minutes.For glass pan, add 5 minutes to the bake time. Cool completely in pan before cutting.

Do not over bake. Fresh-baked brownies appear under baked but cool to doneness.


Ghirardelli Triple Chocolate Brownies

Ghirardelli Triple Chocolate Brownies

                                    Fudgy Brownies, made from scratch, are already here.
Read More »

Thursday, October 3, 2013

Khaliat Nahal ~ Honeycomb Buns or Bees Hive Buns


Khaliat Nahal


This month, the We Knead to Bake Group got lucky to choose baking bread that can be made sweet or savoury. It is easy enough to make and what is unusual is that it is filled and then covered with a sugar syrup/ glaze which is typical of Middle Eastern confectionery.
Khaliat al Nahal (also known asKhaliat Nahal) translates as Bee’s Hive in Arabic. This is because the buns are baked close to each other in a round pan where they form a honeycomb like pattern. They’re traditionally made sweet and glazed with honey flavoured syrup, though savoury versions are also made.
This recipe makes 18 smallish buns, and if you want fewer you can halve the recipe to make about 9 or 10 buns. For half the recipe, use a 6” or 7” round cake tin to bake the Honeycomb Bread. You can also bake them individually in muffin tins if you prefer, except they would not have their characteristic “honeycomb” pattern.
Traditionally, the filling used in this bread is a small piece of plain cream cheese but here choice of filling is optional. You can make it sweet or savoury.

Khaliat Nahal


Read More »

Tuesday, August 27, 2013

Homemade Pretzels (Hard and Soft)


Pretzels


Pretzels


I wouldn't want to type this as the first liner. I dislike pretzels :). Hence I was down with some unusual laziness to lay my hands on them when Aparna announced for the "We Knead to Bake" group.
When it finally surpassed I decided to bake them. Both soft and hard.
Here I admit that I started loving them as any other breads of the year!
Homemade pretzels are simply great. The soft ones turned out perfect with the crispy outsides and the 'bready' insides while the hard pretzels stayed crunchy with a lovely burnt flavour!

The authentic German Pretzel, the Laugenbrezel, has a dark brown, crispy, salty crust, and inside a soft dough. It has a plump "body", and thin, crispy (not dry) crossed "arms." The Hard or Crunchy Pretzels are an American invention!

The story goes that one morning sometime in the late 1800s, a baker at the Munich Royal Café, was preparing some sweet pretzels for his guests. Instead of brushing them with sugar he accidentally brushed them with the sodium hydroxide solution being used to clean and disinfect the bakery countertops!Instead of binning his dough he went ahead and bake them anyway. The resulting pretzels came out of the oven with a unique brown crust, soft centre, and delicious taste.
There many stories about the shape too. A popular one is that the shape resembles a praying monk (back then the praying position was arms crossed with the hands on the shoulders).

The taste of the Pretzel comes from its dunking in the soda bath. Originally a solution of lye was used for this bath but lye is highly corrosive and needs to be handles with care. A baking soda solution works just as well, and once you’re done, pouring it down your sink will give help unclog the drain if necessary!
Pretzels are usually brushed with an egg wash after the soda bath and this is what gives them their characteristic shine. Then they’re sprinkled lightly with coarse/ sea salt crystals before baking them. I left out the egg wash and the salt sprinkle on my Pretzels, and you can do the same if you want to.
This is a good video to watch before starting on making the pretzels. It’s for making soft pretzels but the dough shaping and soda bath technique is the same.


Pretzels


Pretzels


Crunchy / Hard Pretzels
Adapted from Alton Brown’s recipe

Ingredients:
1 3/4 cups warm water (about 40C or 110F)
1 tablespoon sugar
2 tsp active dry yeast
4 1/2 cups all-purpose flour (a little more if necessary)
2 tsp salt*
6 cups water
2 tbsp baking soda
Egg wash (1 yolk + 2 tbsp water whisked together) - optional
Pretzel salt or coarse salt crystals

*You might want to cut down on the salt a bit if you’re going to sprinkle salt on the pretzels while baking.

Method:

Pretzels

-->Put the warm ware, sugar and yeast in a bowl and mix. Keep aside for about 5 minutes or so until the yeast activates and becomes “frothy”.
-->Put this, the flour and the salt in the processor bowl and knead until you have a soft, smooth and elastic dough that is slightly sticky to touch, but pulls away from the sides of the bowl. If your dough feels too wet add a couple of tablespoons of flour to get the required consistency. I hand-kneaded the dough and it was extremely sticky that it was in high demand of flour :)
-->Shape the dough into a ball and place it in an oiled bowl, turning it to coat it well. Cover with a wet cloth of a cling film. I let it side in the 'pyrex' bowl used to froth yeast to save some washing time ;)
--> Let it double in volume. This should take about an hour or so.


Pretzels

Deflate the dough, so that almost all the air is removed. pinch out 1/4th of the dough placing the maximum 3/4th part in the chiller compartment of your refrigerator. If you are a beginner, it will take some time to shape the pretzels and this is to avoid fighting with the quick rising dough if kept inactive for minutes. Lightly flour your work surface and roll the dough out into a small cylinder. Then using a pizza cutter divide the dough into large marble sized balls.
Now lightly oil your palms and your work surface. If you add too much of oil you will not be able to roll out the dough into “ropes”. Flatten each square of dough and then roll it up as tightly as you can. Now place the “rolled” bit of dough on your work surface and using your hands, roll it out into a uniform “rope” of about 15” length. It will be thinner than a pencil.

  If the above pictorials don't do justice, please click here for the video that shows how to shape pretzels.

For 'sticks' and 'bites'
You can leave them as “sticks” instead of shaping them into pretzels. If you want them shorter, you can halve them. Remember baking time will differ depending on the shape of your pretzels. The baking temperature is the same whether you shape them into sticks or pretzels.
If you would prefer to make pretzel bites then do not roll the dough out into a square. Just divide it into 4 portions and then roll each portion into a “rope that is about 1” in diameter. Cut each rope into 1 1/2" bits. Roll each ball into a long rope about 1” in diameter. Cut each rope into 1 1/2" bits. Then proceed to boil them as given in the instructions below. Bake the pretzel bites at 210C (425F) for about 15 minutes.


Pretzels

Shape it into a pretzel and place it on a greased plate or sheet. Place the shaped dough on the greased plate/ sheet leaving about 1/2" space between them.
First prepare your baking sheets. It is a good idea to line them with parchment paper which is lightly brushed with oil. This makes them easy to remove after baking and also protects your baking sheets from the soda solution.
Now prepare the soda bath. Bring 6 cups of water to boil in a deep pan/ pot. Add the baking soda carefully. It will bubble up and froth a bit and then settle down. Using a slotted spoon or a spatula, gently slide about 5 to 6 pretzels, one at a time, into the bath. Let them cook on one side for 10 seconds. Flip them over and cook them for another 10 seconds. Do not cook them for more than 30 seconds in total, or your dough will become slimy. Remove the boiled pretzels with a slotted spoon and place them on the parchment lined baking sheets. If using the egg wash, brush it over the pretzels, and then sprinkle it with the salt.


Pretzels

Bake them at 180C (335F) for 40 to 50 minutes until they’re deep golden brown in colour and hard. Cool them on a rack and store them in airtight containers or they will become soft and chewy.
This recipe makes 36 hard pretzels.

 How does the soft pretzels differ from hard pretzels?

 I halved the original recipe and made soft and hard ones. The method is all the same for both. The soft pretzels demand a thicker rope and a bit of resting to rise while the harder ones are with thinner ropes and baked until browned a shade or two more. Thus the texture differs slighly in both. The recipe for soft pretzels or Laugenbrezels were adapted from here.

Read More »
Related Posts Plugin for WordPress, Blogger...