Wednesday, March 21, 2012

Homemade Gooseberry Wine


                                                        Tastespotted , Foodgawked


Amla or nellikka wine needs no introduction to a Malayalee as it is a common and simple delicacy, brewed at almost all the Christian houses of central Kerala for years during the festival seasons of Easter, Christmas or otherwise.
This had been a recipe which I had wanted to share with you for such a long time and here we go...

Nellikka / Gooseberry Wine (without yeast)
Recipe courtesy- Seba, one of my closest pals in town.

Yield - Three 750 ml wine bottles, +/-

Get ready with:-
Gooseberry / Amla / Nellikka- 1 kg
Sugar- 1kg
Water- 1 litre


 Preparation of the sugar syrup.
Mix sugar and water to a rolling boil in a saucepan. Switch off stove. Cool down the syrup to room temperature. Strain to remove any impurities. Keep aside.

Preparation of the berries.
Wash the gooseberries well in running water. Spread on a kitchen towel and wipe them one by one completely dry with a clean and dry piece of cloth.

Assembly
Layer the them in a dry, clean sundried bharani (which I had used in one of the pickle recipes )or the traditional earthen pot. Pour the cooled sugar syrup over the berries in the bharani. Close the bharani with its loose lid with a cloth tied around the mouth.

Fermentation
 Stir the mixture everyday with a wooden ladle. If you happen to see a fungal layer on top, which is unusual but may happen for beginners, skim /discard carefully from the surface.
The wine needs to ferment for 21 days.
Strain the mixture using a clean and dry muslin cloth. Retain the berries after liquid part has passed through. Transfer a few at a time to a broad and deep metal sieve and extract the pulp gently from them. You might find them soft as soaked in the wine or a few may be broken too. Discard the remains.

Colouring the wine by caramelising.
The wine thus filtered has a light amber colour or the colour of  tears, to be precise!
Caramelising is done to add the colour of the final wine to improve the looks, making it look sexier ;)

 Sugar- 1 cup
 Hot water -1/2-3/4 cup

Place a clean dry wok on medium fire. Transfer sugar to it and stir continuously till it melts and acquires a golden brown- reddish brown hue. burn. Now, add  hot water to this syrup (take care and stay a little away while doing this as it bubbles up) little by little and mix well. There would be lumps at this stage but you can see the colour getting deepened to a more reddish brown colour. Return to low heat and melt them completely by a gentle simmer. The syrup should not boil much or thicken (as a thick syrup doesn't blend with the wine). Cool and add this whole syrup to the wine. Combine well.
The wine would have attained a beautiful deep red colour, now.
Aging of wine enhances the taste and improves the colour.

Check also Swapna's recipe where the uncaremelised wine had acquired its hue naturally as a result of aging!

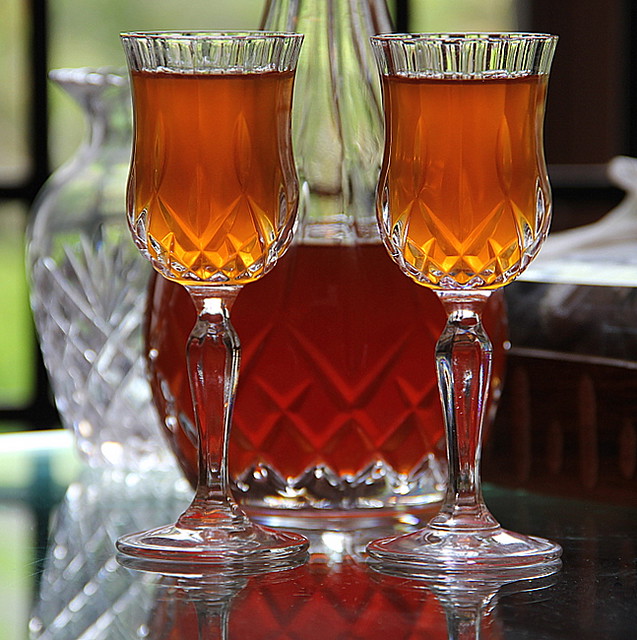


Photo Sharing and Video Hosting at Photobucket Wine is the most healthful and most hygienic of beverages" -- Louis Pasteur
                  
Read More »

Tuesday, March 13, 2012

Picture of the week ~ The Palace of Illusions


 Blogging had been taking away much or whole of my free time for the past 5 years.
 Badly wanting to go back to reading I got this novel after my sister's suggestion.

 The story is all about Mahabharatha, the greatest epics ever since, in Panchaali's (the Pandavas' wife) point of view! Palace of  Illusions took me to a roller coaster ride of emotions :  pride, fear, anxiety, desire, laughter, worry, envy, resentment.... eventually I saw myself in Panchaali !

Her complicated relationship with Krishna which she herself fails to decipher, the way her heart reaches out for Karna... beautifully portrayed!

I don't remember crying after a novel but this one got my eyes brimming, when Karna confesses to Bheeshma, in his death bed, his mingled feelings of passion and respect, he had for Panchaali!
And again, when Arjun doomed after Krishna's sad end, when panchaali confronts the blue corpse wrapped in yellow silk...
Three loud cheers to you Chitra!!

And this mighty lady, Gandhari, removes the cloth tied around her eyes, powering every cell of her beloved son Duryodhan's body with immense strength so as to withstand the war against Pandavas--- goosebumps!
The way Krishna signals Bheema during the duel with the strong Duryodhan, to break the bones high up his thighs ( he was supposed to be naked when he confronted his mother to acquire her supreme strength in him, but he wore a loin cloth) the part of his body where he had his own/lesser power and Bheema who listens to it is cursed, for breaking the rule of duel war as not supposed to hit a rival under his navel, while Duryodhan enters the heaven.....
 Krishna bears the sin and turning to Panchali he says he accepts the sin for her sake, as he couldn't stand the way she was humiliated by Duryodhan in his court and he deserved such a death!
The flashing emotions Krishna sees on her face, the way he gets confused....
Ah! I am losing words here....

After all it's Mahabharatha! which has already found its place to dwell...in my system!!


Read More »

Wednesday, February 29, 2012

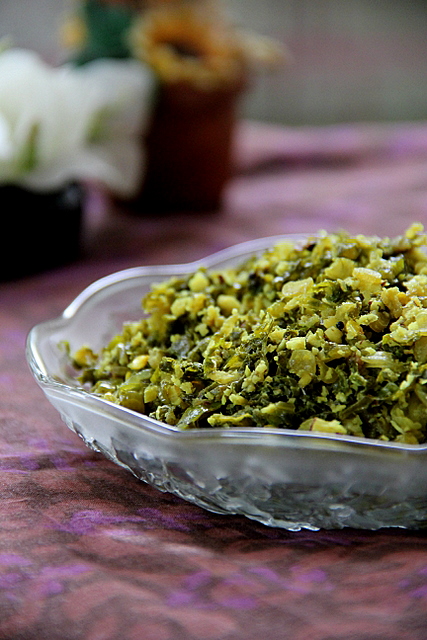
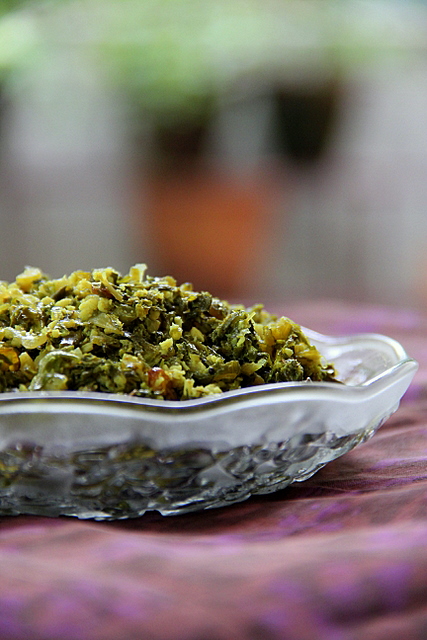
Mullangi Keerai (Radish Greens) Poriyal / Thoran


Radishes in the plant bed


The fully grown root veggie pops up the ground and is ready to be pulled out!


I wet the soil well and Yay!  I harvested my own radish (radishes, but pictured only one) in the kitchen garden!
I never knew the greens are edible and badly wanted to make good use of the healthy organic greens. I decided to make poriyal / thoran, which is gonna be my first attempt!


Here we go..


 So, to start with, slice away the radishes underneath and wash the greens well in running water.


Remove the hard stem (if you feel rough while chopping.The stems here were tender) and chop the greens. Mine were a little spiny and I noticed them getting soft while getting cooked!


Top it with green chillies, onions, turmeric powder, salt and coconut.


and mix gently with your fingers well to combine.


Heat oil in a kadai, splutter the mustard seeds, brown the urad dal and dump the green mixture.


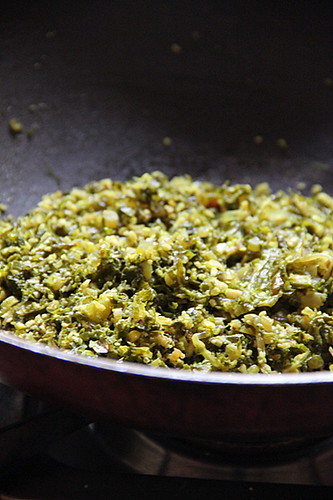
Sprinkle some water, say, a tbsp and close with a lid once it starts steaming. Open the lid once every 3-4 mins now and then sprinkling a tbsp of water to keep it hydrated and not letting it turn too dry.


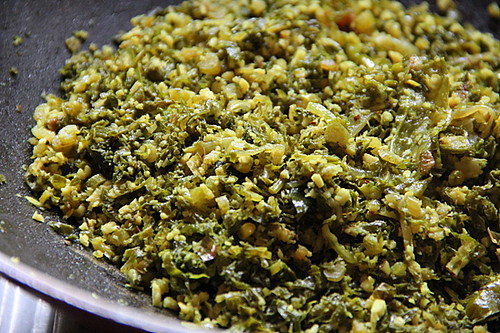
Radish greens need a longer time to get cooked; for about 15-20 minutes.


 They do wilt and change colour as any greens while getting cooked but still stay a bit crunchy!
 Yummy and healthy as well :)


Serve warm with steamed rice or Indian breads.
The leaves taste a li'l bitter, but flavorful!


Now, for the recipe all in one place..


You need:

A  bunch of radish greens (3 large cups +/- ,  loosely filled)
Green chillies- 3-4, slit  lengthwise and halved (you can susbstitute red chillies, which go better)
Turmeric powder- 1/4 tsp
Shallots- 10-15, sliced ( I used 1/2 big onion)
Salt- to taste
Grated coconut - 1/4 cup

To Season,

Oil-  a tbsp
Mustard seeds- 1/4 tsp
Urad dal- 1/2 tsp

Method:

Slice away the radishes and wash the greens well in running water.
Remove the hard stem (if you feel it rough while chopping.The stems here were tender) and chop the greens.Mine were a little spiny and I noticed them getting soft while getting cooked!
Top it with green chillies, onions, turmeric powder, salt and coconut and mix gently with your fingers well to combine.
Heat oil in a kadai, splutter the mustard seeds, brown the urad dal and dump the green mixture.

Sprinkle some water, say, a tbsp and close with a lid once it starts steaming.
Open the lid once every 3-4 mins now and then sprinkling a tbsp of water to keep it hydrated and not letting it turn too dry.

Radish greens need a longer time to get cooked; for about 15-20 minutes. They do wilt and change colour as any greens while getting cooked but still stay a bit crunchy!


Read More »

Thursday, February 23, 2012

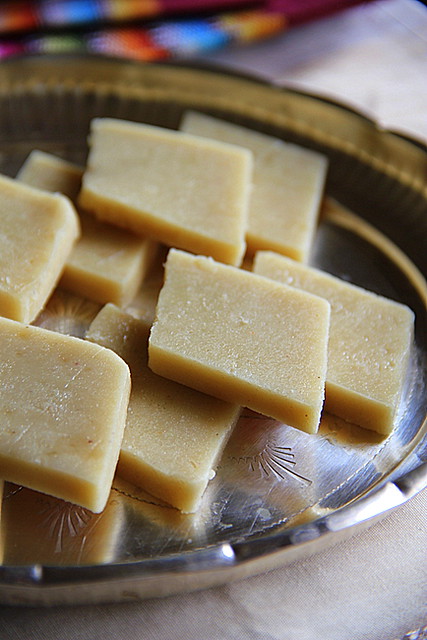
Kaju Katli


While the activities, cooking, baking and photography when it comes to any cuisine make me confident and proud, this is the probably an Indian recipe which I found completely challenging! I tried making Kathlis 5 times last Diwali and flawed miserably. The first time the mistake was due to the sticky cashew powder stuck on the inner walls of the mixie jar while the second and third trial failures due to the mistake in sugar syrup consistency. The following errors were due to the overcooked dough!Whatever, my kitchen was filled with hard katlis, sticky katlis, raw katlis, and dry katlis.

I decided not to try making inedible Katlis again, though it made me desperate! I very well knew the fact that I flaw with Indian sweets and snacks, but my ego as a cook and the blogger in me totally refused to admit this which probably relaxed my tough decision.

During my last visit to Kottayam, I came across tetra packed ready made cashew powder. Why not give another try?
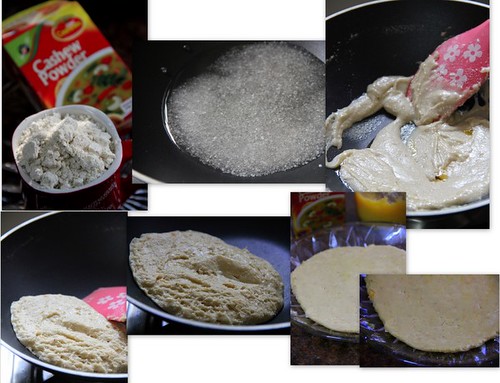
To be honest I wasn't confident, when I took the stepwise shots, about the final outcome.
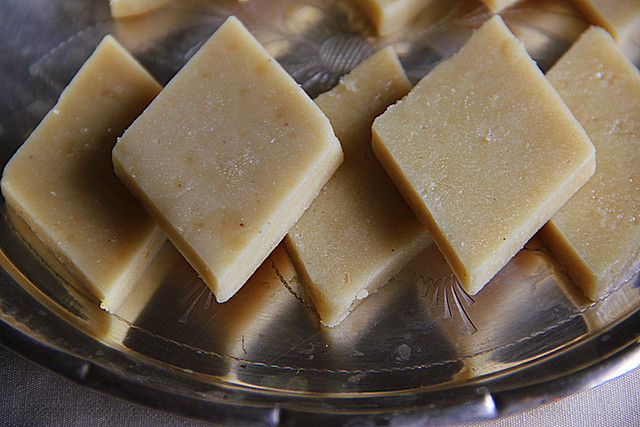
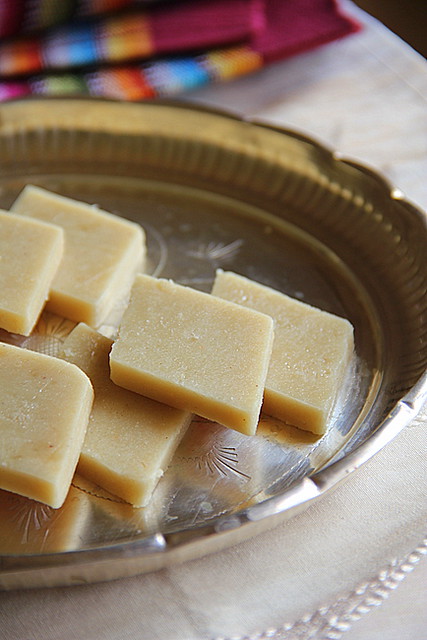
Anyway, now you see them and Bharathy is waiting eagerly for your comments :)


  Kaju Katli
Yields 10 diamonds and bits :)

Recipe Inspiration- Lavi

  Ingredients:

*Cashew powder - 1 large cup
 Sugar - 1/2 cup
 Water - just to the immerse the sugar in the pan ( 4 tbsp)
 Ghee - 1/4 tsp (which is optional. The actual recipe doesn't call for it) +  a few drops to grease the plate.


Remember, the ratio between cashew powder and sugar is 2 : 1

Method:

How to Make Sugar Syrup for Kaju Katli?

Take half cup sugar(3 oz.) in a thick bottomed pan, and pour water till it get immersed (say 4 tbsps of water).

Keep checking every half minute..

A. Soon after the sugar water starts to boil, have a little in a spoon and touch it with your fingers. it will be very sticky to your fingers.

B. Second stage is, just drop a drop of sugar syrup on a plate, and tilt the plate, sugar syrup will start flowing.
 Therefore the required stage for Kaju Katli is just before the stage of 'Single String Consistency'.
When the syrup attains this stage, put the cashew powder to the syrup and keep stirring to avoid lumps. Break lumps if any.

Keep the flame low and keep stirring for at least 3-4 minutes.

The Dough in the Pan on Fire

When you see bubbles coming and blowing off from the cashew burfi and when you take it with a slotted spoon ( Jalli Karandi ), and tilt the spoon, the mass should start sliding vertically like a piece of paper and flow flat.

The Transfer


Switch off the flame and remove from the stove. (just takes 3 - 4 minutes in slow flame, dont exceed this time, if you are a beginner)

Transfer the dough on a ghee smeared flat plate (I used a glass half plate) and smooth the top with the spatula making sure the dough is 1/4 inch thick. I used the silicon spatula which did the job quite gracefully!

Line the dough into diamonds with a sharp knife. Cool and separate the pieces.


Note


About the Cashews

*I used cashew powder. If you do not get it, you can powder the cashews.
As Lavi says, you can use 30 large ones which would yield a cup of powder.Something very important about this is that to make sure they are dry and fresh. Refrigerated nuts tend to be moist and while to powder you may find the powder getting stuck to the sides of your mixie jar or coffee grinder. This spoils the whole later steps. Therefore the nuts and the ground powder needs to be dry!

About the Sugar Syrup Consistency

Again, as she says the string consistency for sugar syrup is very important in making Katlis. The other important fact is, when to switch off the flame. If you overcook, then you will end up in hard Katlis. so these two facts are to be learned and followed exactly.

When she says 'String Consistency'  here in the Kaju Katli, you need not wait for single string consistency at all, it should be the previous stage to single string consistency.

About the dough

Do not over cook the dough.
I added a few drops of ghee, which is optional. This made the dough glossy, smooth and manageable with no broken edges.See to it the dough is soft and loose while transferring on to the plate since it hardens while cooling.


Read More »

Monday, February 20, 2012

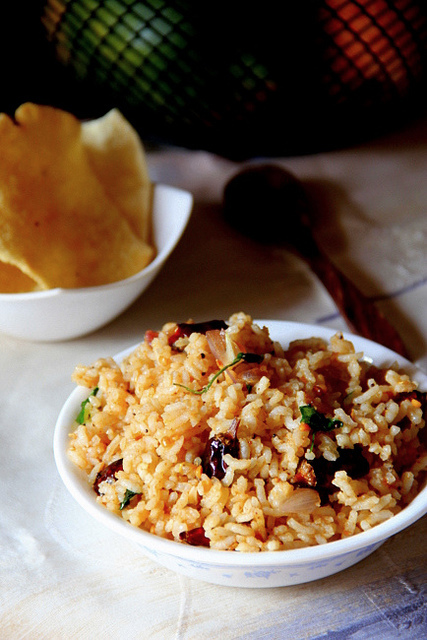
Pachai Puli Sadam / Raw Tamarind Rice


I am not quite sure whether such a recipe for tamarind rice or 'puli sadam' exists traditionally in the state, but this had been one of the regular dishes ever since I got married, which I learnt from my in-laws.

So, what is this Raw or Pachai Puli Sadam  all about?

Unlike the regular Tamarind Rice where you prepare the tangy sauce and  spice powder, this calls for the simple tamarind extract and some extra amount of left over rice (particularly if you had skipped the day's lunch!) as for the main ingredients.

It's easy to make and a satisfying meal that doesn't demand for any accompaniments, the ingredients always ready in a South Indian kitchen and more satisfying as you had found a good way to get rid of the previous day's left over rice!


Pachai Pulisadam / Raw Tamarind Rice
To serve 2

You need:

To marinate,

Freshly cooked rice or left over rice - 4 cups
Tamarind-  a medium lime sized- extract thick pulp
Sesame seed oil/ Nallennai- 1/4 cup
Turmeric powder - 1/4 tsp
Salt- as needed

To season,

 Sesame seed oil/ Nallennai- 2 tbsps
 Mustard seeds- 1/2 tsp
 Urad dal- 1 tsp
 Hing/ perungaya podi- 3 fat pinches
 Dried red chillies- 7-8 nos, broken into 3-4 pcs each
 Curry leaves- 2 sprigs

 Shallots/ chinna vengayam - 12-15 nos, cut into 4 pcs each

Method:

Mix 4 cups of rice with thick tamarind extract, 1/4 cup of sesame seed oil, salt and turmeric powder, if possible with your clean dry fingers. Lightly press/pack the rice. Close it with a lid and let it stand for at least 6-8 hours.

After 4-6-8 hours,

  Heat 1/4 cup of sesame seed oil in a wok, splutter the mustard seeds, brown the urad dal, throw in the curry leaves and broken chillies. Stir in the shallot pieces (it shouldn't get sauteed but retain the rawness and cruchiness) immediately followed by the rice. Mix gently on fire until pulisadam gets heated up and the oil coats over the grains.

Remove from fire and serve hot with vadagam / paruppu thuvaiyal / curd.


Note:

I marinate the rice overnight and use it for brunch the following day. So, I let it stand for 10-12 hours.
The marinated rice keeps well for few more hours under refrigeration.
Always use shallots / chinna vengayam cut into chunks. If you do not prefer the raw crunchy taste and texture, feel free to saute a bit in oil before you add the red chilles. See to it you do not over do that.
Pachai pulisadam serves well as a packed lunch too :)

Read More »
Related Posts Plugin for WordPress, Blogger...