Classic Croissants with Aparna is already a hit with the recipe choice of #2 We Knead to Bake for the month of February!
Pain au chocolat is a continuation of the same.
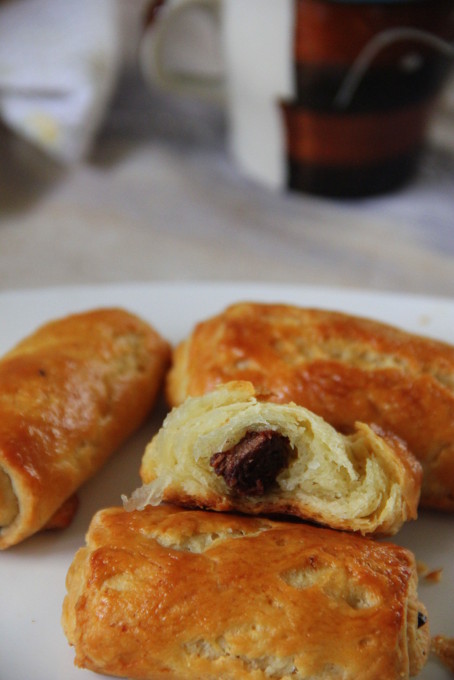
Now, pains au chocolat or chocolate croissants are nothing but puff pastries with rich creamy chocolate wrapped in, so that when you bite into it you have the buttery flaky outer layers giving way to the absolute 'yumminess' inside!
It's a bit of hard work as the dough is prepared as the same for Classic Croissants. Personally, these cute chocolate stuffed rolls rose better and tasted awesome!
Basically with the dough explained down, you can roll not only chocolate but filling of your choice. A mix of coconut and cardamom, cinnamon and sugar, minced mushroom or chicken dry curry with caramelised onions are to name a few.
Anyway, let's get to the recipe...
Pains au Chocolat
Recipe for the dough is same as Classic Croissants, adapted from Jeffrey Hamelman's at Fine Cooking.
I had halved the below recipe, laminated, made 6 medium sized croissants (posted here) with half the sheet and reserved the rest to make 6 pains au chocolat.
For the dough
1 lb. 2 oz. (4 cups) unbleached all-purpose flour; more for rolling
5 oz. (1/2cup plus 2 Tbs.) cold water
5 oz. (1/2 cup plus 2 Tbs.) cold whole milk
2 oz. (1/4 cup plus 2 Tbs.) granulated sugar
1-1/2 oz. (3 Tbs.) soft unsalted butter
1 Tbs. plus scant 1/2 tsp. instant yeast
2-1/4 tsp. table salt
For the butter layer
10 oz. (1-1/4 cups) cold unsalted butter
For the egg wash
1 large egg
I am pasting the recipe down for the basic dough back from my Croissants recipe, to have it all again in one place.
Day 1
Make the Dough
Combine all of the dough ingredients in the bowl of a stand mixer fitted with the dough hook. Mix on low speed for 3 minutes, scraping the sides of the mixing bowl once if necessary. Mix on medium speed for 3 minutes.
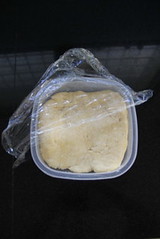
(I used my hands to knead and didn't do it more than 2 minutes fearing the formation of gluten. My dough demanded a little extra liquid; a tbsp more of water and milk, the original recipe halved ). Transfer the dough to a lightly floured 10-inch pie pan or a dinner plate.( I used a square sandwich box which is 3 inches deep. I chose the shape square, hoping to roll out and extend the dough to a square, without much difficulty for Day-2, again as the recipe says. It helped too :)Also, 'flatter' the dough, lesser the gluten formation during resting time. More the gluten, more the disobedient dough while rolling in Day-2 & 3). Lightly flour the top of the dough and wrap well with plastic so it doesn’t dry out. Refrigerate overnight.
Day 2
Make the Butter Layer
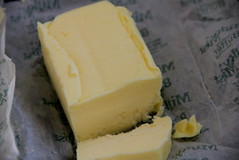
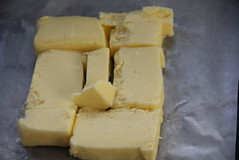
The next day, cut the cold butter lengthwise (and may be not across, as you see in the picture) into 1/2-inch-thick slabs. Arrange the pieces on a piece of parchment or waxed paper to form a 5- to 6-inch square, cutting the butter crosswise as necessary to fit.
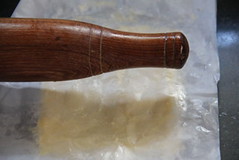
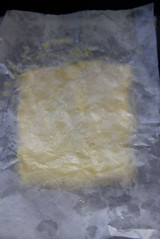
Top with another piece of parchment or waxed paper. With a rolling pin, pound the butter with light, even strokes. As the pieces begin to adhere, use more force. Pound the butter until it’s about 7-1/2 inches square.
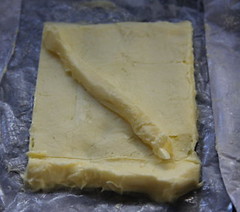
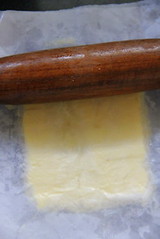
Trim the edges of the butter. Put the trimmings on top of the square and pound them in lightly with the rolling pin. Refrigerate while you roll out the dough.
Laminate the Dough
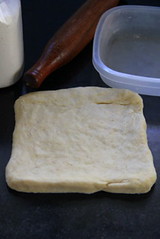
Unwrap and lay the dough on a lightly floured work surface. Roll into a 10-1/2-inch square. Brush excess flour off the dough.
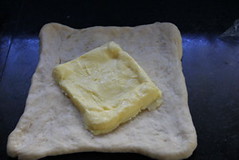
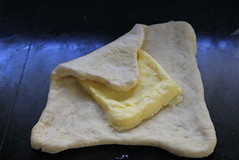
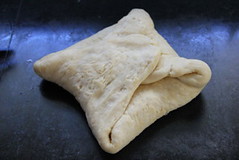
Remove the butter from the refrigerator—it should be pliable but cold. If not, refrigerate a bit longer. Unwrap and place the butter on the dough so that the points of the butter square are centered along the sides of the dough. Fold one flap of dough over the butter toward you, stretching it slightly so that the point just reaches the center of the butter. Repeat with the other flaps . Then press the edges together to completely seal the butter inside the dough. (A complete seal ensures butter won’t escape.)
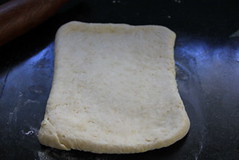
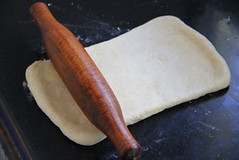
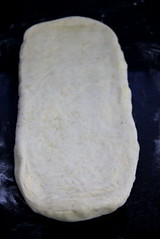
Lightly flour the top and bottom of the dough. With the rolling pin, firmly press the dough to elongate it slightly and then begin rolling instead of pressing, focusing on lengthening rather than widening the dough and keeping the edges straight.Roll the dough until it’s 8 by 24 inches. If the ends lose their square shape, gently reshape the corners with your hands. Brush any flour off the dough. Pick up one short end of the dough and fold it back over the dough, leaving one-third of the other end of dough exposed. Brush the flour off and then fold the exposed dough over the folded side. Put the dough on a baking sheet, cover with plastic wrap, and freeze for 20 minutes to relax and chill the dough.
Repeat the rolling and folding, this time rolling in the direction of the two open ends until the dough is about 8 by 24 inches. Fold the dough in thirds again, as shown in the photo above, brushing off excess flour and turning under any rounded edges or short ends with exposed or smeared layers. Cover and freeze for another 20 minutes.
If you live in a humid/hotter country, it is quite natural for the butter square to melt at least at the edges and seep in the dough while rolling out
Immediately stick to the freezer ( not the fridge) and allow the butter to harden. Butter smudged dough is not the right one for croissants. Instead they need to be laminated beautifully between the layers of the dough with no seepage.
I also saw butter leaking out through the holes from dough while rolling out. I dusted flour well,wherever the butter peeped and completed the process. This prevented seepage of fat to an extend.
Remember, patch work with dough will not work!
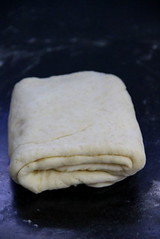
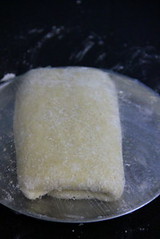
Give the dough a third rolling and folding. Put the dough on the baking sheet and cover with plastic wrap, tucking the plastic under all four sides. Refrigerate overnight.
Day 3
Divide the Dough
The next day, unwrap and lightly flour the top and bottom of the dough. Cut the dough along the longer side into halves. Cover one half with plastic wrap and refrigerate it while working on the other half.
( I didn't divide the dough into two at this point as I had halved the original recipe. I continued rolling and again used just half of the sheet to make 6 Classic Croissants and froze the rest of the half which you see further down to make pain au chocolat)
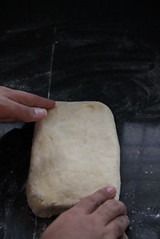

With the rolling pin, “wake the dough up” by pressing firmly along its length—you don’t want to widen the dough but simply begin to lengthen it with these first strokes. ( If your dough is too cold, start with gentle strokes with your fingers and palms )
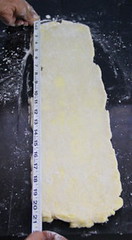
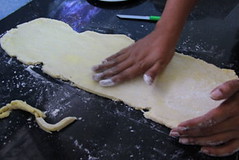
Roll the dough into a long and narrow strip, 8 inches by about 22 inches. If the dough sticks as you roll, sprinkle with flour. Once the dough is about half to two-thirds of its final length, it may start to resist rolling and even shrink back. If this happens, fold the dough in thirds, cover, and refrigerate for about 10 minutes; then unfold the dough and finish rolling. Lift the dough an inch or so off the table at its midpoint and allow it to shrink from both sides—this helps prevent the dough from shrinking when it’s cut. Check that there’s enough excess dough on either end to allow you to trim the ends so they’re straight and the strip of dough is 20 inches long. Trim the dough.
This is the point where half the sheet was cut and rolled into Croissants
NOW,
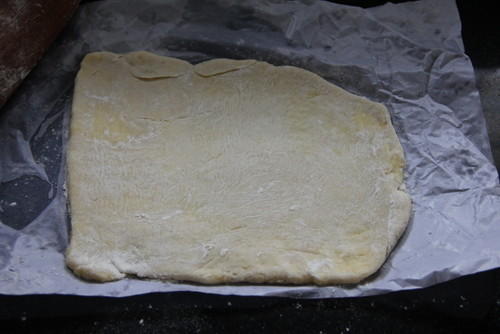
Let's, start from the reserved half of the sheet of laminated dough (this is therefore a quarter portion of the original recipe, since I had halved the recipe earlier to begin with) which was frozen for 4-5 days after making the plain classic croissants.
Roll the dough gently, dusting flour if sticky, smoothing the edges.
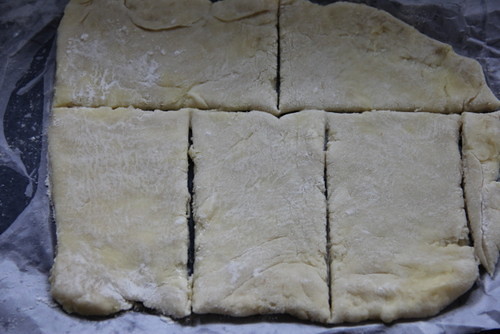
Cut into rectangles with minimum wastage.
My full rectangles measured around 2.5 by 5 inches. The std size of the rectangle I hear is 3 by 7 inches. That doesn't really matter as you may end up with smaller or larger rolls.
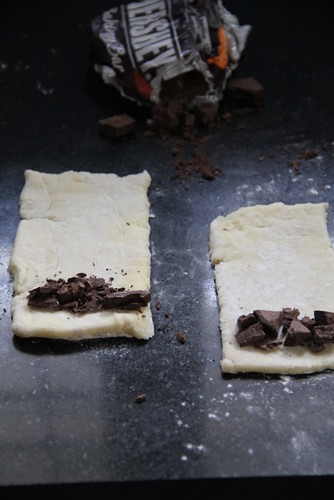
Carefully sprinkle about a tablespoon of semi sweet chocolate chips or broken chocolate bits as a line on the shorter edge.
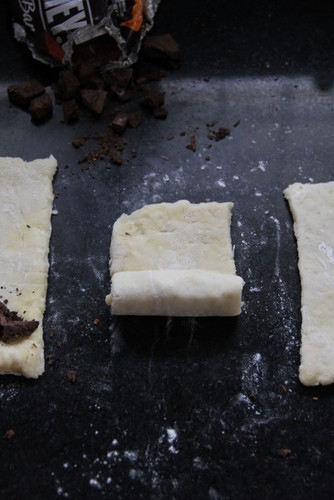
Roll, enclosing the chocolate,
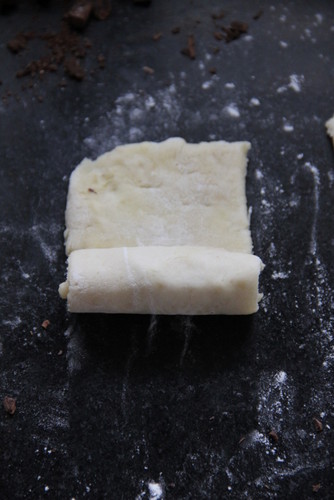
till the other end.
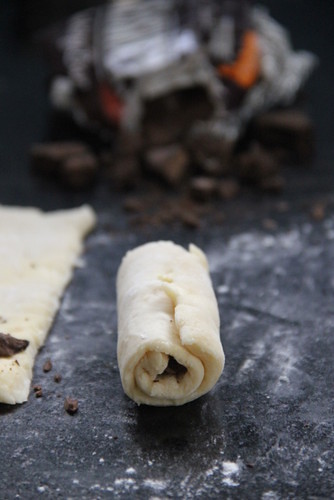
Not too tight, not too loose. Pinch down the edges carefully to seal.
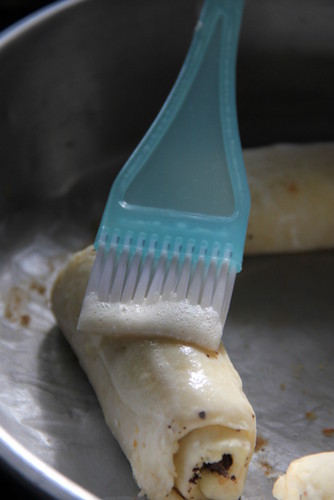
Place the seal edges downwards on a lined baking tray, leaving a gap of 2 inches in between.
Proofing
Make the egg wash by whisking the egg with 1 tsp. water in a small bowl until very smooth.Brush gently, the top, sides, seam and the edges. Refrigerate the remaining as you will need it again.
Cover with a baking tray loosely with plastic wrap ensuring it doesn't touch the dough.
Leave to rise for about 21/2 - 3 hours. They really don't double in size after proofing but you may be able to see the layers that wiggle slightly if you shake the sheet gently.
Bake the Pains au Chocolat
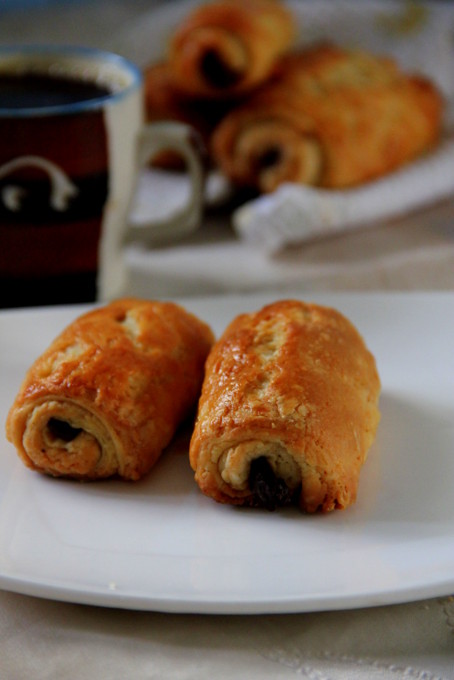
Shortly before the croissants are fully proofed, position racks in the top and lower thirds of the oven and heat it to 400°F convection, or 425°F conventional. Brush the croissants with egg wash a second time. Put the sheets in the oven. After 10 minutes, rotate the sheets and swap their positions. Continue baking until the bottoms are an even brown, the tops richly browned, and the edges show signs of coloring, another 8 to 10 minutes. If they appear to be darkening too quickly during baking, lower the oven temperature by 10°F. Let cool on baking sheets on racks.
Verdict:
Crunchy flaky outsides and buttery soft layered insides complimented with the creamy chocolate: tasted just too good!!
I will be baking them again, mustering all my bread making patience ;)




looks so delicious kids will love it.. can I do this with pastry dough?
ReplyDeleteMy hubby's favourite..looks just like store-bought! Well done Bharathy! :)
ReplyDeletei am a crazy person for chocolate - am sure this will be my best treat, excellent explanation,pleasing clicks
ReplyDeleteLooks so delicious, nice step by step procedure
ReplyDeleteTotally in love with those beauties
ReplyDeleteDrooling hereee,our family favourite and love ur patience for taking those stepwise clicks.
ReplyDeletelooks delicious bharathy :) loved the pictures completely !
ReplyDeleteLovely colour, and so flaky. Belicious
ReplyDeletethat was meant to say - Delicious!!!
ReplyDeletelooks really flaky... yum...
ReplyDeleteOMG!!!!!!!!!!!!!!!!!!!!! superb dear..3days and a wonderful treat atlast.. wowww... :)
ReplyDeleteI am sure my daughter will love this.....still haven't got around to making this.
ReplyDeleteWOW WOW!!! SO delicious!!!! no words to describe its beauty!!!
ReplyDeleteSowmya
Ongoing Event - HITS - Diabetic Friendly
Ongoing Event + Giveaway - Italian Dishes
These look scrumptious!
ReplyDeletehttp://thegoddessofspice.blogspot.com/
Wow...looks so tempting...wonderful stepwise presentation...
ReplyDeleteThey look yumm perfectly flaky! :)
ReplyDeletehmmmmmmmmmmm
DeleteLooks so delicious... Sure a treat to chocolate lovers... Nice click
ReplyDeleteLooks so delicious... Sure a treat to chocolate lovers... Nice click
ReplyDeleteWow, you have a lot of patience!! This so worth the effort.
ReplyDeleteIt looks so delicious, i would love to taste it still going crazy about it.:)
ReplyDelete