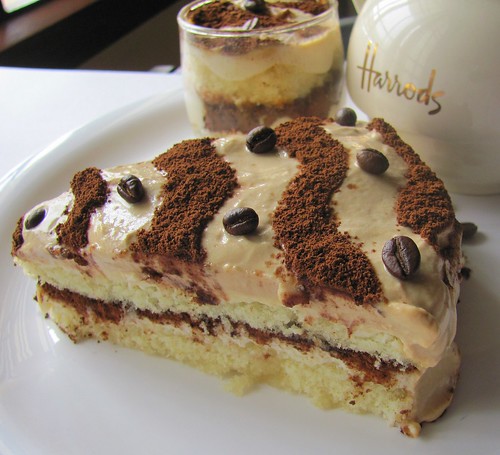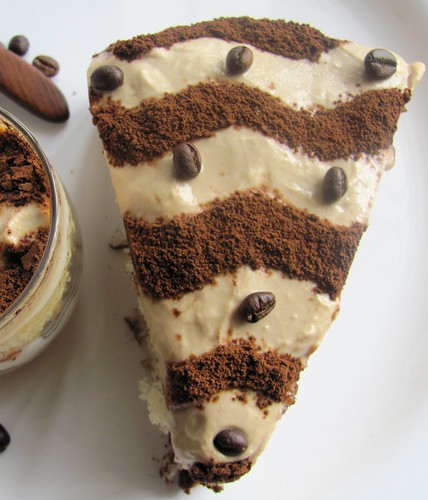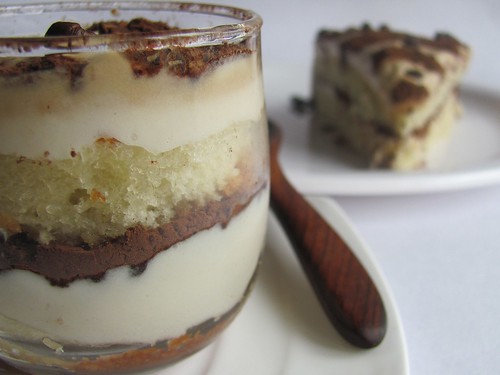


This enters Spicy Tasty's Sizzling Summer Contest.
Updated on 8th July 2010
The Picture of the entry is being selected as one among the best 12 !! (yay)
Please Vote for me HERE, where the Tiramisu Cake is numbered 6 :)
Thanks in Advance, Friends! :)
now for the recipe...
Obviously I fell in Love with this comforting traditional dessert served with style, in all its 'glamour', a decade ago, while fine dining with my man in one of those elite French restaurants at Champs-Elysees.
I never had in my distant most dreams that I would ever try baking this heavenly dessert, as I am for sure, Never a Daring Baker!
and finally I succeeded in making 6 0z of Mascarpone from Amul Fresh Cream!
About ' A Sweet Punch'!
Well, they have a passion-it's baking!
They have a mission-it's making baking simpler for everyone. So they(Ria, Maria and Divya) will be trying a variety of baked goodies one of each month of the year!
All I needed next was a gentle push when it comes to venturing new recipes esp when it comes to baking and thus I got into ‘A Sweet Punch’, when Ria had sent over the step by step recipe of the Classic Tiramisu!

Tiramisu Cake
Baking: From My Home to Yours by Dorie Greenspan
For the cake layers:
2 cups cake flour
2 teaspoons baking powder
1/8 teaspoon baking soda
1/4 teaspoon salt
1 1/4 sticks (10 tablespoons) unsalted butter, room temperature
1 cup sugar
3 large eggs
1 large egg yolk
1 1/2 teaspoons pure vanilla extract
3/4 cup buttermilk
For the espresso extract:
2 tablespoons instant espresso powder
2 tablespoons boiling water
For the espresso syrup:
1/2 cup water
1/3 cup sugar
1 tablespoon amaretto, Kahlua, or brandy
For the filling and frosting:
1 8-ounce container mascarpone (store-bought or homemade)
1/2 cup confectioners’ sugar, sifted
1 1/2 teaspoons pure vanilla extract
1 tablespoon amaretto, Kahlua, or brandy
1 cup cold heavy cream
2 1/2 ounces bittersweet or semisweet chocolate, finely chopped, or about 1/2 cup store-bought mini chocolate chips
Chocolate-covered espresso beans, for decoration (optional)
Cocoa powder, for dusting
Getting ready:
Center a rack in the oven and preheat the oven to 350 degrees F. Butter two 9×2 inch round cake pans, dust the insides with flour, tap out the excess, and line the bottoms of the pans with parchment or wax paper. Put the pans on a baking sheet.
To make the cake:
- Sift together the cake flour, baking powder, baking soda, and salt.
- Working with a stand mixer, preferably fitted with a paddle attachment, or with a hand mixer in a large bowl, beat the butter on medium speed until soft and creamy.
- Add the sugar and beat for another 3 minutes. Add the eggs one by one, and then the yolk, beating for 1 minute after each addition. Beat in the vanilla; don’t be concerned if the mixture looks curdled. Reduce the mixer speed to low and add the dry ingredients alternately with the buttermilk, adding the dry ingredients in 3 additions and the milk in 2 (begin and end with the dry ingredients); scrape down the sides of the bowl as needed and mix only until the ingredients disappear into the batter. Divide the batter evenly between the two pans and smooth the tops with a rubber spatula.
- Bake for 28 to 30 minutes, rotating the pans at the midway point. When fully baked, the cakes will be golden and springy to the touch and a thin knife inserted into the centers will come out clean. Transfer the cakes to a rack and cool for about 5 minutes, then run a knife around the sides of the cakes, unmould them, and peel off the paper liners. Invert and cool to room temperature right-side up.

To make the extract:
- Stir the espresso powder and boiling water together in a small cup until blended. Set aside.
- To make the syrup:
- Stir the water and sugar together in a small saucepan and bring just to a boil. Pour the syrup into a small heatproof bowl and stir in 1 tablespoon of the espresso extract and the liqueur or brandy; set aside.
To make the filling and frosting:
Put the mascarpone, sugar, vanilla, and liqueur in a large bowl and whisk just until blended and smooth.
Working with the stand mixer with the whisk attachment or with a hand mixer, whip the heavy cream until it holds firm peaks. Switch to a rubber spatula and stir about one quarter of the whipped cream into the mascarpone. Fold in the rest of the whipped cream with a light touch.
To assemble the cake:
If the tops of the cake layers have crowned, use a long serrated knife and a gentle sawing motion to even them. Place one layer right-side up on a cardboard round or a cake plate protected with strips of wax or parchment paper. Using a pastry brush or a small spoon, soak the layer with about one third of the espresso syrup. Smooth some of the mascarpone cream over the layer – user about 1 1/4 cups – and gently press the chopped chocolate into the filling. Put the second cake layer on the counter and soak the top of it with half the remaining espresso syrup, then turn the layer over and position it, soaked side down, over the filling. Soak the top of the cake with the remaining syrup.
For the frosting, whisk 1 to 1 1/2 tablespoons of the remaining espresso extract into the remaining mascarpone filling. Taste the frosting as you go to decide how much extract you want to add. If the frosting looks as if it might be a little too soft to spread over the cake, press a piece of plastic wrap against its surface and refrigerate it for 15 minutes or so. Refrigerate the cake too.
With a long metal icing spatula, smooth the frosting around the sides of the cake and over the top. If you want to decorate the cake with chocolate-covered espresso beans, press them into the filling, making concentric circles of beans or just putting some beans in the center of the cake.
Refrigerate the cake for at least 3 hours (or for up to 1 day) before serving – the elements need time to meld.
Just before serving, dust the top of the cake with cocoa.

How “Punching” was it ?
To make Tiramisu from scratch demanded 2 days plus a day of refrigeration and thus a total of 3 whole days were required. So calculate the time you need to start with time you intend to serve the dessert.
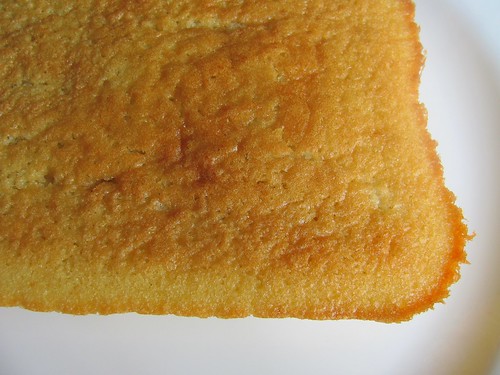
The sponge cake came out perfectly!.soft, spongy, moist, melt in the mouth,which I’d baked on Day-1, around noon. At night, I made the Mascarpone.
Day-2 was planned for cutting and layering the cake to turn it magically into Tiramisu.
When I was layering the cheese, the room temperature was 40 deg C. Yes, the peak summer day of T.N. I had much difficulty working with it as it was turning to be a watery creamy something. Pushing the whole thing into the freezer once in every 2 minutes helped a little, but then we had a power shut down of full 4 hours at a stretch!. Soon I found myself filling and frosting the cake with my head squeezing into the freezer compartment wide open ;)..
Whew!! it was tiring, absolutely, as the grated chocolate, supposed to be layered over the cheese, was melting fast turning out to be a lump of soft something, again,giving me a shock..
I was forced to use sprinkled chocolate powder as the nearest alternative.
Again, the topmost layer (cream with mocha) doesn't show up much, as a layer(which I badly wanted to) in the picture as it refused to stand firm above the slice! :)
Using chocolate chips was a last option, as we dislike biting into them in soft desserts.
I substituted home made grape wine for the alcohol part.
 To wrap up, I am immensely happy and satisfied with the final outcome, the Perfect Tiramisu a beginner can ever make!

